Locking a photo in place ensures it stays exactly where you want it, no matter what edits you make to the surrounding text; let dfphoto.net be your guide to mastering this essential skill. Securing images is vital for maintaining design integrity in documents and presentations, ensuring a professional and polished final product with visual elements, image stabilization, and anchor locking.
1. What is an Object Anchor and How Does It Affect Photo Placement?
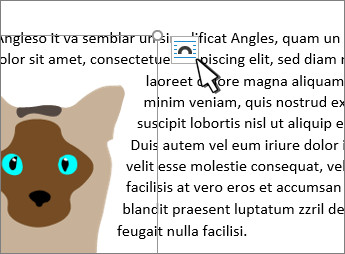
An object anchor is a visual indicator in document editing software that shows how a picture or object is positioned relative to the text. Unlike inline pictures that move with the text, other wrapping options use anchors to tie the image to a specific paragraph. Understanding object anchors is crucial for controlling image placement. Anchors provide a way to lock an image to a paragraph.
Key Takeaways About Object Anchors:
- Definition: Object anchors indicate the paragraph an image is associated with.
- Inline Pictures: These don’t have anchors; they move with the text.
- Wrapping Options: Square, Tight, Through, Top and Bottom, Behind Text, and In Front of Text use anchors.
- Visual Indication: Anchors are a visual aid, not a removable element.
- Flexibility: Different text wrapping options offer varied positioning control.
2. How Do I Display Object Anchors in My Document?
To view object anchors, you need to enable them in your document settings. This allows you to see exactly how your images are anchored to the text. Displaying anchors is essential for precise image positioning.
Steps to Display Object Anchors:
-
Show Formatting Marks:
- Go to the Home tab.
- In the Paragraph group, click the Show/Hide ¶ button.
-
Always Show Anchors:
- Go to File > Options > Display.
- Select the Object anchors checkbox.
By following these steps, you can ensure that object anchors are always visible.
3. Why Can’t I Remove Object Anchors Directly?
Object anchors are not designed to be removed. They are visual indicators of a picture’s position relative to the page. Instead of trying to remove them, you should focus on using different text wrapping options to achieve the desired placement. Object anchors are fundamental to how images interact with text.
Key Reasons Object Anchors Cannot Be Removed:
- Visual Aid: They are primarily for visual indication.
- Text Wrapping Dependence: Their behavior is tied to text wrapping settings.
- Alternative Solutions: Adjusting text wrapping provides better control.
4. How Do I Change Text Wrapping Options to Position My Photo Better?
Text wrapping options determine how text flows around an image. By experimenting with different options, you can achieve the perfect positioning for your photo. Text wrapping is key to visual harmony in your document.
Common Text Wrapping Options:
- Square: Text wraps around the image in a square shape.
- Tight: Text wraps closely to the contours of the image.
- Through: Text flows through open areas of the image.
- Top and Bottom: Text appears only above and below the image.
- Behind Text: The image appears behind the text.
- In Front of Text: The image appears in front of the text.
To change the text wrapping option, select the picture, and click the Layout Options icon.
 Layout image button on a selected picture
5. What Does It Mean When a Picture is “In Line with Text?”
When a picture is “In Line with Text,” it is treated as a character within the text. This means it moves along with the text as you type or make changes. “In Line with Text” is the simplest form of image integration.
Key Characteristics of “In Line with Text”:
- No Anchor: Images placed “In Line with Text” do not have object anchors.
- Text Behavior: They move with the text like any other character.
- Limited Positioning: Offers less control over precise placement compared to other options.
6. How Do I Lock the Anchor of a Photo to Prevent Movement?
Locking the anchor ensures that the image stays tied to its associated paragraph, even if the text around it is edited or deleted. This is useful for maintaining a specific layout. Anchor locking guarantees image stability.
Steps to Lock the Anchor:
- Select the picture.
- Click the Layout Options icon.
- Select See more.
- Check the Lock anchor option.
Once the anchor is locked, the image will remain in its position relative to the paragraph.
7. What Happens if I Delete the Text Around a Locked Anchor?
If you delete the text around a locked anchor, the image will remain in the document but may shift to the nearest available paragraph. The image will attempt to maintain its relative position. Locked anchors provide some degree of image retention.
Expected Behavior:
- Image Remains: The image is not deleted.
- Position Shift: It may move to the closest paragraph.
- Anchor Integrity: The anchor remains locked to the new paragraph.
8. Can I Lock the Anchor of an “In Line with Text” Image?
No, you cannot lock the anchor of an “In Line with Text” image. Because these images do not use anchors, the option to lock an anchor is unavailable. “In Line with Text” images lack anchor functionality.
Limitations:
- No Anchor: “In Line with Text” images lack anchors.
- Unavailable Option: Anchor locking is not applicable.
- Alternative Placement: Use other text wrapping options for anchor control.
9. How Do Different Text Wrapping Options Affect Anchor Behavior?
Different text wrapping options influence how the anchor behaves when the text around it changes. For example, “Square” and “Tight” wrapping keep the image close to the surrounding text, while “Top and Bottom” keeps it above or below. The wrapping option is vital in anchor behavior.
Impact of Text Wrapping on Anchor Behavior:
- Square/Tight: Image stays closely tied to the surrounding text.
- Top and Bottom: Image maintains its position above or below the text.
- Behind/In Front: Image position is independent of text flow.
10. Are There Other Ways to Ensure a Photo Stays in Place Besides Locking the Anchor?
Yes, besides locking the anchor, you can also group the image with other elements like text boxes or shapes. Grouping creates a single, movable object that maintains its internal arrangement. Grouping offers an alternative method for image stabilization.
Steps to Group Objects:
- Select all the objects you want to group (hold Ctrl while clicking).
- Right-click and select Group > Group.
The grouped objects will now move together as a single unit.
11. How Can I Use Tables to Control Photo Placement?
Tables can be used to create a structured layout where you can place images in specific cells. This method provides precise control over the image’s position relative to other content. Tables offer a grid-based approach to image placement.
Steps to Use Tables for Photo Placement:
- Insert a table with the desired number of rows and columns.
- Place the image in one of the cells.
- Adjust the table borders to be invisible if needed.
Tables ensure that the image stays within the defined cell boundaries.
12. What are the Best Practices for Using Images in Documents to Avoid Movement Issues?
To avoid issues with images moving unexpectedly, use a combination of locking anchors, choosing appropriate text wrapping options, and grouping images with related content. Planning your layout can prevent image displacement.
Best Practices:
- Lock Anchors: Use this feature to tie images to specific paragraphs.
- Choose Text Wrapping Wisely: Select the option that best suits your layout needs.
- Group Related Objects: Combine images with text boxes or shapes.
- Plan Your Layout: Consider image placement during the document design phase.
13. How Does Image Resolution Affect Placement and Stability?
Image resolution can affect how the image appears in your document and how it interacts with the text. High-resolution images may take up more space and processing power, potentially affecting stability. Balancing resolution and performance is important.
Impact of Image Resolution:
- High Resolution: Can lead to larger file sizes and slower performance.
- Low Resolution: May appear blurry or pixelated.
- Optimal Resolution: Choose a resolution that balances visual quality and performance.
14. How Do I Adjust the Anchor Point for More Precise Control?
While you cannot directly adjust the anchor point, the text wrapping options and the paragraph to which the image is anchored effectively determine its position. Experiment with these settings for precise control. Indirect adjustments to anchor points can be achieved through text wrapping.
Methods for Indirect Anchor Point Adjustment:
- Change Text Wrapping: Different options change the image’s relative position.
- Anchor to a Different Paragraph: Move the image to a paragraph closer to the desired location.
- Use Tables: Tables provide a structured grid for precise placement.
15. What Role Does Software Version Play in Image Anchoring?
The version of your document editing software can affect how image anchoring works. Newer versions may offer more advanced features and better stability. Keeping your software up to date is essential.
Impact of Software Version:
- Newer Versions: Often include improvements to image handling and anchoring.
- Older Versions: May have limitations or bugs that affect image stability.
- Compatibility: Ensure your software is compatible with the file format you are using.
16. How Can I Use the Selection Pane to Manage Images and Their Anchors?
The Selection Pane allows you to view and manage all the objects in your document, including images and their anchors. It provides a way to select, hide, and reorder objects. The Selection Pane aids in object management.
Steps to Use the Selection Pane:
- Go to the Home tab.
- In the Editing group, click Select > Selection Pane.
The Selection Pane will display a list of all objects in your document.
17. What is the Difference Between Floating and Inline Images in Terms of Anchoring?
Floating images (those with text wrapping other than “In Line with Text”) use object anchors to maintain their position relative to a paragraph. Inline images, on the other hand, are treated as text characters and do not have anchors. Anchoring distinguishes floating and inline images.
Key Differences:
- Floating Images: Use object anchors, offering more positioning control.
- Inline Images: Treated as text, lacking anchors and precise placement options.
- Flexibility: Floating images provide greater layout flexibility.
18. How Do I Convert an Inline Image to a Floating Image to Use Anchors?
To convert an inline image to a floating image, you need to change its text wrapping option. This will allow you to use object anchors to control its position. Converting images enables anchor functionality.
Steps to Convert:
- Select the image.
- Click the Layout Options icon.
- Choose a text wrapping option other than “In Line with Text” (e.g., Square, Tight).
The image will now be a floating image with an object anchor.
19. Can I Use Macros or Scripts to Automate Anchor Locking?
Yes, you can use macros or scripts to automate the process of locking anchors for multiple images in a document. This can save time and ensure consistency. Automation streamlines anchor locking.
Benefits of Using Macros:
- Efficiency: Lock anchors for multiple images with a single command.
- Consistency: Ensure all images are anchored in the same way.
- Customization: Tailor the script to your specific needs.
20. How Do Templates Affect Image Anchoring and Stability?
Templates often have pre-set text wrapping options and anchor settings for images. Using a template can help ensure consistency and stability in your document layout. Templates provide a foundation for image placement.
Advantages of Using Templates:
- Consistency: Images are handled in a uniform manner.
- Stability: Pre-set settings help prevent unexpected image movement.
- Time-Saving: Reduces the need to manually adjust anchor settings.
21. How Can I Troubleshoot Issues with Images Moving Unexpectedly?
If images are moving unexpectedly, check the text wrapping options, anchor settings, and whether the image is grouped with other objects. Troubleshooting involves checking key settings.
Troubleshooting Steps:
- Check Text Wrapping: Ensure the correct option is selected.
- Verify Anchor Lock: Confirm that the anchor is locked if desired.
- Check Grouping: See if the image is part of a group.
- Review Software Version: Ensure your software is up to date.
22. What Are Some Common Mistakes to Avoid When Working with Image Anchors?
Common mistakes include forgetting to lock the anchor, using the wrong text wrapping option, and not grouping related objects. Avoiding these mistakes ensures image stability.
Common Mistakes:
- Forgetting to Lock Anchor: Leads to images moving unexpectedly.
- Incorrect Text Wrapping: Causes images to be positioned incorrectly.
- Ignoring Grouping: Results in images and text moving independently.
23. How Do I Ensure That Images Stay in Place When Converting a Document to PDF?
To ensure images stay in place when converting a document to PDF, verify that all anchors are locked and that the text wrapping options are correctly set before converting. Conversion can sometimes alter image placement.
Steps for PDF Conversion:
- Lock Anchors: Ensure all relevant images have locked anchors.
- Verify Text Wrapping: Check that text wrapping options are appropriate.
- Save as PDF: Use the “Save as PDF” option in your software.
- Review PDF: Check the final PDF to ensure images are correctly positioned.
24. Can I Use Cloud Storage to Improve Image Stability?
Using cloud storage can help ensure that your images are backed up and accessible, but it does not directly improve image stability within a document. Cloud storage provides data security.
Benefits of Cloud Storage:
- Backup: Images are safely stored in the cloud.
- Accessibility: Access your images from any device.
- Collaboration: Share images with others easily.
25. How Do Different File Formats (e.g., DOCX, RTF) Affect Image Anchoring?
Different file formats can affect how image anchoring is handled. DOCX is generally more reliable for preserving image placement compared to older formats like RTF. File format impacts image anchoring.
File Format Considerations:
- DOCX: Modern format with robust image handling.
- RTF: Older format that may not preserve image placement as reliably.
- Compatibility: Choose a format that is compatible with your software and intended use.
26. What Are Some Advanced Techniques for Controlling Image Placement in Complex Documents?
Advanced techniques include using layers, advanced table layouts, and custom macros to precisely control image placement in complex documents. Layers and macros offer advanced control.
Advanced Techniques:
- Layers: Use layers to create complex layouts with precise image placement.
- Advanced Table Layouts: Employ nested tables and custom cell formatting.
- Custom Macros: Automate repetitive tasks and ensure consistency.
27. How Do I Use Gridlines and Guides to Align Images Perfectly?
Gridlines and guides help you align images precisely in your document. These visual aids ensure that images are placed consistently and professionally. Gridlines and guides promote precise alignment.
Steps to Use Gridlines and Guides:
- Go to the View tab.
- Check the Gridlines and Guides boxes.
- Align your images using the visual cues.
28. How Does Using Shapes or Text Boxes Behind Images Affect Anchoring?
Placing shapes or text boxes behind images can provide a stable background and help maintain the image’s position relative to other elements. Shapes and text boxes enhance image stability.
Benefits of Using Shapes and Text Boxes:
- Stable Background: Provides a consistent visual base for the image.
- Relative Positioning: Helps maintain the image’s position relative to other elements.
- Grouping: Shapes and text boxes can be grouped with the image for added stability.
29. How Can I Customize the Appearance of Object Anchors?
You cannot directly customize the appearance of object anchors, but you can use the “Show/Hide ¶” feature to make them more or less visible. Visual cues can be adjusted for clarity.
Options for Adjusting Anchor Visibility:
- Show/Hide ¶: Toggles the visibility of formatting marks, including anchors.
- Object Anchors Setting: Controls whether anchors are always displayed.
- Text Wrapping: Adjusting text wrapping can change the anchor’s behavior and appearance.
30. What Are Some Resources for Learning More About Image Anchoring and Text Wrapping?
There are many online resources, tutorials, and courses available to help you learn more about image anchoring and text wrapping. These resources provide in-depth knowledge and practical tips. dfphoto.net is an excellent resource, and you might also consult Santa Fe University of Art and Design’s Photography Department.
Recommended Resources:
- Online Tutorials: Search for tutorials on image anchoring and text wrapping.
- Software Documentation: Refer to the official documentation for your software.
- Photography and Design Blogs: Follow blogs that cover document layout and design.
- Online Courses: Consider taking a course on document design and layout.
31. How Do Different Printers Affect Image Placement?
Different printers may interpret document layouts slightly differently, potentially affecting image placement. Always test your document on the intended printer before finalizing it. Printer variations can impact image rendering.
Considerations for Printing:
- Printer Drivers: Ensure you have the correct drivers installed.
- Print Settings: Adjust print settings for optimal image quality.
- Test Prints: Always perform test prints to verify image placement.
32. How Do I Handle Anchoring When Collaborating on Documents?
When collaborating on documents, ensure that all collaborators are aware of the anchor settings and text wrapping options used. Consistent settings help prevent unexpected image movement. Collaboration requires clear communication.
Tips for Collaborative Anchoring:
- Communicate Settings: Share information about anchor settings and text wrapping options.
- Use Templates: Templates ensure consistency across the document.
- Review Changes: Carefully review changes made by collaborators.
33. What Role Does Accessibility Play in Image Anchoring?
Proper image anchoring can improve document accessibility by ensuring that images are correctly positioned and described with alternative text. Accessibility enhances the user experience for everyone.
Accessibility Considerations:
- Alternative Text: Provide descriptive alternative text for all images.
- Logical Placement: Ensure images are placed logically within the document.
- Text Wrapping: Use text wrapping options that do not obstruct text flow.
34. How Can I Use Sections to Control Image Anchoring in Long Documents?
Sections allow you to divide a long document into smaller parts, each with its own formatting settings. This can be useful for controlling image anchoring in different parts of the document. Sections enable localized formatting control.
Benefits of Using Sections:
- Localized Formatting: Apply different formatting settings to each section.
- Independent Anchoring: Control image anchoring separately in each section.
- Improved Organization: Sections help organize long documents.
35. What Are Some Best Practices for Mobile Viewing of Documents with Anchored Images?
When creating documents for mobile viewing, consider how anchored images will appear on smaller screens. Use responsive text wrapping options and test the document on various devices. Mobile viewing requires responsive design.
Tips for Mobile Viewing:
- Responsive Text Wrapping: Use text wrapping options that adapt to different screen sizes.
- Test on Multiple Devices: Verify that images are correctly positioned on various devices.
- Simplify Layouts: Avoid complex layouts that may not render well on mobile devices.
36. How Do I Use VBA to Programmatically Control Image Anchors?
You can use VBA (Visual Basic for Applications) to programmatically control image anchors in Microsoft Word. This allows you to automate tasks such as locking anchors, changing text wrapping, and adjusting image positions. VBA offers advanced automation capabilities.
Steps to Use VBA for Image Anchoring:
- Open the VBA editor in Word (Alt + F11).
- Insert a new module (Insert > Module).
- Write VBA code to manipulate image anchors.
- Run the code.
Here’s an example of VBA code to lock the anchor of the first image in a document:
Sub LockFirstImageAnchor()
    Dim oShape As Shape
    Set oShape = ActiveDocument.InlineShapes(1).ConvertToShape
    oShape.LockAnchor = True
End Sub
37. What Are the Limitations of Image Anchoring in Web-Based Document Editors?
Web-based document editors may have limitations compared to desktop software when it comes to image anchoring. Features may be less robust, and performance can vary depending on the browser and internet connection. Web-based editors may have feature limitations.
Common Limitations:
- Reduced Feature Set: Fewer options for text wrapping and anchor control.
- Performance Issues: Slower performance compared to desktop software.
- Browser Compatibility: Variations in how different browsers render images.
38. How Do I Handle Watermarks and Anchoring in Documents?
Watermarks can be added to documents to protect copyright or indicate the document’s status. When using watermarks, ensure that they are properly anchored so they do not move or interfere with the text. Watermarks require careful anchoring.
Steps for Handling Watermarks:
- Insert the watermark as an image or text box.
- Set the text wrapping option to “Behind Text.”
- Lock the anchor to prevent movement.
- Adjust the transparency and position as needed.
39. What Are the Best Practices for Using Screenshots and Anchoring?
Screenshots are commonly used to illustrate tutorials or provide visual examples. When using screenshots, ensure they are clear and properly anchored to the relevant text. Screenshots benefit from clear anchoring.
Best Practices for Screenshots:
- Capture High-Quality Images: Use a screenshot tool that captures images at high resolution.
- Crop and Edit: Crop the screenshot to focus on the relevant area and edit as needed.
- Anchor to Relevant Text: Ensure the screenshot is anchored to the text it illustrates.
40. How Can I Optimize Images for Anchoring and Performance in Large Documents?
In large documents, optimizing images can improve performance and stability. Reduce file sizes, choose appropriate resolutions, and use efficient file formats. Optimization enhances performance in large files.
Optimization Techniques:
- Compress Images: Use image compression tools to reduce file sizes.
- Choose Appropriate Resolution: Select a resolution that balances visual quality and performance.
- Use Efficient File Formats: Use formats like JPEG for photographs and PNG for graphics with text.
By following these detailed guidelines, you can effectively lock photos in place and maintain the desired layout in your documents. Remember to visit dfphoto.net for more tips and resources on mastering photography and document design.
Address: 1600 St Michael’s Dr, Santa Fe, NM 87505, United States.
Phone: +1 (505) 471-6001.
Website: dfphoto.net.
Ready to take your photography skills to the next level? Visit dfphoto.net today for a wealth of tutorials, stunning photo collections, and a vibrant community of photographers eager to connect. Discover new techniques, find inspiration, and share your own masterpieces with the world.
FAQ: Locking Photos in Documents
Here are some frequently asked questions about locking photos in documents to prevent them from moving:
1. What is the primary reason photos move in documents?
Photos primarily move in documents because their anchors are not locked, or they are set “In Line with Text”, which treats them as characters that move with the text.
2. How do I make object anchors visible in Microsoft Word?
To make object anchors visible, go to File > Options > Display and check the “Object anchors” box. Alternatively, you can click the “Show/Hide ¶” button on the Home tab.
3. Can I lock the anchor of a photo that is “In Line with Text”?
No, you cannot lock the anchor of a photo that is “In Line with Text.” You must change the text wrapping option to something else, like “Square” or “Tight,” to enable anchor locking.
4. What happens if I delete the paragraph to which a photo’s anchor is locked?
If you delete the paragraph to which a photo’s anchor is locked, the photo will typically move to the nearest available paragraph.
5. How does text wrapping affect a photo’s position in a document?
Text wrapping determines how text flows around a photo. Different options, such as “Square,” “Tight,” or “Top and Bottom,” affect how the anchor behaves and how the photo interacts with surrounding text.
6. Is there a way to group a photo with other elements to keep them together?
Yes, you can group a photo with other elements like text boxes or shapes by selecting all the objects, right-clicking, and choosing “Group” > “Group.”
7. How do I ensure photos stay in place when converting a document to PDF?
To ensure photos stay in place when converting to PDF, verify that all anchors are locked and that the text wrapping options are correctly set before converting the document.
8. What role does image resolution play in the stability of a photo’s placement?
High-resolution images can sometimes cause performance issues, but they do not directly affect the stability of a photo’s placement if the anchor is locked. Balancing resolution and performance is important.
9. Can I use macros to automate the process of locking anchors for multiple images?
Yes, you can use VBA macros in Microsoft Word to automate the process of locking anchors for multiple images in a document.
10. How do templates help in maintaining image stability?
Templates often have pre-set text wrapping options and anchor settings for images, which helps ensure consistency and stability in your document layout.