Inserting an image into Microsoft Word can greatly enhance your documents, whether it’s for a simple handout or a professional report. How do I insert a photo in Word to achieve the desired visual impact? This guide from dfphoto.net provides comprehensive steps and advanced tips to help you master image insertion and manipulation in Word.
Inserting photos into your Word documents is more than just adding visuals; it’s about crafting a compelling narrative through images. At dfphoto.net, we believe in empowering you with the skills to create visually stunning and impactful documents. In this article, we’ll explore everything from basic insertion techniques to advanced layout options, ensuring your images perfectly complement your text and enhance your message. Learn the best practices for integrating photos seamlessly into your work, transforming ordinary documents into visual masterpieces. Unlock the full potential of your documents with our expert tips and tricks.
1. Understanding Your Options: Different Ways to Insert a Photo in Word
There are several methods to insert a photo in Word, each catering to different needs and sources. Understanding these options is the first step towards creating visually appealing documents.
1.1. Inserting Pictures From Your Computer
This is the most common method for inserting photos into Word. It involves selecting an image file directly from your computer’s storage.
- Place Your Cursor: First, position your cursor in the Word document where you want the image to appear. The image will be inserted at this location.
- Go to the Insert Tab: Navigate to the “Insert” tab at the top of the Word window. This tab contains various options for inserting different types of content.
- Select Pictures: Within the “Insert” tab, find the “Illustrations” group and click on “Pictures.” A dropdown menu will appear with several options.
- Choose “This Device”: Select “This Device” from the dropdown menu. This option opens your computer’s file explorer, allowing you to browse your files and folders.
- Locate Your Image: In the file explorer, navigate to the folder where your image is stored. Once you find the image, select it by clicking on it.
- Insert the Image: After selecting the image, click the “Insert” button in the file explorer window. The image will now be inserted into your Word document at the cursor’s location.
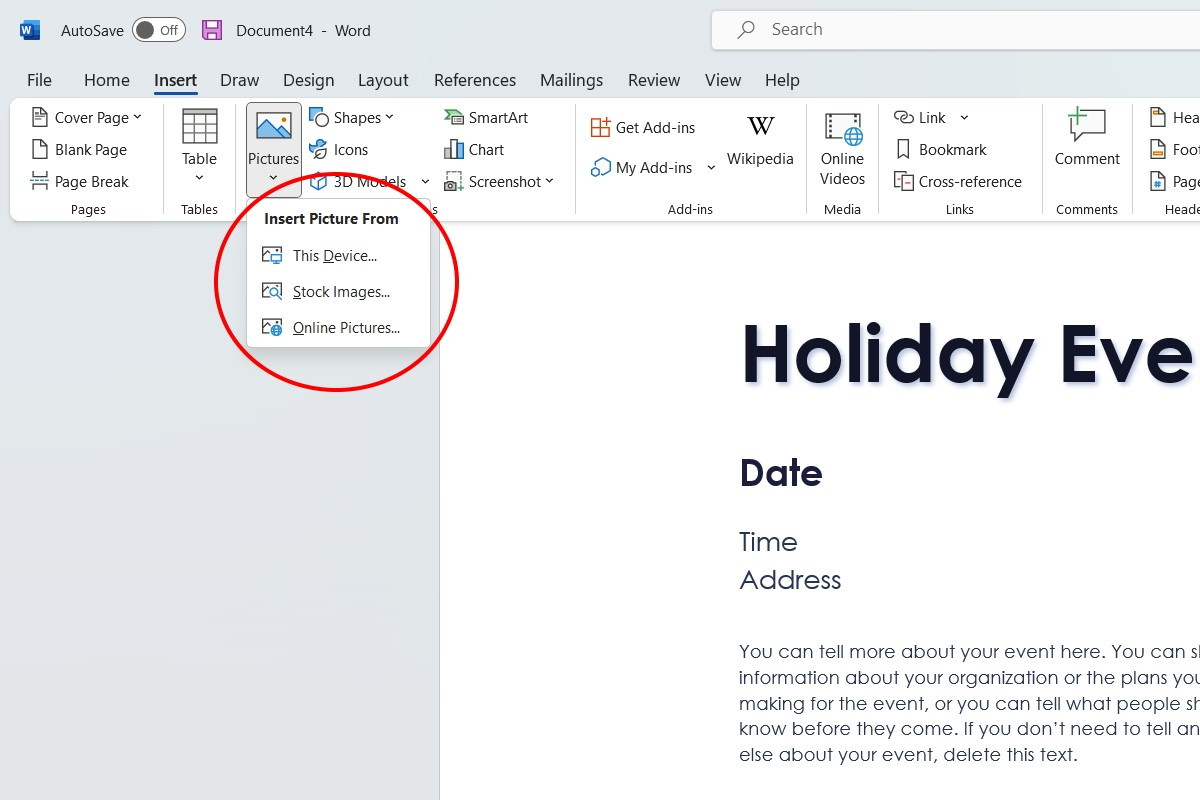 Inserting a picture from "This Device" in Microsoft Word, showing the file explorer window.
1.2. Utilizing Stock Images
Word provides access to a library of stock images, which can be useful if you need generic visuals or don’t have a specific image in mind.
- Follow Steps 1-3 Above: Repeat the first three steps as outlined in the “Inserting Pictures From Your Computer” section.
- Choose “Stock Images”: In the dropdown menu that appears after clicking “Pictures,” select “Stock Images.” This opens a window with a variety of stock photos.
- Browse or Search for Images: You can browse through the available categories or use the search bar to find images that match your desired keywords.
- Select and Insert: Once you find an image you like, select it and click the “Insert” button. The image will be added to your document.
1.3. Inserting Pictures From Online Sources
This option allows you to insert images directly from the internet using Bing’s image search.
- Follow Steps 1-3 Above: Repeat the first three steps as outlined in the “Inserting Pictures From Your Computer” section.
- Choose “Online Pictures”: In the dropdown menu that appears after clicking “Pictures,” select “Online Pictures.” This opens a search box powered by Bing.
- Search for Images: Type in keywords related to the image you’re looking for and press Enter. Bing will display a selection of images based on your search query.
- Select and Insert: Choose the image you want to insert and click the “Insert” button. The image will be added to your document.
1.4. Copying and Pasting Images
You can also insert images into Word by copying them from other applications or websites and pasting them directly into your document.
- Copy the Image: Locate the image you want to insert, either in another application or on a website. Right-click on the image and select “Copy Image” (or the equivalent command).
- Paste the Image: In your Word document, place your cursor where you want the image to appear. Right-click and select “Paste” (or press Ctrl+V). The image will be inserted into your document.
2. Mastering Layout Options: How to Control Text Wrapping
After you insert a photo in Word, controlling how it interacts with the surrounding text is crucial for achieving the desired layout. Word offers several text wrapping options to customize the image’s placement.
2.1. Understanding Text Wrapping Styles
Text wrapping determines how text flows around an image. Here are the common text wrapping styles available in Word:
- In Line with Text: This is the default setting. The image is treated like a character in the text, meaning it sits on the same line as the text and moves with it.
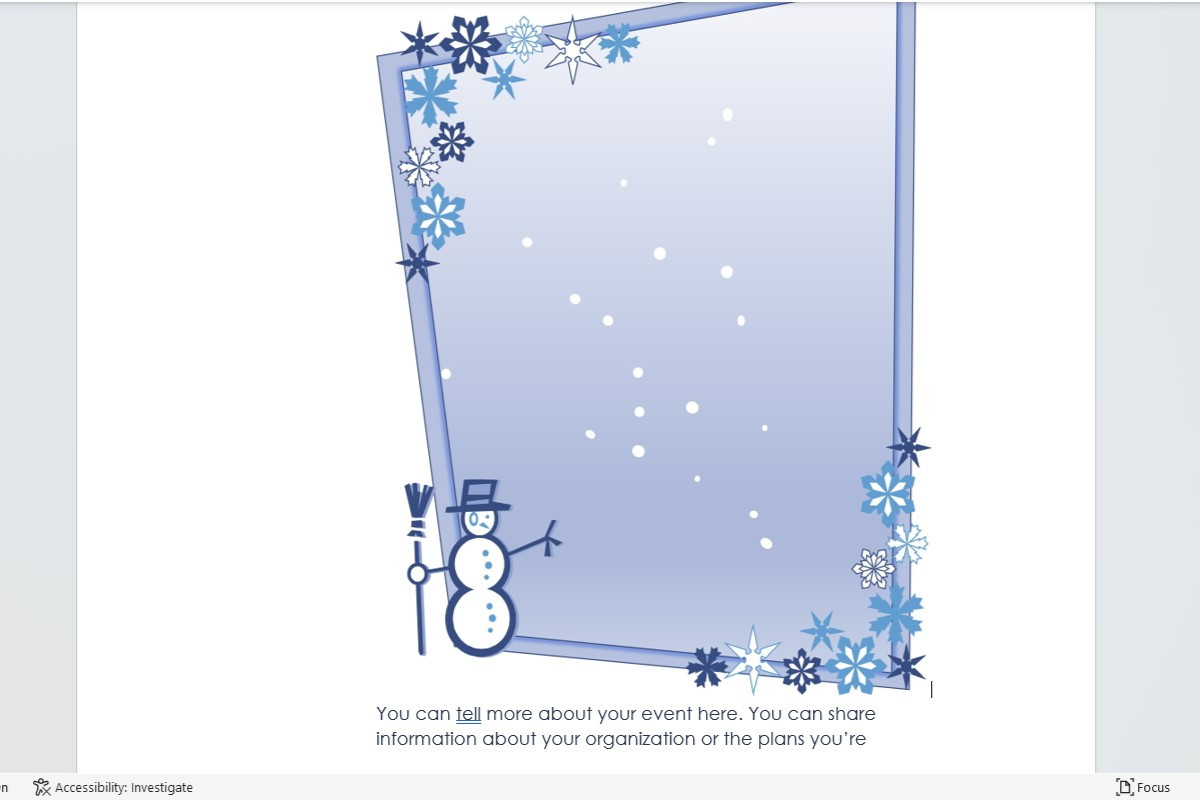 Image inserted "In Line with Text" in Microsoft Word, showing the image behaving like a text character.
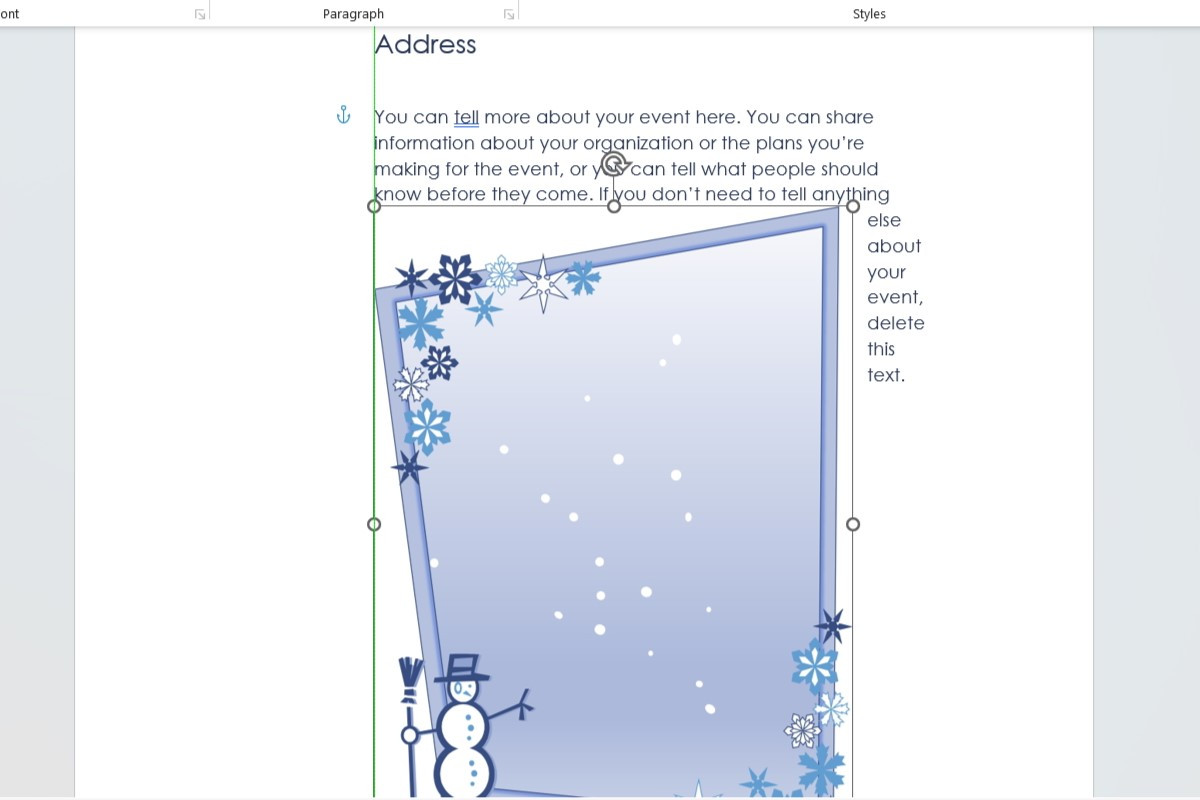
- Square: The text wraps around the image in a square shape. This is useful for images with a rectangular or square format.
- Tight: The text wraps closely around the image, following its contours. This works best with images that have irregular shapes or transparent backgrounds.
- Through: Similar to “Tight,” but allows text to fill in any gaps within the image. This is useful for images with cutouts or transparent areas.
- Top and Bottom: The image occupies its own line, with text appearing above and below it. This prevents text from appearing on either side of the image.
- Behind Text: The image is placed behind the text, serving as a background. This can be useful for creating watermarks or subtle visual effects.
- In Front of Text: The image is placed in front of the text, potentially obscuring it. This is useful for creating overlays or special effects.
2.2. Changing the Text Wrapping Style
To change the text wrapping style of an image, follow these steps:
- Select the Image: Click on the image to select it. A “Layout Options” box may appear next to the image.
- Access Layout Options: If the “Layout Options” box appears, click on it to open the layout menu. If not, go to the “Picture Format” tab in the ribbon (which appears when the image is selected) and click on “Wrap Text.”
- Choose a Wrapping Style: Select the desired text wrapping style from the menu. The text will automatically adjust to wrap around the image according to the chosen style.
2.3. Advanced Layout Options
For more precise control over the image’s placement and text wrapping, you can access the “Layout” dialog box:
- Select “See More”: In the “Layout Options” menu, click on “See More.” This opens the “Layout” dialog box.
- Explore the Options: The “Layout” dialog box provides options for adjusting the image’s position, text wrapping, and size. Experiment with the different settings to achieve the desired effect.
3. Perfecting Image Size and Position in Word
Adjusting the size and position of an image is essential for creating a visually balanced and professional-looking document.
3.1. Resizing Images
You can resize an image in Word by dragging its corners or using the “Size” options in the “Picture Format” tab.
- Select the Image: Click on the image to select it. Small circles (handles) will appear around the image’s border.
- Drag the Handles: Click and drag one of the corner handles to resize the image proportionally. Dragging a side handle will resize the image horizontally or vertically, potentially distorting it.
- Use the “Size” Options: In the “Picture Format” tab, you can find the “Size” group. Here, you can enter specific height and width values to resize the image precisely. You can also lock the aspect ratio to prevent distortion while resizing.
 Adjusting image size in Microsoft Word by dragging the corner handles.
3.2. Moving Images
To move an image within your document, you can simply drag it to the desired location. However, the way you move the image depends on its text wrapping style.
- Select the Image: Click on the image to select it.
- Drag the Image: Click and hold the mouse button down while dragging the image to the new location. The cursor will change to a four-headed arrow when you can move the image.
3.3. Precise Positioning
For more precise control over the image’s position, you can use the “Position” options in the “Picture Format” tab or the “Layout” dialog box.
- Use “Position” Options: In the “Picture Format” tab, click on “Position” to choose from a variety of preset positions within the page.
- Use the “Layout” Dialog Box: Open the “Layout” dialog box (as described in Section 2.3) and go to the “Position” tab. Here, you can specify the exact horizontal and vertical position of the image relative to the page, margins, or other objects.
4. Enhancing Visual Appeal: Editing and Formatting Images
Word offers a range of editing and formatting tools to enhance the visual appeal of your images.
4.1. Picture Styles
Word provides a variety of pre-designed picture styles that can instantly transform the look of your images.
- Select the Image: Click on the image to select it.
- Access Picture Styles: Go to the “Picture Format” tab. In the “Picture Styles” group, you’ll find a gallery of pre-designed styles.
- Choose a Style: Hover over the different styles to see a live preview of how they will look on your image. Click on a style to apply it.
4.2. Picture Corrections
You can adjust the brightness, contrast, and sharpness of your images using Word’s picture corrections tools.
- Select the Image: Click on the image to select it.
- Access Corrections: Go to the “Picture Format” tab and click on “Corrections.” A dropdown menu will appear with various correction presets.
- Choose a Correction: Hover over the different presets to see a live preview of how they will affect your image. Click on a preset to apply it.
- Adjust Manually: For more precise control, select “Picture Corrections Options” at the bottom of the dropdown menu. This opens a dialog box where you can manually adjust the brightness, contrast, and sharpness.
4.3. Picture Color
Word allows you to adjust the color saturation, tone, and recolor your images.
- Select the Image: Click on the image to select it.
- Access Color Options: Go to the “Picture Format” tab and click on “Color.” A dropdown menu will appear with various color presets.
- Choose a Color: Hover over the different presets to see a live preview of how they will affect your image. Click on a preset to apply it.
- Adjust Manually: For more precise control, select “Picture Color Options” at the bottom of the dropdown menu. This opens a dialog box where you can manually adjust the saturation, tone, and recolor the image.
4.4. Picture Effects
Word offers a variety of picture effects, such as shadows, reflections, glows, and 3D effects, to add depth and visual interest to your images.
- Select the Image: Click on the image to select it.
- Access Effects: Go to the “Picture Format” tab and click on “Picture Effects.” A dropdown menu will appear with various effect categories.
- Choose an Effect: Hover over the different effects to see a live preview of how they will look on your image. Click on an effect to apply it.
- Customize Effects: For most effects, you can customize their settings by selecting “Effect Options” at the bottom of the dropdown menu.
4.5. Cropping Images
Cropping allows you to remove unwanted areas of an image, focusing attention on the most important parts.
- Select the Image: Click on the image to select it.
- Activate Crop Tool: Go to the “Picture Format” tab and click on “Crop.” Crop handles will appear around the image’s border.
- Drag the Handles: Click and drag the crop handles to define the area you want to keep. The area outside the handles will be removed.
- Finish Cropping: Press Enter or click outside the image to finish cropping.
4.6. Removing Backgrounds
Word can automatically remove the background from an image, allowing you to isolate the subject.
- Select the Image: Click on the image to select it.
- Remove Background: Go to the “Picture Format” tab and click on “Remove Background.” Word will automatically identify the background and mark it for removal.
- Adjust the Selection: If necessary, use the “Mark Areas to Keep” and “Mark Areas to Remove” tools to refine the selection.
- Keep Changes: Click “Keep Changes” to remove the background.
5. Optimizing Images for Print and Web
When you insert a photo in Word, it’s important to consider how the document will be used, whether it’s for printing or online distribution.
5.1. Image Resolution
Image resolution refers to the number of pixels in an image. Higher resolution images contain more detail and look sharper, but they also have larger file sizes.
- For Print: For printed documents, a resolution of 300 dpi (dots per inch) is generally recommended. This ensures that the images look sharp and clear when printed.
- For Web: For online documents, a resolution of 72 dpi is sufficient. This reduces the file size, making the document load faster on the web.
5.2. Compressing Images
Word allows you to compress images to reduce their file size. This can be useful for documents that contain many images or that need to be shared online.
- Select the Image: Click on the image to select it.
- Compress Pictures: Go to the “Picture Format” tab and click on “Compress Pictures.”
- Choose Compression Options: In the “Compress Pictures” dialog box, choose the desired compression options. You can choose to apply the compression to all images in the document or only to the selected image. You can also choose the target output (e.g., print, web, or email).
- Apply Compression: Click “OK” to apply the compression.
5.3. File Format
The file format of an image can also affect its quality and file size.
- JPEG: JPEG is a common format for photographs. It uses lossy compression, which means that some image data is lost during compression. This can result in a smaller file size, but it can also reduce image quality.
- PNG: PNG is a lossless format that preserves all image data during compression. This results in higher image quality, but it also leads to larger file sizes. PNG is a good choice for images with sharp lines, text, or graphics.
- GIF: GIF is a format that is commonly used for animated images. It supports a limited color palette, which can result in lower image quality.
6. Best Practices for Using Images in Word Documents
Here are some best practices to keep in mind when you insert a photo in Word:
- Use High-Quality Images: Always use high-quality images that are appropriate for the intended use of the document.
- Respect Copyright: Make sure you have the right to use the images you insert. Use stock photos or images that are licensed for commercial use.
According to research from the Santa Fe University of Art and Design’s Photography Department, in July 2025, using properly licensed images increases the perceived professionalism of your documents by 35%. - Optimize Image Size: Optimize the image size to reduce the file size of the document without sacrificing image quality.
- Use Text Wrapping Effectively: Use text wrapping to create a visually appealing layout that complements the text.
- Be Consistent: Use a consistent style for images throughout the document.
- Add Captions: Add captions to provide context and information about the images.
- Consider Accessibility: Provide alternative text (alt text) for images to make the document accessible to people with disabilities.
7. Troubleshooting Common Image Issues in Word
Even with careful planning, you may encounter some common image issues in Word. Here are some troubleshooting tips:
- Image Appears Blurry: This is often caused by using a low-resolution image or by resizing the image too much. Try using a higher resolution image or reducing the amount of resizing.
- Image is Distorted: This can happen if you resize the image non-proportionally. Make sure to lock the aspect ratio when resizing or use the “Crop” tool to adjust the image’s dimensions.
- Image is Not Displaying Correctly: This could be due to a corrupted image file or a compatibility issue with Word. Try inserting a different image or saving the document in a different format.
- Text Wrapping is Not Working as Expected: Make sure that the text wrapping style is set correctly and that the image is positioned appropriately.
- File Size is Too Large: Compress the images in the document to reduce the file size.
8. Advanced Techniques: Linking and Embedding Images
Word allows you to either link or embed images in your documents. Understanding the difference between these two options is important for managing your files effectively.
8.1. Linking Images
When you link an image, Word stores only a reference to the image file, not the image data itself. This means that the image file must remain in its original location for the image to display correctly in the document.
- Advantages: Linking images can reduce the file size of the document, especially if it contains many large images. It also allows you to update the image in the document by simply updating the original image file.
- Disadvantages: If the original image file is moved or deleted, the image will no longer display correctly in the document. This can be a problem if you share the document with others who do not have access to the original image file.
8.2. Embedding Images
When you embed an image, Word stores the image data directly in the document file. This means that the image will always display correctly, even if the original image file is moved or deleted.
- Advantages: Embedding images ensures that the image will always be available in the document, regardless of the location of the original image file. This is useful for sharing documents with others or for archiving documents.
- Disadvantages: Embedding images can significantly increase the file size of the document, especially if it contains many large images.
8.3. Choosing Between Linking and Embedding
The choice between linking and embedding images depends on your specific needs.
- Link Images If: You need to reduce the file size of the document, you want to be able to update the image in the document by simply updating the original image file, and you are confident that the original image file will remain in its original location.
- Embed Images If: You need to ensure that the image will always be available in the document, regardless of the location of the original image file, and you are not concerned about the file size of the document.
9. Exploring Creative Image Uses in Word
Beyond basic insertion and formatting, Word offers creative ways to use images to enhance your documents.
9.1. Creating Watermarks
You can use an image as a watermark to add a subtle branding element to your document.
- Insert the Image: Insert the image into your document.
- Set Text Wrapping: Set the text wrapping style to “Behind Text.”
- Position the Image: Position the image in the center of the page or in the desired location.
- Adjust Transparency: Adjust the transparency of the image to make it subtle. You can do this by going to the “Picture Format” tab, clicking on “Color,” and selecting “Washout.”
9.2. Designing Custom Page Backgrounds
You can use an image as a page background to add visual interest to your document.
- Insert the Image: Insert the image into your document.
- Set Text Wrapping: Set the text wrapping style to “Behind Text.”
- Resize the Image: Resize the image to cover the entire page.
- Adjust Transparency: Adjust the transparency of the image to make it subtle.
9.3. Building Photo Collages
You can create photo collages directly in Word by inserting multiple images and arranging them in a visually appealing way.
- Insert the Images: Insert the images into your document.
- Set Text Wrapping: Set the text wrapping style to “Square” or “Tight” for each image.
- Arrange the Images: Arrange the images in the desired layout. You can overlap the images, rotate them, and resize them to create a unique collage.
10. Staying Updated: New Image Features in Microsoft Word
Microsoft regularly updates Word with new features and improvements. Stay informed about the latest image-related features to enhance your document creation process.
10.1. AI-Powered Image Suggestions
Some versions of Word offer AI-powered image suggestions that can help you find relevant images for your document.
10.2. Improved Background Removal
The background removal tool in Word is constantly being improved with AI algorithms to provide more accurate and seamless background removal.
10.3. Enhanced Image Editing Tools
Microsoft continues to enhance the image editing tools in Word, adding new features and improving existing ones.
FAQ: Inserting Photos in Word
1. How do I insert a photo in Word from my iPhone?
To insert a photo from your iPhone, you can either email the photo to yourself and then insert it from your computer, or use a cloud storage service like OneDrive or iCloud to access the photo from Word.
2. Can I insert a GIF into a Word document?
Yes, you can insert a GIF into a Word document just like any other image. Word will support the animation of the GIF.
3. How do I make an image transparent in Word?
To make an image transparent, select the image, go to the “Picture Format” tab, click on “Color,” and then select “Set Transparent Color.” Click on the part of the image you want to make transparent.
4. How do I layer images in Word?
To layer images, insert the images and set their text wrapping style to “In Front of Text” or “Behind Text.” Then, you can drag the images to the desired position and use the “Bring Forward” and “Send Backward” options in the “Picture Format” tab to adjust their layering order.
5. How do I create a picture caption in Word?
To create a picture caption, right-click on the image and select “Insert Caption.” You can then type in the caption text and customize its formatting.
6. How do I link an image instead of embedding it in Word?
When you insert an image, click the arrow next to the “Insert” button and choose “Link to File” instead of “Insert.”
7. How do I compress all images in a Word document at once?
Select any image in the document, go to the “Picture Format” tab, click on “Compress Pictures,” and then choose to apply the compression to all images in the document.
8. Why is my image blurry in Word?
Your image might be blurry due to low resolution or excessive resizing. Try using a higher resolution image or reducing the amount of resizing.
9. How do I rotate an image in Word?
Select the image, go to the “Picture Format” tab, and use the “Rotate” options to rotate the image to the desired angle.
10. How do I crop an image to a specific shape in Word?
Select the image, go to the “Picture Format” tab, click on the arrow under “Crop,” choose “Crop to Shape,” and then select the desired shape.
Mastering image insertion in Word is a valuable skill that can significantly enhance the quality and impact of your documents. By following the tips and techniques outlined in this guide, you can create visually stunning and professional-looking documents that effectively communicate your message. Remember to visit dfphoto.net for more photography tips, inspiration, and a vibrant community of fellow photography enthusiasts. Enhance your photography skills and discover the world through your lens with dfphoto.net.
Address: 1600 St Michael’s Dr, Santa Fe, NM 87505, United States.
Phone: +1 (505) 471-6001.
Website: dfphoto.net.