Have you ever found yourself with a photo that looks great on your phone but becomes blurry or pixelated when you try to view it on a larger screen or print it? This is often due to low photo resolution. Increasing your photo resolution can help improve the clarity and detail of your images, especially when you need to enlarge them. This article will guide you through a simple method to increase photo resolution and discuss what to consider regarding image quality.
Understanding Photo Resolution and Upscaling
Photo resolution refers to the amount of detail an image holds. It’s measured in pixels, the tiny building blocks that make up a digital image. A higher resolution means more pixels, resulting in finer detail and sharper images, particularly when enlarged. When you increase photo resolution, you’re essentially adding more pixels to the image. This process is often called “upscaling” or “upsampling”.
While it sounds like a perfect solution to blurry photos, it’s important to understand that you can’t magically add detail that wasn’t originally captured. Upscaling algorithms work by estimating and creating new pixels based on the existing ones. Different software uses various methods for this estimation, which can affect the final image quality.
Step-by-Step Guide to Upscaling in Preview (Mac)
For Mac users, the built-in Preview application offers a quick and easy way to increase photo resolution. Here’s how:
-
Open your photo in Preview: Simply drag and drop your image file onto the Preview icon in your Dock or Applications folder.
-
Access the Adjust Size tool: In the Preview menu bar, click on “Tools” and then select “Adjust Size…”.
-
Adjust the dimensions: The “Adjust Size” dialog box will appear. Here you can change the dimensions of your image.
-
Specify desired dimensions: In the “Fit into” field, you can choose a preset size or enter your desired width and height in pixels. For example, you can select “1024 x 768” or input custom values.
-
Ensure proportional scaling: Make sure the “Scale proportionally” checkbox is ticked. This maintains the original aspect ratio of your image, preventing distortion.
-
Enable resampling: Crucially, ensure the “Resample image” checkbox is also checked. This tells Preview to add new pixels to increase the resolution.
-
-
Save the upscaled image: After adjusting the size, click “OK”. Before closing Preview, go to the “File” menu and select “Save As…”.
-
Choose a new name: It’s recommended to save the upscaled image with a slightly different name (e.g., add “_upscaled” to the filename) to keep the original photo untouched.
-
Select “JPEG” format and “Best” quality: In the save dialog, ensure the “Format” is set to “JPEG” for common photo usage and “Quality” is set to “Best” to minimize compression artifacts in the new, larger image.
-
Choose a save location: Select where you want to save the new, upscaled image. “Desktop” is often convenient for easy access.
-
 Adjust Size Dialog in Preview App
The Quality Question: Does Upscaling Improve or Degrade Images?
This is a point of debate, as seen in discussions among photographers and image enthusiasts. Technically, increasing resolution through upscaling cannot add genuine detail that wasn’t there initially. The new pixels are interpolated, meaning they are algorithmically generated based on the surrounding pixels.
Arguments against Upscaling:
Critics argue that upscaling inevitably leads to image degradation. They point out that creating “new” pixels is essentially guessing what should be there, which can result in:
- Blurriness: Instead of sharp details, upscaled images can appear softer or blurry, especially when enlarged significantly.
- Artifacts: Upscaling algorithms can sometimes introduce unwanted artifacts, such as pixelation, halos, or unnatural textures, particularly in areas with fine details.
Arguments for Upscaling (in certain cases):
However, proponents of upscaling, especially for specific scenarios, argue that it can improve the perceived visual quality, particularly for low-resolution images intended for screen viewing or moderate enlargement. For example:
- Smoothing out pixelation: For very small, pixelated web images, upscaling can “smooth out” the harsh pixel edges, making the image look less jagged and more visually appealing on larger displays.
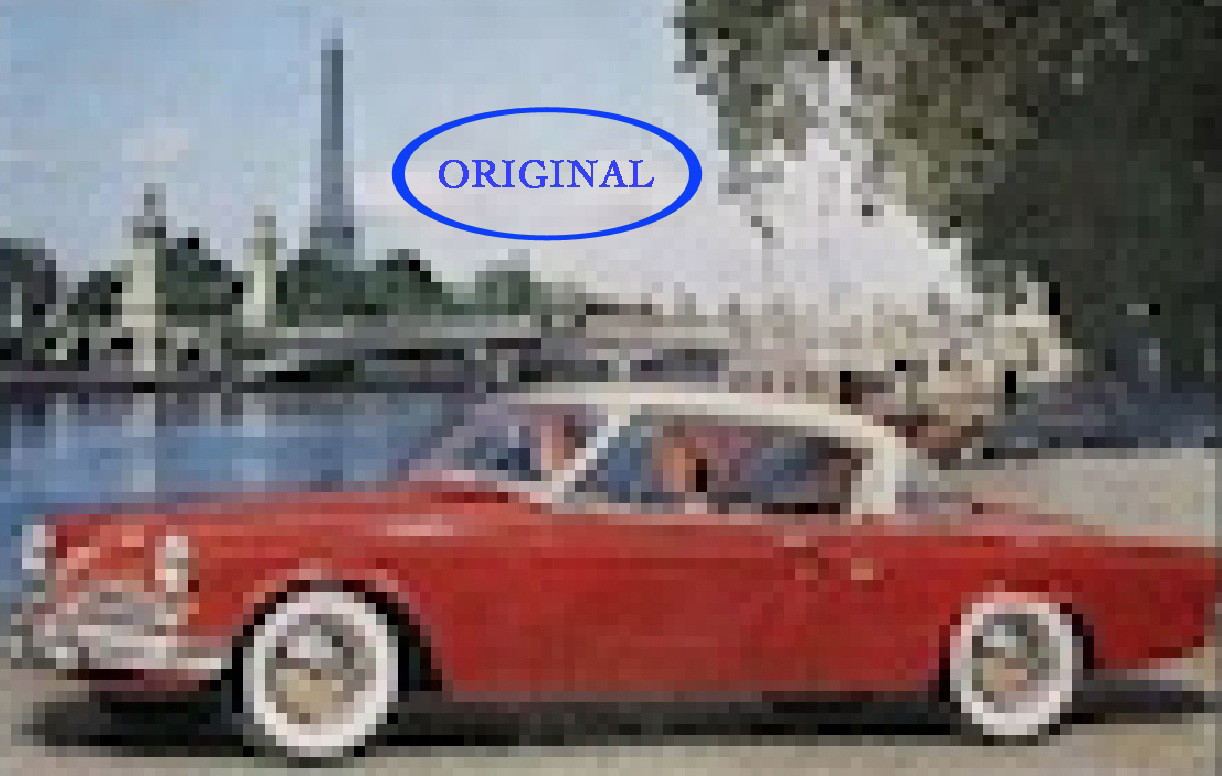
 Detail of an Original Low-Resolution Photo
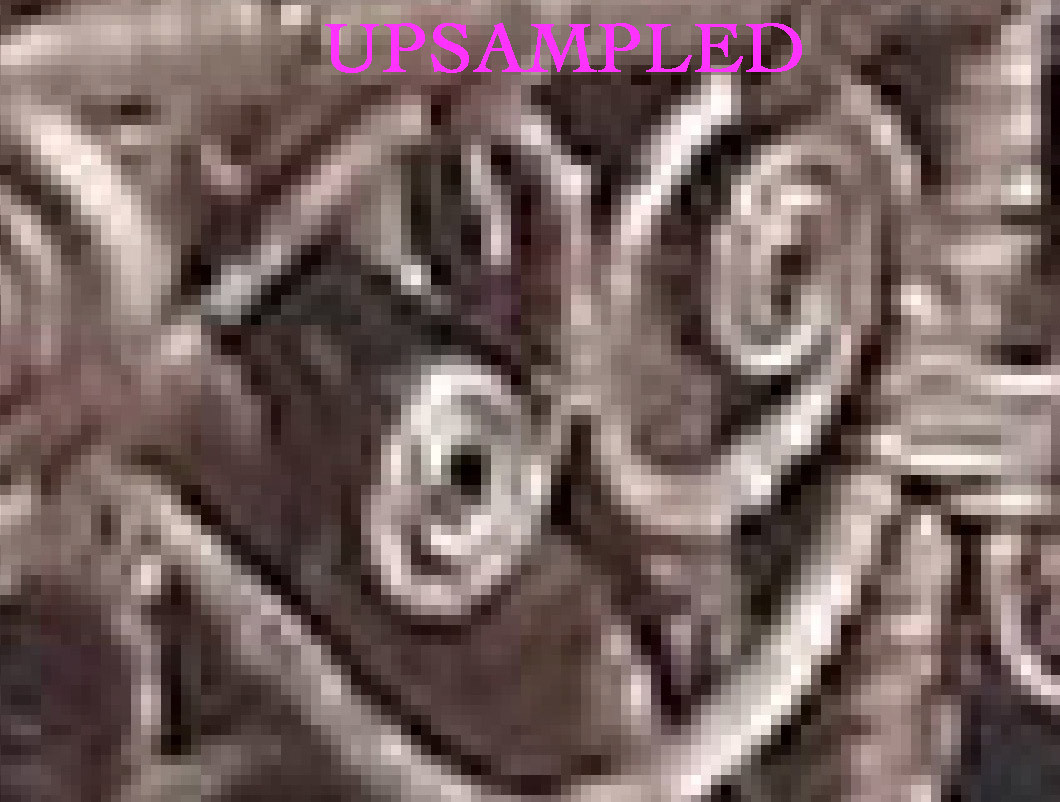 Detail of an Upscaled Photo
- Improving small images for web use: If you have a small image that needs to be displayed larger on a website, upscaling can make it presentable without extreme pixelation, although it won’t match the quality of a natively high-resolution image.
Important Consideration: The degree of upscaling matters significantly. Small increases (e.g., 10-20%) might be less noticeable in terms of quality loss, while dramatically upscaling an image (e.g., 200% or more) is much more likely to introduce visible artifacts and blurriness.
 Original Small Web Image
 800% Upscaled Image
 Zoomed Original Image (Not Upscaled)
When to Upscale and When to Avoid It
-
Upscale when:
- You have a very low-resolution image that needs to be viewed on a larger screen or used online at a slightly larger size.
- You understand that upscaling won’t create detail but might improve perceived visual smoothness.
- You are making minor enlargements.
-
Avoid upscaling when:
- Image quality is paramount, especially for professional photography or critical applications.
- You intend to print the image at a large size – starting with a high-resolution image is always preferable for prints.
- You expect upscaling to magically restore lost detail – it cannot.
Beyond Preview: Other Tools for Increasing Resolution
While Preview is a convenient tool for basic upscaling, more advanced software offers sophisticated algorithms that can produce better results, albeit often with a trade-off in processing time or cost. These include:
- Adobe Photoshop: Offers various resampling methods (like Bicubic Smoother) that can provide more refined upscaling than basic interpolation.
- Dedicated AI Upscaling Software: Emerging AI-powered tools use machine learning to “imagine” missing details during upscaling, often yielding impressive results, although they are not always perfect and may introduce their own types of artifacts. Examples include Topaz Gigapixel AI, and others.
- Online Upscaling Tools: Numerous websites offer free or paid online image upscaling services, often utilizing AI algorithms for enhanced results.
Conclusion
Increasing photo resolution is possible, and tools like Preview make it easily accessible. However, it’s essential to understand that upscaling is not a magic bullet for poor image quality. While it can be helpful for certain situations, especially for improving the visual appearance of small images for screen viewing, it’s crucial to be mindful of the potential for quality degradation, particularly with aggressive upscaling. For the best results, always strive to capture images at the highest resolution possible from the start. Upscaling should be considered a tool for managing existing low-resolution images, rather than a substitute for good photographic practices.