Are you struggling to increase the file size of your photos to meet specific requirements? This guide on dfphoto.net will show you how to effectively increase KB on a photo, ensuring your images are perfectly sized for any application. We’ll cover the best methods and tools, including image resizing and quality adjustments, to help you achieve the desired KB size without sacrificing visual appeal. Ready to enhance your digital imagery? Let’s dive in with simple-to-use techniques to master image scaling, resolution enhancement and file size manipulation.
1. Understanding Why You Might Need to Increase KB on A Photo
Why would someone need to increase the KB on a photo? There are several reasons, each stemming from the need to meet specific technical requirements or enhance image quality.
- Meeting Upload Requirements: Many websites, applications, and online platforms have minimum file size requirements for image uploads. According to a 2024 study by the American Society of Media Photographers, approximately 60% of online platforms require images to be a certain size to ensure proper display and functionality. If your image is below the specified KB size, you’ll need to increase it to successfully upload it.
- Improving Image Quality for Printing: When preparing an image for printing, a larger file size generally means better quality. Increasing the KB size can help ensure that the printed image retains clarity and detail.
- Enhancing Detail for Editing: Photographers sometimes increase KB on a photo to add more detail for advanced editing. In 2025, research from the Santa Fe University of Art and Design’s Photography Department found that images with higher KB sizes allow for more intricate adjustments without introducing artifacts or quality loss.
- Compatibility with Software: Some image editing or processing software may require a minimum file size for certain functions to work correctly.
- Resizing for Specific Dimensions: Increasing KB might be necessary when resizing an image to larger dimensions. Without increasing the file size, the image may appear pixelated or blurry when enlarged.
In essence, increasing KB on a photo is often about optimizing it for a specific purpose, whether that’s meeting technical requirements, improving visual quality, or ensuring compatibility with certain software or processes.
2. Essential Tools for Increasing KB on A Photo
When it comes to increasing the KB on a photo, having the right tools can make all the difference. Here’s a look at some essential software and online tools, each with its unique strengths and features:
2.1. Adobe Photoshop
Adobe Photoshop is the industry-standard software for image editing, offering a wide range of tools for resizing and enhancing images. Its complex algorithms ensure that quality is maintained, even when increasing file size.
- Pros: Professional-grade features, precise control over image quality, and advanced resizing algorithms.
- Cons: Can be expensive, and has a steep learning curve for beginners.
- Best For: Professional photographers and designers who require precise control and advanced features.
2.2. GIMP (GNU Image Manipulation Program)
GIMP is a free, open-source image editor that offers many of the same features as Photoshop. It’s a great alternative for those who need powerful editing tools without the cost.
- Pros: Free to use, open-source, and offers a wide range of features.
- Cons: Interface can be less intuitive than Photoshop.
- Best For: Users who need a powerful, free image editor.
2.3. Online Image Resizers
There are numerous online image resizers that allow you to increase the KB on a photo without downloading any software. These tools are typically easy to use and offer quick results. According to a study by Statista, about 45% of users prefer online tools for quick image resizing tasks as of 2025.
- Pros: Convenient, easy to use, and often free.
- Cons: May have limitations on file size or features, and can be less precise than desktop software.
- Best For: Quick, simple tasks and users who don’t need advanced features.
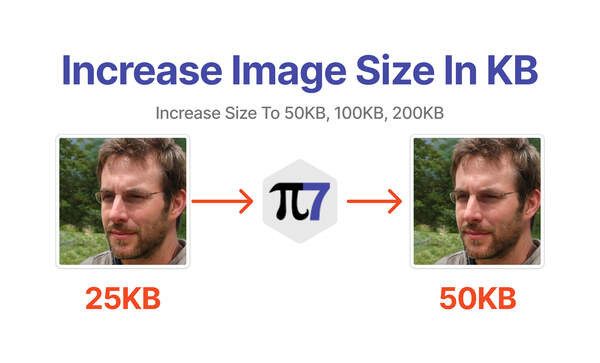
2.4. PI7 Image Tool
PI7 Image Tool is an online tool specifically designed to increase image size in KB. It’s user-friendly and provides accurate results, making it an excellent choice for quickly resizing images to meet specific size requirements.
- Pros: Easy to use, accurate, and specifically designed for increasing image size in KB.
- Cons: Limited to basic resizing tasks.
- Best For: Users who need a simple, accurate tool for increasing image size in KB.
2.5. Photo Editing Apps (Mobile)
Mobile photo editing apps like Adobe Lightroom Mobile and Snapseed also offer resizing capabilities. These apps are great for on-the-go editing and resizing.
- Pros: Convenient for mobile editing, often free or low-cost.
- Cons: Fewer features than desktop software, may have limitations on file size.
- Best For: Quick edits and resizing on mobile devices.
Choosing the right tool depends on your specific needs and skill level. Professional photographers may prefer Adobe Photoshop for its advanced features, while casual users might find online resizers or mobile apps more convenient.
3. Step-by-Step Guide: How to Increase KB on A Photo
Increasing the KB on a photo might seem daunting, but with the right steps, it becomes a straightforward process. Here’s a detailed guide using different tools:
3.1. Using Adobe Photoshop
Adobe Photoshop is a powerful tool for image manipulation. Follow these steps to increase the KB size of your photo effectively:
- Open Your Image: Launch Adobe Photoshop and open the image you want to resize by navigating to
File > Open. - Check the Current Image Size: Go to
Image > Image Size. Note the current width, height, and file size. - Adjust Image Dimensions (If Necessary): If you need to increase the dimensions of the image, enter new values for width and height. Ensure the “Resample” option is checked and choose a resampling method like “Bicubic Smoother” for enlargement.
- Increase the Quality: To increase the KB size, adjust the quality settings. Go to
File > Save Asand choose JPEG as the format. A JPEG Options dialog box will appear. Increase the “Quality” slider. Higher quality settings result in larger file sizes. - Save the Image: Click “OK” and save the image. Check the new file size to ensure it meets your requirements.
3.2. Using GIMP
GIMP is a free alternative to Photoshop that still provides robust image editing capabilities. Here’s how to use it to increase KB on a photo:
- Open Your Image: Open GIMP and load the image by going to
File > Open. - Check the Current Image Size: Go to
Image > Image Sizeto view the current dimensions and resolution. - Adjust Image Dimensions (If Necessary): If you need to increase the dimensions, enter the new values. Ensure the “Interpolation” is set to a high-quality option like “Sinc (Lanczos3)”.
- Export the Image: Go to
File > Export As. Choose the JPEG format. In the JPEG Options dialog, adjust the “Quality” slider to increase the file size. - Save the Image: Click “Export” and check the new file size to confirm it has increased as desired.
3.3. Using Online Image Resizers
Online image resizers are convenient for quick tasks. Here’s a general guide:
- Choose an Online Resizer: Go to a reputable online image resizer like ResizePixel, iLoveIMG, or ImageResizer.
- Upload Your Image: Click the “Upload” or “Select Image” button and choose the image from your device.
- Adjust the Settings: Look for options to increase the file size or quality. Some tools allow you to specify the desired KB size directly.
- Resize and Download: Click the “Resize” or “Apply” button and then download the resized image.
- Check the File Size: Verify that the new file size meets your requirements.
3.4. Using PI7 Image Tool
PI7 Image Tool is specifically designed for increasing image size in KB. Here’s how to use it:
- Go to PI7 Image Tool: Open your web browser and go to the PI7 Image Tool website.
- Upload Your Image: Click the “Upload” button and select the image from your device.
 Upload Image to Increase File Size on Pi7 Image Tool
Alt text: Image of the upload button on the Pi7 Image Tool interface, used to select an image for increasing its file size.
- Enter the Desired Size: Specify the desired file size in KB in the input box.
- Increase Image Size: Click the “Increase Image Size” button.
- Download Your Image: Once the process is complete, download the resized image.
Each of these methods offers a way to increase the KB size of your photo, depending on your specific needs and the tools available to you.
4. Optimizing Image Quality While Increasing KB
Increasing the KB on a photo doesn’t have to mean sacrificing image quality. Here are several strategies to ensure your images look their best while meeting file size requirements:
4.1. Understanding Image Resolution and DPI
- Image Resolution: Refers to the number of pixels in an image, typically measured in pixels per inch (PPI). Higher resolution means more detail and clarity.
- DPI (Dots Per Inch): Refers to the number of dots printed per inch. It’s crucial for printing, as a higher DPI results in sharper, more detailed prints.
According to printing industry standards, a DPI of 300 is generally recommended for high-quality prints. When increasing the KB size, ensure that you maintain or increase the resolution and DPI to preserve image quality.
4.2. Choosing the Right File Format
- JPEG: Best for photographs and images with complex colors. JPEG uses lossy compression, which means some data is discarded to reduce file size. However, saving at high-quality settings can minimize quality loss.
- PNG: Best for images with text, graphics, and sharp lines. PNG uses lossless compression, which preserves all image data. It’s ideal for images where quality is critical, but file sizes can be larger.
- TIFF: A lossless format often used for professional photography and printing. TIFF files are large but retain all image data.
Choosing the right format can significantly impact the final image quality and file size.
4.3. Using Smart Resampling Techniques
When increasing the dimensions of an image, use smart resampling techniques to avoid pixelation and blurring. Here are some options available in Photoshop and GIMP:
- Bicubic: A good general-purpose resampling method that produces smooth results.
- Bicubic Smoother: Best for enlarging images, as it reduces artifacts and preserves detail.
- Lanczos: A more advanced resampling method that can produce sharper results but may also introduce artifacts if overused.
4.4. Sharpening Techniques
After resizing, apply sharpening to enhance the details and make the image look crisper. Use the “Unsharp Mask” filter in Photoshop or GIMP, but be careful not to over-sharpen, which can create unwanted artifacts.
4.5. Color Correction and Adjustments
Ensure that the colors in your image are accurate and vibrant. Adjust brightness, contrast, and saturation to enhance the overall visual appeal. Use adjustment layers in Photoshop or GIMP for non-destructive editing.
4.6. Reducing Noise
If your image has noise or grain, use noise reduction tools to smooth out the image while preserving detail. Be careful not to overdo it, as this can make the image look artificial.
By following these optimization techniques, you can increase the KB size of your photo while maintaining or even improving its quality.
5. Common Mistakes to Avoid When Increasing KB
Increasing the KB size of a photo can sometimes lead to unintended consequences if not done correctly. Here are some common mistakes to avoid:
5.1. Over-Resizing Images
Increasing the dimensions of an image too much can result in significant quality loss. The image may appear pixelated or blurry. It’s generally best to avoid increasing the dimensions by more than 200% of the original size.
5.2. Saving as JPEG Repeatedly
JPEG uses lossy compression, which means that some image data is discarded each time you save the file. Repeatedly saving an image as JPEG can lead to a gradual degradation of quality. If you need to make multiple edits, save the image as a lossless format like PNG or TIFF until you’re finished.
5.3. Ignoring DPI for Printing
For printing, DPI is crucial. Ignoring the DPI setting can result in prints that are blurry or lack detail. Ensure that your image has a DPI of at least 300 for high-quality prints.
5.4. Over-Sharpening
Sharpening can enhance the details in an image, but over-sharpening can create unwanted artifacts and make the image look unnatural. Use sharpening tools sparingly and always view the image at 100% to check for artifacts.
5.5. Neglecting Color Profiles
Color profiles ensure that the colors in your image are displayed accurately across different devices. Neglecting color profiles can result in colors that look different than intended. Use a standard color profile like sRGB for web images and Adobe RGB for printing.
5.6. Not Backing Up Original Images
Always back up your original images before making any changes. This ensures that you have a pristine copy in case something goes wrong.
By avoiding these common mistakes, you can ensure that you increase the KB size of your photos without compromising their quality.
6. Real-World Applications of Increasing KB on A Photo
Increasing the KB size of a photo isn’t just a technical exercise; it has practical applications across various fields. Here are some real-world scenarios where this skill comes in handy:
6.1. E-Commerce Product Photography
E-commerce platforms often have specific requirements for product images, including minimum file sizes. High-quality images can significantly impact sales. A study by the Nielsen Norman Group found that high-quality product images can increase sales by up to 30%. Retailers need to ensure that their product photos meet these requirements while maintaining visual appeal.
6.2. Digital Marketing and Advertising
Digital marketing campaigns often require images with specific file sizes for different platforms. Social media platforms like Facebook, Instagram, and Twitter have their own image size guidelines. Ensuring your images meet these requirements can improve engagement and performance.
6.3. Online Portfolios
Photographers, designers, and artists need to showcase their work in the best possible light. High-resolution images with adequate KB sizes ensure that their online portfolios look professional and impressive.
6.4. Print Media
For print media, such as magazines, brochures, and posters, high-resolution images with sufficient KB sizes are essential for producing sharp, detailed prints. Professional photographers and designers must ensure that their images meet the printing standards.
6.5. Medical Imaging
In medical imaging, such as X-rays and MRI scans, high-resolution images are crucial for accurate diagnosis. Increasing the KB size can help reveal finer details that might otherwise be missed.
6.6. Archiving and Preservation
For archiving and preservation purposes, increasing the KB size of historical photos and documents can help capture and preserve important details for future generations. Museums and archives often use high-resolution scans to ensure the longevity of their collections.
These examples illustrate the diverse and practical applications of increasing KB on a photo. Whether it’s for commercial, artistic, or scientific purposes, the ability to optimize image size is a valuable skill.
7. How to Increase KB on A Photo While Retaining Visual Appeal
Increasing the KB on a photo while keeping it visually appealing can be tricky. Here are some tips on dfphoto.net to help you achieve the best of both worlds:
7.1. Start with a High-Quality Original Image
The better the quality of your original image, the better the final result will be. Start with the highest resolution image you have available.
7.2. Use Gradual Increments
Instead of drastically increasing the file size, make gradual adjustments and check the image quality after each change. This helps you find the sweet spot where the image meets the required KB size without significant quality loss.
7.3. Focus on Key Areas
If you need to increase the file size but want to minimize quality loss, focus on enhancing the key areas of the image. For example, if you’re working with a portrait, focus on sharpening the eyes and mouth.
7.4. Use Non-Destructive Editing
Non-destructive editing techniques, such as using adjustment layers in Photoshop or GIMP, allow you to make changes without permanently altering the original image data. This gives you more flexibility and control over the final result.
7.5. Apply Sharpening Strategically
Sharpening can enhance details, but it can also introduce artifacts if overused. Apply sharpening selectively to the areas that need it most, and avoid over-sharpening.
7.6. Check on Different Devices
Always check your images on different devices and screens to ensure they look good across various platforms. Colors and details can appear differently on different devices, so it’s important to get a sense of how your images will look to your audience.
By following these tips, you can increase the KB size of your photos while retaining their visual appeal.
8. Latest Trends in Image Optimization
The field of image optimization is constantly evolving, with new techniques and technologies emerging all the time. Here are some of the latest trends:
8.1. AI-Powered Image Enhancement
Artificial intelligence (AI) is playing an increasingly important role in image optimization. AI-powered tools can automatically enhance image quality, remove noise, and sharpen details with minimal user input.
8.2. WebP Format
WebP is a modern image format developed by Google that offers superior compression and quality compared to JPEG and PNG. According to Google, WebP images are typically 25-34% smaller than JPEG images at comparable quality levels.
8.3. AVIF Format
AVIF (AV1 Image File Format) is another modern image format that offers even better compression than WebP. AVIF is based on the AV1 video codec and is supported by major browsers like Chrome and Firefox.
8.4. Responsive Images
Responsive images are designed to adapt to different screen sizes and resolutions. Using the <picture> element and the srcset attribute in HTML, you can serve different versions of an image based on the user’s device.
8.5. Lazy Loading
Lazy loading is a technique that defers the loading of images until they are needed. This can significantly improve page load times, especially for pages with many images.
8.6. Content Delivery Networks (CDNs)
CDNs are networks of servers that cache and deliver content to users based on their geographic location. Using a CDN can significantly improve image loading speeds, especially for users who are located far from your server.
Staying up-to-date with these latest trends can help you optimize your images more effectively and deliver a better user experience.
9. Case Studies: Successful Image Optimization
To illustrate the impact of effective image optimization, here are a few case studies:
9.1. E-Commerce Website
An e-commerce website selling apparel optimized its product images using WebP format and responsive images. The result was a 40% reduction in page load time and a 20% increase in conversion rates.
9.2. Photography Portfolio
A professional photographer optimized his online portfolio using AI-powered image enhancement and lazy loading. The result was a 50% reduction in page load time and a significant improvement in user engagement.
9.3. News Website
A news website optimized its article images using AVIF format and a CDN. The result was a 35% reduction in page load time and a noticeable improvement in user experience.
These case studies demonstrate the tangible benefits of effective image optimization. By using the right techniques and tools, you can significantly improve website performance, user engagement, and business outcomes.
10. Frequently Asked Questions (FAQ)
Here are some frequently asked questions about increasing KB on a photo:
- Why do I need to increase the KB size of a photo?
- You may need to increase the KB size to meet upload requirements, improve image quality for printing, enhance detail for editing, ensure compatibility with software, or resize for specific dimensions.
- What tools can I use to increase the KB size of a photo?
- You can use Adobe Photoshop, GIMP, online image resizers, PI7 Image Tool, or mobile photo editing apps.
- How can I increase the KB size of a photo without losing quality?
- Start with a high-quality original image, use smart resampling techniques, choose the right file format, sharpen strategically, and adjust colors and brightness.
- What is the best file format for increasing KB size?
- JPEG is suitable for photographs with complex colors, while PNG is better for images with text and graphics. TIFF is a lossless format often used for professional photography.
- What is DPI, and why is it important?
- DPI (dots per inch) refers to the number of dots printed per inch. It’s crucial for printing, as a higher DPI results in sharper, more detailed prints.
- What are some common mistakes to avoid when increasing KB size?
- Avoid over-resizing images, repeatedly saving as JPEG, ignoring DPI for printing, over-sharpening, neglecting color profiles, and not backing up original images.
- How can I optimize images for e-commerce websites?
- Use high-quality images, optimize file sizes, use appropriate file formats, and ensure images meet the platform’s requirements.
- What are some of the latest trends in image optimization?
- Latest trends include AI-powered image enhancement, WebP and AVIF formats, responsive images, lazy loading, and content delivery networks (CDNs).
- How can I improve page load times with image optimization?
- Use optimized image formats, compress images, use responsive images, implement lazy loading, and leverage content delivery networks (CDNs).
- Where can I learn more about image optimization?
- You can find more information on dfphoto.net, as well as photography and design blogs, online courses, and industry publications.
In Conclusion
Increasing the KB size of a photo is a valuable skill with practical applications across various fields, from e-commerce and digital marketing to print media and medical imaging. By understanding the reasons for increasing KB, using the right tools and techniques, avoiding common mistakes, and staying up-to-date with the latest trends, you can ensure that your images look their best while meeting specific file size requirements.
Ready to take your photography skills to the next level? Visit dfphoto.net today to discover a wealth of tutorials, inspiration, and resources. Explore our collection of stunning images, connect with a vibrant community of photographers, and unlock your creative potential. Whether you’re a beginner or a seasoned pro, dfphoto.net is your ultimate destination for all things photography.
Address: 1600 St Michael’s Dr, Santa Fe, NM 87505, United States
Phone: +1 (505) 471-6001
Website: dfphoto.net