Are you struggling with low-resolution images when you want to create stunning prints? It’s a common issue in photography and visual arts, but dfphoto.net is here to provide a solution. With the right techniques, you can significantly enhance your image resolution, ensuring your prints look sharp and professional. Whether you’re working with family photos or client projects, understanding how to increase resolution is essential for achieving high-quality results, clarity and detail.
1. Why Is Photo Resolution Important for Printing?
Photo resolution matters for printing because it directly affects the quality and clarity of the final printed image. When printing, a high-resolution photo ensures sharp details and smooth gradients, while a low-resolution image can appear pixelated or blurry.
1.1 What Is Photo Resolution?
Photo resolution refers to the number of pixels in an image, typically measured in dots per inch (DPI) or pixels per inch (PPI). Higher resolution means more pixels, resulting in a sharper and more detailed image.
1.2 Why Does Resolution Affect Print Quality?
Resolution determines how much detail can be captured and reproduced in a print. An image with insufficient resolution will lack the necessary pixel density to maintain clarity when enlarged for printing.
1.3 What Is the Ideal Resolution for Printing?
The ideal resolution for printing is generally considered to be 300 DPI. At this resolution, the human eye cannot distinguish individual pixels at a normal viewing distance, resulting in a smooth and detailed print.
1.3.1 How Does Print Size Factor In?
The required resolution depends on the print size. Larger prints require higher resolutions to maintain quality. For example, a 4×6 inch print can look good at 300 DPI, but a 12×18 inch print might need more to avoid pixelation.
1.3.2 What Happens If the Resolution Is Too Low?
If the resolution is too low, the printed image will appear blurry, pixelated, or lack detail. This is because the printer has to stretch the available pixels to fill the printed area, resulting in a loss of sharpness.
1.4 Understanding DPI vs. PPI
DPI (dots per inch) refers to the number of ink dots a printer lays down per inch, while PPI (pixels per inch) refers to the number of pixels in an image per inch. While related, they are not the same. PPI is relevant to digital images, while DPI is relevant to printing.
2. Common Scenarios Where You Need to Improve Photo Resolution
There are several common scenarios where you might need to enhance photo resolution for printing. These include using old photos, working with web images, and upscaling for large prints.
2.1 Printing Old or Scanned Photos
Old photos or scanned images often have low resolution compared to modern digital photos. Enhancing their resolution can make them suitable for printing without losing too much detail.
2.2 Using Images from the Web
Images downloaded from the web are typically optimized for online viewing and have low resolution to reduce file size. If you want to print these images, you’ll need to increase their resolution.
2.3 Upscaling Images for Large Prints
When you want to print an image in a large format, such as a poster or canvas print, you often need to increase the resolution to avoid pixelation. Upscaling can help you achieve a higher resolution suitable for large prints.
3. Methods to Improve Photo Resolution for Printing
Several methods can be used to improve photo resolution for printing. These include using software like Adobe Photoshop and Lightroom, as well as online tools.
3.1 Using Adobe Photoshop
Adobe Photoshop is a powerful tool for enhancing photo resolution. Its resampling techniques and detail enhancement features can help you increase the size and quality of your images.
3.1.1 Resampling Techniques in Photoshop
Photoshop offers various resampling methods, such as Bicubic, Bilinear, and Nearest Neighbor. Bicubic is generally the best option for increasing resolution, as it provides a good balance between sharpness and smoothness.
3.1.2 Step-by-Step Guide to Increasing Resolution in Photoshop
To increase resolution in Photoshop:
- Open your image in Photoshop.
- Go to Image > Image Size.
- In the Image Size dialog box, enter the desired width and height for your print.
- Ensure the Resample option is checked and choose Bicubic Smoother for enlargement.
- Click OK.
- Save the image with a new name to preserve the original.
3.1.3 Enhancing Details and Reducing Noise
After resampling, you may need to enhance details and reduce noise. Use the Sharpen filter to bring out fine details and the Reduce Noise filter to minimize unwanted artifacts.
3.2 Using Adobe Lightroom
Adobe Lightroom also offers tools for enhancing photo resolution, particularly through its Enhance feature. This feature uses AI to upscale images while preserving detail.
3.2.1 The Enhance Feature in Lightroom
The Enhance feature in Lightroom uses a process called “Super Resolution” to double the linear resolution of an image, resulting in four times the total pixel count.
3.2.2 Step-by-Step Guide to Using Enhance in Lightroom
To use the Enhance feature in Lightroom:
- Open your image in Lightroom.
- Go to Photo > Enhance.
- In the Enhance dialog box, check the Super Resolution box.
- Click Enhance.
- Lightroom will create a new, higher-resolution version of the image.
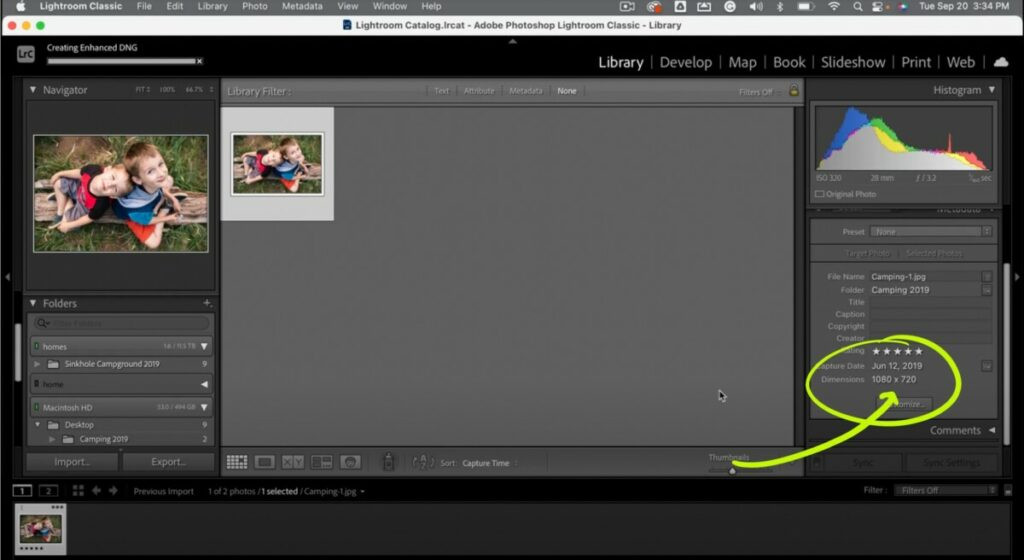 Enhance feature in Lightroom increases image resolution for better print quality
3.2.3 Combining Lightroom and Photoshop for Best Results
For optimal results, you can combine Lightroom and Photoshop. Use Lightroom to upscale the image with the Enhance feature and then use Photoshop to refine details and reduce noise.
3.3 Online Photo Resolution Enhancers
Several online tools can help you improve photo resolution without needing to install software. These tools often use AI to upscale images quickly and easily.
3.3.1 Overview of Popular Online Tools
Popular online photo resolution enhancers include:
- Let’s Enhance: Uses AI to upscale images and enhance details.
- Deep Image: Offers AI-powered image upscaling and enhancement.
- Icons8 Upscaler: Provides a simple and effective way to increase image resolution.
3.3.2 Pros and Cons of Using Online Tools
Pros:
- Convenient and easy to use.
- No software installation required.
- Often free or low-cost for basic use.
Cons:
- May have limitations on file size or resolution.
- Quality may not be as high as professional software.
- Privacy concerns with uploading images to third-party sites.
3.3.3 Step-by-Step Guide to Using an Online Enhancer
To use an online photo resolution enhancer:
- Visit the website of the online tool.
- Upload your image.
- Select the desired resolution or scale factor.
- Start the upscaling process.
- Download the enhanced image.
4. Tips for Achieving the Best Results
To achieve the best results when improving photo resolution for printing, consider the following tips.
4.1 Start with the Highest Quality Original Image
The better the quality of your original image, the better the results you’ll get when upscaling. Avoid starting with already low-resolution or heavily compressed images.
4.2 Avoid Over-Enlarging Images
Enlarging an image too much can lead to significant loss of quality. It’s generally best to avoid increasing the resolution by more than 200-300%.
4.3 Use Appropriate Sharpening Techniques
Sharpening can help bring out details in an upscaled image, but over-sharpening can introduce unwanted artifacts. Use sharpening sparingly and focus on bringing out fine details.
4.4 Consider the Viewing Distance
The required resolution depends on the viewing distance. Images viewed from a distance can have lower resolutions than those viewed up close.
4.5 Test Prints to Evaluate Quality
Always do test prints to evaluate the quality of your upscaled images. This will help you identify any issues and make adjustments before printing the final version.
5. Understanding Image File Formats
Different image file formats have varying levels of compression and suitability for printing. Understanding these formats can help you choose the best option for your needs.
5.1 JPEG vs. TIFF vs. PNG
- JPEG: A lossy format that compresses images to reduce file size. Suitable for photos but can introduce artifacts with repeated saving.
- TIFF: A lossless format that preserves all image data. Ideal for printing and archiving but results in larger file sizes.
- PNG: A lossless format that supports transparency. Suitable for graphics and images with text or sharp edges.
5.2 Which Format Is Best for Printing?
TIFF is generally the best format for printing due to its lossless compression and ability to preserve image quality. However, JPEG can be acceptable for photos if saved at a high-quality setting.
5.3 Converting Between File Formats
You can convert between file formats using software like Photoshop or online converters. When converting, be mindful of potential quality loss, especially when converting to a lossy format like JPEG.
6. Common Mistakes to Avoid
Avoiding common mistakes can help you achieve better results when improving photo resolution for printing.
6.1 Over-Reliance on Software
While software can help, it’s not a magic bullet. Don’t expect software to completely fix a severely low-resolution image.
6.2 Ignoring the Original Image Quality
Starting with a poor-quality original image will limit the effectiveness of upscaling techniques. Always aim to use the best possible original.
6.3 Not Adjusting Sharpening and Noise Reduction
Failing to adjust sharpening and noise reduction can result in images that are either too soft or contain unwanted artifacts.
6.4 Skipping Test Prints
Skipping test prints can lead to disappointment when you receive the final print. Always test to ensure the quality meets your expectations.
7. Real-World Examples and Case Studies
Examining real-world examples and case studies can provide insights into how to effectively improve photo resolution for printing.
7.1 Restoring Old Family Photos
Many people have old family photos that they want to restore and print. By using techniques like scanning at high resolution, upscaling with Photoshop or Lightroom, and careful retouching, it’s possible to create beautiful prints from old photos.
7.2 Creating Large Format Prints for Exhibitions
Photographers often need to create large format prints for exhibitions. By understanding resolution requirements and using appropriate upscaling techniques, they can produce stunning prints that showcase their work.
7.3 Improving Web Images for Print Marketing Materials
Businesses often need to use web images in print marketing materials. By upscaling these images and optimizing them for print, they can create professional-looking materials that effectively promote their brand.
8. The Future of Photo Resolution Enhancement
The field of photo resolution enhancement is constantly evolving, with new technologies and techniques emerging all the time.
8.1 AI and Machine Learning in Image Upscaling
AI and machine learning are playing an increasingly important role in image upscaling. AI-powered tools can analyze images and intelligently add detail, resulting in more natural-looking upscaled images.
8.2 New Software and Tools on the Horizon
New software and tools are constantly being developed to improve photo resolution enhancement. These tools offer advanced features and capabilities that can help you achieve even better results.
8.3 How to Stay Updated with the Latest Trends
To stay updated with the latest trends in photo resolution enhancement, follow industry blogs, attend workshops and conferences, and experiment with new software and tools.
9. Frequently Asked Questions (FAQs)
9.1 What is the best DPI for printing photos?
The best DPI for printing photos is generally considered to be 300 DPI. This resolution ensures sharp details and smooth gradients in the printed image.
9.2 Can I increase the resolution of a photo without losing quality?
While it’s impossible to completely avoid quality loss when increasing resolution, using the right techniques and software can minimize the impact. Starting with the highest quality original image and using appropriate resampling methods can help preserve detail.
9.3 Is it better to upscale in Photoshop or Lightroom?
Both Photoshop and Lightroom offer tools for upscaling images. Lightroom’s Enhance feature is a quick and easy way to double the linear resolution, while Photoshop provides more control over the upscaling process. For optimal results, you can combine both tools.
9.4 How much can I enlarge a photo without it looking pixelated?
The amount you can enlarge a photo without it looking pixelated depends on the original resolution and the viewing distance. As a general rule, avoid increasing the resolution by more than 200-300%.
9.5 What are the best online tools for upscaling photos?
Popular online tools for upscaling photos include Let’s Enhance, Deep Image, and Icons8 Upscaler. These tools use AI to upscale images quickly and easily.
9.6 What file format should I use for printing photos?
TIFF is generally the best file format for printing photos due to its lossless compression and ability to preserve image quality. However, JPEG can be acceptable for photos if saved at a high-quality setting.
9.7 How do I check the resolution of a photo?
To check the resolution of a photo, open it in an image editing program like Photoshop or Lightroom. Go to Image > Image Size to view the width, height, and resolution of the image.
9.8 Can I use my smartphone to take high-resolution photos for printing?
Yes, many modern smartphones have cameras that can capture high-resolution photos suitable for printing. Ensure you are shooting in good lighting conditions and using the highest resolution setting on your phone.
9.9 What is the difference between resolution and image size?
Resolution refers to the number of pixels in an image, while image size refers to the physical dimensions of the image when printed. Both are important for print quality.
9.10 How do I avoid blurry prints?
To avoid blurry prints, ensure you are using high-resolution images, sharpening appropriately, and printing at the correct DPI. Test prints can help you identify any issues before printing the final version.
10. Conclusion: Enhancing Your Photos for Stunning Prints
Improving photo resolution for printing is a crucial skill for anyone who wants to create high-quality prints. By understanding the importance of resolution, using the right tools and techniques, and avoiding common mistakes, you can enhance your photos and achieve stunning results.
Remember, the key to great prints is starting with the best possible original image, using appropriate upscaling methods, and carefully adjusting sharpening and noise reduction. Always test prints to evaluate the quality and make any necessary adjustments.
Visit dfphoto.net to discover more in-depth tutorials, explore a diverse collection of stunning images, and connect with a thriving community of photography enthusiasts. Whether you’re looking to master advanced photography techniques, find inspiration for your next project, or stay up-to-date with the latest industry trends, dfphoto.net is your ultimate resource.
Address: 1600 St Michael’s Dr, Santa Fe, NM 87505, United States
Phone: +1 (505) 471-6001
Website: dfphoto.net.