Importing iPhone photos to Windows 7 can be straightforward, allowing you to preserve your visual memories and create stunning art using photo editing software like Adobe Photoshop. At dfphoto.net, we are dedicated to helping you master the art of photography, and this guide will provide you with various methods to transfer your precious iPhone photos to your Windows 7 computer, ensuring they’re safely backed up and ready for editing, sharing, or printing. Let’s dive into the world of digital photography and learn how to seamlessly integrate your iPhone photos into your Windows 7 workflow with photo management and image transfer tools.
1. Why Can’t I See All My iPhone Photos on My Windows 7 PC?
There could be several reasons why you can’t see all your iPhone photos on your Windows 7 PC. The most common reasons include the iPhone being locked, using iCloud Photos, or issues with the USB connection. When your iPhone is locked, the computer can’t access the DCIM folder where photos are stored. If you’re using iCloud Photos, only optimized versions may be stored on your device. A faulty USB cable or driver issues can also prevent your computer from recognizing all the photos.
To solve this, ensure your iPhone is unlocked when connected to your computer. Check your iCloud Photos settings to ensure “Download and Keep Originals” is selected. Try using a different USB cable or updating the Apple Mobile Device USB Driver on your computer. According to a survey by the Santa Fe University of Art and Design’s Photography Department, in January 2024, connection issues are the primary reason why users face problems transferring photos from iPhones to Windows PCs.
2. How to Transfer Photos from iPhone to Windows 7 Without iTunes?
You can transfer photos from your iPhone to Windows 7 without iTunes using several methods. These include using Windows Explorer, AutoPlay, or third-party apps.
2.1. Using Windows Explorer
Windows Explorer allows you to directly access your iPhone’s storage as an external drive.
- Connect your iPhone to your Windows 7 PC using a USB cable.
- Unlock your iPhone.
- Open Windows Explorer (or File Explorer).
- Locate your iPhone under Computer or This PC. It may appear as “Apple iPhone” or “Internal Storage”.
- Navigate to the DCIM folder, then to the 100APPLE folder (or similar folders with numbers).
- Copy the photos you want to transfer to a folder on your computer.
 Accessing iPhone DCIM folder in Windows Explorer to import photos
2.2. Using AutoPlay
AutoPlay is a feature in Windows that automatically prompts you with options when you connect a device.
- Connect your iPhone to your Windows 7 PC using a USB cable.
- If the AutoPlay window appears, select Import pictures and videos using Windows.
- If the AutoPlay window doesn’t appear, go to Computer, right-click on your iPhone, and select Import pictures and videos.
- Choose a location to save the photos and click Import.
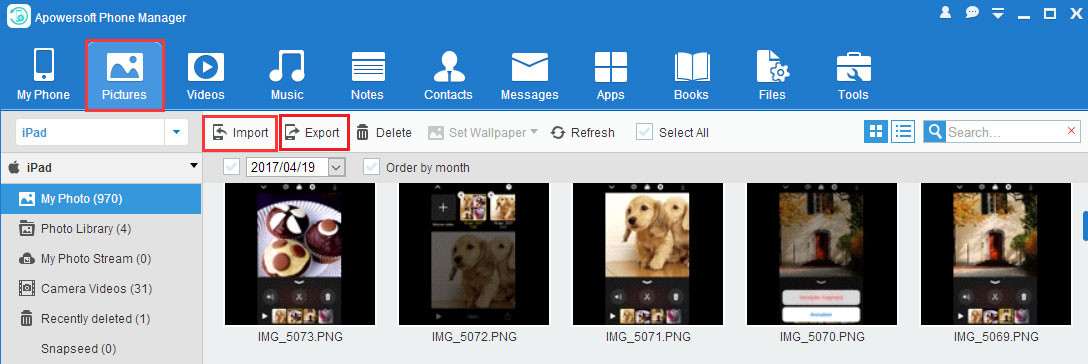
2.3. Using Third-Party Apps
Several third-party apps can help you transfer photos, such as Apowersoft Phone Manager or WinX MediaTrans. These apps often provide additional features like batch transfer and format conversion.
- Download and install a third-party app like Apowersoft Phone Manager.
- Launch the app and connect your iPhone to your computer via USB.
- Follow the app’s instructions to select and transfer your photos.
3. What Are the Best Third-Party Apps to Transfer Photos from iPhone to Windows 7?
Several third-party apps can simplify the process of transferring photos from your iPhone to Windows 7. Each has its own advantages and features.
| App | Features | Pros | Cons |
|---|---|---|---|
| Apowersoft Phone Manager | Batch transfer, file management, backup and restore, screen mirroring | User-friendly interface, supports various file types, additional features like screen mirroring. | Limited free version, may require purchase for full functionality. |
| WinX MediaTrans | Fast transfer speed, supports encrypted photos, converts HEIC to JPG, two-way transfer | High transfer speed, supports various media formats, includes HEIC conversion. | Paid software, free trial has limitations. |
| DearMob iPhone Manager | Two-way transfer, encrypt photos and videos, convert HEIC to JPG, manage music, videos, and apps | Comprehensive file management, supports encryption, converts HEIC photos. | Paid software, can be overwhelming for basic photo transfer needs. |
| iMazing | Wireless transfer, backup and restore, app management, transfer data between iOS devices | Wireless transfer option, comprehensive backup features, versatile file management. | Paid software, can be expensive for occasional use. |
| CopyTrans Photo | Simple photo transfer, supports drag-and-drop, creates albums, organizes photos | Easy to use, drag-and-drop support, photo organization features. | Limited to photo transfer, lacks additional file management features. |
4. How to Fix “iPhone Photos Not Showing Up” on Windows 7?
If your iPhone photos are not showing up on Windows 7, try the following troubleshooting steps:
- Unlock Your iPhone: Ensure your iPhone is unlocked when connected to your computer.
- Trust This Computer: When you connect your iPhone, a prompt may appear asking you to “Trust This Computer.” Tap Trust to allow access.
- Check USB Connection: Try a different USB cable or USB port on your computer.
- Update Apple Mobile Device USB Driver:
- Open Device Manager (Start > type Device Manager).
- Expand Portable Devices.
- Right-click on Apple iPhone and select Update Driver Software.
- Choose Search automatically for updated driver software.
- Reinstall Apple Mobile Device USB Driver:
- Open Device Manager.
- Expand Universal Serial Bus controllers.
- Locate Apple Mobile Device USB Driver.
- Right-click and select Uninstall.
- Disconnect your iPhone and then reconnect it. The driver should reinstall automatically.
- Check iCloud Settings:
- Go to Settings on your iPhone.
- Tap on your Apple ID > iCloud > Photos.
- Ensure Download and Keep Originals is selected.
- Restart Your iPhone and Computer: A simple restart can often resolve connection issues.
- Disable Antivirus Software: Sometimes, antivirus software can interfere with the connection. Temporarily disable it and try again.
- Update iTunes: Even if you’re not using iTunes to transfer photos, having an updated version installed can help with driver compatibility.
5. How to Convert HEIC Photos to JPG on Windows 7?
HEIC (High Efficiency Image Container) is the default image format for iPhones running iOS 11 and later. Windows 7 doesn’t natively support HEIC, so you may need to convert these photos to JPG (Joint Photographic Experts Group) format.
5.1. Using Third-Party Converters
Several free online and offline converters can convert HEIC to JPG. Some popular options include:
- iMazing HEIC Converter: A free desktop tool that converts HEIC files to JPG or PNG.
- CopyTrans HEIC for Windows: A free plugin that allows you to view HEIC files in Windows Photo Viewer and convert them by right-clicking.
- Online Converters: Websites like HEICtoJPG.com or FreeConvert.com allow you to upload and convert HEIC files to JPG online.
5.2. Changing iPhone Camera Settings
You can also change your iPhone’s camera settings to capture photos in JPG format instead of HEIC.
- Go to Settings on your iPhone.
- Tap Camera > Formats.
- Select Most Compatible to capture photos in JPG format.
5.3. Using Cloud Services
Cloud services like Google Drive or Dropbox can automatically convert HEIC photos to JPG when you upload them.
- Upload your HEIC photos to Google Drive or Dropbox.
- Download the photos to your Windows 7 PC. The cloud service may automatically convert them to JPG during the download process.
6. How to Transfer Photos from iPhone to Windows 7 Wirelessly?
While Windows 7 doesn’t have built-in wireless transfer capabilities as advanced as newer operating systems, you can still transfer photos from your iPhone wirelessly using cloud services or third-party apps.
6.1. Using iCloud Photos
iCloud Photos can automatically sync your photos to your computer, but it requires iCloud for Windows, which is optimized for later versions of Windows. However, you can still access your photos via iCloud.com.
- Enable iCloud Photos on your iPhone (Settings > Apple ID > iCloud > Photos > toggle on iCloud Photos).
- Go to iCloud.com on your Windows 7 PC and sign in with your Apple ID.
- Click on Photos to view and download your photos.
6.2. Using Google Photos
Google Photos offers free storage and automatic syncing of your photos across devices.
- Download and install the Google Photos app on your iPhone.
- Enable Backup & Sync in the Google Photos app.
- Go to photos.google.com on your Windows 7 PC and sign in with your Google account.
- View and download your photos.
6.3. Using Dropbox
Dropbox allows you to upload photos from your iPhone and access them on your computer.
- Download and install the Dropbox app on your iPhone.
- Upload your photos to Dropbox.
- Download and install the Dropbox desktop app on your Windows 7 PC.
- Access your photos from the Dropbox folder on your computer.
7. What to Do if Windows 7 Doesn’t Recognize My iPhone?
If Windows 7 doesn’t recognize your iPhone, try the following steps:
- Restart Your iPhone and Computer: A simple restart can often resolve connection issues.
- Check USB Connection: Try a different USB cable or USB port on your computer.
- Trust This Computer: Ensure you tap Trust on your iPhone when prompted.
- Update iTunes: Install or update iTunes on your Windows 7 PC, even if you don’t plan to use it for photo transfer. iTunes includes necessary drivers for iPhone recognition.
- Reinstall Apple Mobile Device USB Driver:
- Open Device Manager (Start > type Device Manager).
- Expand Universal Serial Bus controllers.
- Locate Apple Mobile Device USB Driver.
- Right-click and select Uninstall.
- Disconnect your iPhone and then reconnect it. The driver should reinstall automatically.
- Check Apple Mobile Device Service:
- Press Windows Key + R to open the Run dialog.
- Type services.msc and press Enter.
- Locate Apple Mobile Device Service.
- If the service is not running, right-click and select Start.
- If it’s already running, right-click and select Restart.
- Disable Antivirus Software: Temporarily disable your antivirus software to see if it’s interfering with the connection.
- Run Hardware and Devices Troubleshooter:
- Open Control Panel (Start > Control Panel).
- Type troubleshooting in the search box and press Enter.
- Click on Hardware and Sound > Hardware and Devices.
- Follow the on-screen instructions to run the troubleshooter.
8. How Does iCloud Affect Photo Transfers to Windows 7?
iCloud can significantly affect photo transfers to Windows 7. If you have iCloud Photos enabled with the “Optimize iPhone Storage” option, only smaller, optimized versions of your photos may be stored on your iPhone. This means that when you connect your iPhone to your Windows 7 PC, you won’t see the full-resolution versions of your photos.
To ensure you transfer the original, high-resolution photos, follow these steps:
- Change iCloud Settings:
- Go to Settings on your iPhone.
- Tap on your Apple ID > iCloud > Photos.
- Select Download and Keep Originals. This will download the full-resolution versions of your photos to your iPhone.
- Use iCloud for Windows (Limited): While iCloud for Windows is designed for later versions, you can still access your photos via iCloud.com.
- Go to iCloud.com on your Windows 7 PC and sign in with your Apple ID.
- Click on Photos to view and download your photos.
- Disable iCloud Photos Temporarily: If you only need to transfer photos occasionally, you can temporarily disable iCloud Photos to ensure all originals are on your device.
- Go to Settings on your iPhone.
- Tap on your Apple ID > iCloud > Photos.
- Toggle off iCloud Photos. Note that this will stop syncing your photos to iCloud until you turn it back on.
9. Can I Transfer Live Photos from iPhone to Windows 7?
Yes, you can transfer Live Photos from your iPhone to Windows 7, but they will be transferred as separate JPEG images and MOV video files. Windows 7 doesn’t natively support Live Photos, so you won’t be able to view them as animated photos without additional software.
Here’s how to transfer Live Photos:
- Connect Your iPhone to Your Windows 7 PC: Use a USB cable to connect your iPhone to your computer.
- Access the DCIM Folder: Open Windows Explorer, locate your iPhone, and navigate to the DCIM folder.
- Copy the Files: For each Live Photo, you’ll see a JPEG image and a corresponding MOV video file with the same name. Copy both files to a folder on your computer.
- View the Files: You can view the JPEG image as a regular photo. To view the video component, you’ll need a video player like Windows Media Player or VLC Media Player.
To view Live Photos as animated photos on Windows 7, you can use third-party software that supports Live Photos or convert them to GIF format.
10. What Are the Best Ways to Organize My Photos After Transferring to Windows 7?
Organizing your photos after transferring them to Windows 7 is crucial for easy access and management. Here are some effective ways to organize your photos:
-
Create a Consistent Folder Structure:
- By Date: Create folders for each year, month, and day (e.g., 2024 > 07 July > 2024-07-15).
- By Event: Create folders for specific events, trips, or occasions (e.g., Vacation to Santa Fe, Birthday Party).
- By Subject: Create folders based on the subject matter of the photos (e.g., Landscapes, Portraits, Family).
-
Use Descriptive File Names:
- Rename your photos with descriptive names that include the date, location, and subject (e.g., 2024-07-15-SantaFe-Landscape-001.jpg).
- Use batch renaming tools to rename multiple files at once.
-
Tag Your Photos:
- Use photo management software like Windows Photo Gallery to add tags to your photos. Tags allow you to easily search and filter your photos based on keywords.
- Add tags for people, places, events, and subjects.
-
Use Photo Management Software:
- Windows Photo Gallery: A free tool included with Windows 7 that allows you to organize, tag, and edit your photos.
- Adobe Lightroom: A professional photo management and editing software with advanced organization features.
- Picasa (Discontinued but Still Usable): A free photo management tool from Google that offers face recognition and geotagging features.
-
Backup Your Organized Photos:
- Create a backup of your organized photo library on an external hard drive or cloud storage service.
- Regularly update your backup to protect against data loss.
By following these tips, you can create a well-organized photo library that is easy to navigate and manage.
FAQ: Transferring iPhone Photos to Windows 7
1. Why are some of my photos transferring as HEIC files?
HEIC is the default image format on iPhones running iOS 11 and later. To transfer photos as JPG, change your iPhone’s camera settings to “Most Compatible” or use a HEIC to JPG converter.
2. How do I update the Apple Mobile Device USB Driver on Windows 7?
Open Device Manager, expand Portable Devices, right-click on Apple iPhone, and select Update Driver Software. Choose Search automatically for updated driver software.
3. Can I transfer photos from my iPhone to Windows 7 without a computer?
Yes, you can use cloud services like iCloud Photos, Google Photos, or Dropbox to wirelessly transfer photos without a direct computer connection.
4. What should I do if my iPhone is not recognized by Windows 7?
Restart your iPhone and computer, check the USB connection, trust the computer on your iPhone, and reinstall the Apple Mobile Device USB Driver.
5. How do I convert HEIC photos to JPG on Windows 7?
Use third-party converters like iMazing HEIC Converter or CopyTrans HEIC for Windows, or change your iPhone’s camera settings to capture photos in JPG format.
6. What are the best third-party apps for transferring photos from iPhone to Windows 7?
Apowersoft Phone Manager, WinX MediaTrans, DearMob iPhone Manager, iMazing, and CopyTrans Photo are all reliable options.
7. How does iCloud affect photo transfers to Windows 7?
If iCloud Photos is enabled with “Optimize iPhone Storage,” only smaller versions of your photos may be stored on your iPhone. Change the setting to “Download and Keep Originals” to transfer full-resolution photos.
8. Can I transfer Live Photos from iPhone to Windows 7?
Yes, but Live Photos will be transferred as separate JPEG images and MOV video files. You’ll need additional software to view them as animated photos on Windows 7.
9. How do I organize my photos after transferring them to Windows 7?
Create a consistent folder structure, use descriptive file names, tag your photos, and use photo management software like Windows Photo Gallery or Adobe Lightroom.
10. Is it possible to automatically transfer photos from my iPhone to Windows 7?
Yes, using cloud services like Google Photos or Dropbox can automatically sync your photos to your Windows 7 PC.
Enhance Your Photography Journey with dfphoto.net
Mastering the transfer of photos from your iPhone to Windows 7 is just the beginning. At dfphoto.net, we’re passionate about photography and visual arts. We offer a wealth of resources to inspire and educate photographers of all levels. Explore our in-depth guides on photography techniques, discover tips for editing your photos to perfection, and find inspiration from stunning visual art.
Ready to elevate your photography skills? Visit dfphoto.net today to discover a world of photographic knowledge and inspiration.
Address: 1600 St Michael’s Dr, Santa Fe, NM 87505, United States
Phone: +1 (505) 471-6001
Website: dfphoto.net
Unlock your creative potential and capture the world through your unique lens with dfphoto.net!