In an age where our iPhones are essentially pocket-sized digital diaries, filled with personal moments captured in photos and videos, privacy becomes paramount. Whether it’s safeguarding sensitive documents, concealing personal snapshots from prying eyes, or simply decluttering your main photo library, knowing how to effectively hide photos on your iPhone is an essential skill. Apple understands this need and provides a built-in feature to help you keep your private images discreetly tucked away. This guide will walk you through the process of hiding photos on your iPhone, ensuring your personal moments remain just that – personal.
Why Hide Photos on Your iPhone?
There are numerous reasons why you might want to hide photos on your iPhone. Perhaps you have:
- Sensitive or personal photos: Images that are intimate or you simply prefer to keep private from casual viewers.
- Confidential documents: Screenshots or photos of personal documents like IDs, financial information, or medical records that you want to keep secure.
- Gifts or surprises: Photos related to upcoming surprises for loved ones that you want to keep secret until the right moment.
- Photos you want to declutter: Images you want to keep but don’t necessarily need to see in your daily photo browsing.
Utilizing the iPhone’s built-in “Hidden” album offers a convenient and readily available solution to manage your photo privacy without needing to delete anything permanently. This feature allows you to move selected photos and videos from your main library into a separate, initially visible, but optionally concealed album.
Step-by-Step Guide to Hiding Photos on Your iPhone
Hiding photos on your iPhone is a straightforward process. Here’s how to do it:
Hiding Photos
-
Open the Photos App: Locate and tap the Photos app icon on your iPhone’s home screen to launch it.
-
Select the Photo(s) or Video(s): Navigate to the photo or video you wish to hide. You can do this from your “Library”, within specific “Albums”, or in the “Recents” view.
-
Initiate the Hide Feature: Tap and hold on the photo or video you want to hide until a quick actions menu appears. Alternatively, for multiple selections, tap “Select” in the top right corner, choose all the items you want to hide, and then tap the share button (the square with an upward arrow) at the bottom left.
-
Choose “Hide”: In the quick actions menu (or share sheet), scroll down until you find the “Hide” option. Tap “Hide”.
-
Confirm Hiding: A confirmation prompt will appear at the bottom of your screen, asking “Hide Photo?” (or “Hide [Number] Photos/Videos?”). Tap “Hide Photo” (or the confirmation for multiple items) to move the selected media to the Hidden album.
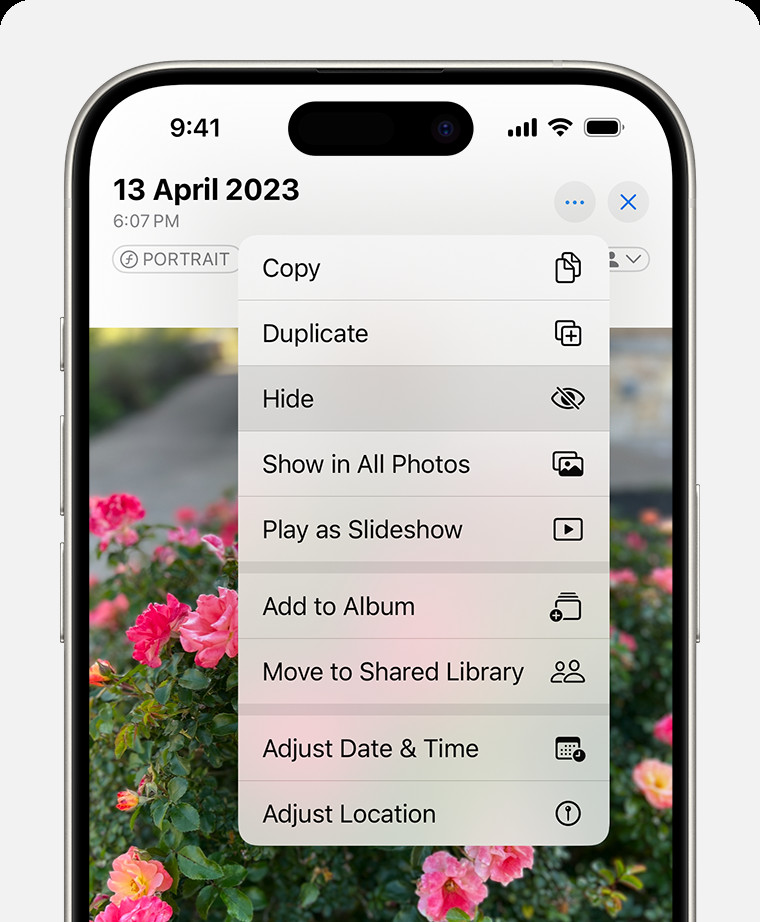 Tapping the hide option from the photo options menu on an iPhone to hide a photo.
Unhiding Photos
If you decide you want to make a hidden photo visible again in your main library, follow these steps:
-
Open the Photos App: Launch the Photos app on your iPhone.
-
Access Albums: Tap on the “Albums” tab at the bottom of the screen. On iPad, you might need to tap the sidebar icon in the upper-left corner first to reveal the albums list.
-
Find the “Hidden” Album: Scroll down the Albums list until you locate the “Utilities” section. Within Utilities, you will see the “Hidden” album.
-
Unlock the Hidden Album (if required): If you are using iOS 16 or later, the Hidden album is locked by default. Tap “Hidden”. You might be prompted to use Face ID, Touch ID, or your passcode to unlock and view the album. Tap “View Album” and authenticate.
-
Select the Photo(s) or Video(s) to Unhide: Once inside the Hidden album, tap and hold the photo or video you want to unhide until the quick actions menu appears. For multiple items, use “Select” as described in the hiding steps.
-
Choose “Unhide”: In the quick actions menu (or share sheet), find and tap “Unhide”. The selected photo or video will be moved back to your main “Library” and will reappear in “All Photos” and “Recents”, as well as any albums it was previously in.
Finding the Hidden Album
By default, the “Hidden” album is visible within the Utilities section of your Albums in the Photos app.
-
Open the Photos App: Launch the Photos app.
-
Go to Albums: Tap the “Albums” tab.
-
Scroll to Utilities: Scroll down to the “Utilities” section.
-
Locate “Hidden”: You will see the “Hidden” album listed here.
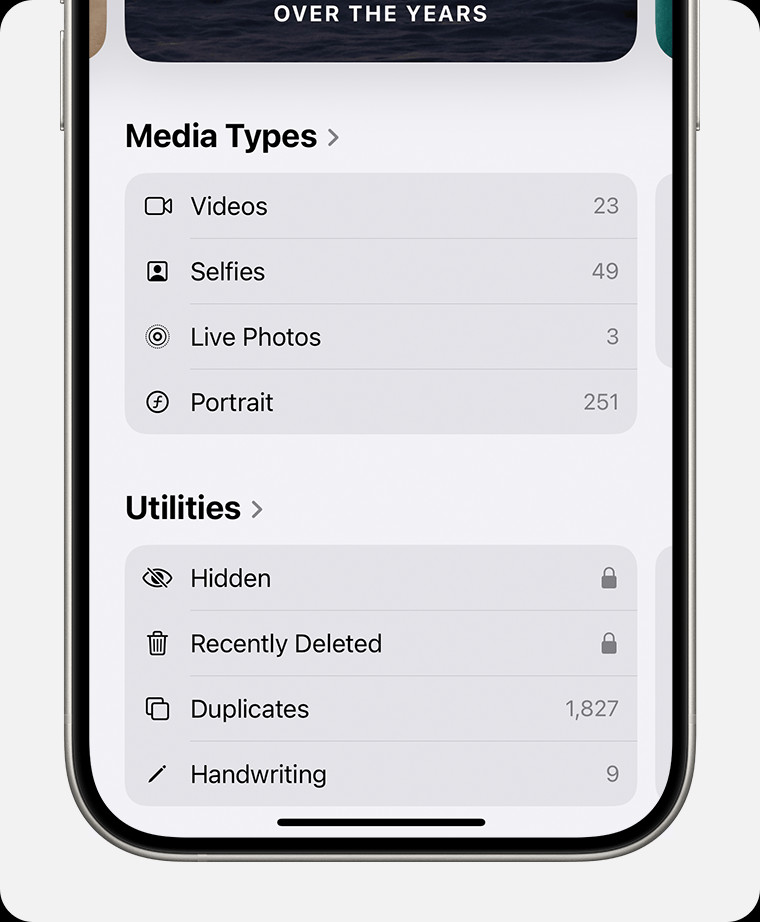 The Hidden album highlighted in the Utilities section of the Albums tab in the iPhone Photos app.
Turning Off the Hidden Album Visibility for Enhanced Privacy
For an extra layer of privacy, you can turn off the visibility of the “Hidden” album itself. When you do this, the Hidden album will not appear in the Utilities section, making it completely hidden from casual browsing.
-
Open the Settings App: Go to the Settings app on your iPhone’s home screen.
-
Scroll to “Photos”: Scroll down and tap on “Photos”.
-
Toggle “Show Hidden Album”: Under the “Albums” section, find the “Show Hidden Album” toggle. By default, it is turned on (green). Tap the toggle to turn it off (grey).
When “Show Hidden Album” is turned off, the Hidden album will no longer be visible in the Photos app. To access your hidden photos again, you’ll need to return to Settings > Photos and toggle “Show Hidden Album” back on.
Hiding Photos on Other Apple Devices
The process of hiding and unhiding photos is consistent across Apple’s ecosystem, including iPad, Mac, and Apple Vision Pro. While the exact menu layouts might slightly differ based on the operating system, the core functionality remains the same. You can find similar “Hide” and “Unhide” options in the Photos app on these devices, usually accessible through a right-click (on Mac) or a long press (on iPad and Vision Pro) on the photo, or via the Image menu on Mac. Remember that if you are using iCloud Photos, hiding a photo on your iPhone will also hide it on your linked iPad, Mac, and Apple Vision Pro devices, and vice versa, ensuring consistent privacy across your Apple devices.
Tips for Enhanced Photo Privacy on iPhone
Beyond using the Hidden album, consider these additional tips to further enhance your photo privacy on your iPhone:
- Use a Strong Passcode, Face ID, or Touch ID: Securing your iPhone itself is the first and most crucial step. A strong passcode or biometric authentication prevents unauthorized access to your entire device, including your Photos app.
- Be Mindful of iCloud Photos: Understand that hiding photos using the built-in feature is not a foolproof security measure against determined individuals who might have access to your iCloud account. For highly sensitive photos, consider additional encryption or storage solutions.
- Regularly Review Your Hidden Album: Periodically check your Hidden album to ensure you are aware of what photos are hidden and to manage them as needed.
By utilizing the “Hidden” album feature and following these tips, you can effectively manage your photo privacy on your iPhone, keeping your personal moments safe and discreet.
