Google Photos is a fantastic tool for backing up and organizing your precious memories. However, there are times when you might want to keep certain photos more private, away from prying eyes. Whether it’s pictures of sensitive documents, personal moments, or simply images you prefer to keep under wraps, Google Photos offers a solution: the Locked Folder. This feature allows you to hide photos from the main Google Photos grid, securing them behind your device’s screen lock.
Why would you need to hide photos in Google Photos? Imagine you’re capturing images of your passport, driver’s license, or financial documents for easy access. Or perhaps you have photos intended as a surprise gift, or personal videos you’d rather keep private. In these scenarios, the Locked Folder provides an extra layer of security and peace of mind. This guide will walk you through the process of setting up and using this valuable privacy feature on your Android device.
Creating Your Google Photos Locked Folder
Setting up the Locked Folder is a straightforward process. Here’s how to create your private photo space:
-
Open Google Photos and Navigate to Utilities:
Start by opening the Google Photos app on your Android phone. Once the app is open, look at the bottom menu and tap on “Utilities.” This section groups together helpful tools and features within Google Photos, including the Locked Folder.
Alt text: Accessing the Utilities menu within the Google Photos Android app to manage hidden photo folders.
-
Initiate Locked Folder Setup:
Within the Utilities menu, scroll down until you find the “Locked Folder” option. It might be listed under a section like “Organize” or “More.” Tap on “Locked Folder” to begin the setup process. If you are setting it up for the first time, you will see an option to “Set up Locked Folder.” Tap on this.
-
Complete the Setup and Authenticate:
After tapping “Set up,” Google Photos will prompt you to finalize the process. Tap “Set up” again at the bottom right of the screen to confirm. You will then be asked to authenticate using your device’s screen lock method. This could be your fingerprint, facial recognition, PIN, or pattern – whichever security method you have enabled on your Android device. This authentication step ensures that only you can access the hidden photos. Once you’ve successfully authenticated, your Locked Folder is created and ready to use. You will see a message indicating “Nothing here yet,” along with a “Move items” button.
Adding Photos to Your Private Locked Folder
Now that your Locked Folder is set up, you can start adding photos and videos to keep them hidden from the main Google Photos view. Here’s how:
-
Access the Locked Folder:
To add photos, you first need to access your newly created Locked Folder. Return to the Google Photos “Utilities” section. Scroll down again, and you will see the “Locked Folder” entry. Tap on it. You’ll be prompted to authenticate again to enter the folder.
-
Select “Move Items”:
Once inside the Locked Folder, tap the “Move items” button. This will open a file picker interface that displays all the photos and videos currently in your Google Photos library (excluding those already in the Locked Folder).
-
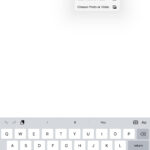
Choose Photos to Hide:
Browse through your photos and videos and select each item you want to move to the Locked Folder. Simply tap on the thumbnails to select them. You can select multiple items at once. After you have chosen all the desired photos and videos, tap “Move” located at the top right corner of the screen.
Alt text: Using the file picker in Google Photos to choose images for moving into the secure Locked Folder.
-
Confirm the Move and Understand the Caveats:
After selecting “Move,” you will be prompted to authenticate one last time. Google Photos will then display a crucial warning message. This message highlights two key points:
- Related photos are not moved: This means copies or edited versions of the photos you select will remain in your main photo library and will not be moved to the Locked Folder.
- Items are deleted if Google Photos is uninstalled: Photos and videos in the Locked Folder are stored locally on your device and are not backed up to your Google account. If you uninstall the Google Photos app or clear its data, the contents of the Locked Folder will be deleted.
Tap “Continue” to acknowledge this warning, and then tap “Move” to finalize the process. Google Photos will then move the selected photos and videos into your Locked Folder, effectively hiding them from the regular photo grid.
Accessing and Managing Your Hidden Photos
To view the photos and videos you’ve hidden in the Locked Folder, you’ll need to revisit the Utilities section in Google Photos.
-
Navigate to Utilities and Locked Folder: Open Google Photos, tap “Utilities,” and scroll down to find and tap “Locked Folder.”
-
Authenticate to View: You will need to authenticate using your screen lock method each time you access the Locked Folder.
-
View and Manage Content: Once authenticated, you can view all the photos and videos within the Locked Folder. From here, you can also move items out of the Locked Folder back into your main Google Photos library if needed.
Important Considerations for Using Locked Folder
Keep these points in mind when using the Google Photos Locked Folder:
- Local Storage Only: Photos and videos in the Locked Folder are stored only on your device and are not backed up to Google cloud. This is crucial for privacy, but also means you could lose these photos if your device is lost, damaged, or reset, or if you uninstall the Google Photos app. Consider keeping a separate backup of these sensitive items if necessary.
- No Cloud Backup: Because Locked Folder items are not backed up, they will not be accessible on other devices where you use Google Photos. The Locked Folder is device-specific.
- Use Wisely: The Locked Folder is ideal for sensitive and personal photos you want to keep private on your device. For general photo privacy across your Google account, consider adjusting sharing settings and album visibility instead.
By utilizing the Locked Folder feature in Google Photos, you can effectively hide sensitive photos and videos on your Android device, adding an extra layer of privacy and security to your personal media. Remember to use this feature thoughtfully and be aware of its local storage nature to ensure your important hidden photos remain safe.