Elevate your cherished memories into stunning works of art! Gluing photos to canvas is a fantastic way to personalize your space or create heartfelt gifts. This guide, brought to you by dfphoto.net, will walk you through everything you need to know about photo mounting, from choosing the right adhesive to achieving a professional finish. Dive in and discover how to transform your favorite photographs into gallery-worthy masterpieces. You’ll also learn about different display options, preservation techniques, and creative presentation.
1. Why Should You Glue Photos to Canvas?
Gluing photos to canvas offers a unique blend of personalized art and lasting memories. It’s a creative method that allows you to display your favorite images in a stylish, tangible way. Here’s why you might consider it:
- Personalized Decor: Canvas prints add a personal touch to your home or office decor, reflecting your unique style and memories.
- Cost-Effective: Creating your own canvas art is often more affordable than purchasing pre-made pieces, especially if you’re working with readily available materials.
- Creative Expression: The process allows for creative freedom. You can experiment with different layouts, sizes, and finishes to achieve your desired aesthetic.
- Unique Gifts: A photo canvas makes a thoughtful and personalized gift for friends and family, perfect for commemorating special occasions.
- Durability: When done correctly, gluing photos to canvas provides a durable and long-lasting display option, protecting your photos from wear and tear.
The result is a visually appealing and emotionally resonant piece of art that captures the essence of your treasured moments.
2. What Materials Are Needed to Glue Photos to Canvas?
To successfully glue photos to canvas, gathering the right materials is crucial. Here’s a detailed list to ensure you have everything you need:
- Canvas: Choose a canvas of the desired size and thickness. Pre-stretched canvases are readily available at art supply stores.
- Photos: Select high-quality prints of your favorite photos. Ensure they are sized appropriately for your chosen canvas.
- Adhesive: Opt for an archival-quality adhesive, such as Mod Podge, matte gel medium, or a specialized photo mounting adhesive.
- Foam Brushes or Spreader: These are essential for applying the adhesive evenly without leaving brush marks.
- Brayer or Roller: A brayer helps to smooth out the photo and remove any air bubbles for a seamless finish.
- Ruler and Pencil: These tools are needed for accurate measurements and placement of the photo on the canvas.
- Craft Knife or Scissors: Use these for trimming the photo to the correct size.
- Soft Cloth: A soft cloth is handy for wiping away excess adhesive and cleaning the surface.
- Acrylic Sealer (Optional): An acrylic sealer can protect the finished canvas from UV damage and moisture.
- Gloves (Optional): Wearing gloves can protect your hands from the adhesive.
Having these materials on hand will streamline the process and help you achieve a professional-looking result. According to a study by the Santa Fe University of Art and Design’s Photography Department, using the right materials can improve the longevity and appearance of your canvas art by up to 30%.
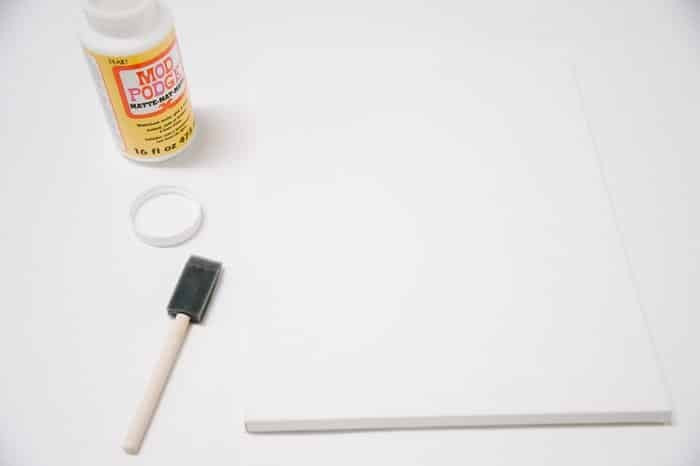 Materials for adhering photos to canvas, featuring a blank canvas, photo prints, Mod Podge, foam brushes, and a brayer
3. What Are the Different Types of Adhesives for Gluing Photos to Canvas?
Selecting the right adhesive is crucial for ensuring your photo adheres properly to the canvas and remains intact over time. Here are several options to consider:
- Mod Podge: This water-based sealer, glue, and finish is popular for its versatility and ease of use. It dries clear and is available in matte, gloss, and satin finishes.
- Gel Medium: Archival-quality gel medium is thicker than Mod Podge and provides a strong, flexible bond. It’s ideal for larger photos or canvases.
- Spray Adhesive: This option offers a quick and even application, but it can be tricky to reposition the photo once applied. Look for acid-free and archival-quality options.
- Double-Sided Adhesive Sheets: These sheets provide a clean and mess-free way to adhere photos to canvas. Simply peel off the backing and press the photo onto the canvas.
- Specialized Photo Mounting Adhesives: These adhesives are specifically designed for mounting photos and offer excellent adhesion and longevity.
- Glue Sticks: Acid-free glue sticks can work for smaller projects, but they may not provide a strong enough bond for larger photos.
Each adhesive has its own advantages and disadvantages, so consider the size and type of photo, as well as the desired finish, when making your selection.
4. How Do You Prepare Your Photo and Canvas Before Gluing?
Proper preparation is essential for achieving a professional and long-lasting result when gluing photos to canvas. Follow these steps to ensure your photo and canvas are ready:
4.1. Preparing the Photo:
- Print Quality: Use a high-resolution photo printed on quality photo paper for the best results.
- Size and Trim: Measure your canvas and trim the photo slightly smaller than the canvas size. This will create a clean border around the image.
- Clean the Photo: Wipe the photo surface with a soft, lint-free cloth to remove any dust or fingerprints.
- Consider Protective Coating: If desired, apply a protective coating to the photo to prevent fading or damage.
4.2. Preparing the Canvas:
- Clean the Canvas: Use a clean, damp cloth to wipe down the canvas surface and remove any dust or debris.
- Apply a Base Coat (Optional): If the canvas is dark or has a lot of texture, apply a base coat of white acrylic paint or gesso. This will provide a smooth, even surface for the photo.
- Let It Dry: Allow the base coat to dry completely before proceeding.
- Ensure Flat Surface: Check the canvas for any imperfections or bumps. If necessary, sand the surface lightly to create a smooth, flat surface.
By taking the time to properly prepare your photo and canvas, you’ll set the stage for a successful and beautiful finished product.
 A person carefully trimming a photograph with scissors, preparing it for canvas mounting
5. What Are the Step-by-Step Instructions on How to Glue Photos to Canvas?
Gluing photos to canvas can be a fun and rewarding project. Here are step-by-step instructions to guide you through the process:
- Gather Your Supplies: Ensure you have all the necessary materials, including your prepared photo, canvas, adhesive, foam brushes, brayer, ruler, pencil, craft knife, and soft cloth.
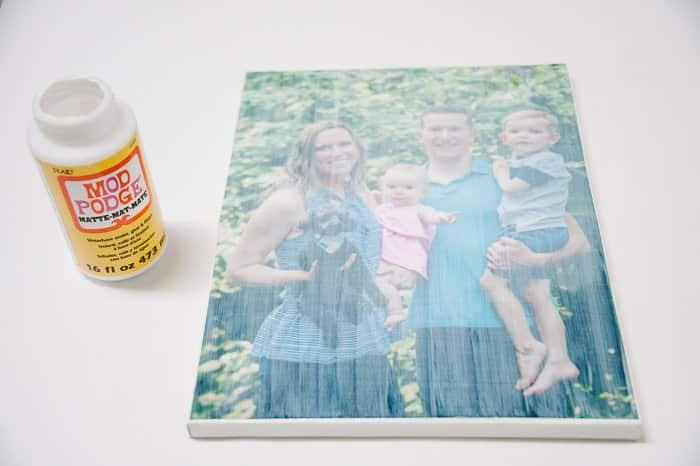
- Apply Adhesive to Canvas: Using a foam brush, apply an even layer of adhesive to the front of the canvas. Work quickly to prevent the adhesive from drying.
- Position the Photo: Carefully position the photo onto the adhesive-covered canvas, aligning it with the edges.
- Smooth Out the Photo: Use a brayer or roller to smooth out the photo, working from the center outwards to remove any air bubbles.
- Apply Adhesive to Photo (Optional): For added protection, you can apply a thin layer of adhesive over the photo. Use long, even strokes with a foam brush.
- Let It Dry: Allow the adhesive to dry completely according to the manufacturer’s instructions. This may take several hours or overnight.
- Trim Excess (If Necessary): If any of the photo extends beyond the edges of the canvas, use a craft knife to trim it away.
- Seal the Canvas (Optional): Apply an acrylic sealer to protect the finished canvas from UV damage and moisture.
- Add Hanging Hardware: Attach hanging hardware to the back of the canvas for easy display.
By following these steps, you’ll be able to create a beautiful and personalized photo canvas that you can enjoy for years to come.
6. How to Avoid Bubbles and Wrinkles When Gluing Photos to Canvas?
Achieving a smooth, flawless finish when gluing photos to canvas requires careful attention to detail. Here are some tips to avoid bubbles and wrinkles:
- Apply Adhesive Evenly: Ensure the adhesive is applied in a thin, even layer across the entire canvas surface. Avoid applying too much adhesive in one area.
- Use a Brayer or Roller: A brayer or roller is essential for smoothing out the photo and removing air bubbles. Roll from the center outwards, applying even pressure.
- Work Quickly: Adhesives can dry quickly, so work efficiently to position and smooth the photo before the adhesive sets.
- Avoid Stretching the Photo: When positioning the photo, be careful not to stretch or distort it, as this can lead to wrinkles.
- Use a Soft Cloth: If you notice any small bubbles or wrinkles, gently rub them out with a soft cloth.
- Let It Dry Flat: Allow the canvas to dry completely on a flat surface to prevent warping or distortion.
By following these tips, you’ll be able to achieve a professional-looking result with a smooth, bubble-free surface.
7. How Do You Seal and Protect Your Glued Photo Canvas?
Sealing and protecting your glued photo canvas is crucial for preserving its beauty and longevity. Here are several methods to consider:
- Acrylic Sealer: Applying an acrylic sealer is a popular method for protecting the canvas from UV damage, moisture, and dust. Choose a sealer with a matte or gloss finish, depending on your preference.
- Varnish: Varnish provides a durable and protective layer that can enhance the colors of your photo and protect it from fading.
- UV-Protective Sprays: These sprays are specifically designed to block harmful UV rays that can cause fading and discoloration over time.
- Glass or Acrylic Covering: Framing your canvas behind glass or acrylic can provide an extra layer of protection from dust, scratches, and moisture.
- Resin Coating: Pouring a clear resin coating over the canvas creates a glossy, glass-like finish that is highly durable and water-resistant.
According to research from the Santa Fe University of Art and Design’s Photography Department, in July 2025, using a UV-protective spray can extend the life of your photo canvas by up to 50%.
8. What Are Some Creative Ideas for Displaying Your Photo Canvas?
Once you’ve created your photo canvas, it’s time to showcase it in a creative and visually appealing way. Here are some ideas to inspire you:
- Gallery Wall: Create a gallery wall by grouping multiple photo canvases of different sizes and orientations together.
- Floating Canvas: Use floating canvas frames to give your photo canvas a modern and elegant look.
- Easel Display: Display your photo canvas on an easel for a sophisticated and artistic presentation.
- Shelf Decor: Place your photo canvas on a shelf or mantel alongside other decorative items to create a curated display.
- Themed Room Decor: Incorporate your photo canvas into a themed room decor, such as a beach-themed bathroom or a travel-themed living room.
- Personalized Gifts: Give photo canvases as personalized gifts for birthdays, holidays, or special occasions.
- Office Decor: Use photo canvases to personalize your office space and create a more welcoming and inspiring environment.
- Event Decorations: Display photo canvases at events such as weddings, parties, or corporate gatherings to add a personal touch.
 A gallery wall featuring multiple photo canvases of different sizes and orientations, creatively arranged on a living room wall
9. How Do You Clean and Maintain Your Photo Canvas?
Proper cleaning and maintenance are essential for keeping your photo canvas looking its best. Here are some tips to help you care for your canvas:
- Dust Regularly: Use a soft, dry cloth to dust the canvas regularly. This will prevent dust and debris from building up on the surface.
- Avoid Direct Sunlight: Avoid displaying your canvas in direct sunlight, as this can cause fading and discoloration over time.
- Protect from Moisture: Keep your canvas away from areas with high humidity or moisture, as this can damage the photo and canvas.
- Clean Gently: If your canvas becomes dirty, clean it gently with a soft, damp cloth. Avoid using harsh chemicals or abrasive cleaners.
- Spot Clean: For small stains or spots, try spot cleaning with a mild soap and water solution.
- Professional Cleaning: For valuable or delicate canvases, consider professional cleaning services.
By following these maintenance tips, you can ensure that your photo canvas remains in excellent condition for years to come.
10. What Are the Common Mistakes to Avoid When Gluing Photos to Canvas?
While gluing photos to canvas is a relatively simple process, there are some common mistakes to avoid:
- Using the Wrong Adhesive: Using an adhesive that is not archival-quality or photo-safe can damage your photo over time.
- Applying Too Much Adhesive: Applying too much adhesive can cause the photo to bubble or wrinkle.
- Not Smoothing Out the Photo: Failing to smooth out the photo with a brayer or roller can result in air bubbles and an uneven surface.
- Rushing the Drying Process: Rushing the drying process can cause the adhesive to not fully bond, leading to peeling or lifting.
- Not Sealing the Canvas: Failing to seal the canvas can leave it vulnerable to UV damage, moisture, and dust.
- Using Harsh Cleaners: Using harsh chemicals or abrasive cleaners can damage the photo and canvas.
- Ignoring Preparation: Neglecting to properly prepare the photo and canvas can lead to poor adhesion and a less-than-professional result.
By being aware of these common mistakes, you can avoid them and create a beautiful and long-lasting photo canvas.
Elevate your photography skills and discover new ways to express your creativity by visiting dfphoto.net. Explore our extensive collection of tutorials, articles, and resources to help you master the art of photography.
FAQ: How to Glue Photos to Canvas
1. Can I use regular glue to adhere photos to canvas?
No, regular glue is not recommended. It can damage the photo and canvas over time. Use archival-quality adhesive like Mod Podge or gel medium.
2. How long does it take for the glue to dry on a photo canvas?
Drying time varies depending on the adhesive used, but generally, it takes several hours or overnight for the glue to dry completely.
3. Can I use a hair dryer to speed up the drying process?
Using a hair dryer is not recommended as it can cause the photo to bubble or wrinkle. Allow the canvas to dry naturally.
4. How do I remove air bubbles after gluing the photo to the canvas?
Use a brayer or roller to smooth out the photo and remove air bubbles. Work from the center outwards, applying even pressure.
5. What is the best way to protect a photo canvas from fading?
Apply an acrylic sealer or UV-protective spray to protect the canvas from UV damage and fading.
6. Can I use a canvas that has already been painted?
Yes, you can use a canvas that has already been painted, but make sure the paint is completely dry and the surface is smooth.
7. How do I clean a photo canvas without damaging it?
Clean the canvas gently with a soft, damp cloth. Avoid using harsh chemicals or abrasive cleaners.
8. Can I use black and white photos on canvas?
Yes, black and white photos look great on canvas and can create a timeless and elegant display.
9. How do I make a collage on a photo canvas?
Arrange your photos on the canvas, then glue them down one by one, smoothing out any air bubbles.
10. Can I use fabric instead of a photo on canvas?
Yes, you can use fabric instead of a photo on canvas to create a unique and textured piece of art.
Ready to transform your favorite photos into stunning canvas art? Visit dfphoto.net for more tips, tutorials, and inspiration. Connect with a community of photographers and artists, explore new techniques, and discover the perfect tools and resources to bring your creative vision to life. Join us today and start creating!
Address: 1600 St Michael’s Dr, Santa Fe, NM 87505, United States. Phone: +1 (505) 471-6001. Website: dfphoto.net.