Getting white background photos is achievable with the right techniques and tools, enhancing your photography and visual arts significantly. At dfphoto.net, we’ll show you how to master the art of creating flawless white backgrounds in your photos, perfect for product shots, portraits, and more, using professional photography tips. Get ready to explore methods like proper lighting, backdrop selection, and post-processing to achieve pristine results and photo editing skills.
Table of Contents
1. Why Use White Background Photos?
2. Who Needs White Background Photos?
3. What are the Search Intentions for “How To Get White Background Photos?”
4. What is the Best Color Backdrop for Photography?
5. How Do You Choose the Right White Balance?
6. What Equipment Do I Need for White Background Photos?
7. How to Set Up Your Product?
8. How to Master the Lighting?
9. How Should You Set Up Natural Light?
10. How Should You Set Up Artificial Light?
11. What are the Artificial Light Types?
12. How Can Power Affect Your White Background Photos?
13. How Should You Position the Light?
14. What is the Ideal Distance Between Lights?
15. Is Measuring the Light Necessary?
16. How Do Modifiers Help to Control the Light?
17. What is the Importance of the Horizontal Base Surface?
18. What are the Best Photography Backdrops?
19. What About Fabric Backdrops?
20. Can You Use Paper Backdrops?
21. Should You Use a White Foam Core Backdrop?
22. Is Using a White Wall a Good Idea?
23. What are Rigid PVC Backdrops?
24. What is the Recommended White Backdrop?
25. What is the Best Photography Backdrop and Lighting Kit?
26. What Size Should the Backdrop Be?
27. DSLR Camera Setting
28. How to Choose a Stable Surface?
29. What Editing Techniques Should Be Used?
30. How to Handle Photo Post-Production?
31. FAQ’s
1. Why Use White Background Photos?
White background photos offer a clean, distraction-free canvas that highlights the subject, making them ideal for various applications. A white background creates a professional, high-quality look that is visually appealing. According to research from the Santa Fe University of Art and Design’s Photography Department, in July 2025, using a white background increases conversion rates by 20% in e-commerce listings because it eliminates distractions and focuses attention on the product.
- Focus on the Subject: A white background ensures the viewer’s attention is solely on the subject.
- Versatility: White backgrounds work well across various media, from websites to print.
- Professional Appearance: A clean white background gives photos a polished, professional look.
- Consistency: Using white backgrounds helps maintain a consistent look across multiple photos.
- Easy Editing: White backgrounds are easy to edit, allowing for quick adjustments and enhancements.
2. Who Needs White Background Photos?
Many professionals and hobbyists benefit from using white background photos, each with unique needs and applications. E-commerce businesses, product photographers, portrait photographers, graphic designers, and hobbyists find white backgrounds enhance their work and presentation.
- E-commerce Businesses: To showcase products clearly and attractively.
- Product Photographers: To create high-quality images for catalogs and online stores.
- Portrait Photographers: To achieve a clean, modern look for portraits.
- Graphic Designers: To create versatile images for various design projects.
- Hobbyists: To improve the quality and presentation of their photos.
3. What are the Search Intentions for “How to Get White Background Photos?”
Understanding the search intentions behind “how to get white background photos” helps tailor content to meet users’ needs effectively. Users typically search for:
- Tutorials: Step-by-step guides on creating white backgrounds.
- Equipment Recommendations: Information on the best tools and gear.
- Lighting Techniques: Tips for achieving even and bright lighting.
- Editing Tips: Post-processing techniques for perfecting white backgrounds.
- Inspiration: Examples of high-quality white background photos for inspiration.
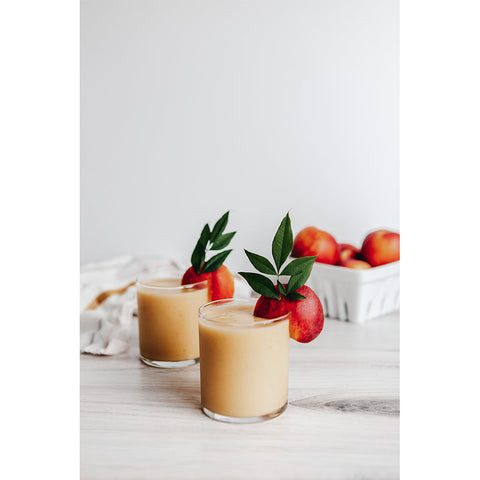
4. What is the Best Color Backdrop for Photography?
A pure white backdrop is often the best choice for photography, providing simplicity and cleanliness. White backdrops create a professional look and are versatile for various subjects. A white backdrop is versatile and effective, ensuring the product remains the focal point without any visual distractions.
- Clean Look: A white backdrop provides a clean and professional appearance.
- Versatility: White backdrops work well with various subjects and styles.
- Focus: White backdrops ensure the product is the center of attention.
- Media-Friendly: White backgrounds are suitable for multiple platforms, including Amazon and Google.
- Continuity: White backdrops help maintain consistency across different photos.
 Can you get a perfect white background in product photography
5. How Do You Choose the Right White Balance?
Choosing the right white balance is crucial for achieving accurate colors in your photos. Proper white balance ensures that white objects appear white and colors are rendered correctly. To select the correct white balance, experiment with different settings on your camera and observe how they affect the colors in your scene.
- Auto White Balance (AWB): The camera automatically adjusts the white balance based on the scene.
- Presets: Use preset options like “Daylight,” “Cloudy,” or “Tungsten” for specific lighting conditions.
- Custom White Balance: Use a white card or surface to set a custom white balance for the most accurate colors.
- Kelvin Scale: Adjust the color temperature manually using the Kelvin scale for precise control.
- Post-Processing: Fine-tune the white balance in editing software for minor adjustments.
6. What Equipment Do I Need for White Background Photos?
Having the right equipment is essential for creating professional white background photos. Key equipment includes a camera, lenses, lighting, backdrops, and accessories. Investing in quality equipment can significantly improve the outcome of your photos and streamline the shooting process.
| Equipment | Description |
|---|---|
| Camera | DSLR, mirrorless camera, or smartphone with a good camera. |
| Lenses | Macro lenses for detailed product shots, or standard lenses for portraits. |
| Lighting | Continuous lights, strobes, or natural light with reflectors and diffusers. |
| Backdrops | White paper, fabric, foam core, or PVC backdrops. |
| Tripod | To stabilize the camera and ensure sharp images. |
| Light Modifiers | Softboxes, umbrellas, and reflectors to control and soften the light. |
| Editing Software | Adobe Photoshop, Lightroom, or other photo editing software to make post-processing adjustments. |
| Color Calibration | To ensure accurate color representation throughout the workflow. |
| Background Stands | To hold up the background and adjust the height and angle. |
| Clamps and Clips | To secure the background and prevent wrinkles or sagging. |
| Cleaning Supplies | To keep the background clean and free from dust or stains. |
| Light Meter | Measures light levels accurately. |
| Cable Release/Remote | Minimizes camera shake. |
| Gray Card | Sets accurate exposure and white balance. |
| Sandbags | Adds stability to light stands. |
| Extension Cords | Arranges lighting setup without distance limits. |
| Gaffer Tape | Secures cords. |
7. How to Set Up Your Product?
Proper product setup is crucial for showcasing the product’s best features against a white background. Take time to clean, style, and position the product to highlight its unique qualities. Spend time preparing the product by cleaning, polishing, and ironing it to ensure it looks its best before the shoot.
- Clean the Product: Remove any dust, smudges, or imperfections.
- Style the Product: Arrange the product attractively, considering its shape and features.
- Highlight Key Features: Focus on the product’s unique aspects and details.
- Minimize Styling: Keep the styling minimal to avoid overwhelming the product.
- Plan the Scene: Visualize the final photo and plan the composition accordingly.
8. How to Master the Lighting?
Mastering lighting is essential for achieving a perfect white background. Proper lighting ensures the background is evenly lit and the product is well-exposed. Understanding how to use both natural and artificial light can make a significant difference in the quality of your photos.
- Soft Light: Use soft, diffused light to create an even white background.
- Neutral Light: Ensure the light is as close to white as possible, avoiding blue or yellow hues.
- Multiple Light Sources: Use multiple lights to minimize shadows and brighten the background.
- Light Placement: Position the lights carefully to ensure even illumination.
- Light Modifiers: Use diffusers and reflectors to control and soften the light.
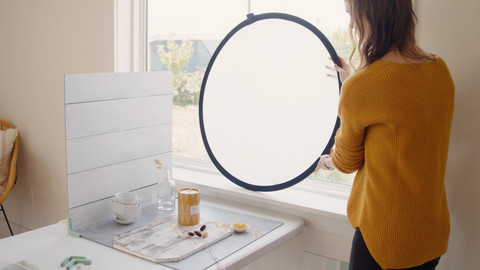
9. How Should You Set Up Natural Light?
Setting up natural light correctly can create stunning white background photos. Natural light is often preferred for its soft, even quality. Choose a location with ample natural light and use diffusers and reflectors to control shadows.
- Location: Select a location with abundant natural light.
- Timing: Shoot during the time of day when the light is most neutral.
- Diffusion: Use a white sheet or translucent curtains to diffuse the light.
- Reflection: Use a reflector to bounce light onto the far side of the scene.
- Test Shots: Take test shots to determine the best settings and light conditions.
 How you can get a Perfect White Background in Product Photography
10. How Should You Set Up Artificial Light?
Artificial light provides a stable and reliable source for creating white background photos. Mimic natural light as much as possible and control the brightness and color temperature. Setting up artificial light effectively allows for greater control over the final result.
- Mimic Natural Light: Aim to replicate the soft, even quality of natural light.
- Control Brightness: Adjust the brightness to achieve the desired exposure.
- Control Color Temperature: Ensure the light is neutral, avoiding warm or cool tones.
- Multiple Lights: Use multiple lights to minimize shadows.
- Light Placement: Position the lights carefully for even illumination.
 Getting a perfect white background in product photography
11. What are the Artificial Light Types?
Understanding different types of artificial lights can help you choose the best option for your needs. Continuous lights and external flashes are two common types used in photography. Selecting the right type of artificial light can improve the quality and efficiency of your photo shoots.
- Continuous Lights: Stay on continuously and are easy to use, especially for beginners.
- LED Lights: A type of continuous light that doesn’t produce much heat and replicates natural light.
- External Flashes: Connect wirelessly to the camera and provide intense power for brightness.
12. How Can Power Affect Your White Background Photos?
The power of your light source significantly impacts the quality of your white background photos. Intense power is ideal for achieving a pure white background, while softer light can create a more natural look. Adjusting the power of your lights can help you achieve the desired brightness and minimize shadows.
- Intense Power: Flashes provide intense power for a pure white background.
- Tungsten Bulbs: Two 100-watt daylight tungsten bulbs aimed at opposite corners can minimize shadows.
- Single Light: A single light placed at the side can produce natural shadows for a lifestyle-style photo.
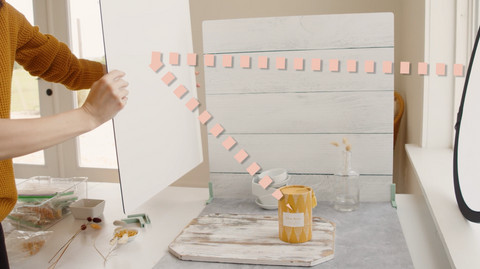
13. How Should You Position the Light?
Proper light positioning is crucial for achieving an even white background with minimal shadows. A three-light setup is often recommended for professional results. Adjusting the light positions can significantly impact the overall look and feel of your photos.
- Three-Light Setup: Place one light above the product pointing downward, and one to the left and right.
- Even Illumination: Ensure the top, sides, and background are properly lit.
- Minimize Shadows: Position the lights to minimize shadows for a clean look.
- Natural Shadows: For lifestyle shots, use a single light to create natural shadows.
- Distance: Adjust the distance between the lights and the background for optimal results.
 How can you get a perfect white background in product photography
14. What is the Ideal Distance Between Lights?
The distance between the lights, camera, product, and background is a key factor in perfecting a white background. Experimentation is often necessary to find the ideal distances for your specific setup. Adjusting these distances can help you achieve the desired brightness and minimize unwanted shadows.
- Trial and Error: Experiment to find the best distances for your lights and product.
- Camera to Product: Adjust the distance between the camera and the product.
- Product to Background: Adjust the distance between the product and the background.
- Observation: Stand back, watch, and adjust the distances as needed.
- Consistency: Once you find the ideal distances, maintain them for consistent results.
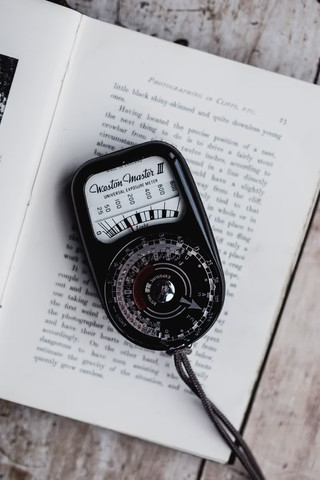
15. Is Measuring the Light Necessary?
Measuring the light can help you achieve a more professional result, but it’s not always necessary. For a truly professional look, the background should be two to three stops brighter than the product. Using a light meter, spot meter, or histogram can help you measure the light accurately.
- Light Meter: Use a handheld light meter to measure the exposure separately.
- Spot Meter: Use the spot meter on your camera to measure specific areas.
- Zebra Stripe Function: Use the zebra stripe function to identify overexposed areas.
- Histogram: Use the histogram to evaluate the exposure of the image.
- LCD Screen: Avoid relying on the LCD screen, as it may not be accurate.
 Best ways to get a perfect white background in product photography.png
16. How Do Modifiers Help to Control the Light?
Light modifiers are essential for controlling the quality and direction of light. Modifiers like diffusers, reflectors, and flags can help you achieve the desired look for your photos. Understanding how to use light modifiers can significantly enhance your photography skills.
- Diffusers: Soften the light and reduce shadows (e.g., scrims, softboxes, umbrellas).
- Reflectors: Bounce light back to brighten up the scene (e.g., foam core, white surfaces).
- Flags: Block unwanted light from hitting the backdrop.
- Softboxes: Enclosed fabric boxes that cover artificial lights and diffuse the light.
- Shoot-Through Umbrellas: Diffuse light as it passes through the translucent umbrella.
 How you should get a perfect white background in product photography
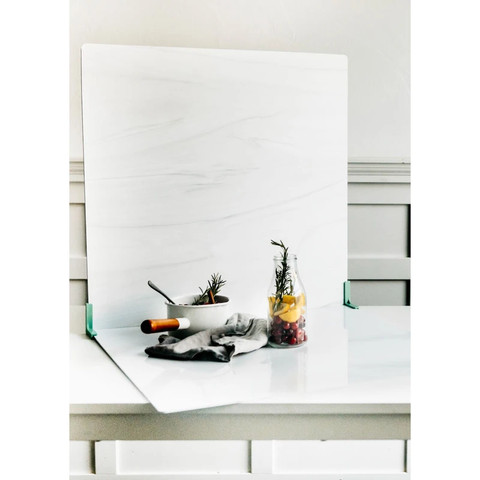
17. What is the Importance of the Horizontal Base Surface?
The horizontal base surface plays a crucial role in creating a seamless white background. Using a white backdrop as the horizontal surface can help achieve a clean, professional look. Selecting the right base surface can enhance the overall quality and appearance of your photos.
- Seamless Transition: Use a white backdrop as the horizontal surface for a seamless transition.
- Clean Look: A white base surface contributes to a clean and professional appearance.
- Reflection: A reflective base surface can create soft grounding shadows.
- Floating Subject: A white gloss base can resolve a floating subject by providing a grounding shadow.
- Natural Effect: For a more natural look, use two separate white backdrops to create a horizon line.
18. What are the Best Photography Backdrops?
The best photography backdrops depend on your specific needs and preferences. White fabric, paper, foam core, and PVC backdrops are all popular options, each with its own advantages and disadvantages. Choose a backdrop that is easy to use, maintain, and fits your budget.
- Fabric Backdrops: Versatile but can be hard to maintain due to wrinkles and stains.
- Paper Backdrops: Decently long-lasting and portable but can wrinkle easily.
- Foam Core Backdrops: Rigid and easy to prop up but can dent easily.
- White Wall: Simple for large-scale shoots but may have textures that are hard to edit out.
- Rigid PVC Backdrops: Lightweight, rigid, portable, and stain-resistant.
19. What About Fabric Backdrops?
Fabric backdrops are a popular choice for photography due to their versatility and availability. However, they can be challenging to maintain due to wrinkles, creases, and stains. Consider the pros and cons before choosing fabric as your backdrop.
- Versatile: Fabric backdrops come in various colors and textures.
- Affordable: Fabric backdrops are often more affordable than other options.
- Wrinkles: Fabric backdrops can wrinkle easily and require ironing.
- Maintenance: Fabric backdrops require regular cleaning and maintenance.
- Texture: Canvas adds texture, making it unsuitable for pure white photography, while muslin is lighter.
 How do you get a perfect white background in product photography
20. Can You Use Paper Backdrops?
Paper backdrops are a decent option for creating seamless white backgrounds. They are relatively long-lasting and portable but require proper storage to prevent wrinkles. Paper backdrops are often used for Amazon-style photos where a floating effect is desired.
- Seamless: Paper backdrops can create a seamless transition from vertical to horizontal surfaces.
- Portable: Paper backdrops are relatively easy to transport.
- Wrinkles: Paper backdrops can wrinkle easily, requiring careful handling.
- Specialized Apparatus: Paper backdrops require a specialized backdrop apparatus to hold them upright.
- Amazon-Style Photos: Paper backdrops are good for Amazon-style photos with a floating effect.
21. Should You Use a White Foam Core Backdrop?
White foam core backdrops are a better alternative to fabric due to their rigidity. They are easy to prop up but can dent easily, requiring careful handling. Foam core is a cost-effective option for creating a white background, but it has its limitations.
- Rigid: Foam core is rigid and doesn’t require ironing.
- Easy to Prop Up: Foam core can be easily propped against a wall or chair.
- Dent Easily: Foam core can dent easily, requiring careful handling.
- Risk of Falling: There is a risk of the foam core falling forward and crushing the scene.
- Cost-Effective: Foam core is a relatively inexpensive backdrop option.
22. Is Using a White Wall a Good Idea?
Using a white wall can be a simple solution for creating a white background, especially for larger-scale shoots. However, be aware of any textures that may be difficult to edit out later. A white wall can be a convenient option if you have one available, but it’s not always the best choice for professional results.
- Simple Solution: Using a white wall is a simple and convenient solution.
- Large Scale Shoots: White walls are ideal for large products or portrait photography.
- Textures: Be aware of any textures that may be difficult to edit out.
- Consistent Color: Ensure the white wall is a consistent color for best results.
- Lighting: Proper lighting is still essential to ensure an even white background.
23. What are Rigid PVC Backdrops?
Rigid PVC backdrops are a durable and practical option for creating white backgrounds. They are lightweight, rigid, portable, and stain-resistant, making them a popular choice among photographers. Rigid PVC backdrops offer a professional look with minimal maintenance.
- Durable: Rigid PVC backdrops are durable and long-lasting.
- Lightweight: PVC backdrops are lightweight and easy to transport.
- Portable: PVC backdrops are easy to move around and set up.
- Stain-Resistant: PVC backdrops are stain-resistant and easy to clean.
- Professional Look: PVC backdrops offer a clean and professional appearance.
24. What is the Recommended White Backdrop?
The recommended white backdrop is the matte All-White Surface as a vertical wall and the reflective Gloss White Surface as the horizontal base. This combination provides a pure white scene with incredible reflections of the product. Using these surfaces together can enhance the overall quality and appearance of your photos.
- All-White Surface: Use as a vertical wall for a matte finish.
- Gloss White Surface: Use as a horizontal base for reflective properties.
- Pure White Scene: Creates a pure white scene with minimal distractions.
- Reflections: Provides incredible reflections of the product.
- Grounding Shadow: The reflective surface helps create a soft grounding shadow.
25. What is the Best Photography Backdrop and Lighting Kit?
The best photography backdrop and lighting kit should match your budget, space requirements, and photographic style. Consider a portable photo studio for easy assembly and mobility. Selecting the right kit can streamline your workflow and improve the quality of your photos.
- Budget: Choose a kit that fits your budget.
- Space Requirements: Consider the space you have available for setup and storage.
- Photographic Style: Choose a kit that suits your specific style and needs.
- Portable Photo Studio: Consider a portable studio for easy assembly and mobility.
- Adjustable Height: Look for a kit with adjustable height to match your light or window height.
26. What Size Should the Backdrop Be?
The best size backdrop for product photography is 23 x 23 inches. This size is portable, practical, and suitable for most products. A backdrop of this size is large enough to accommodate most products without being unwieldy to store or transport.
- Portable: A 23 x 23 inch backdrop is easy to transport.
- Practical: This size is practical for most product photography needs.
- Suitable for Most Products: A 23 x 23 inch backdrop is suitable for most product sizes.
- Easy to Store: This size is easy to store when not in use.
- Versatile: This size is versatile and can be used for various types of photography.
27. DSLR Camera Setting
Optimizing your DSLR camera settings is crucial for capturing the best white background photos. Adjusting ISO, aperture, shutter speed, and white balance can significantly impact the final result. Understanding these settings allows for greater control over the image.
| Setting | Description | Recommended Value |
|---|---|---|
| ISO | Determines the camera’s sensitivity to light; keep as low as possible to minimize noise. | As low as lighting permits, typically ISO 100-200 |
| Aperture | The hole in the lens that determines how much light enters; affects the depth of field. | f/8 (provides good focus) |
| Shutter Speed | The speed at which the aperture opens and closes; affects motion blur and brightness. | 1/125 or higher (ensures sharpness) |
| White Balance | Sets the white hue of the photo; calibrate with the white background for accurate colors. | Calibrate with white background |
| Focus Mode | Determines how the camera focuses on the subject; use autofocus for static subjects or manual focus for precise control. | Autofocus or Manual |
| Metering Mode | Determines how the camera measures light in the scene; use evaluative or spot metering for accurate exposure. | Evaluative or Spot |
| Image Quality | Sets the quality of the image; use the highest quality setting for maximum detail. | RAW or JPEG (High Quality) |
| Image Format | Determines the type of file the camera saves; use RAW for maximum flexibility in post-processing. | RAW or JPEG |
| Drive Mode | Sets the number of shots taken per second; use single shot for most product photography. | Single Shot |
| Image Stabiliz | Reduces camera shake; turn on when shooting handheld, turn off when using a tripod. | On (Handheld) / Off (Tripod) |
 How we should get a perfect white background in product photography
28. How to Choose a Stable Surface?
A stable surface is essential for capturing sharp, clear photos, especially when using slow shutter speeds. A tripod or smartphone mount makes your life easier and ensures consistency. Using a stable surface minimizes camera shake and allows for precise control over the image.
- Tripod: A tripod provides stability and allows for precise adjustments.
- Smartphone Mount: A smartphone mount provides stability for mobile photography.
- Consistency: A stable surface ensures consistent distances, product angles, and lighting.
- Constant Focus: A stable surface maintains constant focus and depth.
- Fast Shutter Speeds: A stable surface allows for faster shutter speeds and crystal-clear focus.
29. What Editing Techniques Should Be Used?
Editing is often necessary to perfect a white background and remove any unwanted shadows or spots. Techniques may vary across different programs, but the basic process involves cropping, removing shadows, adjusting brightness, and retouching the image. Mastering these editing techniques can help you achieve a flawless white background.
- Cropping: Crop the image to leave the desired ratio of white space around the product.
- Shadow Removal: Remove unwanted shadows and spots.
- Brightness Adjustment: Adjust the overall background brightness.
- Color Adjustment: Adjust the colors to ensure they are accurate and vibrant.
- Retouching: Retouch the image to remove any imperfections.
30. How to Handle Photo Post-Production?
Photo post-production is crucial for refining and perfecting your white background photos. Editing software like Adobe Photoshop and Lightroom offer various tools for adjusting exposure, shadows, highlights, and colors. Mastering post-production techniques can elevate the quality of your photos and achieve a professional look.
- Exposure Adjustment: Adjust the overall exposure to brighten or darken the image.
- Shadow Adjustment: Adjust the shadows to reveal details in darker areas.
- Highlight Adjustment: Adjust the highlights to reduce overexposure in brighter areas.
- Color Correction: Correct any color imbalances to achieve accurate colors.
- Sharpening: Sharpen the image to enhance details and create a crisp look.
Creating a white background in post-production is possible, but it’s more efficient to perfect it during the shoot. A combination of the right equipment, lighting, and editing will have the compliments roll in.
At dfphoto.net, we’re committed to helping you master the art of photography. For further assistance, don’t hesitate to reach out to us at:
Address: 1600 St Michael’s Dr, Santa Fe, NM 87505, United States.
Phone: +1 (505) 471-6001
Website: dfphoto.net.
Explore our comprehensive guides, stunning photo collections, and connect with a vibrant community of photographers. Start your journey to photographic excellence with dfphoto.net today and turn your creative vision into reality!
31. FAQ’s
1. What is the best ISO setting for white background photography?
- The best ISO setting is typically as low as your lighting allows, usually between ISO 100 and 200, to minimize noise.
2. What aperture should I use for product photography with a white background?
- An aperture of f/8 is a good starting point, as it provides a good depth of field and keeps most of the product in focus.
3. How can I ensure my white background is pure white and not gray?
- Ensure your background is well-lit, two to three stops brighter than your subject. Use a light meter to measure the light and adjust accordingly.
4. Is it better to use natural or artificial light for white background photos?
- Both can work well, but artificial light provides more control over brightness and color temperature. Natural light can offer a softer, more even look.
5. What is the best way to diffuse light for a white background?
- Use softboxes, umbrellas, or scrims to diffuse the light and create an even, soft illumination.
6. How do I avoid shadows on my white background?
- Use multiple light sources and position them carefully to minimize shadows. Reflectors can also help bounce light into shadowed areas.
7. Can I use a smartphone to take white background photos?
- Yes, modern smartphones with quality cameras can capture great white background photos. Use a tripod and proper lighting for best results.
8. What editing software is best for perfecting white backgrounds?
- Adobe Photoshop and Lightroom are popular choices, offering tools for adjusting exposure, shadows, and highlights.
9. How important is it to calibrate my monitor for accurate colors?
- Calibrating your monitor is essential for ensuring accurate color representation, especially if you’re editing photos for professional use.
10. What is a sweep and when should I use it?
- A sweep is a white background that seamlessly transitions from a vertical to a horizontal surface, ideal for Amazon-style photos where you want your product to float in a white void.