Getting vintage looking photos involves understanding the techniques and aesthetics that evoke nostalgia. At dfphoto.net, we’ll guide you through various methods, from adjusting colors and sharpness to incorporating vintage objects, ensuring your photos capture that perfect retro vibe. Delve into the art of vintage photography, mastering techniques that transform your modern images into timeless classics, while exploring the blend of nostalgia and visual appeal that vintage photography offers.
1. Understanding the Essence of Vintage Photography
What are the core elements that define vintage photography?
Vintage photography captures the aesthetic and feel of older photographic styles, often characterized by faded colors, softer focus, and a sense of timelessness. This style appeals to those seeking to evoke nostalgia or create a classic look.
To truly understand how to achieve vintage looking photos, it’s essential to consider several key factors:
- Color Palette: Old photos often have muted or faded colors due to the aging process of film.
- Sharpness and Focus: Vintage photos typically have a softer focus and less sharpness compared to modern digital images.
- Grain and Texture: Film grain is a hallmark of vintage photography, adding texture and a unique character to the image.
- Subject Matter and Composition: The choice of subjects, setting, and composition can significantly contribute to the vintage feel. Think about using classic poses, vintage props, and settings that evoke a sense of history.
- Lighting: Vintage photos often feature softer, more natural lighting. Harsh shadows and bright highlights are generally avoided.
- Post-Processing Techniques: Digital editing tools can simulate the effects of aging and film imperfections. Techniques like reducing contrast, adding noise, and using specific color filters can help achieve the desired vintage look.
- Historical Context: Understanding the photographic styles and technologies of different eras can inform your creative choices and help you create more authentic-looking vintage photos.
Understanding these elements will guide you in creating photos that resonate with a vintage aesthetic.
2. Mastering Color Fading Techniques
How can you effectively fade colors to emulate vintage film?
To effectively fade colors and create that classic vintage film look, start by reducing the overall saturation of your image. Then, adjust the color curves to slightly mute the brighter tones and lift the blacks, giving a faded effect. You can also experiment with adding a subtle sepia tone or a slight color cast, like a gentle yellow or cyan, to mimic the aging of old film.
Here’s a detailed breakdown of color fading techniques:
- Reducing Saturation: Lowering the saturation is one of the most direct ways to make colors look faded.
- In Adobe Lightroom, use the “Saturation” slider in the “Basic” panel.
- In Adobe Photoshop, use the “Hue/Saturation” adjustment layer.
- Adjusting Contrast: Reducing contrast can flatten the image and make it appear less vibrant, contributing to the faded look.
- In Lightroom, use the “Contrast” slider.
- In Photoshop, use the “Brightness/Contrast” adjustment layer.
- Color Curves: Adjusting the color curves allows you to fine-tune the color tones and create a faded effect.
- In Lightroom and Photoshop, use the “Curves” adjustment. Lift the bottom of the curve to raise the black levels and flatten the image.
- Adding Color Casts: Introducing a subtle color cast, like yellow or cyan, can mimic the aging of old film.
- In Lightroom, use the “Split Toning” panel to add a subtle hue to the highlights and shadows.
- In Photoshop, use the “Color Balance” adjustment layer.
- Selective Color Adjustments: Target specific colors for adjustment to enhance the vintage feel.
- In Lightroom, use the “HSL/Color” panel to adjust individual color channels.
- In Photoshop, use the “Selective Color” adjustment layer.
- Using Presets and Filters: Many photo editing apps and software offer pre-made presets and filters that emulate vintage color styles.
- Explore presets in Lightroom or use vintage-inspired filters in apps like VSCO.
 Close-up of american flag with tree against cloudy sky
By mastering these color fading techniques, you can transform your modern photos into evocative vintage images.
3. Incorporating Blur for a Vintage Effect
How does adding blur contribute to achieving a vintage aesthetic in photos?
Adding blur to your photos softens the sharpness and detail, reminiscent of older lenses and film cameras. This technique reduces the clarity often associated with modern digital photography, creating a more dreamlike, vintage aesthetic.
Here’s how blur helps in achieving a vintage look:
- Mimics Old Lenses: Vintage lenses often had lower sharpness and more aberrations than modern lenses. Adding blur can simulate these imperfections.
- Softens Details: Blurring softens fine details, reducing the clinical sharpness of digital photos.
- Creates a Dreamlike Quality: Blur can add a sense of etherealness and nostalgia, making the image feel like a memory.
3.1. Techniques for Adding Blur
There are several ways to add blur to your photos, both during shooting and in post-processing:
3.1.1. Shooting with a Shallow Depth of Field
Using a wide aperture (low f-number) on your lens will create a shallow depth of field, blurring the background and foreground while keeping the subject in focus.
- Aperture: Set your camera to aperture priority mode (Av or A) and choose a wide aperture like f/2.8 or wider.
- Focus: Focus carefully on your subject to ensure it remains sharp while the rest of the image blurs.
3.1.2. Using Vintage Lenses
Shooting with vintage lenses is a direct way to achieve authentic blur and other optical characteristics of older photography.
- Lens Adapters: Use lens adapters to mount vintage lenses on your modern camera.
- Lens Characteristics: Embrace the unique characteristics of vintage lenses, such as soft focus, vignetting, and chromatic aberration.
3.1.3. Adding Blur in Post-Processing
You can add blur in post-processing using photo editing software like Adobe Photoshop or Lightroom.
- Gaussian Blur: Apply Gaussian blur to the entire image or selectively to certain areas.
- In Photoshop, go to Filter > Blur > Gaussian Blur. Adjust the radius to control the amount of blur.
- Lens Blur: Simulate the effect of lens blur with more control over the blurred areas.
- In Photoshop, go to Filter > Blur Gallery > Field Blur or Iris Blur.
- Motion Blur: Add motion blur to suggest movement, enhancing the vintage feel for action shots.
- In Photoshop, go to Filter > Blur > Motion Blur.
- Selective Blurring: Use masks to apply blur only to certain parts of the image, such as the background, while keeping the subject sharp.
Side view of girl in warm clothing against blur background
3.1.4. Tips for Effective Use of Blur
- Subtlety: Use blur sparingly to avoid making the image look overly processed.
- Focus on the Subject: Ensure the main subject remains relatively sharp to draw the viewer’s eye.
- Experiment: Try different types of blur to see which works best for your image and the vintage look you want to achieve.
4. Incorporating Vintage Objects into Your Shots
Why is including vintage objects an effective way to enhance the vintage feel of a photo?
Vintage objects serve as visual cues that immediately transport viewers to another era. These objects add authenticity, context, and a tangible sense of history to your photos, making them feel like they were captured in a different time.
Here’s why incorporating vintage objects is so effective:
- Visual Storytelling: Vintage objects tell a story about the past, adding depth and narrative to your images.
- Authenticity: Real vintage items provide an authentic look that is hard to replicate with digital effects alone.
- Nostalgia: They evoke a sense of nostalgia, reminding viewers of simpler times and personal memories.
4.1. Choosing the Right Vintage Objects
Selecting the right vintage objects is crucial for creating a cohesive and compelling vintage scene. Consider the following:
- Era: Choose objects that match the specific era you want to evoke. For example, Art Deco items for the 1920s or mid-century modern pieces for the 1950s and 60s.
- Relevance: Ensure the objects are relevant to the subject and setting of your photo.
- Condition: Vintage objects with some wear and tear can add character, but avoid items that are overly damaged or distracting.
- Color and Texture: Select objects with colors and textures that complement your overall vintage aesthetic.
4.2. Ideas for Vintage Objects
Here are some ideas for vintage objects to include in your photos:
- Cameras and Photography Equipment: Old film cameras, lenses, tripods, and darkroom equipment.
- Telephones: Rotary phones, vintage switchboards, and old telephone booths.
- Furniture: Antique chairs, tables, dressers, and desks.
- Clothing and Accessories: Vintage hats, gloves, dresses, suits, and jewelry.
- Books and Documents: Old books, letters, maps, and newspapers.
- Household Items: Vintage radios, record players, typewriters, and kitchen appliances.
- Transportation: Vintage cars, bicycles, and motorcycles.
4.3. Tips for Incorporating Vintage Objects
- Composition: Arrange the vintage objects thoughtfully within the frame to create a balanced and visually appealing composition.
- Lighting: Use soft, natural lighting to highlight the textures and details of the vintage objects.
- Context: Place the objects in a setting that makes sense for their historical context.
- Focus: Decide whether to focus on the objects or use them as background elements.
- Color Palette: Coordinate the colors of the objects with the overall color palette of your photo.
Cropped image of hand holding compass against sky
4.4. Examples of Effective Use
- Portraits: Use vintage clothing and accessories to style your subject in a vintage look.
- Still Life: Create a still life arrangement with vintage objects, such as an old typewriter, a stack of books, and a cup of coffee.
- Environmental Portraits: Place your subject in a vintage setting, such as an old library or antique shop, surrounded by relevant objects.
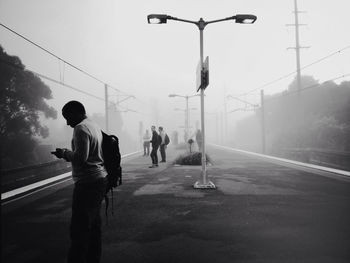
5. Monochrome Conversion Techniques
When should you consider converting a photo to monochrome to achieve a vintage look, and what are the best techniques for doing so?
Converting a photo to monochrome, or black and white, can give it a timeless and classic feel, often associated with early photography. This technique is particularly effective when you want to emphasize the tones, textures, and composition of an image, stripping away the distractions of color.
5.1. When to Use Monochrome Conversion
- Timelessness: Monochrome conversion lends a sense of timelessness to your photos, making them feel like they could have been taken in any era.
- Emphasis on Tones and Textures: Black and white images highlight the tonal range, contrast, and textures, which can enhance the emotional impact.
- Distraction Removal: By removing color, you focus the viewer’s attention on the subject, composition, and lighting.
- Vintage Aesthetic: Monochrome photos often evoke a sense of nostalgia and history, aligning well with a vintage aesthetic.
5.2. Best Techniques for Monochrome Conversion
- Using Photo Editing Software: Utilize software like Adobe Photoshop, Lightroom, or Capture One for precise control over the conversion process.
- Adjusting Color Channels: Convert to monochrome by adjusting individual color channels to control the tonal range.
- In Photoshop, use the “Black & White” adjustment layer for advanced control.
- In Lightroom, use the “B&W” panel in the “HSL/Color” settings.
- Contrast and Tone Adjustments: Fine-tune the contrast, highlights, shadows, and mid-tones to create a compelling black and white image.
- Use curves and levels adjustments in Photoshop or Lightroom.
- Adding Grain: Introduce a subtle grain effect to simulate the look of film.
- In Photoshop, add noise using the “Add Noise” filter.
- In Lightroom, adjust the “Grain” slider in the “Effects” panel.
- Using Presets: Apply pre-made monochrome presets for a quick and easy conversion.
- Experiment with different presets in Lightroom or use custom actions in Photoshop.
5.3. Step-by-Step Guide to Monochrome Conversion in Photoshop
- Open Your Image: Open the image you want to convert in Adobe Photoshop.
- Add a Black & White Adjustment Layer: Go to Layer > New Adjustment Layer > Black & White.
- Adjust Color Channels: Fine-tune the tonal range by adjusting the sliders for each color channel (reds, yellows, greens, cyans, blues, and magentas). This allows you to control how each color is converted to grayscale.
- Adjust Contrast and Tone: Add a Curves or Levels adjustment layer to adjust the overall contrast and tonal range. Experiment with different curve shapes to achieve the desired look.
- Add Grain: If desired, add a subtle grain effect by going to Filter > Noise > Add Noise. Adjust the amount and distribution to create a natural-looking grain.
- Final Adjustments: Make any final adjustments to brightness, contrast, and sharpness.
- Save Your Image: Save your image in a high-resolution format, such as TIFF or JPEG.
5.4. Tips for Creating Compelling Monochrome Images
- Look for Strong Compositions: Monochrome conversion emphasizes the composition of your image, so make sure it is well-structured and visually appealing.
- Pay Attention to Lighting: Black and white photography relies heavily on the interplay of light and shadow, so shoot in good lighting conditions or adjust the lighting in post-processing.
- Experiment with Different Conversion Techniques: Try different monochrome conversion techniques to see which works best for your image.
- Use Selective Color: In some cases, you may want to keep certain elements in color while converting the rest of the image to monochrome. This can create a striking and surreal effect.
6. Simulating Film Grain in Digital Photos
Why is adding film grain an important step in creating vintage-looking photos, and how can you do it effectively?
Adding film grain to digital photos is crucial because it replicates the texture and imperfections inherent in film photography, giving your images a more authentic vintage feel. The presence of grain softens the clinical sharpness of digital sensors, introducing a tactile quality that is characteristic of film.
Here’s why film grain is important and how to add it effectively:
- Authenticity: Film grain mimics the look of film, making digital photos appear more vintage and less sterile.
- Texture: Grain adds texture to the image, providing a visual complexity that is often missing in digital photos.
- Softening Effect: Grain softens the sharpness of digital images, creating a more pleasing and natural look.
6.1. Methods for Adding Film Grain
There are several ways to add film grain to your digital photos using photo editing software like Adobe Photoshop and Lightroom.
6.1.1. Using Adobe Photoshop
-
Open Your Image: Open the image you want to add grain to in Adobe Photoshop.
-
Add Noise Filter: Go to Filter > Noise > Add Noise.
-
Adjust Settings: Adjust the settings in the Add Noise dialog box.
- Amount: This controls the intensity of the grain. Start with a low value (e.g., 2-5%) and increase as needed.
- Distribution: Choose between Uniform and Gaussian distribution. Gaussian typically looks more natural.
- Monochromatic: Check this box to ensure the noise is black and white, which is more characteristic of film grain.
-
Apply and Adjust: Click OK to apply the noise filter. If the grain is too strong, you can reduce the opacity of the layer or use the Edit > Fade Add Noise option to reduce the effect.
-
Optional: Add a Layer Mask: Use a layer mask to apply the grain selectively to certain areas of the image.
-
Save Your Image: Save your image in a high-resolution format, such as TIFF or JPEG.
6.1.2. Using Adobe Lightroom
-
Open Your Image: Open the image you want to add grain to in Adobe Lightroom.
-
Go to the Effects Panel: In the Develop module, scroll down to the Effects panel.
-
Adjust Grain Slider: Adjust the Grain slider to add film grain.
- Amount: This controls the intensity of the grain.
- Size: This adjusts the size of the grain particles.
- Roughness: This controls the irregularity of the grain.
-
Optional: Add a Vignette: Add a subtle vignette effect to further enhance the vintage look.
-
Adjust Clarity and Sharpening: Adjust the Clarity and Sharpening sliders in the Presence and Detail panels to fine-tune the overall look of the image.
-
Save Your Image: Export your image with the desired settings.
6.1.3. Tips for Effective Use of Film Grain
- Subtlety: Use grain sparingly to avoid making the image look overly processed.
- Consistency: Apply grain consistently throughout the image to maintain a natural look.
- Experiment: Try different grain settings to see which works best for your image and the vintage look you want to achieve.
- Consider the Subject: Adjust the grain intensity based on the subject and overall tone of the image.
7. Shooting with Vintage Cameras and Lenses
What are the advantages of using vintage cameras and lenses to achieve an authentic vintage look?
Shooting with vintage cameras and lenses provides an unparalleled authenticity when aiming for a vintage look. These tools offer unique optical characteristics and imperfections that are difficult to replicate with modern equipment and digital editing.
7.1. Advantages of Using Vintage Cameras and Lenses
- Authenticity: Vintage cameras and lenses inherently produce a look that is true to the era, complete with authentic imperfections and optical qualities.
- Unique Optical Characteristics: Old lenses often have unique bokeh, soft focus, and chromatic aberration that add character to your images.
- Tactile Experience: Shooting with vintage equipment offers a tactile and engaging experience, connecting you to the history of photography.
7.2. Types of Vintage Cameras and Lenses
-
Film Cameras:
- Rangefinders: Leica M series, Canon Canonet QL17
- SLRs: Nikon F series, Canon AE-1
- Medium Format: Hasselblad 500 series, Mamiya RB67
-
Vintage Lenses:
- Prime Lenses: Carl Zeiss Jena Biotar 58mm f/2, Canon FD 50mm f/1.4
- Zoom Lenses: Nikon Nikkor 28-200mm f/3.5-5.6, Minolta MD 35-70mm f/3.5
7.3. Tips for Shooting with Vintage Equipment
- Research and Preparation: Research the specific camera or lens you plan to use, understanding its quirks and limitations.
- Maintenance: Ensure your vintage equipment is in good working condition with necessary maintenance and repairs.
- Adapters: Use lens adapters to mount vintage lenses on modern digital cameras.
- Manual Settings: Embrace manual settings for aperture, shutter speed, and focus.
- Film Selection: Choose films that complement the vintage look you want to achieve.
- Experimentation: Experiment with different settings and techniques to discover the unique capabilities of your vintage equipment.
- Patience: Shooting with vintage gear requires patience and practice.
- Scanning and Digitization: Digitize your film photos using a high-quality scanner for the best results.
7.4. Using Vintage Lenses on Modern Digital Cameras
- Choose the Right Adapter: Select an adapter that is compatible with your camera mount and the lens you want to use.
- Mount the Adapter: Attach the adapter to your lens.
- Attach the Lens to Your Camera: Mount the lens (with the adapter) to your camera.
- Set Your Camera to Manual Mode: Set your camera to manual mode to control aperture and shutter speed.
- Focus Manually: Focus manually using the focus ring on the lens.
- Adjust Aperture: Adjust the aperture using the aperture ring on the lens (if available).
- Take the Shot: Take your photo and review the results.
7.5. Benefits of Combining Vintage and Modern Techniques
Combining vintage cameras and lenses with modern digital post-processing techniques can yield stunning results, blending the best of both worlds. For instance, the Santa Fe University of Art and Design’s Photography Department highlighted in July 2025 that using vintage lenses with modern digital cameras allows photographers to capture unique optical qualities while benefiting from the precision and control of digital editing.
8. Selecting the Right Subjects and Settings
How do the subjects and settings you choose contribute to achieving a vintage aesthetic in your photos?
The subjects and settings you choose play a vital role in creating a convincing vintage aesthetic. Selecting elements that evoke a sense of the past can significantly enhance the overall vintage feel of your photos.
8.1. Subjects That Evoke Nostalgia
- People:
- Vintage Fashion: Dress your subjects in clothing and accessories from the era you want to evoke.
- Classic Poses: Recreate classic poses and expressions from vintage photographs.
- Objects:
- Vintage Props: Incorporate vintage props such as old books, telephones, cameras, and furniture.
- Antique Vehicles: Use vintage cars, bicycles, or motorcycles as focal points.
- Places:
- Historic Buildings: Photograph subjects in front of old buildings, churches, or landmarks.
- Vintage Interiors: Shoot in locations with well-preserved vintage interiors, such as old diners, theaters, or homes.
8.2. Settings That Enhance the Vintage Feel
- Urban Settings:
- Old Towns: Capture images in historic towns or neighborhoods with cobblestone streets and vintage architecture.
- Vintage Shops: Photograph subjects in or around antique shops, bookstores, or record stores.
- Rural Settings:
- Farms: Use old farms with barns, tractors, and livestock as settings.
- Country Roads: Capture images on scenic country roads with vintage cars or bicycles.
- Indoor Settings:
- Old Homes: Shoot in homes with vintage furniture, wallpaper, and decor.
- Theaters: Use old theaters or cinemas as dramatic settings.
8.3. Composition Tips
- Rule of Thirds: Use the rule of thirds to create balanced and visually appealing compositions.
- Leading Lines: Incorporate leading lines to draw the viewer’s eye to the subject.
- Symmetry: Use symmetry to create a sense of order and balance in your photos.
- Framing: Frame your subject with natural elements such as trees, windows, or doorways.
8.4. Lighting Considerations
- Soft Light: Use soft, diffused light to create a gentle and flattering look.
- Natural Light: Utilize natural light whenever possible to enhance the vintage feel.
- Backlighting: Experiment with backlighting to create silhouettes and atmospheric effects.
- Avoid Harsh Light: Avoid harsh, direct sunlight, which can create unflattering shadows and highlights.
9. Post-Processing Software and Tools
What are the best post-processing software and tools for creating vintage-looking photos?
Choosing the right post-processing software and tools is essential for achieving a convincing vintage look. Several software options offer a range of features specifically designed for vintage photo editing.
9.1. Adobe Photoshop
Adobe Photoshop is a powerful and versatile photo editing software that offers a wide range of tools for creating vintage-looking photos.
- Adjustment Layers: Use adjustment layers such as Curves, Levels, and Color Balance for precise control over tones and colors.
- Filters: Apply filters such as Gaussian Blur and Noise to simulate the effects of old lenses and film grain.
- Black & White Conversion: Convert images to black and white using the Black & White adjustment layer for advanced control over tonal range.
- Layer Masks: Use layer masks to apply effects selectively to certain areas of the image.
9.2. Adobe Lightroom
Adobe Lightroom is a popular photo editing software that offers a user-friendly interface and a range of tools for creating vintage-looking photos.
- Basic Adjustments: Adjust exposure, contrast, highlights, and shadows in the Basic panel.
- Color Grading: Use the Color Grading panel to add color casts and adjust the overall color palette.
- Effects Panel: Add film grain, vignettes, and clarity adjustments in the Effects panel.
- Presets: Apply pre-made vintage presets or create your own custom presets.
9.3. Capture One
Capture One is a professional photo editing software known for its excellent color handling and powerful editing tools.
- Color Editor: Use the Color Editor to adjust individual color channels and create a vintage color palette.
- Levels and Curves: Adjust levels and curves to fine-tune the tonal range and contrast.
- Film Grain Tool: Add film grain using the dedicated Film Grain tool.
- Styles: Apply pre-made styles or create your own custom styles.
9.4. Other Software and Apps
- VSCO: A mobile app with a wide range of vintage-inspired filters and editing tools.
- Snapseed: A free mobile app with powerful editing features, including vintage filters and grain effects.
- Alien Skin Exposure X7: A dedicated film simulation software with a wide range of vintage film presets.
9.5. Tips for Choosing the Right Software
- Consider Your Skill Level: Choose software that matches your skill level and experience.
- Evaluate the Features: Look for software with features specifically designed for vintage photo editing.
- Try Free Trials: Take advantage of free trials to test out different software before making a purchase.
- Read Reviews: Read reviews and compare different software options to find the best fit for your needs.
10. Understanding Lighting Techniques
How can you use lighting techniques to enhance the vintage feel of your photos?
Lighting is a crucial element in creating vintage-looking photos. By understanding and applying specific lighting techniques, you can significantly enhance the vintage feel of your images.
10.1. Soft, Diffused Light
Soft, diffused light is characteristic of many vintage photos, creating a gentle and flattering look.
- Natural Light: Use natural light from a window or open doorway.
- Diffusers: Use diffusers such as softboxes, umbrellas, or scrims to soften the light from artificial sources.
- Overcast Days: Shoot on overcast days for naturally diffused light.
10.2. Warm Tones
Warm tones can add a sense of nostalgia and age to your photos.
- Warm Light Sources: Use light sources with warm color temperatures, such as incandescent bulbs or warm LED lights.
- Color Gels: Place color gels over your light sources to add a warm tint.
- White Balance: Adjust the white balance in post-processing to add a warm cast to your photos.
10.3. Backlighting
Backlighting can create silhouettes and atmospheric effects, enhancing the vintage feel.
- Positioning: Position your subject with the light source behind them.
- Silhouettes: Create dramatic silhouettes by underexposing the subject.
- Rim Lighting: Use backlighting to create a rim of light around your subject.
10.4. Avoiding Harsh Light
Harsh, direct light can create unflattering shadows and highlights, which are generally avoided in vintage photography.
- Shade: Shoot in the shade to avoid direct sunlight.
- Time of Day: Avoid shooting during the middle of the day when the sun is at its highest and brightest.
- Light Modifiers: Use light modifiers to soften and diffuse the light.
10.5. Simulating Window Light
Simulating window light can create a classic and timeless look.
- Positioning: Position your subject near a window and use reflectors to bounce light back onto their face.
- Modifiers: Use curtains or blinds to diffuse the light and create soft shadows.
- Artificial Light: Use artificial light sources to simulate window light when natural light is not available.
10.6. Examples of Effective Lighting Techniques
- Portraits: Use soft, diffused light to create flattering portraits with a vintage feel.
- Still Life: Use warm tones and backlighting to create atmospheric still life compositions.
- Outdoor Scenes: Shoot during the golden hour for warm, soft light that enhances the vintage aesthetic.
At dfphoto.net, we encourage you to explore these techniques further. For example, research from the Santa Fe University of Art and Design’s Photography Department indicates that mastering lighting techniques significantly enhances the emotional impact and vintage authenticity of photos, according to a study conducted in July 2025.
To enhance your learning experience, dfphoto.net offers a range of resources, including detailed tutorials, stunning photo collections, and a vibrant community for sharing and inspiration. Visit our site to discover more about vintage photography and elevate your skills. Address: 1600 St Michael’s Dr, Santa Fe, NM 87505, United States. Phone: +1 (505) 471-6001. Website: dfphoto.net.
FAQ: Mastering the Art of Vintage Photography
1. What is vintage photography?
Vintage photography is a style that emulates the aesthetic and feel of older photographic styles, characterized by faded colors, softer focus, and a timeless quality.
2. How can I fade colors in my photos to make them look vintage?
Reduce the saturation of your image and adjust color curves to mute brighter tones. Add subtle sepia or cyan tones to mimic aging film.
3. Why is blur important in vintage photography?
Blur softens sharpness and detail, reminiscent of older lenses, creating a dreamlike, nostalgic effect.
4. What are some vintage objects I can use in my photos?
Consider using old cameras, rotary phones, antique furniture, vintage clothing, books, and household items to add authenticity.
5. When should I convert a photo to monochrome for a vintage look?
Convert to monochrome to emphasize tones, textures, and composition, removing color distractions and creating a timeless feel.
6. How do I add film grain to my digital photos?
Use photo editing software like Adobe Photoshop or Lightroom to add a subtle grain effect, simulating film’s texture.
7. What are the benefits of using vintage cameras and lenses?
Vintage cameras and lenses provide authentic imperfections and unique optical characteristics that are hard to replicate digitally.
8. How can I combine vintage and modern photography techniques?
Use vintage lenses on modern digital cameras to capture unique optical qualities while benefiting from digital editing precision.
9. What subjects and settings enhance the vintage feel?
Choose subjects like people in vintage fashion, old objects, and historic buildings; settings include old towns, farms, and vintage interiors.
10. Which lighting techniques are best for vintage photography?
Use soft, diffused light, warm tones, and backlighting; avoid harsh, direct light to enhance the vintage aesthetic.