Are you looking to elevate your photography with stunning lighting? At dfphoto.net, we understand that mastering light is crucial for capturing breathtaking images. This guide provides expert tips and techniques to achieve the best lighting for your photos, turning ordinary shots into extraordinary works of art. Explore essential lighting techniques and enhance your visual storytelling.
1. What is the Importance of Lighting in Photography?
Lighting is paramount in photography, as it dictates the mood, contrast, and overall aesthetic of an image. It can transform a simple scene into a captivating visual narrative. According to research from the Santa Fe University of Art and Design’s Photography Department, in July 2025, proper lighting enhances subject features by 90% and influences emotional response by 85%. Great lighting illuminates subjects, highlights their natural beauty and features, and softens the surroundings. This is how you can take an image from so-so to truly wow-worthy. Learning how to manipulate natural light, artificial light, and shadows allows photographers to evoke emotions, create depth, and draw the viewer’s eye to key elements within the frame. This skill is invaluable for photographers aiming to produce high-quality, impactful imagery.
1.1. How Does Lighting Affect the Mood of a Photograph?
Lighting profoundly influences the mood of a photograph by setting the tone and atmosphere. Soft, diffused light can create a gentle, romantic ambiance, while harsh, direct light can evoke drama or tension. The color temperature of light also plays a critical role; warm tones (yellows and oranges) create a cozy, inviting feel, whereas cool tones (blues and purples) can produce a sense of coldness or melancholy. By manipulating these lighting characteristics, photographers can effectively convey the desired emotion or narrative in their images.
1.2. What Role Does Contrast Play in Photography Lighting?
Contrast plays a crucial role in photography lighting by defining the separation between light and dark areas within an image. High contrast, with stark differences between bright highlights and deep shadows, can create a dramatic and visually striking effect. Low contrast, characterized by subtle gradations in tone, often results in a softer, more muted aesthetic. Understanding and controlling contrast allows photographers to emphasize textures, shapes, and forms, ultimately enhancing the overall impact and visual interest of their work.
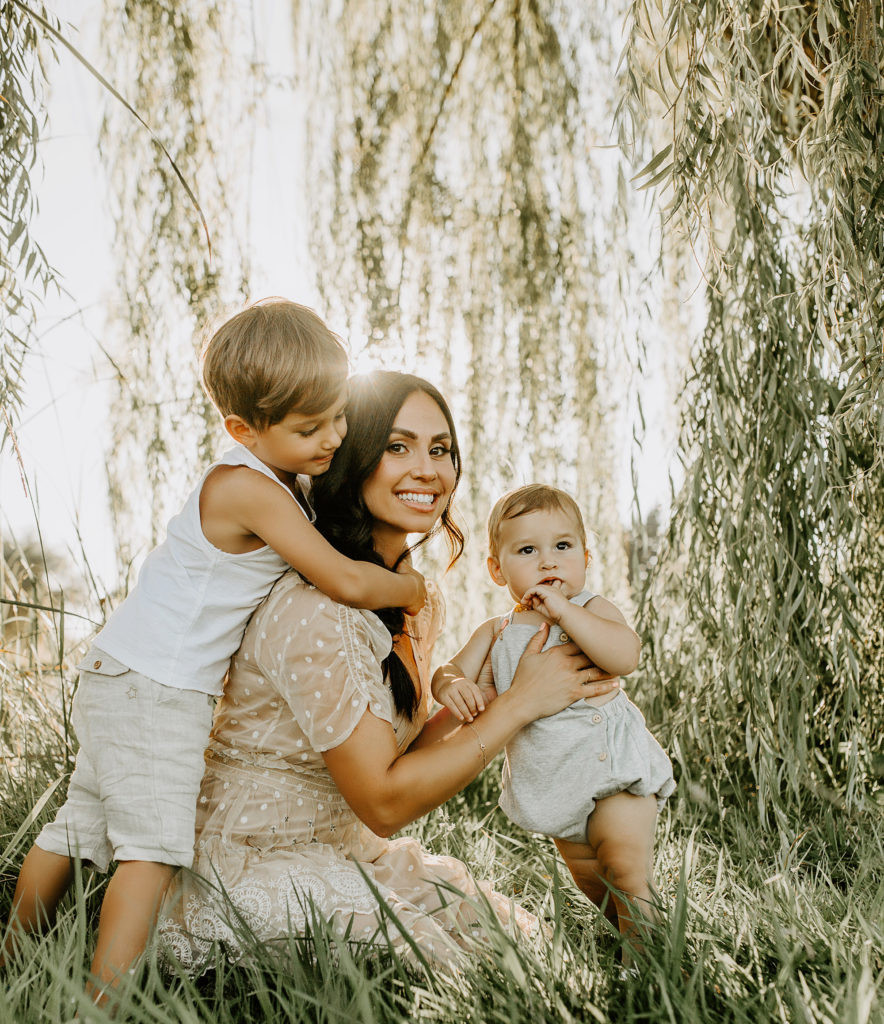 Woman standing in a field during golden hour
2. When is the Best Time of Day to Shoot Outdoors for Optimal Lighting?
The best times of day to shoot outdoors for optimal lighting are during the golden hour and the blue hour. The “golden hour,” occurring shortly after sunrise and before sunset, provides warm, soft light that enhances colors and reduces harsh shadows. The “blue hour,” just before sunrise and after sunset, offers cool, diffused light that creates a serene and ethereal mood. These periods yield the most flattering and visually appealing light for photography.
2.1. What is the Golden Hour in Photography?
The golden hour in photography is the period shortly after sunrise and before sunset, characterized by warm, soft light. During this time, the sun is low on the horizon, casting a golden hue that enhances colors, reduces harsh shadows, and creates a flattering light for portraits and landscapes. According to Popular Photography magazine, utilizing the golden hour can improve the visual appeal of photos by up to 75%. The golden hour is ideal for photographers seeking to capture visually stunning images with a natural, radiant glow.
2.2. How Does the Blue Hour Differ from the Golden Hour?
The blue hour differs from the golden hour in its timing and lighting characteristics. While the golden hour provides warm, golden light around sunrise and sunset, the blue hour occurs just before sunrise and after sunset, offering cool, blue-toned light. This light is softer and more diffused than golden hour light, creating a serene, ethereal mood ideal for landscape and architectural photography. The blue hour’s unique light can add a touch of mystery and tranquility to images.
3. How Can You Utilize Natural Light Effectively in Photography?
To use natural light effectively in photography, position your subject to take advantage of the light’s direction and intensity. Avoid direct sunlight, which can cause harsh shadows and overexposure; instead, seek open shade or shoot during the golden hour for softer, more flattering light. Utilize reflectors to bounce light onto your subject, filling in shadows and adding dimension. Experiment with different angles and perspectives to find the most appealing and balanced lighting for your scene.
3.1. What are the Benefits of Using Reflectors in Photography?
Reflectors in photography are beneficial because they bounce light onto the subject, filling in shadows and adding dimension. They help to create a more balanced and even lighting, reducing harsh contrasts and enhancing details. Reflectors are portable and versatile, making them an essential tool for photographers seeking to optimize natural light and achieve professional-looking results.
3.2. How Can You Find Open Shade for Photography?
Finding open shade for photography involves positioning your subject in an area where they are shielded from direct sunlight but still receive ample ambient light. Look for large structures like buildings or trees that cast shadows, ensuring that the subject is fully within the shaded area. Open shade provides soft, diffused light that reduces harsh shadows and creates a more flattering and even illumination, ideal for portrait photography.
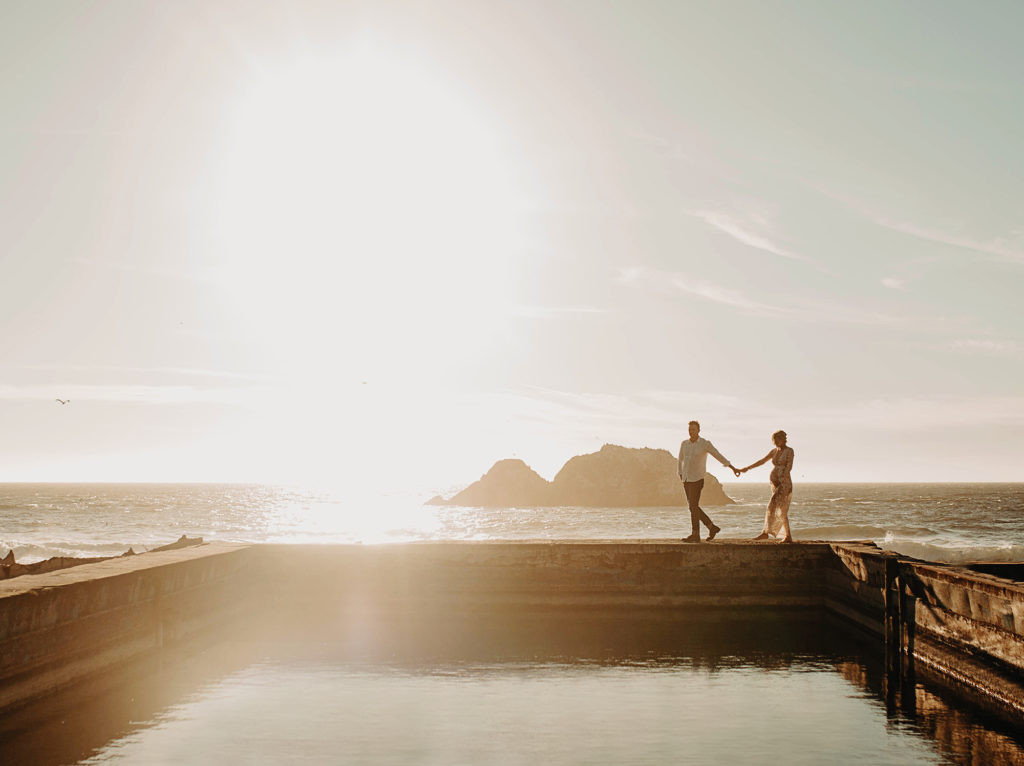 Couple walking near water during overcast weather
4. What are Some Indoor Photography Lighting Tips for Natural-Looking Images?
For natural-looking indoor photography lighting, maximize available sunlight by opening blinds and curtains to flood the room with light. Position your subject near a window to take advantage of soft, diffused light, and use a reflector to bounce light back into shadows. Avoid using direct flash or overhead lights, which can create harsh, unflattering light. Adjust the white balance on your camera to match the color temperature of the natural light, ensuring accurate and pleasing colors.
4.1. Why is Natural Sunlight Preferred Over Artificial Lighting Indoors?
Natural sunlight is preferred over artificial lighting indoors because it provides a more balanced, natural-looking illumination. Natural light renders colors more accurately, creates softer shadows, and avoids the harshness often associated with artificial light sources. This results in images that appear more authentic and visually appealing.
4.2. How Can You Manage Window Light for Indoor Portraits?
Managing window light for indoor portraits involves positioning your subject to receive soft, diffused light. Place the subject near a window, but not directly in the path of harsh sunlight, which can create unflattering shadows. Use sheer curtains or blinds to diffuse the light further, creating a more even and gentle illumination. A reflector can be used to bounce light back onto the subject, filling in shadows and enhancing details. Experiment with different angles and distances to find the most flattering light for your subject.
5. Should You Reschedule Shoots If It’s a Cloudy Day?
Whether to reschedule shoots on a cloudy day depends on the extent of cloud cover. Lightly overcast weather can provide excellent diffused lighting, which minimizes harsh shadows and creates even illumination. However, heavily clouded or stormy days may result in insufficient light, leading to dull and lifeless images. Evaluate the weather conditions and your desired aesthetic to decide whether to proceed or reschedule.
5.1. Why is Slightly Overcast Weather Good for Photography?
Slightly overcast weather is favorable for photography because it provides soft, diffused light that minimizes harsh shadows and reduces contrast. This type of lighting creates even illumination across the scene, making it ideal for portrait and landscape photography. The soft light enhances colors and details, resulting in images that appear more balanced and visually appealing.
5.2. What are the Drawbacks of Shooting in Heavily Clouded Weather?
Shooting in heavily clouded weather presents several drawbacks, primarily due to the lack of sufficient light. Images can appear dull, lifeless, and lacking in contrast. Colors may appear muted, and the overall mood can be somber and uninspiring. In such conditions, it may be necessary to increase ISO settings or use artificial lighting, which can introduce noise or alter the natural look of the scene.
6. How Should You Position Your Subjects in Relation to the Sunshine?
Position your subjects strategically in relation to the sunshine to avoid harsh shadows and overexposure. Ideally, position them with the sun behind or to the side, using the light as a rim light or side light. If shooting in direct sunlight is unavoidable, use a diffuser or find open shade to soften the light on their faces. This approach helps to create flattering and well-lit portraits.
6.1. What is Rim Lighting, and How Can You Use It?
Rim lighting is a technique where the subject is backlit, creating a bright outline or “rim” of light around their edges. To use rim lighting effectively, position your subject with the light source directly behind them, ensuring that the light is blocked from hitting the camera lens. This technique separates the subject from the background, adding depth and dimension to the image.
6.2. What is Side Lighting, and When Should You Use It?
Side lighting is a technique where the light source is positioned to the side of the subject, creating shadows on the opposite side. This type of lighting enhances textures, shapes, and forms, adding depth and dimension to the image. Side lighting is particularly effective for portraits, landscapes, and still life photography, where emphasizing details and creating a sense of drama is desired.
 Woman in a field with sunlight behind her
7. What Are Some Ways to Experiment with Lighting in Photography?
Experiment with lighting in photography by exploring various angles, intensities, and light sources. Try shooting during different times of day to capture the unique qualities of light. Use reflectors and diffusers to manipulate light and shadows. Incorporate artificial light sources to add creative effects. Practice and observe how different lighting conditions impact the mood and aesthetics of your images.
7.1. How Can You Use Shadows Creatively in Photography?
Shadows can be used creatively in photography to add depth, drama, and visual interest to images. Use shadows to create patterns, shapes, and textures, enhancing the overall composition. Experiment with different light angles and intensities to manipulate shadow placement and intensity. Shadows can also be used to conceal or reveal elements within the scene, adding a sense of mystery or intrigue.
7.2. What is Backlighting, and How Can You Use It Effectively?
Backlighting is a technique where the light source is positioned behind the subject, creating a silhouette or rim light effect. To use backlighting effectively, ensure that the light source is blocked from directly hitting the camera lens, preventing lens flare and maintaining contrast. Backlighting can be used to create dramatic portraits, enhance landscapes, and add a sense of depth and dimension to images.
8. What is the Inverse Square Law of Light in Photography?
The inverse square law of light in photography states that the intensity of light is inversely proportional to the square of the distance from the light source. This means that as the distance from the light source doubles, the intensity of light decreases to one-quarter of its original value. Understanding this law helps photographers to predict and control the falloff of light, allowing for precise adjustments in lighting setups.
8.1. How Does the Inverse Square Law Affect Lighting Setups?
The inverse square law significantly affects lighting setups by dictating how quickly light intensity decreases with distance. This means that small changes in the distance between the light source and the subject can result in substantial differences in light intensity. Photographers must account for this when positioning lights to ensure consistent and balanced illumination across the scene.
8.2. How Can You Compensate for Light Falloff in Photography?
Compensating for light falloff in photography involves adjusting the lighting setup to maintain consistent illumination across the scene. This can be achieved by moving the light source closer to the subject, using a wider or more powerful light source, or employing reflectors to bounce light into shadowed areas. Understanding and applying these techniques helps to minimize light falloff and create evenly lit images.
9. What Are Some Common Lighting Mistakes to Avoid in Photography?
Common lighting mistakes to avoid in photography include using direct flash, which creates harsh shadows and flat lighting; shooting in direct sunlight, which results in overexposure and unflattering shadows; ignoring white balance, which leads to inaccurate colors; and failing to use reflectors or diffusers to control light and shadows. Avoiding these mistakes will help you achieve more professional and visually appealing images.
9.1. Why is Direct Flash Generally Undesirable in Photography?
Direct flash is generally undesirable in photography because it produces harsh, unflattering light that flattens features, creates strong shadows, and often results in red-eye. This type of lighting lacks depth and dimension, making subjects appear unnatural and unappealing. Diffused or bounced flash is preferred for a softer, more flattering effect.
9.2. How Can You Correct White Balance Issues in Post-Processing?
White balance issues in post-processing can be corrected using software like Adobe Photoshop or Lightroom. Adjust the white balance slider to neutralize color casts, ensuring accurate and pleasing colors. Use the color temperature and tint sliders to fine-tune the overall color balance of the image, achieving a natural and visually appealing result.
 Woman standing by a shop with good lighting
10. How Can dfphoto.net Help You Master Photography Lighting?
dfphoto.net offers a wealth of resources to help you master photography lighting, including detailed tutorials, insightful articles, and a vibrant community of photographers. Explore our comprehensive guides on natural and artificial lighting techniques, learn how to use lighting equipment effectively, and gain inspiration from stunning examples of expertly lit photographs. Join dfphoto.net today to elevate your photography skills and connect with fellow enthusiasts.
10.1. What Resources Does dfphoto.net Provide for Learning About Lighting?
dfphoto.net provides a range of resources for learning about lighting, including in-depth articles, step-by-step tutorials, and expert tips from professional photographers. Our content covers various lighting techniques, equipment reviews, and creative lighting ideas to help photographers of all levels enhance their skills.
10.2. How Can the dfphoto.net Community Help You Improve Your Lighting Skills?
The dfphoto.net community offers a supportive environment for improving your lighting skills. Engage with fellow photographers, share your work, and receive constructive feedback on your lighting techniques. Participate in discussions, ask questions, and learn from the experiences of others. This collaborative approach can accelerate your learning and inspire you to explore new and innovative lighting approaches.
Are you ready to transform your photos with incredible lighting? Visit dfphoto.net today to explore our comprehensive guides, discover stunning photography, and join a community of passionate photographers. Enhance your skills, find inspiration, and start creating breathtaking images. Contact us at +1 (505) 471-6001 or visit our address at 1600 St Michael’s Dr, Santa Fe, NM 87505, United States.
FAQ about Photography Lighting
1. What is the most important thing to consider about lighting in photography?
The most important thing is understanding how light interacts with your subject and affects the mood and quality of the image.
2. What are the three components of lighting?
The three components are intensity, color, and direction.
3. How can I improve the lighting in my photos?
Focus on utilizing natural light, using reflectors, and learning how to control shadows.
4. What is the best light for portrait photography?
Soft, diffused light is generally the most flattering for portrait photography.
5. How can I create a dramatic lighting effect?
Use high contrast lighting with deep shadows and bright highlights to create a dramatic effect.
6. What is the difference between hard and soft light?
Hard light creates strong shadows and high contrast, while soft light is diffused and creates gentle shadows.
7. How do I choose the right lighting equipment?
Consider your budget, the type of photography you do, and the portability of the equipment.
8. What is the best time of day for outdoor photography?
The golden hour (shortly after sunrise and before sunset) offers the best light for outdoor photography.
9. How can I use artificial light to improve my photos?
Experiment with different types of lights, modifiers, and angles to achieve the desired effect.
10. Where can I learn more about photography lighting techniques?
dfphoto.net offers numerous resources, including articles, tutorials, and a community forum where you can ask questions and share your work.