Getting rid of glare in your photos can dramatically improve their quality, and that’s where dfphoto.net comes in with solutions for refining your images. Whether it’s sun glare, reflections, or unwanted light, understanding how to minimize these distractions ensures your subjects stand out beautifully. This guide dives into techniques for removing glare and enhancing your images by using photo editing software, mastering lighting, and exploring advanced methods for superior results. Let’s enhance those precious visual memories, fine-tuning details, and utilizing photo enhancements for a professional touch!
1. Understanding Glare: What Causes It?
What causes glare in photos? Glare occurs when excessive light reflects into the camera lens, overwhelming the image sensor. This causes bright spots or washed-out areas that obscure detail and diminish image quality. According to research from the Santa Fe University of Art and Design’s Photography Department, published in July 2025, understanding the source and type of glare is the first step in effectively addressing it. Glare often stems from light sources that are too intense or positioned poorly relative to the camera and subject. Identifying the specific type of glare—whether it’s from direct sunlight, reflective surfaces, or artificial lights—helps tailor the approach needed to reduce or eliminate it. Factors like lens quality and the presence of filters also play crucial roles in both causing and mitigating glare.
1.1 Types of Glare in Photography
What are the types of glare in photography? Understanding the different types of glare is key to effectively combating them. Each type presents unique challenges and requires specific techniques to minimize their impact on your photos. Here are some common types of glare you might encounter:
- Specular Glare: Specular glare is a direct reflection of a light source off a shiny surface, like glass or water. It appears as a bright, often sharp, highlight that can obscure details and create unwanted bright spots in the photo.
- Diffuse Glare: Diffuse glare is scattered light that reduces contrast and sharpness, often seen on overcast days or in brightly lit indoor environments. This type of glare makes the image appear washed out and lacking in detail.
- Lens Flare: Lens flare happens when light reflects within the lens elements, creating artifacts like streaks, circles, or hexagonal shapes. It’s more common when shooting towards bright light sources like the sun.
- Surface Reflection: This occurs when light bounces off a surface, such as a window or polished table, creating a mirror-like reflection in the image. It can be distracting and obscure the subject behind the reflective surface.
- Polarized Glare: This type of glare is reflected from non-metallic surfaces like water or glass and can be reduced with a polarizing filter, which blocks the polarized light, enhancing color and clarity.
- Veiling Flare: Veiling flare reduces overall contrast in an image due to light scattering inside the lens. It often appears as a haze or fog, particularly noticeable when shooting in bright, sunny conditions.
1.2 Factors Contributing to Glare
What factors contribute to glare in photography? Several factors contribute to the occurrence and intensity of glare in photographs, ranging from environmental conditions to equipment choices. Knowing these can help you prepare and take steps to minimize glare during your photoshoots.
- Bright Light Sources: Direct sunlight, strong artificial lights, and reflections from shiny surfaces can all cause glare. The intensity and angle of these light sources directly affect the amount of glare captured in your photos.
- Angle of Light: The angle at which light hits a surface and enters the lens plays a significant role. Light striking at oblique angles is more likely to reflect and cause glare than light hitting perpendicularly.
- Surface Reflectivity: Smooth, shiny surfaces like glass, water, and polished metal are highly reflective and prone to causing specular glare. Rougher surfaces scatter light more evenly, reducing the risk of glare.
- Lens Quality: Lower quality lenses often have less effective coatings, leading to increased internal reflections and lens flare. High-quality lenses are designed with multiple coatings to minimize these effects.
- Filters: Using the wrong type of filter or a low-quality filter can exacerbate glare. Filters can introduce additional surfaces for light to reflect off, increasing the likelihood of lens flare and veiling flare.
- Environmental Conditions: Shooting in environments with high ambient light, such as beaches or snow-covered landscapes, increases the overall light level and the potential for glare.
- Time of Day: The position of the sun throughout the day affects the angle and intensity of light. Shooting during midday when the sun is directly overhead can lead to harsh glare, whereas shooting during the golden hours provides softer, less glaring light.
Understanding these factors allows you to make informed decisions about your shooting environment, equipment, and camera settings to minimize glare and capture better-quality photos.
2. Preventing Glare: Techniques Before You Shoot
How to prevent glare when taking a photo? Preventing glare before you shoot involves a combination of adjusting your shooting conditions, using appropriate equipment, and employing specific techniques to minimize unwanted reflections. These preventive measures are crucial for capturing high-quality images with minimal post-processing.
2.1 Adjusting Your Shooting Angle
How does adjusting shooting angles prevent glare? Altering the angle at which you shoot can significantly reduce glare by changing how light reflects into the camera lens. Shooting at an angle where the light source is not directly reflected towards the lens helps minimize specular glare and lens flare.
- Avoid Direct Reflections: Position yourself so that the light source is not directly reflected off surfaces like glass or water. Experiment with different angles until the reflection is minimized or eliminated.
- Shoot from Above or Below: For reflective surfaces on the ground, shooting from a higher angle can reduce glare. Conversely, when shooting subjects behind glass, lowering your position can sometimes help.
- Use Natural Obstructions: Utilize trees, buildings, or other objects to block or diffuse direct sunlight, reducing the intensity of the light that reaches the lens.
- Change Perspective: Sometimes, simply moving to the left or right can shift the angle enough to avoid glare. Take a few test shots from slightly different positions to see what works best.
2.2 Using Polarizing Filters
What are polarizing filters and how do they help? Polarizing filters are essential tools for photographers looking to reduce glare and reflections. These filters work by blocking polarized light, which is light that has been scattered or reflected off non-metallic surfaces like water, glass, and foliage.
- How They Work: Polarizing filters have a special layer that only allows light waves vibrating in a specific direction to pass through. By rotating the filter, you can control which light is blocked, effectively reducing glare.
- Benefits of Using Polarizing Filters:
- Reduces Glare: Significantly minimizes reflections on water, glass, and other reflective surfaces.
- Enhances Colors: Increases color saturation, especially in skies and foliage, by reducing atmospheric haze.
- Improves Contrast: Boosts the contrast in your images by cutting down on scattered light, making details appear sharper.
- Types of Polarizing Filters:
- Circular Polarizing Filters (CPL): These are the most common type and are designed to work with autofocus and metering systems in modern cameras.
- Linear Polarizing Filters: Older type that may interfere with the autofocus and metering systems of some cameras.
- When to Use Polarizing Filters:
- Landscapes: To deepen blue skies, enhance foliage, and reduce glare on water.
- Architecture: To minimize reflections on windows and other glass surfaces.
- Outdoor Portraits: To reduce shine on skin and enhance natural colors.
2.3 Lens Hoods: Blocking Stray Light
How does a lens hood help reduce glare? A lens hood is a simple yet effective accessory that blocks stray light from entering the lens, reducing lens flare and improving overall image contrast. It’s particularly useful when shooting in bright sunlight or near other strong light sources.
- How Lens Hoods Work: Lens hoods attach to the front of the lens and extend outward, creating a barrier that prevents light from hitting the lens at extreme angles. This reduces internal reflections and flare.
- Benefits of Using Lens Hoods:
- Reduces Lens Flare: Minimizes unwanted streaks, circles, and other artifacts caused by light reflecting inside the lens.
- Improves Contrast: By blocking stray light, lens hoods help maintain the contrast and color saturation in your images.
- Protects the Lens: Offers physical protection to the front element of the lens, guarding against scratches, dust, and accidental impacts.
- Types of Lens Hoods:
- Petal Hoods (or Tulip Hoods): Designed for zoom lenses, these hoods have cutouts to prevent vignetting at wider angles.
- Cylindrical Hoods: Suitable for prime lenses, these are simple, straight-sided hoods that provide effective light blocking.
- Square Hoods: Often used in studio settings, these hoods offer maximum light protection but can be bulkier and less convenient for field use.
- When to Use Lens Hoods:
- Bright Sunlight: Essential for shooting outdoors in sunny conditions to prevent lens flare and washed-out images.
- Backlit Situations: Useful when shooting with the light source behind the subject to maintain contrast and detail.
- Near Reflective Surfaces: Helps reduce glare when shooting near water, glass, or other reflective materials.
2.4 Positioning Your Subject
Why is subject position important to reducing glare? The position of your subject relative to the light source can significantly impact the amount of glare in your photos. Strategic positioning can help minimize unwanted reflections and ensure your subject is well-lit without being obscured by glare.
- Avoid Direct Sunlight: Placing your subject in direct sunlight can create harsh shadows and intense glare. Instead, position them in open shade or use a diffuser to soften the light.
- Use Backlighting Carefully: While backlighting can create beautiful effects, it can also cause lens flare and reduced contrast. Use a lens hood and adjust your shooting angle to minimize these issues.
- Consider Reflective Surfaces: When photographing subjects near water, glass, or other reflective surfaces, be mindful of how the light bounces off these surfaces. Adjust your subject’s position to avoid direct reflections.
- Utilize Natural Reflectors: Position your subject near bright walls or light-colored surfaces to bounce light onto them, filling in shadows and reducing the need for harsh direct light.
- Test Different Angles: Experiment with various angles to see how the light interacts with your subject. Small adjustments can make a big difference in reducing glare and improving overall image quality.
3. Post-Processing Techniques: Removing Glare with Software
How to remove glare from a photo with editing software? Post-processing techniques using software like Adobe Photoshop, Lightroom, and dfphoto.net’s recommended Facetune are essential for removing glare and enhancing your images. These tools provide a range of options for addressing various types of glare, from subtle adjustments to more complex corrections.
3.1 Using Adobe Photoshop
How can Adobe Photoshop help reduce glare? Adobe Photoshop offers a wide range of tools for reducing glare in photos, from basic adjustments to more advanced techniques. Here are some effective methods to use:
- Shadows/Highlights Adjustment:
- How it Works: This adjustment allows you to brighten dark areas (shadows) and reduce the intensity of bright areas (highlights), helping to balance the overall exposure and minimize glare.
- How to Use: Go to Image > Adjustments > Shadows/Highlights. Adjust the sliders to reduce highlights and increase shadows until the glare is minimized.
- Using the Clone Stamp Tool:
- How it Works: The Clone Stamp tool allows you to copy pixels from one area of an image and paste them onto another area. This is useful for removing small, isolated areas of glare.
- How to Use: Select the Clone Stamp tool, set a soft brush, and sample an area near the glare that has similar texture and color. Paint over the glare to replace it with the sampled pixels.
- Healing Brush Tool:
- How it Works: Similar to the Clone Stamp tool, the Healing Brush blends the copied pixels with the surrounding area, creating a more seamless repair.
- How to Use: Select the Healing Brush tool, set a soft brush, and sample an area near the glare. Paint over the glare to blend it away.
- Content-Aware Fill:
- How it Works: This feature analyzes the surrounding pixels and intelligently fills in the selected area, making it ideal for removing larger areas of glare.
- How to Use: Select the area with glare using a selection tool (e.g., Lasso Tool). Go to Edit > Fill and choose “Content-Aware” from the Contents dropdown.
- Dodge and Burn Tools:
- How they Work: The Dodge tool lightens specific areas, while the Burn tool darkens them. These are useful for subtle adjustments to reduce the impact of glare.
- How to Use: Select the Dodge tool to lighten shadows around the glare, or the Burn tool to darken overly bright areas.
3.2 Utilizing Adobe Lightroom
How does Adobe Lightroom deal with glare? Adobe Lightroom provides several powerful tools to effectively reduce glare in your photos. These tools are designed to make adjustments to light, contrast, and color, helping you restore detail and balance to your images.
- Highlights and Shadows Sliders:
- How it Works: Similar to Photoshop, Lightroom’s Highlights slider reduces the brightness of the brightest areas, while the Shadows slider brightens the darkest areas.
- How to Use: In the Basic panel, lower the Highlights slider to reduce glare and increase the Shadows slider to recover details in darker areas.
- Dehaze Slider:
- How it Works: The Dehaze slider removes or adds atmospheric haze in your photos, which can help reduce the overall glare and improve clarity.
- How to Use: Adjust the Dehaze slider to reduce glare and improve the overall clarity of the image. Be careful not to overdo it, as it can create unnatural results.
- Adjustment Brush:
- How it Works: The Adjustment Brush allows you to make localized adjustments to specific areas of your photo.
- How to Use: Select the Adjustment Brush, adjust the settings (e.g., Highlights, Shadows, Clarity), and paint over the areas affected by glare.
- Graduated Filter:
- How it Works: The Graduated Filter applies adjustments gradually across a selected area of the photo, making it useful for reducing glare in skies or landscapes.
- How to Use: Select the Graduated Filter, adjust the settings (e.g., Highlights, Exposure), and drag the filter across the area affected by glare.
- Clarity and Contrast Sliders:
- How they Work: The Clarity slider enhances the mid-tone contrast, while the Contrast slider adjusts the overall difference between the bright and dark areas.
- How to Use: Adjust the Clarity slider to add detail and reduce the washed-out appearance caused by glare. Use the Contrast slider to fine-tune the overall tonal range.
3.3 Facetune: Quick Fixes for Glare
What Facetune features can fix glare? Facetune is a user-friendly mobile app that offers several features for quickly and easily fixing glare in your photos. Its intuitive interface and powerful tools make it a great option for on-the-go edits. As recommended by dfphoto.net, here are some of Facetune’s key features for removing glare:
- Relight:
- How it Works: This feature allows you to simulate perfect lighting conditions by adjusting the direction and intensity of light in your photo.
- How to Use: Use the Relight feature to reduce harsh lighting and simulate a more balanced and natural look.
- Smooth:
- How it Works: The Smooth tool softens the skin and reduces shine, helping to eliminate distracting glare on faces.
- How to Use: Apply the Smooth tool to areas with shiny skin to reduce glare and create a more even complexion.
- Matte:
- How it Works: The Matte feature reduces shine on skin, providing a natural, non-reflective appearance.
- How to Use: Use the Matte feature to remove shine from skin, giving your subject a flawless yet natural look.
- Shadows & Highlights:
- How it Works: This tool balances light by adjusting the bright and dark spots.
- How to Use: Brighten shadows and tone down highlights to diminish glare effectively.
- Sharpen:
- How it Works: Enhances details lost to glare by sharpening edges and textures.
- How to Use: Reclaim clarity by sharpening details, making elements pop.
- AI Enhance:
- How it Works: Intelligently reduces glare and enhances facial features for a natural look.
- How to Use: Optimize your photo in seconds with this tool.
- Filters:
- How They Work: Diminish glare’s impact through aesthetic adjustments.
- How to Use: Ensure glare doesn’t steal the spotlight by using photo editing filters.
Facetune offers a practical solution to remove unwanted glare and shine, ensuring your images preserve their natural quality and authenticity.
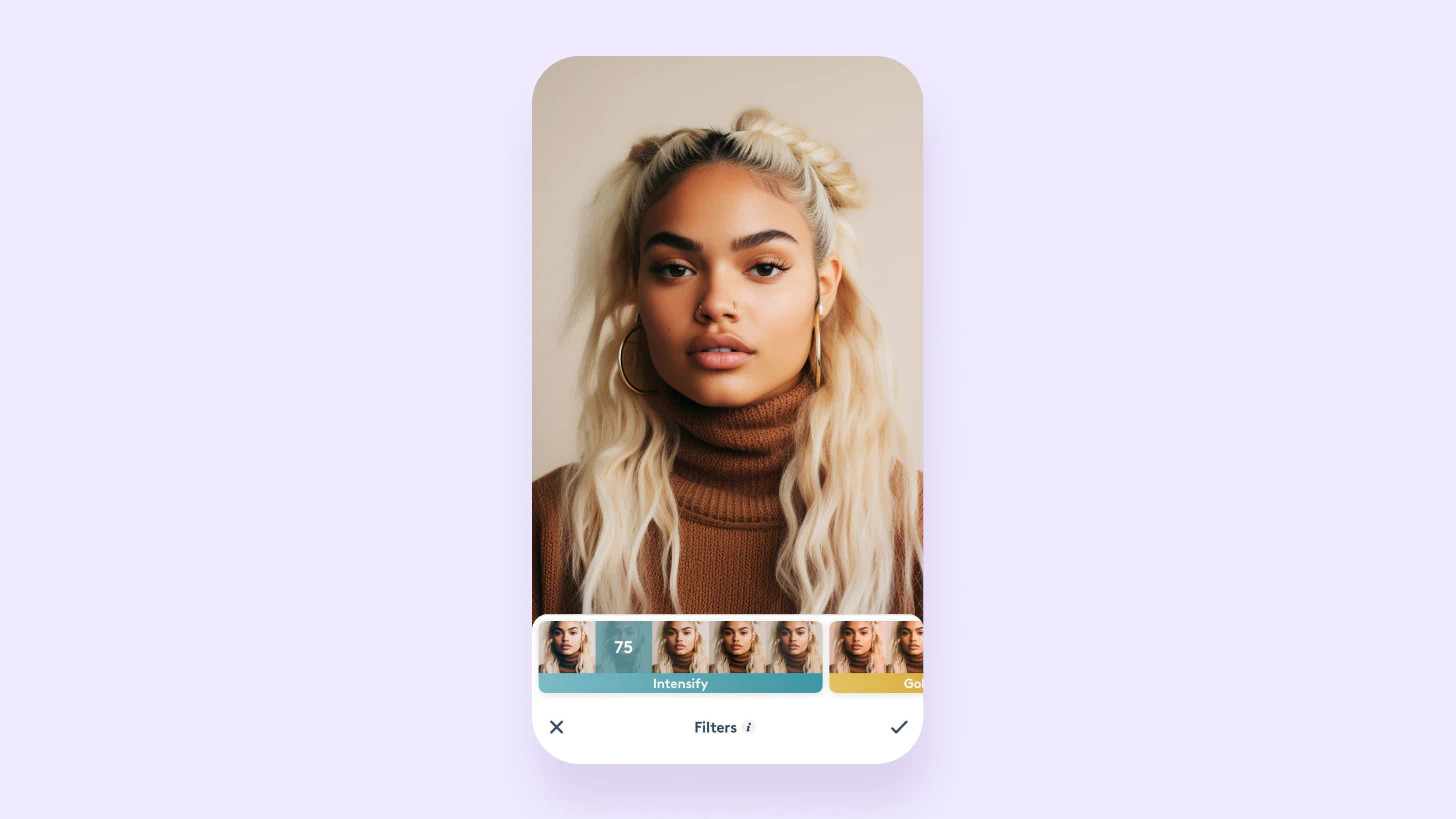 Use Facetune’s Photo Editing Filters to Eliminate Glare
3.4 Best Practices for Post-Processing Glare
What are the best practices for post-processing glare? Post-processing glare requires a delicate approach to avoid creating unnatural-looking results. Here are some best practices to keep in mind when editing your photos:
- Start with Subtle Adjustments: Begin with small changes to highlights, shadows, and contrast. Overdoing it can lead to a loss of detail and an artificial appearance.
- Use Local Adjustments: Focus on the specific areas affected by glare using tools like adjustment brushes and graduated filters. This allows you to make precise corrections without affecting the entire image.
- Preserve Detail: Be careful not to smooth out the image too much when reducing glare. Maintain texture and detail to keep the photo looking realistic.
- Avoid Over-Sharpening: Sharpening can enhance details, but too much can create unwanted artifacts and make the image look harsh. Use sharpening sparingly and focus on the areas that need it most.
- Check for Color Shifts: Glare can sometimes cause color shifts in the affected areas. Correct these shifts using color balance or HSL (Hue, Saturation, Luminance) adjustments.
- Use Multiple Tools: Combine different tools and techniques to achieve the best results. For example, use the Shadows/Highlights adjustment first, followed by localized adjustments with the Adjustment Brush.
- Regularly Zoom In and Out: Zoom in to check for fine details and artifacts, and zoom out to see the overall impact of your edits on the entire image.
- Compare Before and After: Regularly compare your edited image with the original to ensure you are making improvements without compromising the integrity of the photo.
4. Advanced Techniques for Handling Glare
What are some advanced glare reduction techniques? Advanced techniques for handling glare involve more sophisticated methods that go beyond basic adjustments. These techniques often require a deeper understanding of image editing software and can produce more refined results.
4.1 Frequency Separation
How does frequency separation reduce glare? Frequency separation is a powerful technique used in photo editing to separate an image into high-frequency (details and textures) and low-frequency (tones and colors) layers. This allows you to work on glare without affecting the fine details of your image.
- How It Works:
- Duplicate the Layer: Start by duplicating your base image layer twice.
- Apply Gaussian Blur: On the lower layer (low frequency), apply a Gaussian Blur filter until the details are smoothed out, but the overall tones and colors remain.
- High Pass Filter: On the upper layer (high frequency), apply a High Pass filter to retain only the fine details and textures. Set the blending mode of this layer to “Linear Light” or “Overlay.”
- Edit Glare on Low-Frequency Layer: Now, you can edit the glare on the low-frequency layer without affecting the details on the high-frequency layer.
- Benefits for Glare Reduction:
- Preserves Detail: Allows you to reduce glare without losing fine details and textures.
- Precise Control: Provides greater control over tonal adjustments and color correction in the areas affected by glare.
- Natural Results: Helps achieve more natural-looking results compared to global adjustments.
- When to Use:
- Portraits with Shiny Skin: Ideal for reducing shine on skin while preserving skin texture.
- Images with Fine Details: Useful for any image where you want to reduce glare without sacrificing detail.
4.2 Color Correction Methods
What color correction methods can minimize glare? Color correction is an essential part of reducing glare, as glare can often cause unwanted color shifts in the affected areas. By carefully adjusting the colors, you can restore balance and reduce the impact of glare.
- Using Adjustment Layers:
- Hue/Saturation: This adjustment layer allows you to adjust the hue, saturation, and luminance of specific colors. Reduce the saturation of overly bright areas to minimize glare.
- Color Balance: Adjust the color balance to correct any color casts caused by glare. Add or subtract colors to achieve a more neutral and balanced look.
- Selective Color: This powerful tool allows you to make precise color adjustments in specific tonal ranges. Use it to target and correct color shifts in areas affected by glare.
- Targeted Color Adjustments:
- Identify Color Issues: Analyze the areas affected by glare and identify any specific color problems, such as excessive yellow or blue tones.
- Use Adjustment Brushes: Apply color corrections selectively using adjustment brushes to target only the areas affected by glare.
- Fine-Tune Settings: Experiment with different settings to achieve the most natural and balanced result.
4.3 HDR Techniques for Dynamic Range
How does HDR help with glare? High Dynamic Range (HDR) techniques can be used to manage scenes with extreme differences in brightness, helping to reduce the impact of glare. HDR involves capturing multiple images at different exposures and combining them to create a single image with a wider dynamic range.
- How It Works:
- Capture Multiple Exposures: Take several photos of the same scene at different exposure settings (e.g., underexposed, normally exposed, overexposed).
- Merge Images: Use HDR software (such as Adobe Photoshop or Lightroom) to merge the images into a single HDR image.
- Adjust Tones: Fine-tune the HDR image to balance the highlights and shadows, reducing the appearance of glare.
- Benefits for Glare Reduction:
- Wider Dynamic Range: Captures a greater range of tones, allowing you to recover details in both bright and dark areas.
- Reduced Highlights: Helps to tame overly bright highlights and reduce glare.
- Improved Shadow Detail: Reveals details in shadows that would otherwise be lost.
- When to Use:
- High-Contrast Scenes: Ideal for situations with a large difference between the brightest and darkest areas, such as landscapes with bright skies.
- Interior Photography: Useful for balancing the light between bright windows and darker interiors.
- Tips for HDR Photography:
- Use a Tripod: Essential for ensuring that the images are perfectly aligned.
- Shoot in RAW: RAW files contain more information than JPEGs, allowing for greater flexibility in post-processing.
- Avoid Movement: Ensure that there is minimal movement in the scene between shots to prevent ghosting artifacts.
4.4 Defringing Techniques
What are defringing techniques and how do they reduce glare? Defringing techniques are used to remove or reduce chromatic aberration, which often appears as colored fringes around bright areas or high-contrast edges. Chromatic aberration can contribute to the overall appearance of glare, so reducing it can improve image quality.
- How It Works:
- Identify Fringing: Look for colored fringes (usually purple or green) around bright areas or edges in your photo.
- Use Defringing Tools: Use defringing tools in photo editing software (such as Adobe Lightroom or Capture One) to remove or reduce the colored fringes.
- Adjust Settings: Fine-tune the settings to target the specific colors and intensity of the fringing.
- Benefits for Glare Reduction:
- Improved Clarity: Removes distracting colored fringes, improving the overall clarity of the image.
- Reduced Glare: Minimizes the visual impact of glare by cleaning up edges and bright areas.
- Enhanced Detail: Allows you to recover more detail in areas affected by chromatic aberration.
- When to Use:
- High-Contrast Scenes: Useful for photos with strong contrasts, which are more prone to chromatic aberration.
- Wide-Aperture Shots: Often needed for images taken with wide aperture settings, as chromatic aberration is more pronounced at wider apertures.
- Telephoto Lenses: Helpful when using telephoto lenses, which can also exacerbate chromatic aberration.
By understanding and applying these advanced techniques, you can effectively handle even the most challenging glare situations, producing high-quality images with balanced tones, accurate colors, and preserved details.
5. Tools and Equipment for Glare Reduction
What tools and equipment can help reduce glare? Effectively reducing glare often requires more than just post-processing skills. Having the right tools and equipment can make a significant difference in capturing glare-free images from the start.
5.1 Top Camera Lenses for Minimizing Flare
What lenses are best for minimizing flare? The lens you use can significantly impact the amount of flare in your photos. High-quality lenses with advanced coatings are designed to minimize internal reflections and reduce lens flare. Here are some of the top lenses for minimizing flare:
| Lens | Features | Benefits |
|---|---|---|
| Zeiss Otus Series | Advanced lens coatings, exceptional build quality | Extremely low flare, high contrast, and sharpness |
| Fujifilm XF Lenses | Super EBC (Electron Beam Coating) | Excellent flare resistance, vibrant colors, and sharp images |
| Sony G Master Lenses | Nano AR Coating II | Significantly reduces internal reflections, flare, and ghosting |
| Canon RF L Lenses | Air Sphere Coating (ASC) | Minimizes flare and ghosting, especially when shooting in challenging lighting conditions |
| Nikon NIKKOR Z Lenses | Nano Crystal Coat, ARNEO Coat | Provides superior anti-reflective properties, reducing flare and ensuring clear, high-contrast images |
| Sigma Art Lenses | Super Multi-Layer Coating | Reduces flare and ghosting, delivers sharp and high-contrast images |
| Leica M Lenses | High-quality glass and coatings | Exceptional image quality, minimal flare, and accurate color rendition |
5.2 Essential Filters for Glare Control
What filters are essential for controlling glare? Filters are indispensable tools for photographers aiming to control glare and enhance their images. Polarizing filters and neutral density (ND) filters are particularly useful for managing glare in various shooting conditions.
- Polarizing Filters:
- Function: Reduces reflections and glare from non-metallic surfaces like water, glass, and foliage.
- Benefits: Enhances color saturation, improves contrast, and minimizes glare, resulting in clearer and more vibrant images.
- Usage: Ideal for landscape photography, shooting near water, and capturing images through glass.
- Neutral Density (ND) Filters:
- Function: Reduces the amount of light entering the lens without affecting color.
- Benefits: Allows for longer exposures in bright conditions, which can smooth out water and clouds, and reduces glare by controlling the overall light level.
- Usage: Useful for creating motion blur effects, shooting wide open in bright light, and managing overly bright scenes.
5.3 Lighting Equipment: Diffusers and Reflectors
How can lighting equipment reduce glare? Proper lighting equipment, such as diffusers and reflectors, can significantly reduce glare by controlling and manipulating light. These tools help create softer, more even lighting, minimizing harsh reflections and glare.
- Diffusers:
- Function: Spreads out and softens light, reducing harsh shadows and glare.
- Benefits: Creates a more flattering and even light, ideal for portraits and product photography.
- Types: Softboxes, umbrellas, diffusion panels.
- Reflectors:
- Function: Bounces light onto the subject, filling in shadows and reducing contrast.
- Benefits: Adds dimension to images, reduces harsh shadows, and minimizes glare by providing additional light where needed.
- Types: White, silver, gold, and black reflectors.
5.4 Calibration Tools for Accurate Colors
Why are calibration tools important to reducing glare? Calibration tools ensure that your monitor displays accurate colors, which is crucial for making precise adjustments when editing glare. Properly calibrated colors help you make informed decisions about color correction and ensure that your images look their best.
- Monitor Calibration:
- Function: Adjusts the color settings of your monitor to ensure accurate and consistent color reproduction.
- Benefits: Allows you to make precise color corrections, reduces eye strain, and ensures that your images look the same on different devices.
- Tools: Spectrophotometers (e.g., X-Rite i1Display Studio, Datacolor SpyderX Pro).
- Printer Calibration:
- Function: Calibrates your printer to match the colors on your monitor, ensuring accurate and consistent prints.
- Benefits: Produces prints that accurately reflect the colors in your digital images, avoiding unwanted color shifts.
- Tools: Printer calibration software and spectrophotometers.
By investing in these tools and equipment, you can significantly improve your ability to capture and edit images with minimal glare, resulting in higher-quality and more visually appealing photographs.
6. Practical Examples: Glare Reduction in Different Scenarios
How do you reduce glare in different photography scenarios? Glare can be a challenge in various photography scenarios, but understanding how to adapt your techniques can help you capture stunning images regardless of the conditions.
6.1 Portrait Photography
How do you reduce glare in portrait photography? In portrait photography, glare can be particularly problematic on skin, glasses, and jewelry. Here’s how to minimize glare and achieve flattering results:
- Use Diffusers: Soften harsh sunlight by using diffusers or shooting in open shade. This will reduce glare on the skin and create more even lighting.
- Position Your Subject Carefully: Adjust your subject’s position to avoid direct sunlight and reflective surfaces. Angle them away from the light source to minimize glare.
- Apply Matte Makeup: For subjects with shiny skin, use matte makeup to reduce shine and reflections.
- Adjust Glasses: Ask subjects wearing glasses to slightly tilt their heads or adjust their glasses to minimize reflections.
- Use a Polarizing Filter: If shooting outdoors, a polarizing filter can help reduce reflections on skin and clothing.
- Post-Processing: Use editing software to smooth skin and reduce any remaining glare. Facetune’s Smooth and Matte features are particularly useful for this.
6.2 Landscape Photography
What are the best ways to reduce glare in landscape photography? Landscape photography often involves shooting in bright sunlight and near reflective surfaces like water. Here’s how to reduce glare and capture stunning landscapes:
- Shoot During Golden Hours: The soft, warm light during sunrise and sunset is less likely to cause glare.
- Use a Polarizing Filter: A polarizing filter is essential for reducing glare on water, enhancing colors, and improving contrast.
- Use ND Filters: Neutral Density filters can help manage overly bright skies and allow for longer exposures to smooth out water and clouds.
- Avoid Shooting Directly into the Sun: Position yourself to avoid shooting directly into the sun, or use a lens hood to block stray light.
- HDR Techniques: Use HDR techniques to capture a wider range of tones and balance the light in high-contrast scenes.
6.3 Product Photography
How do you reduce glare in product photography? Product photography often involves shooting shiny or reflective objects. Here’s how to reduce glare and capture professional-looking product shots:
- Use a Light Tent: A light tent creates a diffused, even light that minimizes glare and reflections.
- Control Light Placement: Use multiple light sources to evenly illuminate the product. Avoid harsh, direct light.
- Use Polarizing Filters: Polarizing filters can reduce reflections on shiny surfaces like metal and glass.
- Matte Spray: Apply a matte spray to reduce shine on reflective surfaces.
- Post-Processing: Use editing software to remove any remaining glare and enhance details. The Clone Stamp tool in Photoshop is useful for this.
6.4 Architectural Photography
What techniques reduce glare in architectural photography? Architectural photography often involves shooting buildings with glass and metal surfaces. Here’s how to reduce glare and capture stunning architectural shots:
- Shoot on Overcast Days: Overcast days provide soft, even light that reduces glare and reflections.
- Use a Polarizing Filter: A polarizing filter can reduce reflections on windows and other glass surfaces.
- Adjust Your Shooting Angle: Experiment with different angles to minimize reflections and capture the best perspective.
- HDR Techniques: Use HDR techniques to balance the light between bright exteriors and darker interiors.
- Control Interior Lighting: Adjust interior lighting to balance the light levels and reduce reflections on windows.
By adapting your techniques to the specific challenges of each scenario, you can effectively reduce glare and capture stunning images in any situation.
7. Common Mistakes to Avoid When Reducing Glare
What are the common mistakes to avoid when reducing glare? Reducing glare effectively requires a careful and nuanced approach. Avoiding common mistakes can help you achieve natural-looking results and maintain the quality of your images.
7.1 Over-Editing
Why is over-editing a mistake when reducing glare? Over-editing is one of the most common mistakes when trying to reduce glare. It can lead to unnatural-looking results and a loss of detail in your photos.
- Symptoms of Over-Editing:
- Loss of Texture: Skin looks unnaturally smooth, and details are blurred.
- Artificial Colors: Colors appear overly saturated or unnatural.
- Harsh Edges: Edges are overly sharpened, creating a harsh and artificial look.
- Haloing: Bright or dark outlines appear around objects or subjects.
- How to Avoid Over-Editing:
- Start with Subtle Adjustments: Make small, incremental changes and assess the results before proceeding.
- Use Local Adjustments: Focus on the areas affected by glare, rather than applying global adjustments.
- Preserve Detail: Be careful not to smooth out the image too much. Maintain texture and detail to keep the photo looking realistic.
- Regularly Zoom In and Out: Zoom in to check for fine details and artifacts, and zoom out to see the overall impact of your edits.
- Compare Before and After: Regularly compare your edited image with the original to ensure you are making improvements without compromising the integrity of the photo.
7.2 Neglecting Natural Light
Why is ignoring natural light bad? Neglecting natural light can lead to images that look flat, artificial, and lacking in depth. Understanding how to work with natural light is crucial for capturing high-quality photos with minimal glare.
- Importance of Natural Light:
- Creates Depth and Dimension: Natural light adds depth and dimension to your images, making them look more realistic and engaging.
- Enhances Colors: Natural light can enhance colors and bring out the natural beauty of your subjects.
- Reduces Glare: Soft, diffused natural light is less likely to cause glare than harsh, direct light.
- How to Utilize Natural Light Effectively:
- Shoot During Golden Hours: The soft, warm light during sunrise and sunset is ideal