Memory cards, especially SD cards, are incredibly convenient for storing photos and videos from digital cameras, smartphones, and other devices. If you’re wondering how to get those precious memories from your SD card onto your computer, you’re in the right place. This guide will walk you through the easy steps to transfer your photos, ensuring they are safely backed up and ready for viewing, editing, or sharing.
 memory card, digital camera, computer
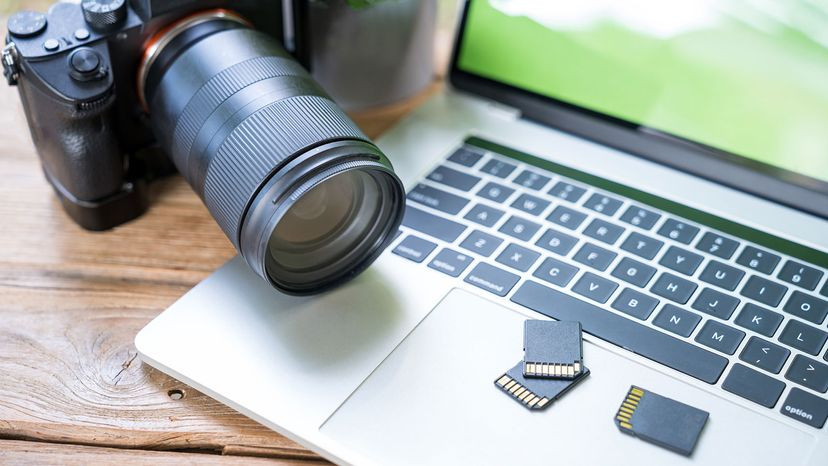
Transferring photos from an SD card to a laptop using a memory card reader.
Methods to Get Photos Off Your SD Card
There are a few straightforward methods to transfer your photos from an SD card to your computer. The best approach for you might depend on the equipment you have available – whether your computer has a built-in SD card reader or if you need to use an external reader or a USB cable.
Using a Built-In SD Card Reader
Many laptops and some desktop computers come equipped with a built-in SD card reader. This slot allows you to directly insert your SD card into your computer, making it a very direct and often fast method for transferring your photos.
Using an External SD Card Reader
If your computer doesn’t have a built-in reader, or if you’re using a different type of memory card format like CompactFlash, an external SD card reader is an essential accessory. These readers are inexpensive, portable, and plug into your computer via a USB port, effectively adding an SD card slot to any device.
Connecting Your Camera or Phone via USB Cable
Another option is to connect your camera or smartphone directly to your computer using a USB cable. While this method keeps the SD card inside your device, it can sometimes be slower than transferring directly from the card itself, especially with cameras. However, it’s a viable alternative, particularly for devices like iPhones that don’t use SD cards and rely on USB connections for data transfer.
Step-by-Step Guide to Transferring Photos from SD Card
Regardless of the method you choose, the basic steps to get your photos off your SD card are quite similar. Here’s a detailed walkthrough:
1. Safely Remove the SD Card
First, ensure your camera or phone is turned off. Then, locate the SD card slot – it’s usually on the side of cameras or phones and might be protected by a small cover. Gently push the SD card in slightly until you hear a click; this will release the card, allowing you to pull it out. Handle the card carefully by its edges to avoid damaging the connectors.
2. Insert the SD Card into the Reader
If you’re using a built-in reader, simply insert the SD card into the slot on your laptop or desktop, ensuring it’s oriented correctly (usually label-up). If you’re using an external reader, plug the reader into a USB port on your computer and then insert the SD card into the reader.
3. Access Your Photos on Your Computer
Once the SD card is inserted, your computer should recognize it as a new removable drive. On Windows, a notification might pop up asking what you want to do with the device. You can choose to “Open folder to view files” or “Import photos and videos.” On macOS, the SD card will typically appear on your desktop and in the Finder sidebar under “Locations.”
4. Copy or Import Your Photos
Now you have a few options to transfer your photos:
- Drag and Drop: Open the SD card drive and navigate to the folder containing your photos (usually named “DCIM”). Open a new window and navigate to the folder on your computer where you want to save your photos (like your Pictures folder). Then, simply drag and drop the photo files or folders from the SD card window to your computer folder window.
- Copy and Paste: Select the photos you want to transfer from the SD card, right-click, and choose “Copy.” Then, navigate to your desired folder on your computer, right-click in an empty area, and select “Paste.”
- Import Function (Windows Photos App): If you chose “Import photos and videos” on Windows, the Photos app will open. You can select the photos you want to import and choose a destination folder. This method often offers options to organize your photos by date.
Best Practices for Managing Your Photos After Transfer
Once you’ve successfully transferred your photos, consider these best practices to keep your photo library organized and safe:
Organize Your Photos
Take some time to organize your photos into folders by date, event, or category. This will make it much easier to find specific photos later. Consider renaming files with descriptive names rather than the default camera filenames.
Backup Your Photos
Always backup your photos! Consider using cloud backup services, external hard drives, or network-attached storage (NAS) to create redundant copies of your precious memories. Losing photos due to hard drive failure or accidental deletion can be heartbreaking, so backups are crucial.
Safely Eject the SD Card
After transferring your photos, it’s important to safely eject the SD card from your computer. On Windows, right-click on the SD card drive in File Explorer and select “Eject.” On macOS, drag the SD card icon from your desktop to the Trash icon in the Dock (which turns into an eject icon). Wait for a confirmation message before physically removing the SD card from the reader.
Transferring photos from your SD card to your computer is a fundamental skill for any photographer or smartphone user. By following these simple steps and best practices, you can ensure your photos are safely transferred, well-organized, and backed up for years to come.
