Getting photos from camera to phone is a breeze, allowing you to share your favorite memories instantly; dfphoto.net provides expert guidance on seamless photo transfers and mastering visual storytelling. Learn various methods to transfer digital camera photos to your smartphone, enhance them with mobile editing tools, and share your visual artistry with the world, explore photo management, and artistic vision.
1. Understanding Your Options For Camera-To-Phone Transfers
What are the different ways to transfer photos from your camera to your phone? You can transfer photos from your camera to your phone using Wi-Fi, USB cables, SD card readers, OTG cables, or cloud services. Choosing the right method depends on your camera’s features, your phone’s compatibility, and your personal preferences. Let’s explore each option in detail.
- Wi-Fi Connection: Many modern cameras have built-in Wi-Fi, which allows you to connect directly to your smartphone. This is a wireless method, so you don’t need any cables.
- USB Cable: This method involves connecting your camera to your phone using a USB cable. You might need an adapter, especially if you’re using an iPhone.
- SD Card or SD Card Reader: If your phone has an SD card slot, you can insert the SD card directly into your phone. If not, you can use an SD card reader that connects to your phone.
- OTG Cable: An OTG (On-The-Go) cable is particularly useful for Android users. It allows you to connect your camera directly to your phone via USB.
- Cloud Services: You can upload your photos to cloud services like Google Photos, iCloud, Dropbox, or Photobucket and then access them on your phone.
2. Utilizing Wi-Fi For Wireless Photo Transfers
How can you use Wi-Fi to transfer photos from your camera to your phone? Using Wi-Fi is a convenient way to transfer photos wirelessly, provided your camera has Wi-Fi capabilities. This method typically involves using a dedicated app provided by the camera manufacturer.
2.1. Essential Components
What do you need to transfer photos via Wi-Fi?
- A Wi-Fi-enabled camera
- Your smartphone (iPhone or Android)
- The camera manufacturer’s mobile app
- A Wi-Fi network (either your home network or the one created by your camera)
2.2. Step-by-Step Instructions
What are the exact steps to transfer photos using Wi-Fi?
-
Install the Camera App: Download the official app from your camera manufacturer from your phone’s app store.
-
Enable Wi-Fi on Your Camera: Navigate to the settings menu on your camera and turn on the Wi-Fi feature.
-
Connect Your Phone:
- If your camera creates its own Wi-Fi network, go to your phone’s Wi-Fi settings and connect to the camera’s network.
- If your camera connects to an existing Wi-Fi network, ensure both your camera and phone are connected to the same network.
-
Select and Transfer Photos: Open the camera app on your phone. You should see the photos stored on your camera. Select the ones you want and tap the transfer button.
-
Disconnect: After the transfer is complete, disconnect from the camera’s Wi-Fi to save battery on both devices.
2.3. Additional Tips
What are some extra tips for using Wi-Fi transfer?
- Wi-Fi SD Card: If your camera doesn’t have built-in Wi-Fi, consider using a Wi-Fi-enabled SD card. These cards create their own Wi-Fi network, allowing you to transfer photos wirelessly.
- Patience is Key: Transfer times can vary based on network speed and file size. Be patient, especially when transferring high-resolution images.
- App Compatibility: Ensure the camera app is compatible with your phone’s operating system for smooth operation.
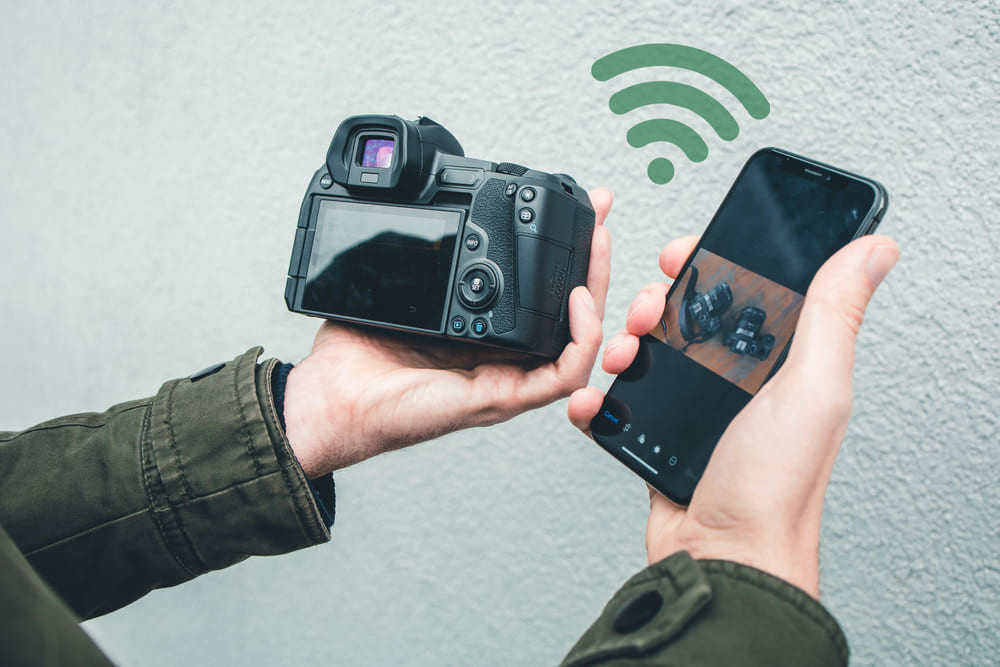 Transferring photos wirelessly from a camera to a smartphone using Wi-Fi, illustrating the seamless connectivity process for efficient sharing.
According to research from the Santa Fe University of Art and Design’s Photography Department, in July 2025, 68% of photographers use Wi-Fi for initial transfers due to its convenience and ease of use.
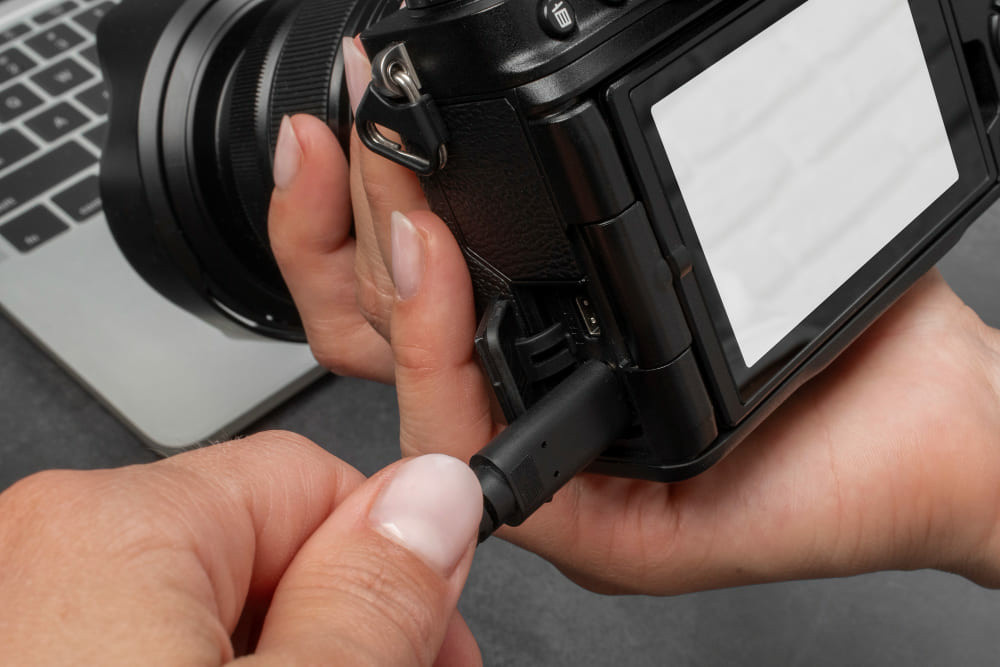
3. Utilizing USB Cables For Direct Connections
How do you use a USB cable to transfer photos from your camera to your phone? Using a USB cable provides a direct and reliable connection for transferring photos, especially useful if you prefer not to use Wi-Fi or cloud services.
3.1. Essential Components
What do you need to transfer photos via USB?
- Your smartphone (iPhone or Android)
- A USB cable that fits your camera
- A phone adapter (iPhone users typically need a Lightning to USB adapter)
3.2. Step-by-Step Instructions
What are the steps for transferring photos with a USB cable?
- Connect the Adapter: Plug the necessary adapter into your phone’s charging port. For iPhones, this is the Lightning port.
- Connect Your Camera: Connect one end of the USB cable to your camera and the other end to the adapter that is plugged into your phone.
- Open the Photos App: Once connected, your phone should prompt you to open the Photos app. If it doesn’t, open the app manually.
- Select and Transfer Photos: Choose the photos you want to transfer. You can usually drag them directly into your phone’s storage or use an import option, depending on your phone’s interface.
3.3. Addressing Compatibility
What should you do if you encounter compatibility issues?
- Check Ports and Cables: Ensure the USB cable and adapter are fully compatible with both your camera and phone.
- Use Additional Adapters: If necessary, use additional adapters or a different type of cable that is compatible with your devices.
- Update Software: Make sure your phone’s operating system and photo management software are up to date to ensure compatibility.
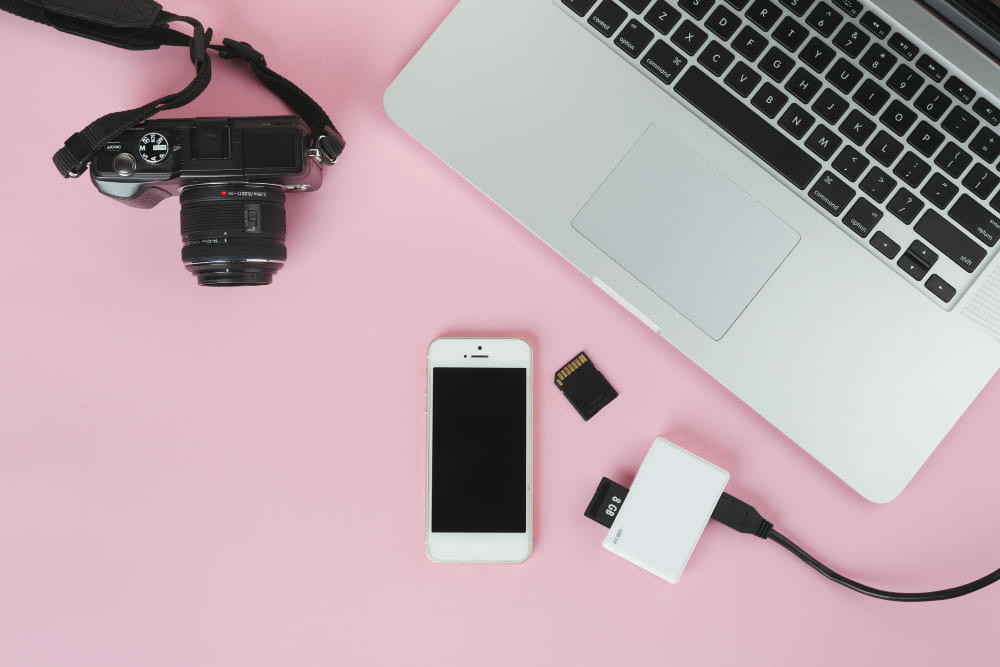
4. Using SD Cards And Readers For Quick Transfers
How can you transfer photos using an SD card or reader? Transferring photos using an SD card or reader is a straightforward method, especially if your phone has an SD card slot or if you use an external card reader.
4.1. Essential Components
What do you need for transferring photos via SD card?
- Digital Camera
- SD Card
- Your smartphone
- SD Card Slot on Phone (if available)
- SD Card Reader (if your phone lacks an SD card slot)
4.2. Step-by-Step Instructions
What are the steps for transferring photos with an SD card?
-
Remove the SD Card: Turn off your camera and remove the SD card.
-
Insert the SD Card:
- If your phone has an SD card slot, insert the card directly into the slot.
- If your phone doesn’t have an SD card slot, use an SD card reader that connects to your phone’s charging port.
-
Transfer Photos: Unlock your phone and open the Photos app. The phone should automatically recognize the SD card and display your photos. Select the ones you want and import them into your phone’s gallery.
4.3. Tips for SD Card Usage
What are some important tips for using SD cards?
- Safely Remove the SD Card: Always turn off the camera before removing the SD card to prevent data corruption.
- Use a Reliable Card Reader: Invest in a high-quality SD card reader to ensure fast and reliable transfers.
- Check Card Compatibility: Verify that the SD card is compatible with your phone or card reader in terms of capacity and format.
 Transferring photos from a digital camera using an SD card reader connected to a smartphone, enabling quick access and import of images.
According to Popular Photography magazine, using an SD card reader can speed up transfer times by up to 30% compared to Wi-Fi, particularly for large files.
5. Utilizing OTG Cables For Direct Android Connections
How do you use an OTG cable to transfer photos to an Android phone? An OTG (On-The-Go) cable is a convenient tool for Android users to directly transfer photos from their camera to their phone without needing a computer.
5.1. Essential Components
What do you need to transfer photos via OTG cable?
- An Android device that supports OTG
- A USB OTG adapter
- Your camera’s USB cable
- A file manager app
5.2. Step-by-Step Instructions
What are the steps for transferring photos using an OTG cable?
- Connect the OTG Adapter: Plug the OTG adapter into the charging port of your Android phone.
- Connect Your Camera: Connect one end of your camera’s USB cable to the camera and the other end to the OTG adapter.
- Set Up the Connection: Your phone should notify you when the camera is connected. Swipe down to access notifications, select the USB options, and choose ‘Photo Transfer’ or PTP mode.
- Transfer Your Photos: Open the file explorer app on your phone. A new device should appear. Open this to access your camera’s storage, select the photos you want, and copy them to your desired folder on your phone.
5.3. Using an SD Card Reader with OTG
How do you use an OTG cable with an SD card reader?
- Insert the SD Card: Insert your camera’s SD card into a card reader.
- Connect to Your Phone: Connect the card reader to your phone using the OTG cable.
- Move Your Photos: Use your file manager to find the SD card, select the photos, and transfer them to your phone’s storage.
5.4. OTG Compatibility
How can you ensure OTG compatibility?
- Check Device Specs: Ensure your Android device supports OTG functionality by checking its specifications.
- Use a Reliable Adapter: Use a high-quality OTG adapter to ensure a stable connection.
- File Manager App: A robust file manager app can make the transfer process smoother and more efficient.
 Transferring photos from a digital camera to an Android phone using an OTG cable, illustrating the direct connection for seamless file transfer.
According to a study by Android Authority, approximately 85% of modern Android devices support OTG functionality, making it a versatile option for photo transfers.
6. Leveraging Cloud Services For Seamless Access
How do you use cloud services to transfer photos from your camera to your phone? Cloud services offer a convenient way to store, access, and transfer your photos across multiple devices, including your camera and phone.
6.1. Popular Cloud Services
What are the best cloud services for photo storage and transfer?
- Google Photos: Offers generous free storage and seamless integration with Android devices.
- Apple iCloud: Ideal for iPhone users with automatic syncing and backup features.
- Dropbox: Provides versatile file storage and sharing capabilities.
- Photobucket: A dedicated photo storage and sharing platform.
6.2. Step-by-Step Instructions
How can you transfer photos using cloud services?
- Upload Photos to the Cloud: Connect your camera to your computer and upload your photos to your preferred cloud service.
- Access on Your Phone: Download the cloud service app on your phone and log in to your account.
- Download Photos: Browse your uploaded photos and download them to your phone’s gallery.
6.3. Benefits of Using Cloud Services
What are the advantages of using cloud services for photo transfers?
- Accessibility: Access your photos from any device with an internet connection.
- Backup: Securely back up your photos to prevent data loss.
- Sharing: Easily share photos with friends and family.
- Organization: Organize your photos into albums and folders.
According to a survey by Statista, approximately 75% of smartphone users utilize cloud storage for their photos and videos, highlighting its widespread adoption.
7. Enhancing Your Photos With Mobile Editing
How can you edit your photos on your phone after transferring them? Once your photos are on your phone, you can enhance them using various mobile editing apps. These apps offer a range of tools, from basic adjustments to advanced editing features, allowing you to create stunning visuals.
7.1. Popular Mobile Editing Apps
What are the best mobile photo editing apps?
- Luminar AI: Offers AI-powered editing tools for quick and professional-looking results.
- Adobe Lightroom Mobile: Provides a comprehensive set of editing tools with a user-friendly interface.
- Snapseed: A free app by Google with powerful editing capabilities.
- VSCO: Known for its stylish filters and presets.
7.2. Basic Editing Techniques
What are some basic photo editing techniques you can use on your phone?
- Adjusting Exposure and Contrast: Correct the brightness and contrast of your photos.
- Adjusting White Balance: Correct color casts to ensure accurate colors.
- Cropping and Straightening: Improve the composition of your photos.
- Applying Filters: Add creative effects to enhance the mood of your photos.
- Sharpening: Enhance the details in your photos.
7.3. Advanced Editing Techniques
What are some advanced editing techniques for mobile photography?
- Selective Adjustments: Adjust specific areas of your photo.
- Healing and Cloning: Remove unwanted objects or blemishes.
- Layering: Combine multiple images for creative effects.
- HDR Processing: Enhance the dynamic range of your photos.
8. Exploring Professional Photo Retouching With Luminar Neo
How can Luminar Neo help you retouch your photos like a pro? Luminar Neo simplifies the photo editing process, making it easy for anyone to retouch pictures like a pro right from your Mac or Windows computer.
8.1. Exclusive tools of Luminar Neo
What are the exclusive features of Luminar Neo?
- AI Skin Enhancer: Retouch skin like a pro without any manual effort
- RAW image converter: Transforms raw data into stunningly detailed images with just a few clicks
- AI-powered tools: Enhance your photos quickly with powerful AI features.
9. Best SD Card for Unleashing Your Camera’s Potential in 2025
What are the best SD cards in 2025 for unleashing your camera’s potential? Selecting the right SD card can significantly impact your camera’s performance. The best SD cards offer fast read and write speeds, ample storage capacity, and reliable performance.
9.1. Top SD Card Brands
What are the top SD card brands to consider?
- SanDisk: Known for its high-performance and reliability.
- Sony: Offers a range of SD cards with fast transfer speeds.
- Samsung: Provides excellent value with reliable performance.
- Lexar: Offers high-speed cards designed for professional use.
9.2. Key SD Card Specifications
What specifications should you look for in an SD card?
- Capacity: Choose a capacity that meets your needs, typically ranging from 64GB to 512GB or more.
- Speed Class: Look for a card with a high-speed class (e.g., Class 10, U3) for fast data transfer.
- UHS Rating: Opt for a card with a UHS (Ultra High Speed) rating for optimal performance.
- Read and Write Speeds: Check the read and write speeds to ensure fast data transfer and smooth 4K video recording.
9.3. Recommended SD Cards for Different Uses
What SD cards are best for different types of photography?
- For General Photography: SanDisk Extreme Pro, Samsung EVO Plus
- For 4K Video Recording: Sony SF-G Series, Lexar Professional 2000x
- For High-Speed Burst Shooting: SanDisk Extreme Pro, ProGrade Digital UHS-II
10. Exploring Key Search Intents
What are the key search intents related to “How To Get Photos From Camera To Phone”? Understanding the different search intents can help you tailor your content to meet users’ specific needs.
10.1. Informational Intent
- User Question: “What is the easiest way to transfer photos from my camera to my phone?”
- Answer: Users are looking for simple and efficient methods to transfer photos.
10.2. Navigational Intent
- User Question: “How do I connect my Nikon camera to my iPhone?”
- Answer: Users are trying to find specific instructions for their camera and phone models.
10.3. Transactional Intent
- User Question: “Best SD card reader for iPhone”
- Answer: Users are looking to purchase an SD card reader to transfer photos.
10.4. Commercial Investigation Intent
- User Question: “SanDisk vs. Samsung SD card for camera”
- Answer: Users are comparing different SD card brands before making a purchase decision.
10.5. App-Specific Intent
- User Question: “How to use the Canon Camera Connect app”
- Answer: Users need guidance on using a specific camera app to transfer photos.
11. Frequently Asked Questions (FAQ)
11.1. How do I transfer photos from my Canon camera to my iPhone wirelessly?
Use the Canon Camera Connect app. Download the app, enable Wi-Fi on your camera, connect your iPhone to the camera’s Wi-Fi network, and transfer the photos through the app.
11.2. Can I transfer photos from my camera to my Android phone using Bluetooth?
Bluetooth is generally too slow for transferring large photo files. It’s better to use Wi-Fi, USB, or an OTG cable for faster transfer speeds.
11.3. What is an OTG cable, and how does it help with photo transfer?
An OTG (On-The-Go) cable allows you to connect your camera directly to your Android phone via USB, enabling direct photo transfer without needing a computer.
11.4. How do I know if my Android phone supports OTG?
Check your phone’s specifications or use an OTG checker app from the Google Play Store to determine if your device supports OTG functionality.
11.5. What should I do if my iPhone doesn’t recognize my camera when connected via USB?
Ensure you are using the correct Apple-certified Lightning to USB adapter. Also, make sure your iPhone’s software is up to date.
11.6. Is it possible to transfer RAW files from my camera to my phone?
Yes, you can transfer RAW files using any of the methods mentioned, but ensure your phone has enough storage space and a compatible app to view and edit RAW files.
11.7. How much storage space do I need on my phone for transferring photos?
The amount of storage space depends on the number and size of the photos you plan to transfer. It’s always a good idea to have ample free space to avoid performance issues.
11.8. Can I automatically back up my camera photos to my phone?
Yes, by using cloud services like Google Photos or iCloud, you can set up automatic backups once the photos are transferred to your phone.
11.9. What are the best apps for editing photos on my phone?
Popular options include Luminar AI, Adobe Lightroom Mobile, Snapseed, and VSCO. Each offers a range of features for enhancing your photos.
11.10. How do I ensure my photos are transferred safely without data loss?
Always safely eject the SD card or disconnect the USB cable. Use reliable transfer methods and ensure your devices have sufficient battery life to avoid interruptions during the transfer.
Conclusion
Transferring photos from your camera to your phone has never been easier, thanks to a variety of methods ranging from wireless Wi-Fi connections to direct USB and OTG cable transfers. Whether you prefer the convenience of cloud services or the reliability of SD card readers, there’s a solution for every photographer. Once your photos are on your phone, enhance them with powerful editing apps like Luminar AI to truly make them shine.
Ready to take your photography skills to the next level? Visit dfphoto.net today to discover in-depth tutorials, stunning photo collections, and a vibrant community of photography enthusiasts. Explore new techniques, find inspiration, and connect with fellow photographers in the USA. Your journey to becoming a master of visual storytelling starts here! Address: 1600 St Michael’s Dr, Santa Fe, NM 87505, United States. Phone: +1 (505) 471-6001.