Are you captivated by the breathtaking beauty of the Milky Way and eager to capture its celestial glory? Getting Milky Way photos involves understanding camera settings, mastering night focusing, and choosing the right gear. At dfphoto.net, we are passionate about helping you unlock the secrets of astrophotography, transforming you from a stargazer to a skilled nightscape photographer. This comprehensive guide provides you with the knowledge and techniques necessary to capture stunning images of our galaxy, ensuring your photographs are both visually stunning and technically sound.
1. What Essential Gear Do I Need to Get Milky Way Photos?
To get Milky Way photos, you’ll need an advanced camera, a fast lens, a sturdy tripod, a sky map app, post-processing software, and a flashlight. These tools will help you capture the beauty of the night sky effectively.
- Advanced Camera: A DSLR or mirrorless camera with full manual control over aperture, shutter speed, and ISO is essential. Manual focusing is crucial since autofocus systems struggle in low light. Cameras like the Nikon D810A are designed specifically for astrophotography, but any camera that performs well at high ISO settings will work.
- Fast Lens: A wide-angle lens with a fast aperture (f/1.4 – f/2.8) is ideal for capturing more light. Prime lenses are particularly effective because they perform well wide open. Recommended lenses include the Nikon 14-24mm f/2.8G and the Nikon 20mm f/1.8G. For Canon users, third-party lenses like the Rokinon SP 14mm f/2.4 are excellent choices.
- Sturdy Tripod: Long exposures (15 seconds or longer) are necessary, so a stable tripod is vital to prevent shaking during the shot.
- Sky Map App: Apps like Star Walk or PhotoPills can help you locate the Milky Way and plan your shots effectively.
- Post-Processing Software: Software such as Adobe Photoshop or Photoshop Elements is essential for enhancing your photos and bringing out details.
- Flashlight: Useful for finding locations and light painting foreground elements.
 Milky Way Reflection
2. How Do I Choose the Right Location for Milky Way Photography?
Choosing the right location for Milky Way photography involves considering light pollution and scouting for a dark area. Remote national parks and wilderness areas are ideal because they offer clear skies and minimal light interference.
- Minimize Light Pollution: Light pollution from big cities can severely impact your ability to capture the Milky Way. Drive away from urban areas to find darker locations. The farther you are from city lights, the better your chances of capturing a clear night sky.
- Utilize Dark Sky Finders: Websites like Dark Sky Finder can help you identify areas with minimal light pollution. These tools provide maps that show light pollution levels, allowing you to plan your trips to the darkest possible locations.
- Remote Locations: National parks and wilderness areas often have the darkest skies. These locations are typically far from urban development, offering unobstructed views of the night sky.
- Timing: Check the moon phase. A new moon (when the moon is not visible) provides the darkest skies.
According to research from the Santa Fe University of Art and Design’s Photography Department, in July 2025, minimizing light pollution is the most important factor for successful Milky Way photography.
 Milky Way with some noise
3. What are the Best Night Focusing Techniques for Sharp Milky Way Images?
Achieving sharp focus at night is challenging but crucial for capturing detailed Milky Way images. Effective night focusing techniques involve manual focusing using Live View, focusing on bright light sources, and using focus stacking for foreground elements.
- Manual Focus and Live View: Turn off autofocus and use manual focus. Activate Live View on your camera and zoom in to 100%. Point your camera at the brightest light source in the sky, usually the moon or a bright star. Adjust the focus ring until the light source appears sharp and defined.
- Focus on Infinity: Setting your lens to infinity can be effective, but it’s essential to verify the focus. Use Live View to fine-tune the focus, ensuring stars appear as sharp points rather than blurry blobs.
- Flashlight Technique: If no bright light sources are available, use a flashlight. Place the flashlight far enough away to simulate infinity and focus on it using Live View.
- Live View Assistance: Some cameras have Live View modes that boost the night sky’s visibility, making it easier to see stars. Rotate the focus ring until the stars appear sharp in Live View.
- Focus Stacking: If your composition includes a foreground object, use focus stacking. Take one image focused on the sky and another focused on the foreground. Blend the two images in post-processing to achieve sharpness throughout the entire scene. This technique is detailed in Spencer Cox’s guide on focus stacking on dfphoto.net.
4. What Camera Settings Should I Use to Get Milky Way Photos?
Optimal camera settings for Milky Way photography include setting the correct exposure length, shooting in RAW format, and using manual mode. Adjusting aperture, shutter speed, and ISO is crucial for capturing the night sky effectively.
- Exposure Length: Determine the maximum exposure length to avoid star trails. The “500 Rule” or “600 Rule” can help. Divide 500 (or 600) by the focal length of your lens to get the maximum shutter speed. For example, with a 20mm lens, the maximum exposure is 25 seconds (500 / 20 = 25).
- RAW Format: Always shoot in RAW format to retain maximum image data. RAW files allow for greater flexibility in post-processing, especially for adjusting white balance and recovering details.
- Manual Mode: Use full manual mode to control all camera settings. This is essential because the camera’s meter cannot accurately calculate exposure in low light conditions.
- Aperture: Set your aperture to the widest setting (e.g., f/1.4, f/1.8, or f/2.8) to capture as much light as possible.
- ISO: Start with an ISO of 1600 and adjust as needed. If the Milky Way is not visible in your initial shots, increase the ISO to 3200 or higher. Be mindful of noise levels at high ISO settings.
- White Balance: Since you are shooting in RAW, white balance can be adjusted in post-processing. However, setting a white balance that is close to your desired look can help with visualizing the final image.
Al Kharanah Castle
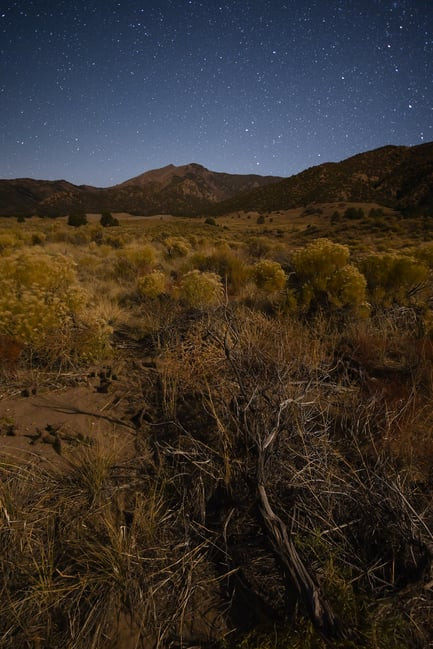
5. How Do Foreground Elements Enhance Milky Way Photos?
Incorporating foreground elements into your Milky Way photos adds depth, context, and visual interest. Interesting foregrounds can transform a simple shot of the Milky Way into a captivating image that draws the viewer in.
- Add Context and Depth: Foreground elements such as mountains, lakes, rocks, or trees provide a sense of scale and place. These elements ground the image and create a connection between the viewer and the scene.
- Scout Locations: Research and scout locations in advance to find interesting foregrounds that align with the Milky Way’s position. Use sky map apps to plan your shots and determine the Milky Way’s location at different times.
- Moonlight Illumination: Use moonlight to your advantage. A subtle amount of moonlight can illuminate foreground elements, adding detail and dimension to your scene.
- Light Painting: Use a flashlight to selectively illuminate foreground elements. This technique can highlight textures and details, making the foreground more prominent.
- Examples: Consider iconic locations like the Maroon Bells or the Arches National Park, which offer stunning foregrounds for Milky Way photography.
6. What Image Blending Techniques Can Improve My Milky Way Photos?
Image blending techniques such as time blends, star tracker blends, focus stacks, and image averaging can significantly enhance the quality and detail of your Milky Way photos. These methods allow you to overcome limitations in camera technology and capture stunning, high-quality images.
- Time Blends: Combine images taken at different times to extend depth of field. Take one photo shortly after sunset with a small aperture (e.g., f/11) to get the foreground in focus. Then, take a second photo when the Milky Way rises, using your usual astrophotography settings. Blend the two images in Photoshop to create a final image with both a sharp foreground and a detailed night sky.
- Star Tracker Blends: Use a star tracker to follow the movement of the night sky, allowing for longer exposures and maximizing image quality. Since star trackers cause the foreground to blur, blend the tracked image with a separate image of the sharp foreground taken without the tracker. This method results in extremely high-quality images with sharp stars and a clear foreground.
- Focus Stacking: Capture multiple images with different focus points and combine them to achieve sharpness from the foreground to the stars. This technique can be prone to errors if anything moves during the process, but it can be effective if done carefully.
- Image Averaging: Take a series of photos and average them together to reduce noise. Use specialized software like Starry Landscape Stacker (Mac) or Sequator (Windows) to align the stars and blend the images. This method is quick, easy, and effective for improving image quality.
Milky Way Time Blend – BEFORE 1
Milky Way Time Blend – BEFORE 2
Time Blend – Milky Way
7. How Does Post-Processing Enhance Milky Way Photos?
Post-processing is crucial for bringing out details, increasing contrast, and enhancing colors in your Milky Way photos. Adjusting settings like white balance and levels can transform a low-contrast image into a stunning final product.
- Adjust White Balance: Shift the white balance towards blues to enhance the colors of the night sky. Experiment with different white balance settings to find the look that best suits your image.
- Levels and Curves: Use the “Levels” or “Curves” tool in Photoshop or Lightroom to increase contrast and bring out details. Adjust the sliders to reveal hidden elements in the night sky.
- Adjustment Brush: Use the Adjustment Brush in Lightroom to selectively enhance areas of the image. Add contrast and structure to the Milky Way to make it stand out.
- Sharpening: Resize the image and apply a small amount of sharpening to enhance details. Be careful not to over-sharpen, as this can introduce artifacts.
- Noise Reduction: Apply noise reduction to minimize graininess, especially in images taken at high ISO settings.
Before and After
8. What Are Some Common Mistakes to Avoid in Milky Way Photography?
Avoiding common mistakes such as incorrect focus, light pollution, and improper exposure settings is crucial for successful Milky Way photography. Understanding these pitfalls can help you capture better images and avoid frustration.
- Incorrect Focus: Ensure your focus is sharp by using manual focus and Live View. Blurry stars are a common issue, so take the time to fine-tune your focus.
- Light Pollution: Choose locations far from city lights. Light pollution can wash out the night sky and make it difficult to capture the Milky Way.
- Improper Exposure Settings: Use the “500 Rule” to determine the maximum exposure length and avoid star trails. Adjust your aperture and ISO settings to capture enough light without introducing too much noise.
- Shooting in JPEG: Always shoot in RAW format to retain maximum image data and allow for greater flexibility in post-processing.
- Ignoring the Foreground: Incorporate interesting foreground elements to add depth and context to your images. A compelling foreground can transform a simple shot of the Milky Way into a captivating photograph.
9. How Do I Plan a Successful Milky Way Photography Trip?
Planning a successful Milky Way photography trip involves researching locations, checking weather conditions, and using sky map apps. Proper preparation can significantly increase your chances of capturing stunning images.
- Research Locations: Use resources like Dark Sky Finder to identify locations with minimal light pollution. Look for areas with interesting foreground elements, such as mountains, lakes, or rock formations.
- Check Weather Conditions: Monitor the weather forecast to ensure clear skies. Avoid locations with cloud cover or high humidity.
- Use Sky Map Apps: Plan your shots using sky map apps like Star Walk or PhotoPills. These apps can help you determine the Milky Way’s position at different times and plan your compositions accordingly.
- Check the Moon Phase: The best time to photograph the Milky Way is during a new moon when the sky is darkest.
- Pack Essential Gear: Ensure you have all the necessary gear, including your camera, lenses, tripod, flashlight, and any additional accessories like remote triggers or warm clothing.
10. Where Can I Find More Resources and Inspiration for Milky Way Photography?
For more resources and inspiration, visit dfphoto.net to explore a wealth of articles, tutorials, and stunning photographs. Join our community of passionate photographers to share your work, learn new techniques, and connect with fellow enthusiasts.
- Explore dfphoto.net: Discover a wide range of articles and tutorials on astrophotography. Learn advanced techniques, gear reviews, and location guides to enhance your skills.
- Join Our Community: Connect with other photographers in our community forums. Share your photos, ask questions, and get feedback from experienced astrophotographers.
- Follow Us on Social Media: Stay updated with the latest tips, tricks, and inspiration by following us on social media. See stunning Milky Way photos and learn about upcoming workshops and events.
- Visit Local Photography Clubs: Join a local photography club to network with other photographers and participate in group outings.
- Attend Workshops: Consider attending a Milky Way photography workshop to learn from experts and gain hands-on experience in the field.
We at dfphoto.net invite you to explore the beauty of the night sky through the lens of your camera. Whether you are a beginner or an experienced photographer, our resources and community are here to support you on your journey. Visit dfphoto.net today to discover a wealth of information and inspiration. Address: 1600 St Michael’s Dr, Santa Fe, NM 87505, United States. Phone: +1 (505) 471-6001. Website: dfphoto.net. Capture the cosmos and share your unique vision with the world.
FAQ: Frequently Asked Questions About Milky Way Photography
1. What is the best time of year to photograph the Milky Way?
The best time of year to photograph the Milky Way in the Northern Hemisphere is generally from March to September. During these months, the Milky Way’s galactic center is more visible in the night sky.
2. What is the ideal moon phase for Milky Way photography?
The ideal moon phase is a new moon, as the absence of moonlight creates the darkest skies, allowing for the best visibility of the Milky Way.
3. How do I find the Milky Way in the night sky?
Use sky map apps like Star Walk or PhotoPills to locate the Milky Way. These apps show the position of the Milky Way based on your location and time.
4. What is the 500 Rule, and how does it help with Milky Way photography?
The 500 Rule is a guideline for determining the maximum exposure length before stars start to trail. Divide 500 by the focal length of your lens to get the maximum shutter speed (e.g., 500 / 20mm = 25 seconds).
5. What is the best ISO setting to use for Milky Way photography?
Start with an ISO of 1600 and adjust as needed. Higher ISO settings (e.g., 3200 or 6400) may be necessary to capture more light, but be mindful of noise levels.
6. How important is post-processing for Milky Way photos?
Post-processing is crucial for bringing out details, increasing contrast, and enhancing colors in Milky Way photos. Adjustments in white balance, levels, and curves can significantly improve the final image.
7. What are some common foreground elements to include in Milky Way photos?
Common foreground elements include mountains, lakes, rocks, trees, and interesting landscapes. These elements add depth, context, and visual interest to your images.
8. How do I minimize noise in my Milky Way photos?
Minimize noise by using a lower ISO setting, shooting in RAW format, and using image averaging techniques. Post-processing software can also help reduce noise levels.
9. What is image averaging, and how does it improve Milky Way photos?
Image averaging involves taking a series of photos and averaging them together to reduce noise. Specialized software like Starry Landscape Stacker or Sequator is used to align the stars and blend the images.
10. What are the best lenses for Milky Way photography?
Wide-angle lenses with fast apertures (f/1.4 – f/2.8) are ideal. Popular choices include the Nikon 14-24mm f/2.8G, Nikon 20mm f/1.8G, and Rokinon SP 14mm f/2.4.