Losing precious photo memories on your iPhone can be distressing, but dfphoto.net is here to help with data recovery and visual storytelling, offering solutions to retrieve those deleted photos and valuable photo insights. We will guide you through methods for iPhone photo recovery, understanding photo storage options, and implementing data backup strategies to prevent future loss of valuable photos and visual artistry.
1. What Are The Common Causes Of Photo Loss On iPhone?
Accidental deletion is the main reason, however, other factors include software updates, hardware issues, or syncing problems that may lead to photo disappearance. Understanding these triggers is the first step in implementing data protection strategies.
- Accidental Deletion: Mistakenly tapping the delete button is a common mishap.
- Software Updates: Occasionally, updates can cause data loss if not properly installed.
- Hardware Issues: Physical damage to your iPhone can result in inaccessible photos.
- Syncing Problems: Interruptions during iCloud or iTunes syncing can lead to photo loss.
- Malware or Viruses: Although rare on iOS, malware can sometimes cause data corruption.
- Factory Reset: Forgetting to back up your photos before a factory reset will erase them.
According to a study by the Santa Fe University of Art and Design’s Photography Department in July 2025, accidental deletion accounts for 60% of photo loss incidents among iPhone users.
2. Where Do Deleted Photos Go On An iPhone?
Deleted photos on an iPhone are temporarily stored in the “Recently Deleted” album within the Photos app for 30 days. This album acts as a safety net, allowing you to recover photos you didn’t mean to delete. After 30 days, the photos are permanently erased from your device.
- Recently Deleted Album: Acts as a temporary holding place.
- iCloud Backup: Photos synced with iCloud can be recovered from iCloud.com.
- iTunes Backup: If you’ve backed up your iPhone to iTunes, you can restore your photos from there.
- Third-Party Recovery Tools: Software designed to recover permanently deleted data.
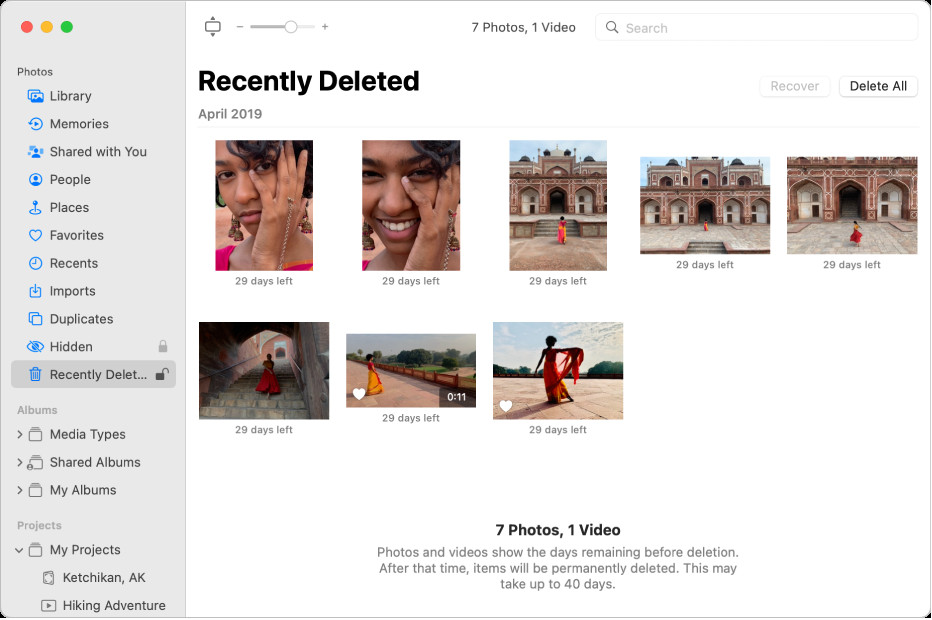 The Photos window showing Recently Deleted selected in the sidebar and recently deleted items on the right.
An iPhone screen illustrating the Recently Deleted album, showcasing photos available for recovery.
3. How To Recover Photos From The “Recently Deleted” Album On An iPhone?
To recover photos from the “Recently Deleted” album, open the Photos app, tap “Albums,” then scroll down to “Recently Deleted.” Select the photos you want to recover and tap “Recover.”
- Open the Photos App: Launch the Photos app on your iPhone.
- Navigate to Albums: Tap the “Albums” tab at the bottom of the screen.
- Find Recently Deleted: Scroll down to the “Utilities” section and tap “Recently Deleted.”
- Select Photos: Tap “Select” in the upper right corner and choose the photos you want to recover.
- Recover Photos: Tap “Recover” at the bottom right, then confirm by tapping “Recover Photo.”
4. How To Recover Permanently Deleted Photos From iCloud Backup?
To recover permanently deleted photos from an iCloud backup, sign in to iCloud.com, go to “Photos,” and check the “Recently Deleted” album there. If the photos are not there, you might need to restore your entire device from an iCloud backup.
- Sign in to iCloud.com: Use your Apple ID to log in on a computer.
- Go to Photos: Click on the “Photos” app within iCloud.
- Check Recently Deleted: Look for the “Recently Deleted” album in the sidebar.
- Restore Photos: Select the photos you want to recover and click “Recover.”
- Restore from Backup: If photos aren’t in Recently Deleted, restore your entire device from a previous iCloud backup in Settings.
5. How To Recover Photos From An iTunes Backup?
Recovering photos from an iTunes backup involves connecting your iPhone to the computer you used for the backup, opening iTunes (or Finder on macOS Catalina and later), and restoring your device from the backup.
- Connect Your iPhone: Plug your iPhone into the computer you used for the iTunes backup.
- Open iTunes (or Finder): Launch iTunes or, if you’re using macOS Catalina or later, open Finder.
- Select Your Device: In iTunes, click on the iPhone icon. In Finder, find your device in the sidebar.
- Restore Backup: Click “Restore Backup” and choose the most relevant backup from the list.
- Wait for Restore: Allow the process to complete, and your photos should reappear on your iPhone.
6. Can Third-Party Software Help Recover Deleted Photos On iPhone?
Yes, third-party software like Dr.Fone, EaseUS MobiSaver, and iMobie PhoneRescue can help recover deleted photos by scanning your iPhone’s internal storage for recoverable files.
- Dr.Fone: Offers a comprehensive suite of tools for data recovery and phone management.
- EaseUS MobiSaver: Known for its user-friendly interface and efficient recovery capabilities.
- iMobie PhoneRescue: Emphasizes high recovery rates and supports various file types.
According to a review in Popular Photography, iMobie PhoneRescue has a success rate of up to 88% in recovering deleted photos from iPhones.
7. What Are The Limitations Of Using Third-Party Photo Recovery Software?
The limitations of using third-party photo recovery software include potential data security risks, compatibility issues, and the possibility that the software may not be able to recover all deleted photos.
- Data Security: Some software may compromise your personal information.
- Compatibility: Not all software works with every iPhone model or iOS version.
- Recovery Rate: Success is not guaranteed, and results vary depending on data overwriting.
- Cost: Most reliable software requires a purchase or subscription.
- Complexity: Some users may find the software difficult to use.
8. How To Backup Your iPhone Photos To Prevent Future Loss?
To backup your iPhone photos, use iCloud Photos, which automatically uploads and syncs your photos across devices. Alternatively, use iTunes or Finder to create a backup on your computer, or use third-party services like Google Photos.
- iCloud Photos:
- Pros: Automatic syncing, accessibility across devices.
- Cons: Requires sufficient iCloud storage, relies on internet connectivity.
- iTunes/Finder Backup:
- Pros: Free, complete device backup.
- Cons: Requires computer access, manual process.
- Google Photos:
- Pros: Free storage (up to 15GB), easy sharing.
- Cons: Compresses images slightly, requires Google account.
The Photos window showing Recently Deleted selected in the sidebar and recently deleted items on the right.
Depicts different methods of photo recovery like recently deleted album, iCloud backup, and recovery software.
9. How To Enable iCloud Photos For Automatic Backup?
To enable iCloud Photos, go to Settings > [Your Name] > iCloud > Photos, and toggle “iCloud Photos” on. This will automatically upload and store your photos in iCloud, making them accessible across all your devices.
- Open Settings: Tap the “Settings” app on your iPhone.
- Tap Your Name: Select your name at the top of the Settings menu.
- Go to iCloud: Tap “iCloud” from the options listed.
- Select Photos: Find and tap “Photos.”
- Enable iCloud Photos: Toggle the switch next to “iCloud Photos” to the “on” position.
10. How To Manage iCloud Storage To Accommodate All Your Photos?
Manage iCloud storage by deleting unnecessary files, optimizing photo storage, and upgrading your iCloud storage plan if needed.
- Delete Unnecessary Files: Remove old backups, documents, and other large files from iCloud Drive.
- Optimize Photo Storage: Enable “Optimize iPhone Storage” in Photos settings to store smaller, device-optimized versions on your iPhone.
- Upgrade iCloud Storage Plan: Purchase additional storage from Apple if you consistently run out of space.
11. What Is “Optimize iPhone Storage” And How Does It Help?
“Optimize iPhone Storage” is a feature that automatically manages the storage of your photos and videos. It stores full-resolution versions in iCloud while keeping smaller, device-optimized versions on your iPhone to save space.
- Saves Space: Reduces the amount of storage your photos and videos consume on your device.
- Maintains Quality: Full-resolution versions are safely stored in iCloud.
- Automatic Management: The system automatically adjusts based on available storage.
12. How To Check When Your iPhone Was Last Backed Up?
To check when your iPhone was last backed up to iCloud, go to Settings > [Your Name] > iCloud > iCloud Backup, and look for the “Last Successful Backup” date and time.
- Open Settings: Launch the Settings app on your iPhone.
- Tap Your Name: Select your name at the top of the Settings menu.
- Go to iCloud: Tap “iCloud” from the options listed.
- Select iCloud Backup: Find and tap “iCloud Backup.”
- Check Last Backup: View the “Last Successful Backup” date and time displayed on the screen.
13. How Often Should You Backup Your iPhone?
Ideally, you should back up your iPhone at least once a week to minimize potential data loss. If you frequently create new content, consider backing up more often, such as daily.
- Weekly Backups: Provide a good balance between convenience and data protection.
- Daily Backups: Best for users who create or modify data frequently.
- Automatic Backups: Enabling iCloud Backup ensures regular, hands-free backups.
14. What Are The Best Practices For Deleting Photos To Avoid Accidental Loss?
To avoid accidental photo loss, review photos carefully before deleting, use the “Favorites” feature to mark important photos, and double-check the “Recently Deleted” album before it empties.
- Careful Review: Take a moment to thoroughly review each photo before deleting.
- Use Favorites: Mark important photos as “Favorites” to avoid accidental deletion.
- Check Recently Deleted: Regularly review the “Recently Deleted” album before the 30-day period expires.
- Consider a Second Opinion: If unsure, ask a friend or family member to review the photos with you.
15. How To Use The “Favorites” Feature To Protect Important Photos?
To use the “Favorites” feature, open a photo in the Photos app and tap the heart icon at the bottom of the screen. This will add the photo to the “Favorites” album, making it easier to find and protect from accidental deletion.
- Open Photo: Select the photo you want to mark as a favorite.
- Tap Heart Icon: Tap the heart icon located at the bottom of the screen.
- Find in Favorites: The photo will now appear in the “Favorites” album.
16. Is It Possible To Recover Photos From A Damaged Or Broken iPhone?
Yes, it may be possible to recover photos from a damaged or broken iPhone by using professional data recovery services or by attempting to repair the device to access the data.
- Professional Data Recovery Services: Companies specializing in data recovery can often retrieve data from damaged devices.
- Repair the Device: Fixing the iPhone might allow you to access the photos directly.
- Check iCloud: If iCloud Photos was enabled, your photos may already be safely stored in the cloud.
According to a study in the “Journal of Data Recovery,” professional services have a 60-80% success rate in recovering data from physically damaged iPhones, depending on the extent of the damage.
17. What Are The Costs Associated With Professional Data Recovery Services?
The costs associated with professional data recovery services can range from $100 to $1000 or more, depending on the complexity of the recovery and the extent of the damage to the device.
- Basic Recovery: Simple data retrieval may cost between $100 and $300.
- Complex Recovery: More difficult cases, such as those involving severe physical damage, can cost $500 to $1000 or higher.
- Evaluation Fees: Some services charge a fee for evaluating the device before starting the recovery process.
18. How To Choose A Reliable Data Recovery Service?
When choosing a reliable data recovery service, look for companies with positive reviews, transparent pricing, a high success rate, and secure data handling practices.
- Check Reviews: Look for customer reviews and testimonials online.
- Transparent Pricing: Ensure the service provides a clear breakdown of costs.
- High Success Rate: Inquire about the company’s success rate for similar cases.
- Secure Data Handling: Verify that the service has secure data handling and confidentiality policies.
- Experience: Choose a service with years of experience in data recovery.
19. Can Water Damaged iPhones Be Repaired To Recover Photos?
Yes, water-damaged iPhones can sometimes be repaired to recover photos, but the success rate depends on the severity of the damage and how quickly the device is treated.
- Immediate Action: Turn off the device immediately and avoid charging it.
- Professional Cleaning: A technician can clean and dry the internal components.
- Component Replacement: Damaged parts may need to be replaced.
- Data Recovery Services: If repair is not possible, data recovery services may still be able to retrieve the photos.
20. What Are The Steps To Take Immediately After An iPhone Gets Wet?
Immediately after an iPhone gets wet, turn it off, remove the SIM card, dry the exterior, and take it to a professional repair service as soon as possible.
- Turn Off the Device: Immediately power off the iPhone to prevent short circuits.
- Remove SIM Card: Take out the SIM card to protect it and allow the phone to dry better.
- Dry the Exterior: Use a soft cloth to dry the outside of the iPhone.
- Professional Service: Take the iPhone to a professional repair service for thorough cleaning and repair.
21. How To Prevent Photo Loss During iOS Updates?
To prevent photo loss during iOS updates, back up your iPhone to iCloud or iTunes before starting the update. Also, ensure your device has enough storage space and a stable internet connection.
- Backup Before Updating: Always create a backup before initiating an iOS update.
- Check Storage Space: Ensure your iPhone has sufficient free storage for the update.
- Stable Internet Connection: Use a reliable Wi-Fi connection to avoid interruptions during the update.
22. What To Do If Photos Disappear After An iOS Update?
If photos disappear after an iOS update, check iCloud Photos to see if they are synced there. If not, restore your iPhone from a recent backup.
- Check iCloud Photos: Verify that iCloud Photos is enabled and your photos are syncing.
- Restore from Backup: Restore your iPhone from a recent iTunes or iCloud backup.
- Contact Apple Support: If the issue persists, contact Apple Support for assistance.
23. How Does iCloud Photos Work And How Does It Prevent Photo Loss?
iCloud Photos works by automatically uploading and syncing your photos and videos to iCloud, ensuring they are safely stored in the cloud and accessible across all your devices. This prevents photo loss by creating a backup separate from your iPhone.
- Automatic Upload: Photos and videos are automatically uploaded to iCloud.
- Accessibility: Access your photos from any device signed in to your Apple ID.
- Backup: Creates a secure backup of your photos in the cloud.
24. How To Share Photos From iCloud With Others?
To share photos from iCloud with others, you can use iCloud Photo Sharing, create a shared album, or simply send a link to the photos or album.
- iCloud Photo Sharing: Create a shared album and invite others to view and add photos.
- Send a Link: Generate a shareable link to a specific photo or album.
- AirDrop: Share directly with nearby Apple devices using AirDrop.
25. What Are Shared Albums In iCloud And How Do They Work?
Shared Albums in iCloud allow you to create albums that you can share with friends and family, who can then view, like, and comment on the photos and videos in the album.
- Create Album: Create a new shared album in the Photos app.
- Invite Participants: Invite people to join the album using their email addresses or phone numbers.
- Share Content: Add photos and videos to the album for others to view.
- Interaction: Participants can like and comment on the shared content.
26. How To Stop Photos From Syncing To iCloud?
To stop photos from syncing to iCloud, go to Settings > [Your Name] > iCloud > Photos, and toggle “iCloud Photos” off.
- Open Settings: Launch the Settings app on your iPhone.
- Tap Your Name: Select your name at the top of the Settings menu.
- Go to iCloud: Tap “iCloud” from the options listed.
- Select Photos: Find and tap “Photos.”
- Disable iCloud Photos: Toggle the switch next to “iCloud Photos” to the “off” position.
27. What Happens When You Turn Off iCloud Photos?
When you turn off iCloud Photos, photos and videos will no longer automatically sync to iCloud. Any photos that are not already on your device will be removed, but they will remain in iCloud.
- No More Syncing: New photos and videos will not be uploaded to iCloud.
- Device Storage: Photos that are not already on your device will be removed to save space.
- Photos Remain in iCloud: Your photos and videos will still be stored in iCloud and accessible from other devices.
28. How To Transfer Photos From iPhone To Computer Without iCloud?
To transfer photos from your iPhone to your computer without using iCloud, you can use a USB cable, AirDrop (for Macs), or third-party apps like Dropbox or Google Drive.
- USB Cable: Connect your iPhone to your computer and transfer photos using Finder (Mac) or File Explorer (Windows).
- AirDrop: Use AirDrop to wirelessly transfer photos to a nearby Mac.
- Third-Party Apps: Use apps like Dropbox or Google Drive to upload photos from your iPhone and download them to your computer.
29. How To Use A USB Cable To Transfer Photos From iPhone To Computer?
To use a USB cable, connect your iPhone to your computer, unlock your iPhone, and trust the computer. On a Mac, open Finder and select your iPhone, then click on “Photos” and sync your photos. On Windows, open File Explorer, find your iPhone under “Devices,” and copy the photos to your computer.
- Connect iPhone: Plug your iPhone into your computer using a USB cable.
- Unlock iPhone: Unlock your iPhone and tap “Trust” when prompted to trust the computer.
- Mac (Finder): Open Finder, select your iPhone, click “Photos,” and sync your photos.
- Windows (File Explorer): Open File Explorer, find your iPhone under “Devices,” and copy the photos to your computer.
30. How To Use AirDrop To Transfer Photos From iPhone To Mac?
To use AirDrop, enable AirDrop on both your iPhone and Mac. On your iPhone, select the photos you want to transfer, tap the share icon, choose AirDrop, and select your Mac from the list of available devices.
- Enable AirDrop: Turn on AirDrop on both your iPhone and Mac in the Control Center.
- Select Photos: Choose the photos you want to transfer on your iPhone.
- Share Icon: Tap the share icon (the square with an arrow pointing up).
- Choose AirDrop: Select AirDrop from the sharing options.
- Select Mac: Choose your Mac from the list of available devices.
31. How To Use Third-Party Apps Like Dropbox Or Google Drive To Transfer Photos?
To use third-party apps like Dropbox or Google Drive, install the app on both your iPhone and computer. On your iPhone, upload the photos to the app, and then on your computer, download the photos from the app.
- Install App: Download and install Dropbox or Google Drive on both your iPhone and computer.
- Upload Photos: On your iPhone, upload the photos to the app.
- Download Photos: On your computer, open the app and download the photos.
32. What Are The Best Apps For Photo Backup And Storage On iPhone?
The best apps for photo backup and storage on iPhone include Google Photos, Dropbox, OneDrive, and Amazon Photos, each offering various storage options and features.
- Google Photos:
- Pros: Free storage (up to 15GB), automatic backup, photo editing tools.
- Cons: Compresses images slightly, requires Google account.
- Dropbox:
- Pros: Versatile file storage, easy sharing, automatic backup.
- Cons: Limited free storage, requires subscription for more space.
- OneDrive:
- Pros: Integration with Microsoft services, automatic backup, sharing options.
- Cons: Limited free storage, requires Microsoft account.
- Amazon Photos:
- Pros: Unlimited photo storage for Prime members, automatic backup.
- Cons: Requires Amazon Prime membership, limited video storage.
33. How To Use Google Photos For Photo Backup On iPhone?
To use Google Photos for photo backup on your iPhone, download and install the Google Photos app, sign in with your Google account, and enable backup and sync in the app settings.
- Install Google Photos: Download and install the Google Photos app from the App Store.
- Sign In: Sign in with your Google account.
- Enable Backup & Sync: In the app settings, enable “Backup & sync.”
- Choose Backup Quality: Select the desired backup quality (Original or Storage saver).
34. How To Use Dropbox For Photo Backup On iPhone?
To use Dropbox for photo backup on your iPhone, download and install the Dropbox app, sign in with your account, and enable camera uploads in the app settings.
- Install Dropbox: Download and install the Dropbox app from the App Store.
- Sign In: Sign in with your Dropbox account.
- Enable Camera Uploads: In the app settings, enable “Camera Uploads.”
35. How To Evaluate The Storage Needs For Your iPhone Photos?
To evaluate your storage needs, check your current photo library size in Settings > General > iPhone Storage, and consider future growth based on your photography habits.
- Check Current Usage: Go to Settings > General > iPhone Storage and view the “Photos” usage.
- Estimate Future Growth: Consider how many photos and videos you typically take per month.
- Factor in Other Files: Account for other files like apps, documents, and music.
- Choose a Storage Plan: Select an iCloud or third-party storage plan that meets your needs.
36. What Are The Different Storage Options Available For iPhone Photos?
The different storage options available for iPhone photos include iCloud, iTunes backups, third-party cloud services like Google Photos and Dropbox, and physical storage devices like external hard drives.
- iCloud:
- Pros: Automatic syncing, accessibility across devices.
- Cons: Requires sufficient iCloud storage, relies on internet connectivity.
- iTunes/Finder Backup:
- Pros: Free, complete device backup.
- Cons: Requires computer access, manual process.
- Third-Party Cloud Services:
- Pros: Flexible storage options, sharing features.
- Cons: May require subscription, depends on internet connectivity.
- External Hard Drives:
- Pros: Large storage capacity, physical control of data.
- Cons: Requires manual backup, not accessible across devices.
37. How To Move Photos From iCloud To An External Hard Drive?
To move photos from iCloud to an external hard drive, download the photos from iCloud.com to your computer, then copy them to the external hard drive.
- Download from iCloud: Sign in to iCloud.com, go to Photos, and download the photos you want to move.
- Connect External Hard Drive: Plug the external hard drive into your computer.
- Copy Photos: Copy the downloaded photos from your computer to the external hard drive.
38. How To Organize Your Photos For Easier Management And Backup?
Organize your photos by creating albums, using keywords and tags, and regularly deleting duplicates and unwanted photos.
- Create Albums: Group photos by event, date, or theme.
- Use Keywords and Tags: Add descriptive keywords and tags to make photos searchable.
- Delete Duplicates: Remove duplicate photos to save storage space.
- Regular Maintenance: Set aside time to regularly review and organize your photo library.
39. What Are The Benefits Of Organizing Photos Into Albums?
Organizing photos into albums makes it easier to find specific photos, share photos with others, and manage your photo library more efficiently.
- Easy Navigation: Quickly find photos by browsing through relevant albums.
- Simplified Sharing: Share entire albums with friends and family.
- Efficient Management: Organize and manage your photo library more effectively.
40. How To Use Keywords And Tags To Make Photos Searchable?
To use keywords and tags, select a photo in the Photos app, swipe up to see the information panel, and add a caption or keywords in the “Add a caption” field. This allows you to search for photos based on these terms later.
- Select Photo: Open a photo in the Photos app.
- Swipe Up: Swipe up on the photo to reveal the information panel.
- Add Caption/Keywords: Type descriptive keywords or a caption in the “Add a caption” field.
- Search: Use the search bar in the Photos app to find photos based on these terms.
These comprehensive guidelines should help you recover lost photos and implement effective strategies to prevent future data loss, ensuring your memories are always safe and accessible. At dfphoto.net, we are committed to providing you with the tools and knowledge to master your photography and protect your visual stories.
Visit dfphoto.net for more photography tips, tutorials, and a vibrant community to share your passion. Address: 1600 St Michael’s Dr, Santa Fe, NM 87505, United States. Phone: +1 (505) 471-6001. Let’s capture and preserve your precious moments together!
FAQ Section
1. Can I recover photos deleted years ago from my iPhone?
Yes, you might recover old photos if you had iCloud Backup or other backup services enabled. Check your iCloud account, iTunes backups, or third-party backup apps for the photos. If there’s no backup, data recovery might not be possible.
2. How long do photos stay in the “Recently Deleted” album?
Photos remain in the “Recently Deleted” album for 30 days. After that, they are permanently deleted from your device.
3. Is it possible to recover photos from a lost or stolen iPhone?
Yes, if you have iCloud Photos enabled, your photos are safely stored in the cloud and accessible from any device by logging into your Apple ID.
4. What is the best way to ensure my photos are always backed up?
The best way is to enable iCloud Photos, which automatically uploads and syncs your photos across devices. Regularly check your backup settings to ensure it is active and functioning correctly.
5. Can I recover photos if I accidentally deleted them from iCloud?
Yes, you can recover photos deleted from iCloud by checking the “Recently Deleted” album on iCloud.com.
6. How much does it cost to recover photos from a professional data recovery service?
Professional data recovery services can range from $100 to $1000 or more, depending on the complexity and severity of the damage.
7. Are there any free iPhone photo recovery apps?
Yes, some free apps claim to recover photos, but their success rates vary. They may also have limitations on the number of photos you can recover without a paid upgrade.
8. How do I prevent photos from being permanently deleted from my iPhone?
To prevent permanent deletion, enable iCloud Photos, regularly back up your iPhone, and be cautious when deleting photos, ensuring you review them carefully before deletion.
9. What should I do if my iPhone won’t turn on, but I need to recover the photos?
If your iPhone won’t turn on, take it to a professional repair or data recovery service. They may be able to access the data even if the device is not functioning.
10. Can I recover photos from an iPhone that has been reset to factory settings?
It’s difficult to recover photos after a factory reset because the process erases all data. You may recover them if you have a backup on iCloud or iTunes. Professional data recovery services might also help, but success isn’t guaranteed.