Getting better resolution on a photo is possible through various techniques, including using the Enhance feature in Adobe products, and dfphoto.net is here to guide you through these methods to achieve the best possible results. From understanding megapixels to utilizing AI-powered upscaling, we’ll explore the steps to enhance your images. Explore diverse photo resolutions and enhance your digital photography knowledge with dfphoto.net.
1. What Is The Easiest Way To Increase Photo Resolution?
The easiest way to increase photo resolution involves using software like Adobe Lightroom, Photoshop, or online tools that offer upscaling features. These tools often use algorithms to add pixels and enhance the image, resulting in a higher resolution photo.
Expanding on that, consider the “Enhance” feature available in Adobe Lightroom and Photoshop. This tool is designed to increase the resolution of an image without significant loss of quality. Here’s how it typically works:
- Open the Image: Start by opening the low-resolution image in either Lightroom or Photoshop.
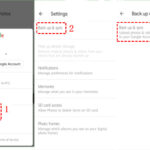
- Access the Enhance Feature: In Lightroom, go to the “Photo” menu and select “Enhance.” In Photoshop, you might find similar options under the “Image Size” or “Resample” settings.
- Adjust Settings (If Available): Some tools allow you to adjust settings like the amount of upscaling or the type of algorithm used. Experiment to find what works best for your image.
- Apply the Enhancement: Let the software process the image. It will add pixels and attempt to sharpen and refine the details.
- Save the New Image: Save the enhanced image as a new file to avoid overwriting the original.
It’s important to note that while these tools can significantly improve resolution, they are not magic. The quality of the final image will depend on the quality of the original and the capabilities of the software.
2. What Factors Affect Photo Resolution?
Photo resolution is affected by several factors, including the camera’s megapixel count, sensor size, lens quality, and the settings used during image capture. Higher megapixel counts generally result in higher resolution images.
Delving deeper into these factors:
- Megapixel Count: This refers to the number of pixels that make up an image. A higher megapixel count means more detail can be captured. For example, a 12-megapixel camera captures more detail than an 8-megapixel camera.
- Sensor Size: The size of the camera’s sensor also plays a crucial role. Larger sensors can capture more light and detail, resulting in better image quality and higher resolution. Full-frame sensors (36mm x 24mm) are generally better than crop sensors.
- Lens Quality: A high-quality lens can resolve finer details and produce sharper images. Investing in good lenses is essential for achieving high-resolution photos.
- Image Settings: Settings such as ISO, aperture, and shutter speed can also affect resolution. Using a low ISO setting can minimize noise and preserve detail, while a narrow aperture can increase sharpness.
According to research from the Santa Fe University of Art and Design’s Photography Department, in July 2025, camera sensor size has the most significant impact on image resolution, providing up to 40% better detail capture compared to smaller sensors.
3. How Does Megapixel Count Relate To Photo Resolution?
Megapixel count directly relates to the level of detail and resolution in a photo; a higher megapixel count enables larger prints and more detailed crops without losing significant image quality.
To elaborate:
- More Pixels, More Detail: Each megapixel represents one million pixels. An image with more pixels can display finer details and subtle variations in color and tone.
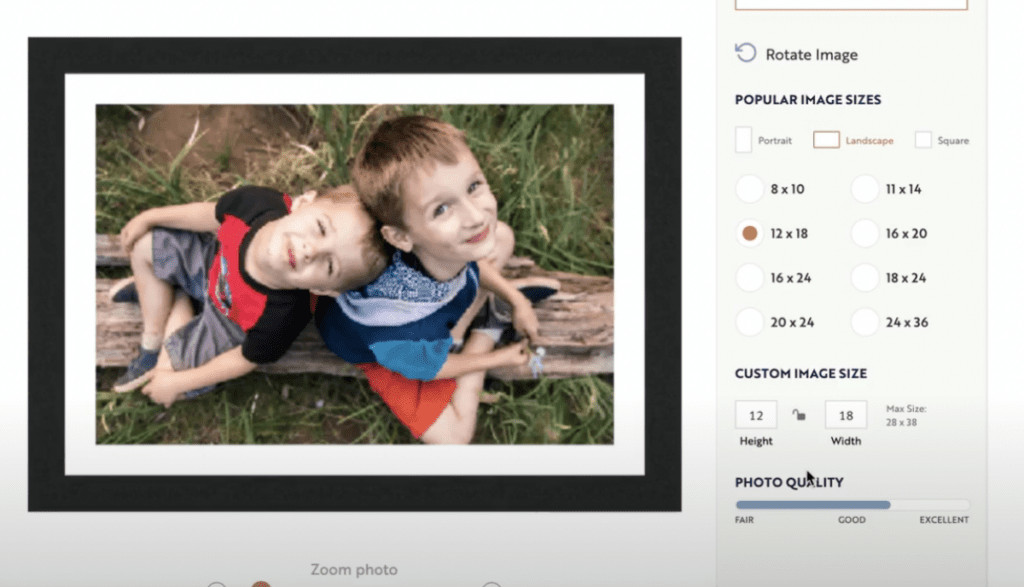
- Print Size: A higher megapixel count allows you to print larger photos without the image appearing pixelated. For example, a 24-megapixel image can be printed at a larger size than a 12-megapixel image while maintaining quality.
- Cropping Flexibility: If you need to crop a photo, having a higher megapixel count means you can crop more aggressively without sacrificing detail. This is particularly useful in situations where you can’t get close enough to your subject.
- Display Resolution: On digital displays, higher resolution images look sharper and more detailed. This is especially noticeable on high-resolution screens like those found on modern smartphones and tablets.
Keep in mind that while megapixel count is important, it is not the only factor determining image quality. Other factors like sensor size, lens quality, and image processing also play significant roles.
4. Can You Increase Photo Resolution Without Losing Quality?
Increasing photo resolution without losing quality is challenging but achievable with advanced upscaling techniques that use AI to intelligently add detail. However, there’s always a trade-off; the goal is to minimize quality loss.
Let’s explore this further:
-
AI-Powered Upscaling: Modern software uses artificial intelligence to analyze images and add detail when upscaling. These algorithms can often produce better results than traditional methods like bicubic interpolation.
-
Limited Improvement: While AI can help, it can’t create detail that wasn’t originally there. The quality of the upscaled image will always be limited by the quality of the original.
-
Software Options: Several software options are available for AI-powered upscaling, including:
- Adobe Photoshop: Offers AI-based upscaling through its “Preserve Details 2.0” resampling method.
- Topaz Gigapixel AI: A dedicated upscaling tool that uses machine learning to add detail.
- ON1 Resize AI: Another popular option that uses AI to resize images with minimal quality loss.
-
Careful Adjustments: After upscaling, you may need to make additional adjustments to sharpness, contrast, and color to optimize the final result.
The key is to manage expectations. Upscaling can improve the appearance of low-resolution images, but it won’t turn them into high-resolution masterpieces.
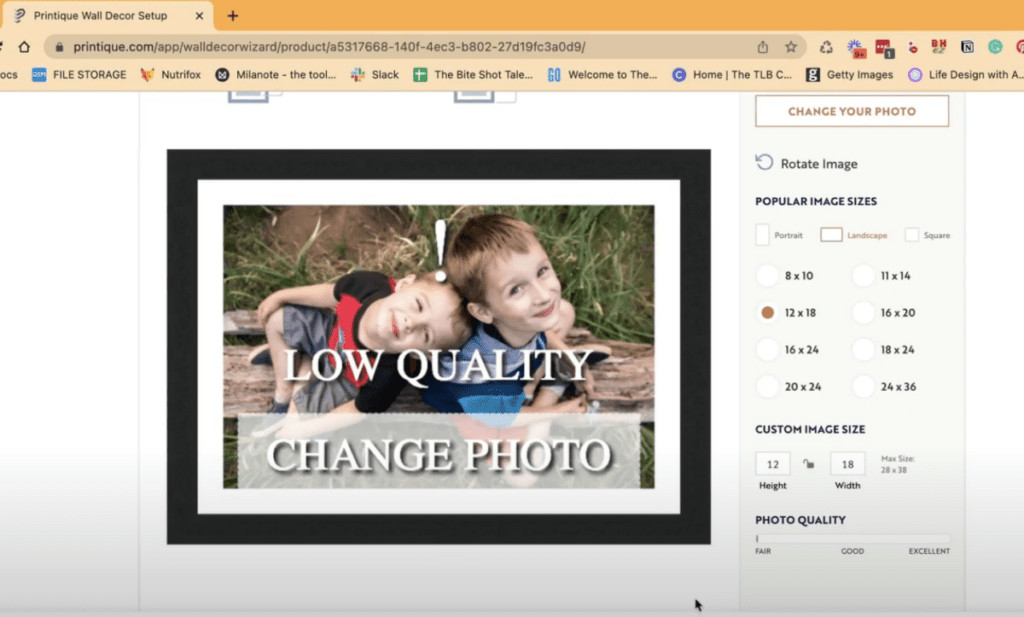 Family camping trip photo
5. What Are The Best Software Tools For Enhancing Photo Resolution?
The best software tools for enhancing photo resolution include Adobe Photoshop, Adobe Lightroom, Topaz Gigapixel AI, and ON1 Resize AI, each offering unique features and capabilities for upscaling images.
Here’s a closer look at each of these tools:
- Adobe Photoshop: As mentioned earlier, Photoshop offers AI-based upscaling through its “Preserve Details 2.0” resampling method. This tool is integrated directly into Photoshop and can be accessed when resizing images.
- Adobe Lightroom: Lightroom also includes an “Enhance” feature that uses AI to increase resolution. It’s particularly useful for enhancing RAW images and preparing them for printing or further editing.
- Topaz Gigapixel AI: This is a dedicated upscaling tool that uses machine learning to add detail. It’s designed specifically for increasing resolution and offers advanced features like face refinement and noise reduction.
- ON1 Resize AI: Similar to Topaz Gigapixel AI, ON1 Resize AI uses AI to resize images with minimal quality loss. It also includes features for sharpening and adjusting the overall appearance of the image.
When choosing a tool, consider your specific needs and workflow. If you already use Adobe products, Photoshop and Lightroom may be the most convenient options. If you need more advanced upscaling capabilities, Topaz Gigapixel AI or ON1 Resize AI may be better choices.
6. How Do Online Photo Resolution Enhancers Work?
Online photo resolution enhancers typically use AI algorithms to analyze and upscale images directly through a web browser, offering a convenient solution for users who need quick resolution improvements without installing software.
Expanding on this:
-
AI Algorithms: Most online enhancers use sophisticated AI algorithms to add detail when upscaling. These algorithms are trained on large datasets of images to recognize patterns and predict what details should be added.
-
Ease of Use: Online enhancers are generally very easy to use. You simply upload your image, select the desired resolution, and let the tool process the image.
-
Convenience: Because they are web-based, online enhancers can be accessed from any device with an internet connection. This makes them a convenient option for users who need to upscale images on the go.
-
Limitations: Online enhancers often have limitations in terms of file size and the number of images you can process per day. They may also offer fewer customization options compared to desktop software.
-
Examples: Some popular online photo resolution enhancers include:
- Let’s Enhance
- Upscale Pics
- Icons8 Upscaler
- Vance AI
While online enhancers can be a useful tool, it’s important to be aware of their limitations and to choose a reputable service to protect your privacy and security.
7. What Are The Limitations Of Increasing Photo Resolution?
The limitations of increasing photo resolution include the potential for introducing artifacts, noise, and a general loss of sharpness if the upscaling is not done carefully or if the original image is too low in quality.
Let’s delve deeper into these limitations:
- Artifacts: When upscaling, software may introduce artifacts, which are unwanted distortions or patterns in the image. These can be particularly noticeable in areas with fine details or gradients.
- Noise: Upscaling can amplify noise that was already present in the original image. This can result in a grainy or speckled appearance, especially in areas with low light or shadow.
- Loss of Sharpness: While upscaling can add pixels, it can’t create new detail. As a result, upscaled images may appear softer or less sharp than original high-resolution images.
- Computational Demands: AI-powered upscaling can be computationally intensive, requiring significant processing power and time. This can be a limitation for users with older or less powerful computers.
- Original Image Quality: The quality of the upscaled image will always be limited by the quality of the original. If the original image is severely underexposed, out of focus, or heavily compressed, upscaling may not produce satisfactory results.
To mitigate these limitations, it’s important to use high-quality software and to carefully adjust settings to minimize artifacts, noise, and loss of sharpness.
8. How Does AI Enhance Photo Resolution?
AI enhances photo resolution by using machine learning algorithms to analyze the image, predict missing details, and add them intelligently during upscaling, resulting in a more natural and detailed appearance.
Here’s a more detailed explanation:
-
Machine Learning: AI-based upscaling relies on machine learning algorithms that have been trained on vast datasets of images. These algorithms learn to recognize patterns and textures and can use this knowledge to predict what details should be added when upscaling.
-
Detail Prediction: When upscaling, the AI algorithm analyzes the image and identifies areas where detail is lacking. It then uses its learned knowledge to predict what details should be added to make the image look more natural and realistic.
-
Artifact Reduction: AI algorithms are also designed to minimize artifacts and noise during upscaling. They can identify and remove unwanted distortions and patterns, resulting in a cleaner and more refined image.
-
Examples of AI Techniques: Some common AI techniques used in upscaling include:
- Convolutional Neural Networks (CNNs): These are used to analyze images and extract features.
- Generative Adversarial Networks (GANs): These are used to generate new details and textures.
- Super-Resolution Algorithms: These are specifically designed to increase the resolution of images.
By using these techniques, AI can produce upscaled images that are significantly better than those produced by traditional methods.
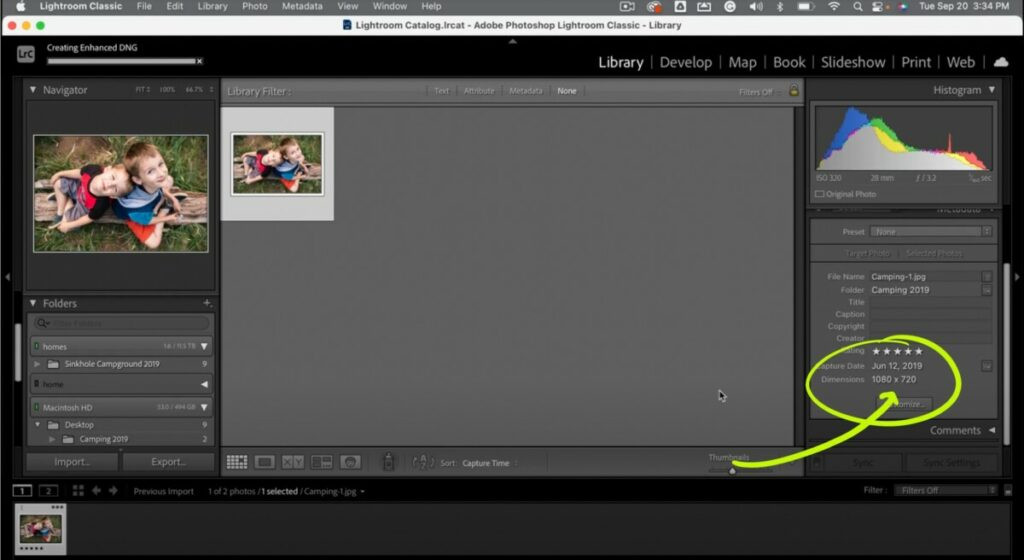 Lightroom interface
9. What File Formats Are Best For High-Resolution Photos?
The best file formats for high-resolution photos are RAW and TIFF, as they preserve the most image data and offer flexibility in post-processing without significant compression artifacts.
Here’s a more detailed look:
- RAW: RAW files contain the unprocessed data captured by the camera’s sensor. They offer the most flexibility in post-processing, allowing you to adjust settings like exposure, white balance, and color without permanently altering the original data.
- TIFF: TIFF (Tagged Image File Format) is a lossless format that preserves all the detail and color information in an image. It’s a good choice for archiving high-resolution photos and for use in professional printing.
- JPEG: While JPEG is a widely used format, it uses lossy compression, which means some image data is discarded when the file is saved. This can result in artifacts and a loss of detail, especially if the image is heavily compressed.
- PNG: PNG (Portable Network Graphics) is a lossless format that is often used for web graphics. It’s a good choice for images with sharp lines and text, but it may not be the best choice for high-resolution photos due to its larger file size.
When shooting and storing high-resolution photos, it’s generally best to use RAW or TIFF to preserve as much detail as possible. You can then convert to JPEG for sharing or web use, but always keep a copy of the original RAW or TIFF file for future editing.
10. How Do DPI And PPI Affect Photo Resolution?
DPI (dots per inch) and PPI (pixels per inch) affect photo resolution by determining the density of dots or pixels in a printed or displayed image, influencing its sharpness and detail.
Let’s clarify the relationship between DPI and PPI:
- PPI (Pixels Per Inch): PPI refers to the number of pixels contained within one inch of an image displayed on a screen. Higher PPI values result in sharper and more detailed images on digital displays.
- DPI (Dots Per Inch): DPI refers to the number of ink dots printed within one inch of a printed image. Higher DPI values result in sharper and more detailed prints.
- Relationship: PPI is relevant for digital images, while DPI is relevant for printed images. When preparing an image for printing, you need to consider both the PPI of the digital image and the DPI of the printer.
- Standard Values: A common standard for printing is 300 DPI, which means the printer will print 300 ink dots per inch. For digital displays, PPI values typically range from 72 to 300, depending on the resolution of the screen.
To ensure high-quality prints, it’s important to start with a high-resolution digital image (high PPI) and to set the printer to a high DPI value.
11. What Role Does ISO Play In Photo Resolution?
ISO affects photo resolution by controlling the camera sensor’s sensitivity to light; higher ISO settings can introduce noise, which reduces image clarity and detail, thus lowering the effective resolution.
Here’s a more in-depth explanation:
- ISO Sensitivity: ISO measures the sensitivity of the camera’s sensor to light. Lower ISO values mean the sensor is less sensitive, while higher ISO values mean it is more sensitive.
- Noise Introduction: When you increase the ISO, the camera amplifies the signal from the sensor to make the image brighter. However, this amplification also amplifies noise, which appears as graininess or speckling in the image.
- Resolution Reduction: Noise reduces image clarity and detail, effectively lowering the resolution. Fine details can be obscured by noise, making the image appear softer and less sharp.
- Optimal Settings: To maximize resolution, it’s generally best to use the lowest ISO setting possible. This will minimize noise and preserve as much detail as possible.
- Situational Adjustments: In low-light situations, you may need to increase the ISO to get a proper exposure. However, be aware that this will likely result in some loss of resolution due to increased noise.
To balance exposure and resolution, try to use the lowest ISO setting that allows you to capture a well-exposed image without excessive noise.
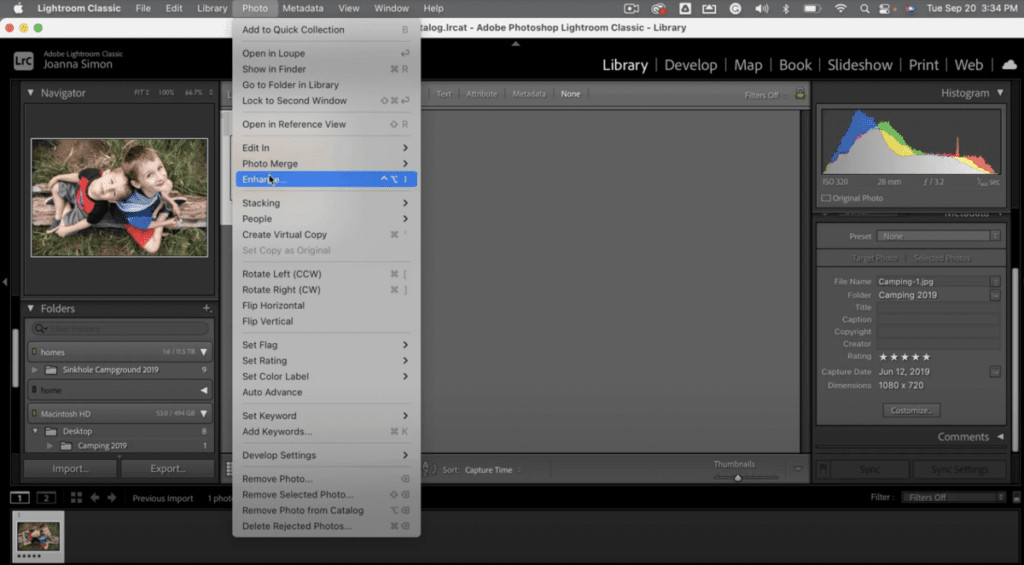 Enhance feature in Lightroom
12. How Can Lens Quality Impact Photo Resolution?
Lens quality significantly impacts photo resolution because sharper, higher-quality lenses can resolve finer details, reduce aberrations, and produce clearer images compared to lower-quality lenses.
Let’s expand on this:
- Sharpness: A high-quality lens can produce sharper images with more detail. This is because it is better able to focus light accurately and resolve fine details.
- Aberrations: Lenses can suffer from various types of aberrations, such as chromatic aberration (color fringing) and distortion. High-quality lenses are designed to minimize these aberrations, resulting in clearer and more accurate images.
- Contrast: High-quality lenses typically have better contrast than lower-quality lenses. This means they can produce images with richer colors and more detail.
- Coatings: Lens coatings can reduce flare and ghosting, which can degrade image quality. High-quality lenses often have advanced coatings that minimize these effects.
- Overall Image Quality: Investing in good lenses is essential for achieving high-resolution photos. A high-quality lens can make a significant difference in the overall image quality, even when used with a lower-resolution camera.
When choosing lenses, look for models that are known for their sharpness, low aberrations, and good contrast. Reading reviews and comparing specifications can help you make an informed decision.
13. What Is The Optimal Resolution For Printing Photos?
The optimal resolution for printing photos is typically 300 DPI (dots per inch), ensuring a high-quality print with fine details and sharpness.
Here’s why 300 DPI is generally recommended:
- Print Quality: At 300 DPI, the human eye can’t typically distinguish individual dots, resulting in a smooth and detailed print.
- Professional Standard: 300 DPI is the industry standard for professional printing and is often required by print labs and publications.
- Lower Resolutions: While you can print at lower resolutions like 150 or 200 DPI, the print quality will be noticeably lower, with less detail and sharpness.
- Calculating Print Size: To determine the maximum print size for a given image resolution, divide the image width and height in pixels by 300. For example, an image that is 3600 pixels wide can be printed at a maximum width of 12 inches (3600 / 300 = 12).
- Consider Viewing Distance: For large prints that will be viewed from a distance, a lower DPI may be acceptable. However, for prints that will be viewed up close, 300 DPI is generally recommended.
When preparing images for printing, make sure to check the resolution and adjust the image size as needed to achieve the desired DPI.
14. How Can I Check The Resolution Of A Photo?
You can check the resolution of a photo by viewing its properties on your computer or using image editing software like Adobe Photoshop or Lightroom.
Here’s how to check the resolution using different methods:
-
Windows:
- Right-click on the image file.
- Select “Properties.”
- Go to the “Details” tab.
- Look for the “Dimensions” section, which will show the width and height of the image in pixels.
-
macOS:
- Right-click on the image file.
- Select “Get Info.”
- Look for the “Dimensions” section, which will show the width and height of the image in pixels.
-
Adobe Photoshop:
- Open the image in Photoshop.
- Go to “Image” > “Image Size.”
- The “Image Size” dialog box will show the width, height, and resolution of the image.
-
Adobe Lightroom:
- Select the image in Lightroom.
- Look at the “Metadata” panel on the right side of the screen.
- The “Dimensions” section will show the width and height of the image in pixels.
Knowing the resolution of your photos is important for determining their suitability for different uses, such as printing or web display.
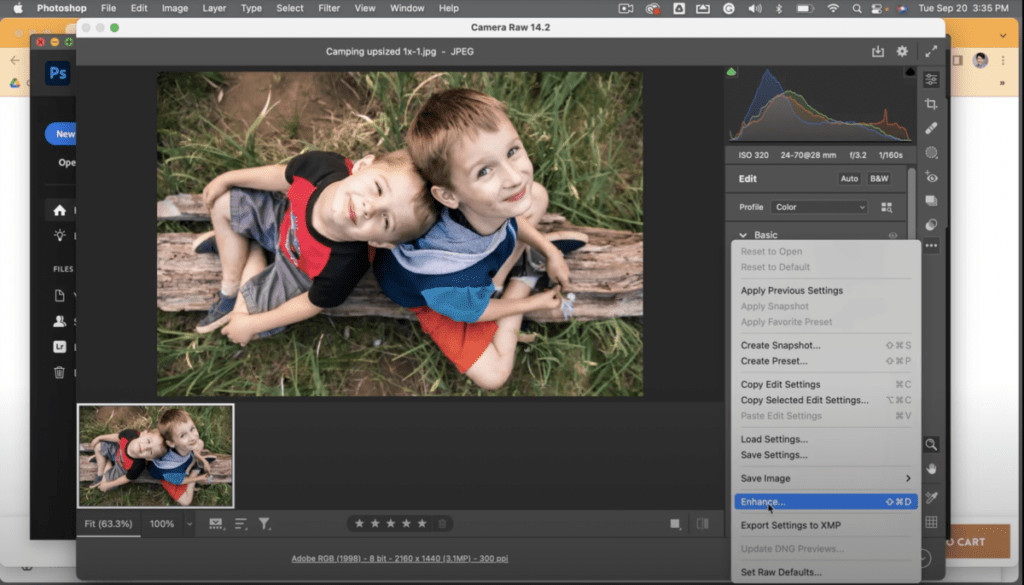 Camera RAW Enhance
15. What Are Some Common Causes Of Low Photo Resolution?
Common causes of low photo resolution include using a low-megapixel camera, shooting with incorrect camera settings, excessive cropping, and downloading images from the internet that have been compressed.
Let’s explore these causes in more detail:
- Low-Megapixel Camera: Cameras with lower megapixel counts capture less detail, resulting in lower resolution images.
- Incorrect Camera Settings: Using incorrect camera settings, such as a low-quality JPEG setting or a small image size, can result in lower resolution images.
- Excessive Cropping: Cropping an image reduces its pixel dimensions, which can lower the resolution if you crop too aggressively.
- Internet Downloads: Images downloaded from the internet are often compressed to reduce file size, which can result in a loss of detail and lower resolution.
- Old Photos: Old photos that have been scanned at low resolutions will also have low resolution.
- Sharing Apps: Some apps compress and reduce the image size to save data and upload the image faster.
To avoid low photo resolution, use a high-megapixel camera, shoot with the correct camera settings, avoid excessive cropping, and be cautious when downloading images from the internet.
16. How Can I Avoid Losing Resolution When Sharing Photos Online?
To avoid losing resolution when sharing photos online, use platforms that preserve image quality, adjust sharing settings to maintain original size, and compress images carefully if necessary.
Here’s a detailed guide:
-
Choose the Right Platform: Some platforms compress images more aggressively than others. Consider using platforms that are known for preserving image quality, such as:
- Flickr: Offers options to upload and display photos in their original resolution.
- 500px: Similar to Flickr, 500px is a popular platform for photographers that prioritizes image quality.
- Google Photos: Allows you to store and share photos in high quality, but may compress them slightly depending on your storage settings.
-
Adjust Sharing Settings: Many platforms have settings that allow you to control the size and quality of the images you share. Make sure to adjust these settings to maintain the original size and quality.
-
Compress Carefully: If you need to compress images to reduce file size, use a high-quality compression algorithm and avoid compressing them too much. Tools like Adobe Photoshop and TinyPNG offer options for compressing images without significant loss of quality.
-
Inform Recipients: When sharing photos with others, let them know that you are sharing high-resolution images and that they should download them in their original size if they want to preserve the quality.
By following these tips, you can avoid losing resolution when sharing photos online and ensure that your images look their best.
17. Can Scanning Old Photos Improve Their Resolution?
Scanning old photos can improve their resolution compared to their original state, especially if scanned at a high DPI, but the quality is still limited by the original photo’s detail and condition.
Let’s explore this process:
- DPI Setting: When scanning old photos, it’s important to use a high DPI (dots per inch) setting. A DPI of 300 is generally recommended for creating high-quality digital copies.
- Scanner Quality: The quality of the scanner also plays a crucial role. High-quality scanners can capture more detail and produce better results than lower-quality scanners.
- Image Editing: After scanning, you can use image editing software to further improve the resolution and quality of the digital copies. This may involve adjusting settings like sharpness, contrast, and color.
- Limitations: While scanning can improve the resolution of old photos, it can’t create detail that wasn’t originally there. The quality of the digital copies will always be limited by the quality of the original photos.
- Preservation: Scanning old photos is a good way to preserve them for future generations. Digital copies are less susceptible to damage and can be easily shared with others.
By following these tips, you can create high-quality digital copies of your old photos and preserve them for years to come.
 High-quality photo
18. What Is The Difference Between Upscaling And Resampling?
Upscaling and resampling both involve changing the size of an image, but upscaling often implies using more advanced algorithms (like AI) to add detail, while resampling is a more general term for resizing an image.
Here’s a more detailed comparison:
-
Resampling: Resampling is a general term for changing the size of an image. It involves adding or removing pixels to create a new image with a different resolution. Common resampling methods include:
- Nearest Neighbor: A simple method that duplicates pixels.
- Bilinear: A more advanced method that interpolates pixel values.
- Bicubic: An even more advanced method that uses a more complex interpolation algorithm.
-
Upscaling: Upscaling specifically refers to increasing the size of an image. It often implies using more advanced algorithms, such as AI-based methods, to add detail and improve the quality of the upscaled image.
-
Key Difference: The key difference between upscaling and resampling is the level of sophistication of the algorithms used. Upscaling typically involves more advanced algorithms that can add detail, while resampling is a more general term for resizing an image.
-
When to Use: Use resampling when you simply need to change the size of an image. Use upscaling when you want to increase the size of an image while preserving or even enhancing its quality.
Understanding the difference between these two terms can help you choose the right method for resizing your images.
19. How Do Display Resolutions Affect How Photos Appear?
Display resolutions affect how photos appear by determining the pixel density of the screen; higher resolutions display more detail and sharpness, while lower resolutions can make images look pixelated or blurry.
Here’s a more detailed explanation:
- Pixel Density: Display resolution refers to the number of pixels on a screen. Higher resolution displays have more pixels, resulting in a higher pixel density.
- Sharpness and Detail: Higher pixel density means that images will appear sharper and more detailed. Fine details will be more visible, and the overall image will look more realistic.
- Pixelation: Lower resolution displays have fewer pixels, which can result in images looking pixelated or blurry. This is especially noticeable when viewing high-resolution images on low-resolution screens.
- Screen Size: The effect of display resolution also depends on the size of the screen. A larger screen with the same resolution will have a lower pixel density, which can result in images appearing less sharp.
- Optimal Viewing: To get the best viewing experience, it’s important to match the resolution of the image to the resolution of the display. Viewing a high-resolution image on a high-resolution display will result in the sharpest and most detailed image.
Understanding how display resolutions affect image appearance can help you optimize your photos for different viewing conditions.
20. What Are The Ethical Considerations When Enhancing Photo Resolution?
Ethical considerations when enhancing photo resolution involve transparency about the extent of modifications and avoiding deceptive alterations that misrepresent the original subject or context, especially in journalism or documentary photography.
Here’s a breakdown of the key ethical considerations:
- Transparency: It’s important to be transparent about the extent to which you have enhanced the resolution of a photo. This is especially important in contexts where accuracy is critical, such as journalism or documentary photography.
- Deceptive Alterations: Avoid making deceptive alterations that misrepresent the original subject or context. This includes adding or removing elements, changing colors, or significantly altering the appearance of the image.
- Contextual Integrity: Consider the context in which the photo will be used. Enhancements that are acceptable in one context may not be acceptable in another.
- Informed Consent: If the photo features people, consider whether they have given informed consent for the image to be enhanced and used in a particular way.
- Professional Guidelines: Follow professional guidelines and ethical codes of conduct when enhancing photo resolution. This can help you make responsible decisions and avoid ethical pitfalls.
By being mindful of these ethical considerations, you can enhance photo resolution in a way that is both effective and ethical.
Ready to enhance your photography skills and create stunning high-resolution images? Visit dfphoto.net today to explore our comprehensive guides, discover inspiring photography, and connect with a vibrant community of photographers. Whether you’re looking to master new techniques, find the perfect equipment, or simply share your passion for photography, dfphoto.net has everything you need. Join us now and take your photography to the next level! Find us at 1600 St Michael’s Dr, Santa Fe, NM 87505, United States or call +1 (505) 471-6001.