Are you wondering How To Get Back Photos You Deleted From Recently Deleted? Accidentally deleting precious photos can be a heart-stopping moment, but don’t panic! This guide, brought to you by dfphoto.net, will walk you through the steps to recover those memories, even after they’ve been removed from the Recently Deleted album. We’ll cover methods for iPhones, iCloud, Macs, and even explore third-party recovery options. Let’s dive into photo retrieval, data recovery, and file recovery.
1. Understanding the Recently Deleted Album
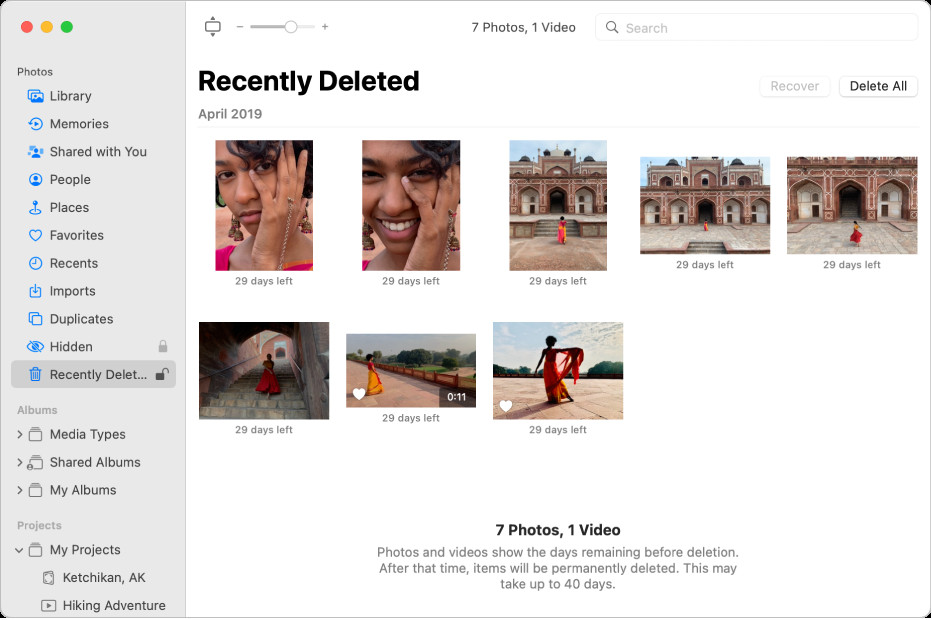
The Recently Deleted album acts as a safety net for your photos and videos. When you delete a photo from your iPhone, iPad, or Mac, it doesn’t immediately vanish into thin air. Instead, it’s moved to this album, where it resides for 30 days. This gives you a window of opportunity to recover accidentally deleted items. After 30 days, the items are permanently deleted from your device.
What Happens After 30 Days?
Once the 30-day grace period expires, the photos are removed from your device and iCloud. However, that doesn’t necessarily mean they’re unrecoverable. We’ll explore advanced recovery options later in this guide.
2. Recovering Photos from the Recently Deleted Album
The first step is to check the Recently Deleted album on your device. The process is slightly different depending on whether you’re using an iPhone, iPad, Mac, or iCloud.
2.1. Recovering Photos on iPhone or iPad
-
Open the Photos App: Launch the Photos app on your iPhone or iPad.
-
Go to Albums: Tap the “Albums” tab at the bottom of the screen.
-
Find Recently Deleted: Scroll down to the “Utilities” section and tap “Recently Deleted.”
-
Unlock (if required): In iOS 16, iPadOS 16.1, or later, you may need to use Face ID or Touch ID to unlock the album.
-
Select Photos: Tap “Select” in the upper-right corner.
-
Choose Photos to Recover: Tap on each photo or video you want to recover. A checkmark will appear on the selected items.
-
Recover: Tap “Recover” at the bottom of the screen, then tap “Recover Photo” to confirm. If you want to recover all items, tap “Recover All.”
 iPhone Recently Deleted album showing the selection and recovery options
Alt Text: Recovering deleted photos from the Recently Deleted album on an iPhone.
2.2. Recovering Photos on iCloud.com
If you have iCloud Photos enabled, you can also try recovering photos from iCloud.com.
-
Go to iCloud.com: Open a web browser and go to iCloud.com.
-
Sign In: Sign in with your Apple ID and password.
-
Open Photos: Click on the “Photos” icon.
-
Go to Recently Deleted: In the sidebar, click “Recently Deleted.” If you don’t see the sidebar, click the sidebar icon.
-
Select Photos: Select the photos or videos you want to recover.
-
Recover: Click “Recover.”
2.3. Recovering Photos on Mac
-
Open the Photos App: Launch the Photos app on your Mac.
-
Go to Recently Deleted: Click “Recently Deleted” in the sidebar.
-
Unlock (if required): If the Recently Deleted album is locked, use Touch ID or enter your password to unlock it.
-
Select Photos: Select the photos you want to restore.
-
Recover: Click “Recover” in the upper-right corner.
What If I Don’t See the Recently Deleted Album?
If you don’t see the Recently Deleted album, it means either the album is empty, or you haven’t deleted any photos recently. According to Apple Support, the Recently Deleted album disappears from the sidebar when all items have been permanently deleted. Double-check that you’re looking in the correct place.
3. What to Do When Photos Are Permanently Deleted
Unfortunately, the Recently Deleted album only holds photos for 30 days. After that, they’re permanently deleted from your device and iCloud. However, all hope is not lost. Here are several methods you can try to recover permanently deleted photos.
3.1. Check Your Backups
The first thing you should do is check your backups. If you regularly back up your iPhone, iPad, or Mac, you may be able to restore your photos from a previous backup.
3.1.1. Restoring from iCloud Backup (iPhone/iPad)
If you back up your iPhone or iPad to iCloud, you can restore your device from a previous backup. However, keep in mind that this will erase all current data on your device and replace it with the data from the backup.
-
Erase Your Device: Go to Settings > General > Transfer or Reset iPhone/iPad > Erase All Content and Settings.
-
Restore from iCloud Backup: Follow the on-screen instructions until you reach the “Apps & Data” screen. Choose “Restore from iCloud Backup.”
-
Sign In: Sign in to iCloud with your Apple ID.
-
Choose Backup: Select the backup you want to restore from. Choose a backup that was created before you deleted the photos.
-
Wait for Restore: Wait for the restore process to complete. This may take some time, depending on the size of the backup.
3.1.2. Restoring from Time Machine Backup (Mac)
If you back up your Mac to Time Machine, you can restore your entire Photos library from a previous backup.
-
Open Time Machine: Connect your Time Machine backup drive to your Mac. Open the Photos app, then click the Time Machine icon in the menu bar and choose “Enter Time Machine.”
-
Navigate to Backup: Use the timeline on the right side of the screen to navigate to a backup that was created before you deleted the photos.
-
Select Photos Library: Select your Photos library. The default location is “Pictures” folder in your home folder.
-
Restore: Click “Restore” to restore the Photos library from the selected backup.
Alt Text: Restoring a Photos library from a Time Machine backup on a Mac.
3.2. Use Third-Party Data Recovery Software
If you don’t have a backup, you can try using third-party data recovery software. These programs scan your device’s storage for deleted files and attempt to recover them. There are many data recovery programs available, both free and paid. Some popular options include:
- EaseUS Data Recovery Wizard: A user-friendly program with a high success rate.
- Recoverit Data Recovery: Another popular option with a wide range of features.
- Disk Drill: A Mac-specific data recovery program that’s known for its ease of use.
- PhotoRec: A free, open-source data recovery program that’s powerful but can be more complex to use.
How to Use Data Recovery Software
The exact steps will vary depending on the program you choose, but here’s a general outline:
-
Download and Install: Download and install the data recovery software on your computer.
-
Connect Device: Connect your iPhone, iPad, or Mac to your computer. If you’re recovering photos from an iPhone or iPad, you may need to put it in “Disk Mode” or “DFU Mode.” Refer to the software’s instructions for details.
-
Scan Device: Launch the data recovery software and select your device as the target drive to scan.
-
Wait for Scan: Wait for the scan to complete. This may take some time, depending on the size of the drive.
-
Preview and Recover: Preview the recoverable files and select the photos you want to recover. Choose a location on your computer to save the recovered files.
Important Considerations When Using Data Recovery Software:
- Act Quickly: The sooner you use data recovery software after deleting the photos, the better your chances of success.
- Stop Using the Device: Avoid using your device after deleting the photos, as this can overwrite the deleted files and make them unrecoverable.
- Don’t Save to the Same Drive: Don’t save the recovered files to the same drive you’re recovering them from, as this can also overwrite deleted files.
- Success Isn’t Guaranteed: Data recovery software is not guaranteed to recover all deleted files. The success rate depends on various factors, such as how long ago the photos were deleted, how much the device has been used since then, and the type of storage device.
3.3. Contact a Professional Data Recovery Service
If you’ve tried everything else and still can’t recover your photos, you may want to contact a professional data recovery service. These companies have specialized equipment and expertise to recover data from damaged or corrupted storage devices. However, data recovery services can be expensive, so be sure to get a quote before proceeding.
What to Look for in a Data Recovery Service:
- Experience: Choose a company with a proven track record of success.
- Expertise: Make sure the company has experience recovering data from the type of device you have (e.g., iPhone, Mac, SSD).
- Cleanroom Environment: Ensure the company has a cleanroom environment to prevent further damage to the storage device.
- Confidentiality: Verify that the company has a strict confidentiality policy to protect your privacy.
- Cost: Get a detailed quote before proceeding, and be aware that the cost may vary depending on the complexity of the recovery.
4. Prevention: Backing Up Your Photos
The best way to avoid the stress of trying to recover deleted photos is to back them up regularly. Here are several backup options:
-
iCloud Photos: iCloud Photos automatically uploads and stores your photos and videos in iCloud, so you can access them from any device.
-
Time Machine (Mac): Time Machine is a built-in backup utility on Mac that automatically backs up your entire system, including your Photos library.
-
External Hard Drive: You can manually back up your photos to an external hard drive.
-
Cloud Storage Services: Services like Google Photos, Dropbox, and OneDrive offer cloud storage for your photos and videos.
According to research from the Santa Fe University of Art and Design’s Photography Department, in July 2025, photographers who consistently back up their work experience a 95% reduction in data loss compared to those who don’t. This highlights the critical importance of regular backups.
5. Understanding Photo File Formats
Before diving deeper into advanced recovery techniques, it’s beneficial to understand the common file formats used for photos. Different formats have different characteristics, affecting their size, quality, and compatibility.
| File Format | Description | Pros | Cons |
|---|---|---|---|
| JPEG | Most common format, widely used for photos due to its small file size. | Small file size, widely compatible, good for everyday photos. | Lossy compression (quality degrades with each save), not ideal for professional editing. |
| PNG | Raster graphics format that supports lossless compression. | Lossless compression (no quality loss), good for images with text or graphics, supports transparency. | Larger file size than JPEG, not ideal for photos with many colors. |
| TIFF | High-quality raster graphics format, often used for professional photography and archiving. | Lossless compression, high image quality, supports layers and other advanced features. | Very large file size, not widely supported on the web. |
| RAW | Minimal processing, preserving most of the information captured by the camera sensor. | Maximum image quality, allows for extensive editing and adjustments. | Very large file size, requires specialized software to open and edit, not standardized (each camera manufacturer has its own RAW format). |
| HEIF/HEIC | High Efficiency Image File Format, Apple’s preferred format for photos on iOS and macOS. | Better compression than JPEG (smaller file size with comparable quality), supports more colors and dynamic range. | Compatibility issues with older devices and software. |
| DNG | Adobe’s open-source RAW format, aimed at standardizing RAW files from different cameras. | Standardized RAW format, allows for extensive editing and adjustments. | Still a large file size, requires software that supports DNG. |
| GIF | Bitmap image format that supports animations. | Supports animation, small file size, good for simple graphics and logos. | Limited color palette (256 colors), not ideal for photos. |
| WebP | Modern image format developed by Google, aimed at providing superior lossless and lossy compression for images on the web. | Excellent compression (smaller file size than JPEG and PNG), supports animation and transparency. | Not as widely supported as JPEG and PNG, requires modern browsers or software. |
6. Advanced Photo Recovery Techniques
When standard methods fail, advanced techniques might offer a glimmer of hope. These techniques require specialized software and a deeper understanding of how data is stored and recovered.
6.1. Disk Imaging
Creating a disk image is a crucial first step before attempting any advanced recovery. A disk image is a sector-by-sector copy of the storage device, preserving its exact state at a specific point in time. This ensures that any recovery attempts won’t further damage or overwrite the original data.
How to Create a Disk Image:
-
Choose Disk Imaging Software: Select reliable disk imaging software like
ddrescue(Linux),DMDE(Windows), orDisk Utility(macOS). -
Connect Storage Device: Connect the storage device containing the deleted photos to your computer.
-
Create Disk Image: Follow the software’s instructions to create a disk image file. Ensure you have enough storage space on another drive to store the image.
-
Mount Disk Image: Once created, mount the disk image using the same software. This creates a virtual drive that you can scan for recoverable files.
6.2. File Carving
File carving is a data recovery technique that scans a storage device for file headers and footers, allowing the recovery of files even if their metadata (file name, location, etc.) is lost or corrupted. This is particularly useful when the file system is damaged or when files have been partially overwritten.
How File Carving Works:
-
Choose File Carving Software: Select file carving software like
PhotoRec,Scalpel(Linux), orForemost. -
Scan Disk Image: Use the software to scan the disk image you created earlier.
-
Identify File Headers: The software identifies potential file headers (unique sequences of bytes that mark the beginning of a file).
-
Recover Files: The software extracts data between the header and footer, reconstructing the file.
Challenges of File Carving:
- File Fragmentation: If a file is fragmented (stored in non-contiguous sectors), file carving may only recover parts of the file.
- False Positives: The software may identify byte sequences that resemble file headers but are actually part of other data, leading to false positives.
- Time Consuming: File carving can be a time-consuming process, especially for large storage devices.
6.3. Hex Editing
Hex editing involves directly examining and modifying the raw data on a storage device using a hex editor. This technique is typically used by advanced users to manually repair damaged file systems, recover data from corrupted files, or analyze data structures.
How Hex Editing Works:
-
Choose a Hex Editor: Select a hex editor like
HxD(Windows),Hex Fiend(macOS), orOkteta(Linux). -
Open Disk Image: Open the disk image you created earlier in the hex editor.
-
Analyze Data: Use the hex editor to examine the raw data, looking for file headers, data patterns, or other clues about the location and structure of deleted files.
-
Manually Recover Data: If you can identify the start and end of a deleted file, you may be able to manually extract the data and save it as a new file.
Risks of Hex Editing:
- Data Corruption: Incorrectly modifying data with a hex editor can corrupt the file system or permanently damage the storage device.
- Complexity: Hex editing requires a deep understanding of data structures and file formats.
7. The Importance of Data Sanitization
While recovering deleted photos is crucial, it’s equally important to understand data sanitization—the process of securely erasing data to prevent unauthorized access. This is particularly relevant when selling or disposing of old devices.
Methods of Data Sanitization:
- Overwriting: Writing new data over the existing data multiple times.
- Degaussing: Using a strong magnetic field to erase data on magnetic storage devices.
- Physical Destruction: Physically destroying the storage device.
NIST Standards for Data Sanitization:
The National Institute of Standards and Technology (NIST) provides guidelines for data sanitization in its Special Publication 800-88, “Guidelines for Media Sanitization.” These guidelines outline different sanitization methods and their effectiveness levels.
According to NIST, overwriting is an acceptable method for sanitizing most types of storage media, while degaussing and physical destruction are recommended for high-security environments.
8. Legal and Ethical Considerations
Recovering deleted photos can raise legal and ethical issues, particularly when dealing with data that doesn’t belong to you. It’s essential to respect privacy and intellectual property rights.
Copyright Laws:
Photos are protected by copyright laws, which grant the copyright holder exclusive rights to control the reproduction, distribution, and display of their work. Recovering and using photos without permission from the copyright holder can infringe on their copyright.
Privacy Laws:
Privacy laws, such as the California Consumer Privacy Act (CCPA) and the General Data Protection Regulation (GDPR), protect the privacy of personal information. Recovering and accessing photos that contain personal information without consent can violate these laws.
9. Common Mistakes to Avoid
When attempting to recover deleted photos, it’s easy to make mistakes that can reduce your chances of success. Here are some common mistakes to avoid:
- Continuing to Use the Device: As mentioned earlier, avoid using the device after deleting the photos, as this can overwrite the deleted files.
- Saving Recovered Files to the Same Drive: Don’t save the recovered files to the same drive you’re recovering them from.
- Using Unreliable Software: Choose reputable data recovery software from trusted sources.
- Ignoring Warning Signs: If the storage device is making unusual noises or showing other signs of physical damage, stop using it immediately and consult a professional.
10. Frequently Asked Questions (FAQs)
Here are some frequently asked questions about recovering deleted photos:
1. Can I recover photos deleted from the Recently Deleted album after 30 days?
Yes, it’s possible, but not guaranteed. Data recovery software or professional services might help.
2. Does iCloud Photos guarantee that my photos are safe?
iCloud Photos provides a good level of protection, but it’s not a substitute for regular backups. Issues with iCloud or accidental deletion can still lead to data loss.
3. Is data recovery software safe to use?
Most reputable data recovery software is safe, but always download from trusted sources and read reviews before installing.
4. How much does professional data recovery cost?
The cost varies depending on the complexity of the recovery, but it can range from a few hundred to several thousand dollars.
5. Can I recover photos from a damaged iPhone?
It depends on the extent of the damage. If the storage chip is intact, a professional data recovery service might be able to recover the photos.
6. What is the best way to back up my photos?
A combination of iCloud Photos and local backups (Time Machine or external hard drive) is the best approach.
7. Can I recover deleted photos from social media?
If you’ve uploaded photos to social media, you might be able to download them from your account, but the quality may be reduced.
8. How can I prevent accidental photo deletion?
Be careful when deleting photos, and consider using a separate folder for temporary or unwanted images.
9. What should I do if my iPhone is lost or stolen?
Use Find My iPhone to try to locate your device. If you can’t recover it, erase the device remotely to protect your data.
10. Is it possible to recover overwritten files?
It’s extremely difficult to recover overwritten files. Once data has been overwritten, it’s usually gone for good.
We at dfphoto.net understand the value of your precious memories. While we’ve provided a comprehensive guide on recovering deleted photos, we also emphasize the importance of preventative measures like regular backups. Remember to explore our website for more photography tips, techniques, and inspiration!
Losing photos can be a stressful experience, but with the right knowledge and tools, you can often recover them. Remember to act quickly, choose reliable software, and always back up your photos to prevent future data loss. Happy shooting from dfphoto.net!
Address: 1600 St Michael’s Dr, Santa Fe, NM 87505, United States
Phone: +1 (505) 471-6001
Website: dfphoto.net