Getting a vintage look on photos involves blending the charm of classic film photography with modern digital techniques. At dfphoto.net, we offer numerous resources to help you achieve this timeless aesthetic, whether you’re aiming for subtle enhancements or a full-blown retro transformation. By exploring various editing methods and understanding the nuances of vintage photography, you can effortlessly infuse your images with nostalgic allure and artistic flair. Explore dfphoto.net to find inspiration, tutorials, and expert advice on creating stunning vintage-style photos. Dive into the world of retro aesthetics, film emulation, and classic photo effects.
1. Why Recreate a Vintage Look on Photos?
Want to know why vintage-looking photos are so popular? They evoke nostalgia, add character, and offer a unique aesthetic that stands out.
Vintage photography offers a unique blend of nostalgia, artistry, and distinct visual characteristics that many find appealing. According to research from the Santa Fe University of Art and Design’s Photography Department, in July 2025, recreating a vintage look adds character and emotional depth to contemporary images.
1.1. Evoking Nostalgia and Emotion
Vintage photos have the power to transport viewers back in time, stirring up feelings of nostalgia and connection to the past. The subtle imperfections, like grain and color casts, add an authentic, human touch often missing in modern, digitally perfect images. This nostalgic quality makes vintage-style photos particularly effective for storytelling and creating emotional resonance.
1.2. Adding Unique Character and Aesthetic Appeal
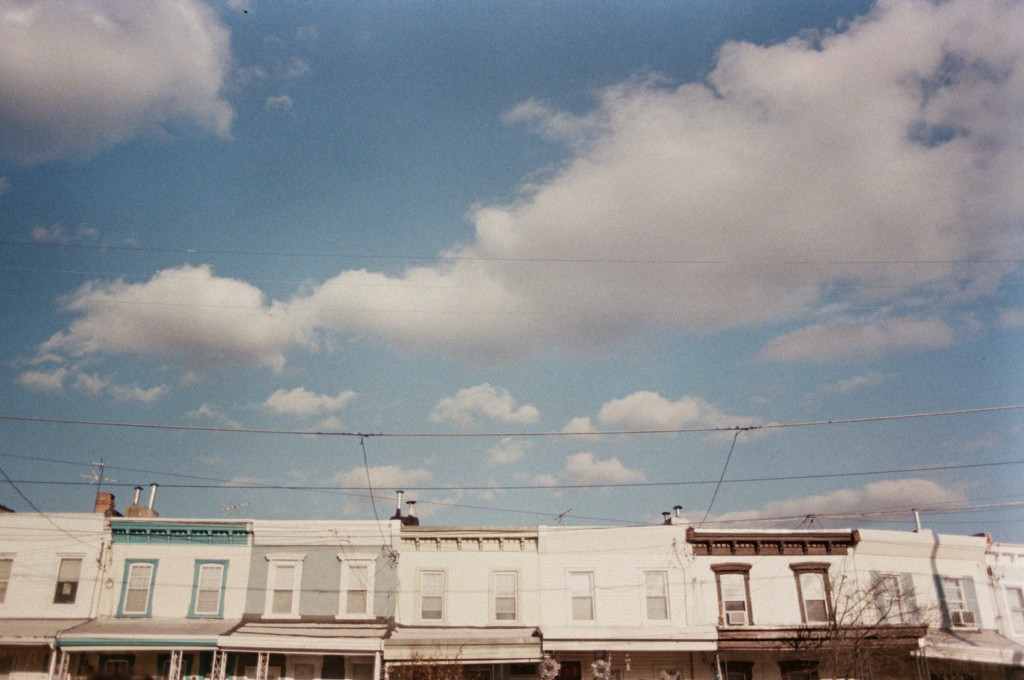
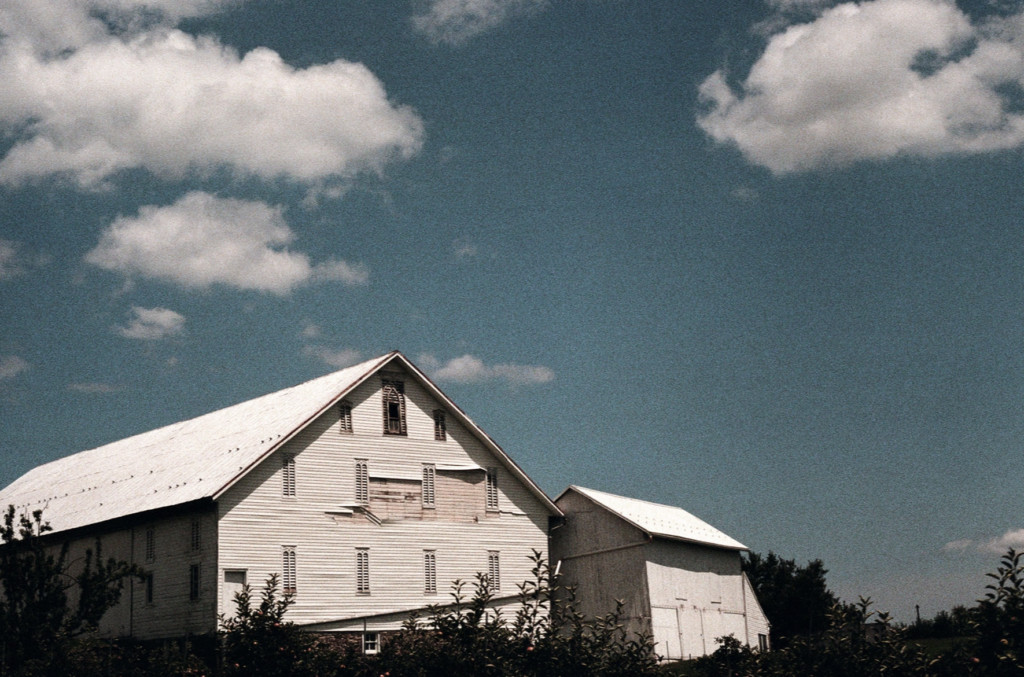
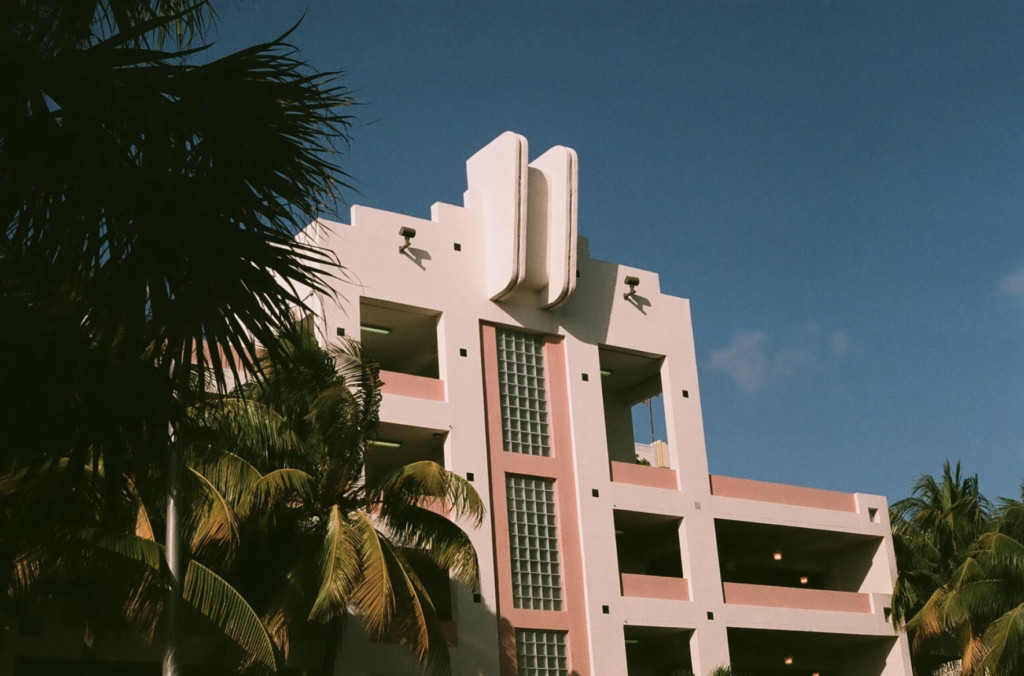
The vintage aesthetic offers a distinctive look that sets photos apart. Unlike the crisp, clean style of modern digital photography, vintage photos often feature softer focus, muted colors, and unique textures. These elements combine to create an artistic and visually interesting image that captures attention and invites closer inspection.
1.3. Standing Out in a Digital World
In an era dominated by digitally perfect images, a vintage look can help your photos stand out. The intentional imperfections and unique color palettes associated with vintage photography provide a refreshing contrast to the often sterile appearance of modern digital images. This distinctiveness makes vintage-style photos ideal for creative projects and artistic expression.
1.4. Creative Applications
Vintage effects can enhance various types of photography, including:
- Portraits: Adding a timeless quality to subjects.
- Landscapes: Evoking a sense of history and timelessness.
- Still Life: Creating a classic, artistic feel.
- Fashion: Blending modern styles with retro aesthetics.
1.5. How dfphoto.net Can Help
At dfphoto.net, we provide resources to help you master the art of vintage photo editing:
- Tutorials: Step-by-step guides on achieving various vintage effects using different software.
- Inspiration: Showcases of vintage-style photos to spark your creativity.
- Community: A platform to share your work and get feedback from fellow photographers.
- Expert Advice: Tips and techniques from experienced photographers on capturing the essence of vintage photography.
2. What are the Key Elements of a Vintage Look in Photography?
Want to know what makes a photo look vintage? It’s all about the colors, contrast, grain, and unique imperfections that mimic classic film photography.
Achieving a convincing vintage look in photography involves understanding and replicating several key elements that characterize classic film photos. These elements include color palettes, contrast levels, grain, and unique imperfections.
2.1. Color Palettes
Classic film photos often exhibit specific color characteristics due to the film stock and processing techniques used. Key aspects include:
- Muted Colors: Vintage photos typically have less saturated colors, giving them a softer, more subtle appearance.
- Warm Tones: A predominance of yellows, oranges, and reds can create a sense of warmth and nostalgia.
- Color Shifts: Slight color imbalances or casts, such as a touch of sepia or a cool blue tone, can enhance the vintage feel.
2.2. Contrast Levels
Contrast plays a crucial role in defining the vintage look. Key aspects include:
- Lower Contrast: Vintage photos often have less dynamic range, resulting in softer transitions between light and dark areas.
- Washed-Out Highlights: Highlights may appear slightly blown out, lacking the detail found in modern digital images.
- Deep Shadows: Shadows can be rich and dense, adding depth and mood to the image.
2.3. Grain
Film grain is a hallmark of vintage photography, adding texture and character to the image. Key aspects include:
- Visible Grain: The presence of fine, granular texture is a distinct characteristic of film.
- Grain Size: The size and intensity of the grain can vary, depending on the ISO and film stock used.
- Digital Grain: In digital editing, adding a subtle layer of digital noise can mimic the appearance of film grain.
2.4. Unique Imperfections
Imperfections are part of the charm of vintage photos, adding authenticity and a sense of history. Key aspects include:
- Light Leaks: Streaks of light caused by gaps in the camera, creating unique color patterns.
- Dust and Scratches: Small marks and blemishes that add texture and a sense of age.
- Soft Focus: Slightly blurred or out-of-focus areas, often due to lens limitations or camera shake.
- Vignetting: Darkening of the corners of the image, drawing attention to the center.
2.5. Emulating the Vintage Look
By carefully adjusting these elements, you can transform digital photos to resemble classic film images:
- Color Correction: Use color balance and hue/saturation adjustments to achieve the desired color palette.
- Contrast Adjustment: Reduce contrast and adjust highlights and shadows to create a softer look.
- Grain Addition: Apply digital noise or grain effects to mimic film texture.
- Imperfection Introduction: Add light leaks, dust, and scratches using textures or brushes in editing software.
2.6. dfphoto.net Resources
dfphoto.net offers a variety of resources to help you master the art of vintage photo editing:
- Detailed Tutorials: Step-by-step guides on recreating vintage effects using software like Adobe Photoshop and Lightroom.
- Preset Packs: Downloadable presets that apply vintage settings with a single click.
- Inspiration Galleries: Examples of vintage-style photos to inspire your creativity.
- Community Forums: A space to share your work and get feedback from fellow photographers.
 Vintage photo of a person wearing sunglasses
3. How to Achieve a Vintage Look Using Digital Editing?
Want to turn your digital photos into vintage masterpieces? You can do it by adjusting color balance, contrast, and adding film grain using editing software.
Achieving a vintage look using digital editing involves several key techniques that mimic the characteristics of classic film photography. By adjusting color balance, contrast, and adding film grain, you can transform your digital photos into vintage masterpieces.
3.1. Software Options
Various software options are available for editing photos, each offering unique tools and features:
- Adobe Photoshop: A professional-grade software with advanced editing capabilities.
- Adobe Lightroom: A popular choice for photographers, offering powerful editing and organization tools.
- GIMP: A free, open-source alternative to Photoshop, with many similar features.
- Mobile Apps: Apps like VSCO, Snapseed, and Instagram offer filters and editing tools for creating vintage effects on the go.
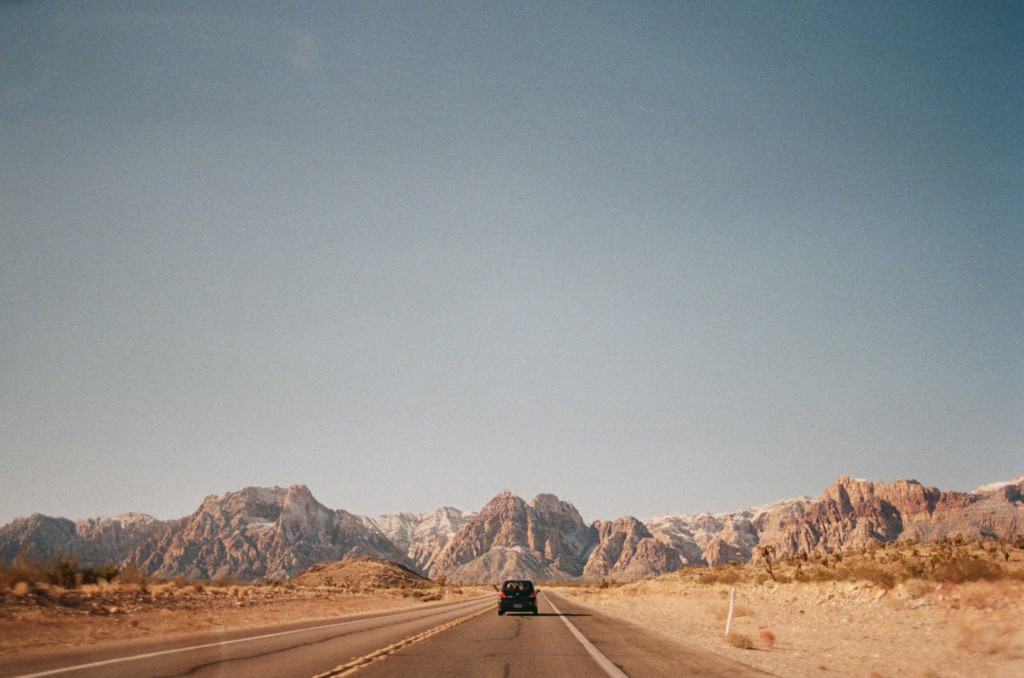
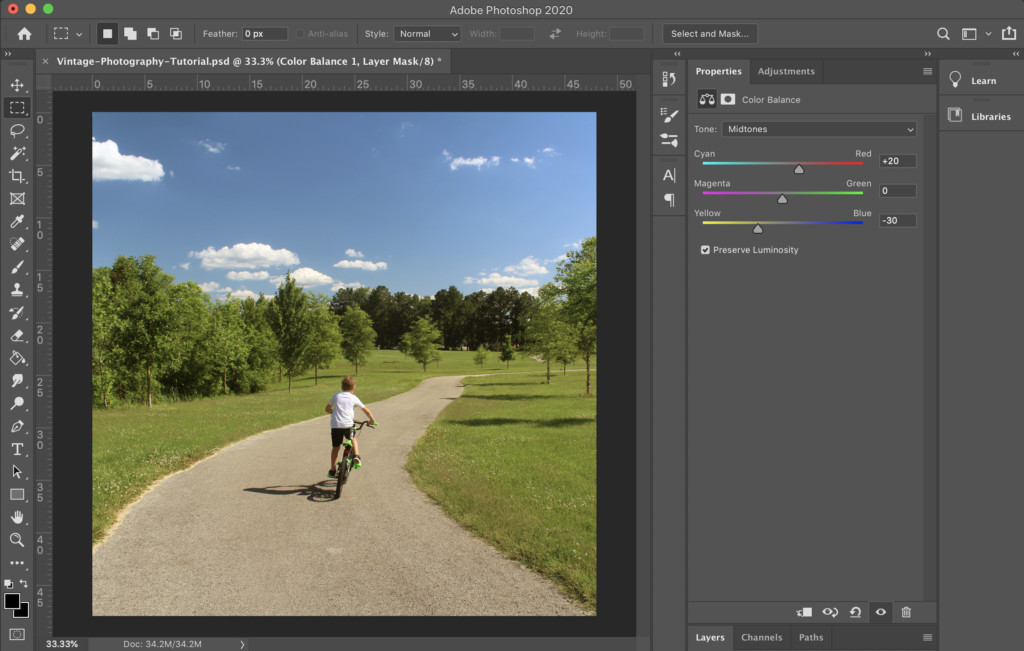
3.2. Adjusting Color Balance
Color balance is crucial for achieving a vintage look. The goal is to shift the colors towards warmer tones and create subtle color casts:
- Warm Highlights: Increase the red and yellow in the highlights to create a warm, sunny feel.
- Cool Shadows: Add blue to the shadows to simulate the color shifts often seen in vintage photos.
- Color Balance Tool: Use the color balance tool in your editing software to make precise adjustments.
3.3. Adjusting Contrast and Exposure
Vintage photos often have lower contrast and a slightly washed-out look:
- Reduce Contrast: Lower the contrast to soften the transitions between light and dark areas.
- Adjust Exposure: Slightly overexpose the image to brighten the highlights and reduce the overall dynamic range.
- Curves Adjustment: Use curves to fine-tune the contrast and brightness, creating a softer, more film-like look.
3.4. Adding Film Grain
Film grain is a key element of the vintage aesthetic:
- Add Noise: Use the “Add Noise” filter in Photoshop or the “Grain” tool in Lightroom to add digital noise.
- Adjust Amount and Size: Experiment with the amount and size of the grain to find a balance that looks natural.
- Monochromatic Noise: Choose monochromatic noise for a more authentic film-like grain.
3.5. Applying Filters and Presets
Filters and presets can streamline the editing process:
- Vintage Filters: Many editing apps and software offer built-in vintage filters that apply a range of effects.
- Download Presets: Download custom presets from dfphoto.net or other sources to quickly apply vintage settings.
- Customize Filters: Adjust the settings of filters and presets to fine-tune the look to your liking.
3.6. Adding Imperfections
To enhance the vintage feel, consider adding imperfections:
- Light Leaks: Use textures or brushes to add streaks of light, simulating light leaks.
- Dust and Scratches: Overlay textures with dust and scratches to add age and character.
- Vignetting: Apply a subtle vignette to darken the corners and draw attention to the center.
3.7. Step-by-Step Example
Here’s a step-by-step example using Adobe Lightroom:
- Import Photo: Open your digital photo in Lightroom.
- Adjust White Balance: Shift the white balance towards warmer tones.
- Reduce Contrast: Lower the contrast slider.
- Adjust Highlights and Shadows: Brighten the highlights and deepen the shadows.
- Add Grain: Use the “Grain” tool to add a subtle layer of noise.
- Apply Vignetting: Use the “Effects” panel to add a slight vignette.
- Fine-Tune: Make any additional adjustments to achieve the desired look.
3.8. dfphoto.net Resources
dfphoto.net offers a wealth of resources to help you master vintage photo editing:
- Detailed Tutorials: Step-by-step guides on using various software tools.
- Preset Downloads: A wide selection of vintage presets for Lightroom and Photoshop.
- Community Forum: Share your edited photos and get feedback from other photographers.
- Expert Tips: Learn from experienced photographers on achieving authentic vintage effects.
 Digital photo editing interface
4. What are the Best Software and Tools for Vintage Photo Editing?
Looking for the right tools to create vintage photos? Adobe Photoshop, Lightroom, and mobile apps like VSCO offer powerful features and filters to help you achieve the perfect retro look.
Selecting the right software and tools is essential for achieving authentic and visually appealing vintage photo edits. Adobe Photoshop and Lightroom are industry-standard choices, while mobile apps like VSCO offer convenient options for on-the-go editing.
4.1. Adobe Photoshop
Adobe Photoshop is a professional-grade software that offers unparalleled control and flexibility for vintage photo editing:
- Advanced Color Correction: Precise color balance and hue/saturation adjustments.
- Layering and Masking: Non-destructive editing with layers and masks.
- Filter Effects: A wide range of filters, including noise, blur, and distortion effects.
- Texture Overlays: Add realistic textures for light leaks, dust, and scratches.
- Custom Brushes: Create and use custom brushes for unique effects.
4.2. Adobe Lightroom
Adobe Lightroom is a popular choice among photographers, offering powerful editing and organization tools:
- Preset Management: Easy import and management of presets for quick vintage looks.
- Global Adjustments: Adjust exposure, contrast, highlights, and shadows.
- Local Adjustments: Use adjustment brushes and gradients for targeted edits.
- Color Grading: Fine-tune color balance with color wheels and sliders.
- Grain and Vignetting: Add realistic film grain and vignetting effects.
4.3. GIMP
GIMP (GNU Image Manipulation Program) is a free, open-source alternative to Photoshop:
- Similar Features: Offers many of the same features as Photoshop, including layers, masks, and filters.
- Customizable Interface: Customize the interface to suit your workflow.
- Plugin Support: Extend functionality with a wide range of plugins.
- Color Correction: Adjust color balance and levels for vintage effects.
- Noise and Blur Filters: Add grain and blur for a film-like appearance.
4.4. VSCO
VSCO is a mobile app known for its high-quality filters and editing tools:
- Film-Inspired Presets: A wide range of presets that emulate classic film stocks.
- Adjustable Filters: Fine-tune the intensity and characteristics of presets.
- Basic Adjustments: Adjust exposure, contrast, and color balance.
- Grain and Fade: Add grain and fade effects for a vintage look.
- User Community: Share your photos and discover inspiration from other users.
4.5. Snapseed
Snapseed is another popular mobile app developed by Google:
- Powerful Tools: Offers a range of editing tools, including curves, selective adjustments, and healing.
- Vintage Filters: Includes several filters specifically designed for creating vintage effects.
- Grain and Texture: Add grain and texture for a film-like appearance.
- Double Exposure: Create unique effects by layering multiple images.
- User-Friendly Interface: Easy-to-use interface for quick and intuitive editing.
4.6. Comparison Table
| Software | Pros | Cons | Price |
|---|---|---|---|
| Photoshop | Advanced editing, maximum control, texture overlays | Steeper learning curve, more expensive | Subscription-based |
| Lightroom | Preset management, global adjustments, easy organization | Less flexible than Photoshop, fewer advanced features | Subscription-based |
| GIMP | Free, open-source, customizable | Less intuitive than Photoshop, limited support and documentation | Free |
| VSCO | Mobile editing, film-inspired presets, user community | Limited editing tools, in-app purchases | Subscription-based |
| Snapseed | Free, mobile editing, powerful tools | Fewer filters than VSCO, less emphasis on community | Free |
4.7. dfphoto.net Recommendations
dfphoto.net recommends the following tools for vintage photo editing:
- For Professionals: Adobe Photoshop and Lightroom offer the most comprehensive features and control.
- For Beginners: VSCO and Snapseed are excellent mobile apps for quick and easy vintage edits.
- For Budget-Conscious Users: GIMP is a powerful, free alternative to Photoshop.
By choosing the right software and tools, you can effectively create stunning vintage-style photos that capture the essence of classic film photography.
 Adobe Photoshop interface
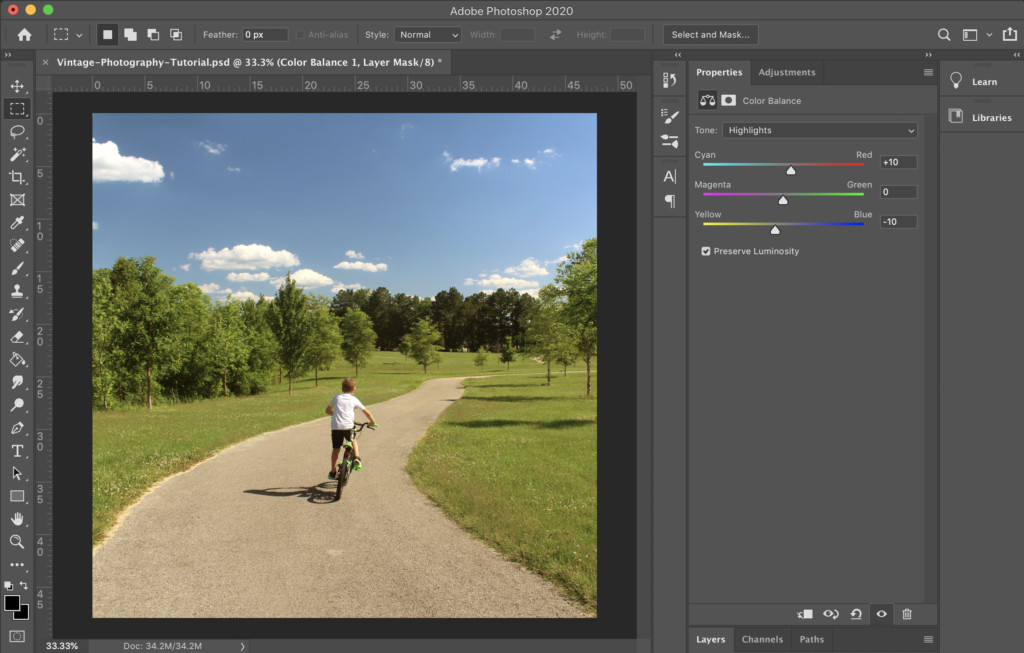
5. How to Simulate Film Grain for a Vintage Photo Effect?
Want to add realistic film grain to your photos? Use editing software like Photoshop or Lightroom to apply digital noise, adjusting the size and amount for the perfect vintage texture.
Simulating film grain is a crucial step in achieving a realistic vintage photo effect. By adding digital noise in editing software, you can replicate the texture and character of classic film.
5.1. Understanding Film Grain
Film grain is the random, textured pattern that appears in film photos due to the presence of tiny silver halide crystals in the film emulsion. The size and density of these crystals determine the amount and appearance of the grain.
5.2. Software Options for Adding Grain
Various software options offer tools for adding digital noise to simulate film grain:
- Adobe Photoshop: Use the “Add Noise” filter to create digital noise.
- Adobe Lightroom: Use the “Grain” tool in the “Effects” panel to add grain.
- GIMP: Use the “Noise” filter to add digital noise.
- VSCO and Snapseed: These mobile apps offer grain tools as part of their editing features.
5.3. Using Photoshop
Here’s how to add film grain in Photoshop:
-
Open Image: Open your photo in Photoshop.
-
Create New Layer: Create a new layer to apply the noise non-destructively.
-
Go to Filter: Go to “Filter” > “Noise” > “Add Noise.”
-
Adjust Settings:
- Amount: Adjust the amount of noise to your liking. A subtle amount (e.g., 2-5%) is usually sufficient.
- Distribution: Choose “Gaussian” for a more natural-looking grain.
- Monochromatic: Check the “Monochromatic” box to add grayscale noise, which is more similar to film grain.
-
Blend Mode: Adjust the blend mode of the noise layer to “Overlay” or “Soft Light” for a more subtle effect.
-
Opacity: Lower the opacity of the noise layer if the grain is too strong.
5.4. Using Lightroom
Here’s how to add film grain in Lightroom:
-
Open Image: Open your photo in Lightroom.
-
Go to Effects Panel: Go to the “Effects” panel in the Develop module.
-
Adjust Grain Settings:
- Amount: Adjust the amount of grain. A value between 10-30 is usually a good starting point.
- Size: Adjust the size of the grain. Smaller sizes create finer grain, while larger sizes create coarser grain.
- Roughness: Adjust the roughness to control the texture of the grain.
5.5. Tips for Realistic Film Grain
- Subtlety is Key: Avoid adding too much grain, which can look artificial. A subtle amount of grain is usually more effective.
- Consider ISO: Higher ISO settings in film photography result in more grain. Consider the equivalent ISO when adding digital noise.
- Match Grain to Film Stock: Different film stocks have different grain characteristics. Research the grain of specific film stocks for inspiration.
- Experiment: Experiment with different settings to find the grain that best suits your photo and desired vintage look.
5.6. Example Settings
Here are some example settings for adding film grain:
| Software | Setting | Value |
|---|---|---|
| Photoshop | Amount | 2-5% |
| Distribution | Gaussian | |
| Monochromatic | Checked | |
| Lightroom | Amount | 10-30 |
| Size | 2-4 | |
| Roughness | 20-40 |
5.7. dfphoto.net Resources
dfphoto.net offers valuable resources to help you simulate film grain effectively:
- Tutorials: Step-by-step guides on adding film grain using Photoshop, Lightroom, and other software.
- Preset Downloads: Presets with realistic grain settings for quick application.
- Community Forum: Share your photos and get feedback on your grain simulation techniques.
- Expert Tips: Learn from experienced photographers on achieving authentic vintage effects.
By following these techniques and utilizing the resources at dfphoto.net, you can add realistic film grain to your photos, enhancing the vintage effect and creating visually appealing images.
 Adding noise filter in Photoshop
6. How to Add Light Leaks and Other Imperfections?
Want to give your photos a genuine vintage feel? Adding light leaks, dust, and scratches can create authentic imperfections that mimic the look of old film.
Adding light leaks and other imperfections is an effective way to give your photos a genuine vintage feel. These elements mimic the look of old film, adding character and authenticity to your images.
6.1. Understanding Imperfections
Imperfections are part of the charm of vintage photos. They tell a story and add a sense of history to the image. Common imperfections include:
- Light Leaks: Streaks of light caused by gaps in the camera.
- Dust and Scratches: Small marks and blemishes on the film.
- Vignetting: Darkening of the corners of the image.
- Color Fringing: Aberrations in color, often seen around high-contrast areas.
6.2. Software Options for Adding Imperfections
Various software options offer tools for adding these imperfections:
- Adobe Photoshop: Use texture overlays and brushes to add light leaks, dust, and scratches.
- Adobe Lightroom: Use adjustment brushes and gradients to add vignetting and color fringing.
- GIMP: Use texture overlays and filters to add imperfections.
- Mobile Apps: Apps like VSCO and Snapseed offer built-in tools for adding light leaks and scratches.
6.3. Adding Light Leaks in Photoshop
Here’s how to add light leaks in Photoshop:
- Find Light Leak Texture: Search for light leak textures online. Many free and paid options are available.
- Open Texture in Photoshop: Open the light leak texture in Photoshop.
- Place Texture on Image: Place the texture on top of your photo layer.
- Adjust Blend Mode: Change the blend mode of the texture layer to “Screen,” “Lighten,” or “Overlay.” Experiment to see which mode looks best.
- Adjust Opacity: Lower the opacity of the texture layer if the light leak is too strong.
- Transform Texture: Use the “Transform” tool (Ctrl+T or Cmd+T) to adjust the size, position, and rotation of the texture.
- Masking: Use a layer mask to selectively apply the light leak to certain areas of the image.
6.4. Adding Dust and Scratches in Photoshop
Here’s how to add dust and scratches in Photoshop:
- Find Dust and Scratches Texture: Search for dust and scratches textures online.
- Open Texture in Photoshop: Open the texture in Photoshop.
- Place Texture on Image: Place the texture on top of your photo layer.
- Adjust Blend Mode: Change the blend mode of the texture layer to “Overlay” or “Soft Light.”
- Adjust Opacity: Lower the opacity of the texture layer if the dust and scratches are too prominent.
- Masking: Use a layer mask to selectively apply the dust and scratches to certain areas of the image.
6.5. Adding Vignetting in Lightroom
Here’s how to add vignetting in Lightroom:
-
Open Image: Open your photo in Lightroom.
-
Go to Effects Panel: Go to the “Effects” panel in the Develop module.
-
Adjust Vignetting Settings:
- Amount: Drag the “Amount” slider to the left to darken the corners.
- Midpoint: Adjust the “Midpoint” slider to control the size of the vignetted area.
- Roundness: Adjust the “Roundness” slider to control the shape of the vignetted area.
- Feather: Adjust the “Feather” slider to control the softness of the vignetting.
6.6. Tips for Realistic Imperfections
- Subtlety is Key: Avoid overdoing the imperfections, which can look artificial.
- Use High-Quality Textures: Use high-resolution textures for the best results.
- Vary Imperfections: Use a variety of different imperfections to create a more realistic look.
- Consider the Image: Tailor the imperfections to the specific image. For example, a portrait might benefit from subtle dust and scratches, while a landscape might benefit from a more prominent light leak.
6.7. dfphoto.net Resources
dfphoto.net offers valuable resources to help you add realistic imperfections:
- Texture Downloads: A wide selection of light leak, dust, and scratches textures.
- Tutorials: Step-by-step guides on adding imperfections using Photoshop, Lightroom, and other software.
- Preset Downloads: Presets with built-in imperfection settings.
- Community Forum: Share your photos and get feedback on your imperfection techniques.
By following these techniques and utilizing the resources at dfphoto.net, you can add realistic imperfections to your photos, enhancing the vintage effect and creating visually appealing images.
 Light leak texture overlay in Photoshop
7. How Does Understanding Film Stocks Help in Achieving a Vintage Look?
Want to make your vintage photos look authentic? Researching and emulating classic film stocks can help you replicate their unique color palettes, contrast, and grain.
Understanding film stocks is essential for achieving an authentic vintage look in your photography. Each film stock has unique characteristics, including color palettes, contrast, and grain, that contribute to the overall aesthetic.
7.1. The Importance of Film Stock Knowledge
Different film stocks produce different results. By understanding the characteristics of classic film stocks, you can better emulate their look in your digital editing:
- Color Palettes: Some film stocks have warm tones, while others have cool tones.
- Contrast: Some film stocks have high contrast, while others have low contrast.
- Grain: Some film stocks have fine grain, while others have coarse grain.
- Saturation: Some film stocks have high saturation, while others have low saturation.
7.2. Popular Film Stocks and Their Characteristics
Here are some popular film stocks and their characteristics:
- Kodak Portra 400: Known for its warm tones, fine grain, and smooth skin tones. Ideal for portraits.
- Kodak Ektar 100: Known for its vibrant colors, fine grain, and high sharpness. Ideal for landscapes and nature photography.
- Fujifilm Superia X-TRA 400: Known for its balanced colors, moderate grain, and versatility. Ideal for general photography.
- Ilford HP5 Plus: A black and white film known for its classic look, wide tonal range, and moderate grain. Ideal for street photography and documentary work.
- Kodachrome: Famous for its vibrant, saturated colors and distinctive grain. While no longer in production, its look is highly sought after.
7.3. Emulating Film Stocks in Digital Editing
Here’s how to emulate film stocks in digital editing:
- Research Film Stock: Research the characteristics of the film stock you want to emulate. Look for sample images and read reviews.
- Adjust Color Balance: Adjust the color balance to match the film stock’s color palette. For example, add warm tones for Kodak Portra 400 or vibrant colors for Kodak Ektar 100.
- Adjust Contrast: Adjust the contrast to match the film stock’s contrast level. Lower the contrast for a softer look or increase it for a more dramatic look.
- Add Grain: Add grain to match the film stock’s grain structure. Use finer grain for film stocks like Kodak Portra 400 and coarser grain for film stocks like Ilford HP5 Plus.
- Adjust Saturation: Adjust the saturation to match the film stock’s saturation level. Lower the saturation for a more muted look or increase it for a more vibrant look.
7.4. Using Presets and Profiles
Presets and profiles can streamline the process of emulating film stocks:
- Download Presets: Download presets designed to emulate specific film stocks. Many free and paid options are available.
- Use Camera Profiles: Some software, like Adobe Lightroom, includes camera profiles that emulate film stocks.
- Customize Presets: Adjust the settings of presets and profiles to fine-tune the look to your liking.
7.5. dfphoto.net Resources
dfphoto.net offers valuable resources to help you understand and emulate film stocks:
- Film Stock Guides: Detailed guides on the characteristics of popular film stocks.
- Preset Downloads: Presets designed to emulate specific film stocks.
- Tutorials: Step-by-step guides on emulating film stocks in digital editing.
- Community Forum: Share your photos and get feedback on your film stock emulation techniques.
By understanding film stocks and utilizing the resources at dfphoto.net, you can create authentic vintage photos that capture the unique look and feel of classic film photography.
 Kodak Portra 400 film example
8. What are Some Common Mistakes to Avoid?
Want to avoid common pitfalls when creating vintage photos? Overdoing the effects, ignoring color balance, and using overly sharp images can ruin the retro look.
Creating a convincing vintage look in photography requires careful attention to detail. Avoiding common mistakes is crucial for achieving an authentic and visually appealing result.
8.1. Overdoing the Effects
One of the most common mistakes is overdoing the vintage effects:
- Too Much Grain: Adding too much grain can make the image look noisy and artificial.
- Excessive Imperfections: Overloading the image with light leaks, dust, and scratches can detract from the subject.
- Harsh Color Adjustments: Making extreme color adjustments can result in an unnatural and unappealing look.
8.2. Ignoring Color Balance
Color balance is essential for achieving a realistic vintage look:
- Incorrect Tones: Failing to adjust the color balance can result in colors that look too modern or unnatural.
- Over-Saturation: Keeping the colors too saturated can prevent the image from looking authentically vintage.
- Unrealistic Color Casts: Applying color casts that are too strong or inconsistent can create an unrealistic effect.
8.3. Using Overly Sharp Images
Vintage photos typically have softer focus and less sharpness:
- Excessive Sharpness: Using overly sharp images can counteract the vintage effect.
- Lack of Softness: Failing to soften the image can result in a look that is too modern and clinical.
8.4. Neglecting Contrast
Contrast plays a crucial role in defining the vintage look:
- Too Much Contrast: Maintaining too much contrast can prevent the image from looking authentically vintage.
- Insufficient Dynamic Range: Failing to reduce the dynamic range can result in a look that is too modern and detailed.
8.5. Overlooking Composition
While editing is important, composition should not be overlooked:
- Modern Composition: Using modern composition techniques can undermine the vintage effect.
- Lack of Storytelling: Failing to consider the story and emotion of the image can result in a less compelling vintage look.
8.6. Tips for Avoiding Mistakes
- Subtlety is Key: Apply vintage effects subtly and gradually.
- Reference Real Vintage Photos: Use real vintage photos as a reference for color, contrast, and grain.
- Pay Attention to Detail: Pay attention to the details, such as color balance, sharpness, and imperfections.
- Get Feedback: Share your photos and get feedback from other photographers.
8.7. dfphoto.net Resources
dfphoto.net offers valuable resources to help you avoid common mistakes:
- Tutorials: Guides on avoiding common mistakes in vintage photo editing.
- Example Images: Showcases of well-edited vintage photos to inspire your work.
- Community Forum: A platform to share your photos and get feedback from other photographers.
- Expert Tips: Advice from experienced photographers on achieving authentic vintage effects.
By avoiding these common mistakes and utilizing the resources at dfphoto.net, you can create stunning vintage photos that capture the essence of classic film photography.
 Vintage photo with balanced color and contrast
9. How Can I Use Vintage Looks for Different Photography Genres?
Want to add a vintage touch to your photography? Apply retro effects to portraits, landscapes, and even fashion shoots to create unique, timeless images.
Vintage looks can be applied to various photography genres to create unique and timeless images. The key is to tailor the vintage effects to suit the specific genre and subject matter.
9.1. Portraits
Applying a vintage look to portraits can add a sense of nostalgia and timelessness. Key considerations include:
- Warm Tones: Use warm tones to create a soft, flattering look.
- Smooth Skin Tones: Smooth skin tones and reduce blemishes for a classic portrait look.
- Soft Focus: Apply a subtle soft focus effect to soften the image.
- Film Stock Emulation: Emulate film stocks like Kodak Portra 400 for a classic portrait aesthetic.
9.2. Landscapes
Applying a vintage look to landscapes can evoke a sense of history and timelessness. Key considerations include:
- Muted Colors: Use muted colors to create a subtle, understated look.
- Reduced Contrast: Reduce contrast to create a softer, more atmospheric image.
- Vignetting: Apply vignetting to draw attention to the center of the image.
- Film Stock Emulation: Emulate film stocks like Kodak Ektar 100 for vibrant yet vintage-inspired landscapes.
9.3. Street Photography
Applying a vintage look to street photography can add a sense of grit and authenticity. Key considerations include:
- Black and White: Convert the image to black and white for a classic street photography look.
- High Contrast: Increase contrast to create a more dramatic image.
- Grain: Add grain to enhance the gritty, urban feel.
- Film Stock Emulation: Emulate black and white film stocks like Ilford HP5 Plus for a timeless street photography aesthetic.
9.4. Fashion Photography
Applying a vintage look to fashion photography can create a unique blend of modern and retro styles. Key considerations include:
- Color Grading: Use color grading to create a distinctive color palette.
- Texture: Add texture to the image to enhance the vintage feel.
- Imperfections: Add subtle imperfections, such as light leaks and scratches.
- Film Stock Emulation: Emulate film stocks like Kodachrome for vibrant, retro-inspired fashion shots.
9.5. Still Life Photography
Applying a vintage look to still life photography can create a