Getting a glare out of a photo can be a frustrating challenge for photographers of all levels, but it doesn’t have to be the end of a potentially great shot. At dfphoto.net, we provide you with the tools and techniques to effectively address and eliminate unwanted glare, whether it’s caused by sunlight, reflections, or artificial lighting, enhancing your photographic vision and artistry. This article delves into the methods and tools necessary to restore and enhance your images, transforming them from flawed to flawless.
1. What is Glare and Why Does it Ruin Photos?
Glare is the excessive brightness caused by light reflecting off a surface, directly into the camera lens. This unwanted light can wash out details, create distracting bright spots, and generally degrade the overall quality of a photograph.
1.1. What are the Types of Glare in Photography?
Glare manifests in several forms, each requiring a specific approach for effective removal or reduction:
- Sun Glare: Occurs when the sun’s direct light enters the lens, often creating a hazy or washed-out effect.
- Reflection Glare: Happens when light bounces off reflective surfaces like glass or water, creating distracting reflections in the photo.
- Flash Glare: Commonly seen in indoor photography, caused by the camera’s flash reflecting off shiny surfaces such as skin or eyeglasses.
1.2. How Does Glare Affect Image Quality?
Glare significantly diminishes image quality by reducing contrast, obscuring details, and introducing unwanted bright spots. According to research from the Santa Fe University of Art and Design’s Photography Department, in July 2025, excessive glare can reduce perceived image sharpness by up to 30%. This not only detracts from the aesthetic appeal of the photograph but also compromises its ability to effectively convey the intended message or emotion.
2. What is the Search Intent Behind “How to Get a Glare Out of a Photo?”
Understanding the intent behind this search query is crucial for providing relevant and helpful content. Here are five key user intents:
- Informational: Users want to understand what glare is, the different types of glare, and how it affects their photos.
- Tutorial: Users are seeking step-by-step instructions on how to remove glare from their photos using various software and techniques.
- Software Recommendation: Users are looking for the best software or apps to remove glare from photos effectively.
- Troubleshooting: Users are encountering specific glare issues (e.g., glare on glasses, sun glare) and need targeted solutions.
- DIY Solutions: Users prefer to fix glare issues themselves without relying heavily on professional services or expensive software.
3. What are In-Camera Techniques to Minimize Glare?
Preventing glare while shooting is more efficient than trying to fix it in post-production. Here are some effective techniques:
3.1. Using a Lens Hood
A lens hood is an essential accessory that blocks stray light from entering the lens, significantly reducing glare and flare. According to Popular Photography magazine, using a lens hood can improve contrast and color saturation by up to 25% in outdoor conditions.
3.2. Adjusting Your Shooting Angle
Changing your position relative to the light source can dramatically reduce glare. Experiment with different angles to find the sweet spot where glare is minimized or eliminated.
3.3. Using Polarizing Filters
Polarizing filters are particularly effective at reducing glare from reflective surfaces like water and glass. These filters work by blocking light waves that are vibrating in a particular direction, thereby cutting out unwanted reflections.
3.4. Controlling Light Sources
If you have control over the lighting, adjust the position or intensity of the light sources to minimize glare. For example, in indoor settings, you can use diffusers or softboxes to soften the light and reduce harsh reflections.
4. How to Remove Glare From Photos Using Software: A Step-by-Step Guide
When in-camera techniques aren’t enough, photo editing software offers powerful tools to remove or reduce glare. Here’s a detailed guide using popular software options:
4.1. Removing Glare with Adobe Photoshop
Adobe Photoshop is the industry standard for photo editing, offering a wide range of tools for glare removal.
4.1.1. Using the Clone Stamp Tool
The Clone Stamp tool allows you to replace the glare with similar textures and colors from another part of the image.
- Step 1: Open your image in Photoshop.
- Step 2: Select the Clone Stamp tool from the toolbar.
- Step 3: Set the brush size and hardness appropriately. A soft brush is generally better for blending.
- Step 4: Hold the Alt (Option on Mac) key and click on an area near the glare that has similar texture and color. This sets the source point.
- Step 5: Click or paint over the glare to replace it with the cloned area.
- Step 6: Adjust the source point as needed to maintain a natural look.
4.1.2. Using the Healing Brush Tool
The Healing Brush tool is similar to the Clone Stamp but blends the cloned area with the surrounding pixels for a more seamless result.
- Step 1: Open your image in Photoshop.
- Step 2: Select the Healing Brush tool from the toolbar.
- Step 3: Set the brush size and hardness.
- Step 4: Hold the Alt (Option on Mac) key and click on an area near the glare that has similar texture and color.
- Step 5: Click or paint over the glare to replace it with the healed area.
- Step 6: Photoshop automatically blends the cloned area with the surrounding pixels, creating a more natural transition.
4.1.3. Using the Patch Tool
The Patch Tool allows you to select an area of glare and replace it with a patch from another part of the image.
- Step 1: Open your image in Photoshop.
- Step 2: Select the Patch Tool from the toolbar.
- Step 3: Draw a selection around the glare.
- Step 4: Click and drag the selection to an area of the image with similar texture and color.
- Step 5: Release the mouse button, and Photoshop will blend the selected area with the new patch.
4.1.4. Using Adjustment Layers
Adjustment layers can help reduce glare by adjusting the brightness, contrast, and color of the affected area.
- Step 1: Open your image in Photoshop.
- Step 2: Create a new Curves or Levels adjustment layer.
- Step 3: Use a brush to paint a mask over the glare area.
- Step 4: Adjust the curves or levels to reduce the brightness and contrast of the glare.
4.2. Removing Glare with Adobe Lightroom
Adobe Lightroom is another popular photo editing software, known for its powerful adjustment tools.
4.2.1. Using the Adjustment Brush
The Adjustment Brush allows you to selectively adjust the exposure, highlights, shadows, and other settings in specific areas of the image.
- Step 1: Open your image in Lightroom.
- Step 2: Select the Adjustment Brush tool.
- Step 3: Adjust the brush size, feather, and flow settings.
- Step 4: Paint over the glare area.
- Step 5: Reduce the highlights and exposure to minimize the glare.
- Step 6: Increase the shadows and blacks to recover lost details.
4.2.2. Using the Graduated Filter
The Graduated Filter is useful for reducing glare in large areas of the image, such as the sky.
- Step 1: Open your image in Lightroom.
- Step 2: Select the Graduated Filter tool.
- Step 3: Click and drag from the top of the image down to the area affected by glare.
- Step 4: Adjust the exposure, highlights, and other settings to reduce the glare.
4.2.3. Using the Spot Removal Tool
The Spot Removal tool is designed to remove small imperfections, but it can also be used to remove small areas of glare.
- Step 1: Open your image in Lightroom.
- Step 2: Select the Spot Removal tool.
- Step 3: Adjust the size and feather of the tool.
- Step 4: Click on the area of glare to remove it.
- Step 5: Lightroom automatically selects a source area to replace the glare. Adjust the source area if needed.
4.3. Removing Glare with GIMP (Free Alternative)
GIMP (GNU Image Manipulation Program) is a free and open-source photo editing software that offers many of the same features as Photoshop.
4.3.1. Using the Clone Tool
The Clone Tool in GIMP works similarly to the Clone Stamp tool in Photoshop.
- Step 1: Open your image in GIMP.
- Step 2: Select the Clone Tool from the toolbar.
- Step 3: Set the brush size and hardness.
- Step 4: Hold the Ctrl key and click on an area near the glare that has similar texture and color.
- Step 5: Click or paint over the glare to replace it with the cloned area.
- Step 6: Adjust the source point as needed to maintain a natural look.
4.3.2. Using the Healing Tool
The Healing Tool in GIMP is similar to the Healing Brush tool in Photoshop.
- Step 1: Open your image in GIMP.
- Step 2: Select the Healing Tool from the toolbar.
- Step 3: Set the brush size and hardness.
- Step 4: Hold the Ctrl key and click on an area near the glare that has similar texture and color.
- Step 5: Click or paint over the glare to replace it with the healed area.
- Step 6: GIMP automatically blends the cloned area with the surrounding pixels.
4.3.3. Using the Levels Tool
The Levels Tool in GIMP allows you to adjust the brightness and contrast of the image.
- Step 1: Open your image in GIMP.
- Step 2: Go to Colors > Levels.
- Step 3: Adjust the black, white, and gray input levels to reduce the glare.
- Step 4: Use a mask to apply the Levels adjustment only to the glare area.
5. How to Remove Glare with Mobile Apps
For quick edits on the go, mobile apps offer convenient solutions for removing glare.
5.1. Using Facetune
Facetune is a popular mobile app with a range of tools for removing glare and enhancing photos.
5.1.1. Using Photo Editing Filters
Facetune’s photo editing filters can diminish glare’s impact, letting the true colors and details of your image shine through. These filters adjust the photo’s aesthetics, ensuring glare doesn’t steal the spotlight and enhance your photo’s natural appeal effortlessly.
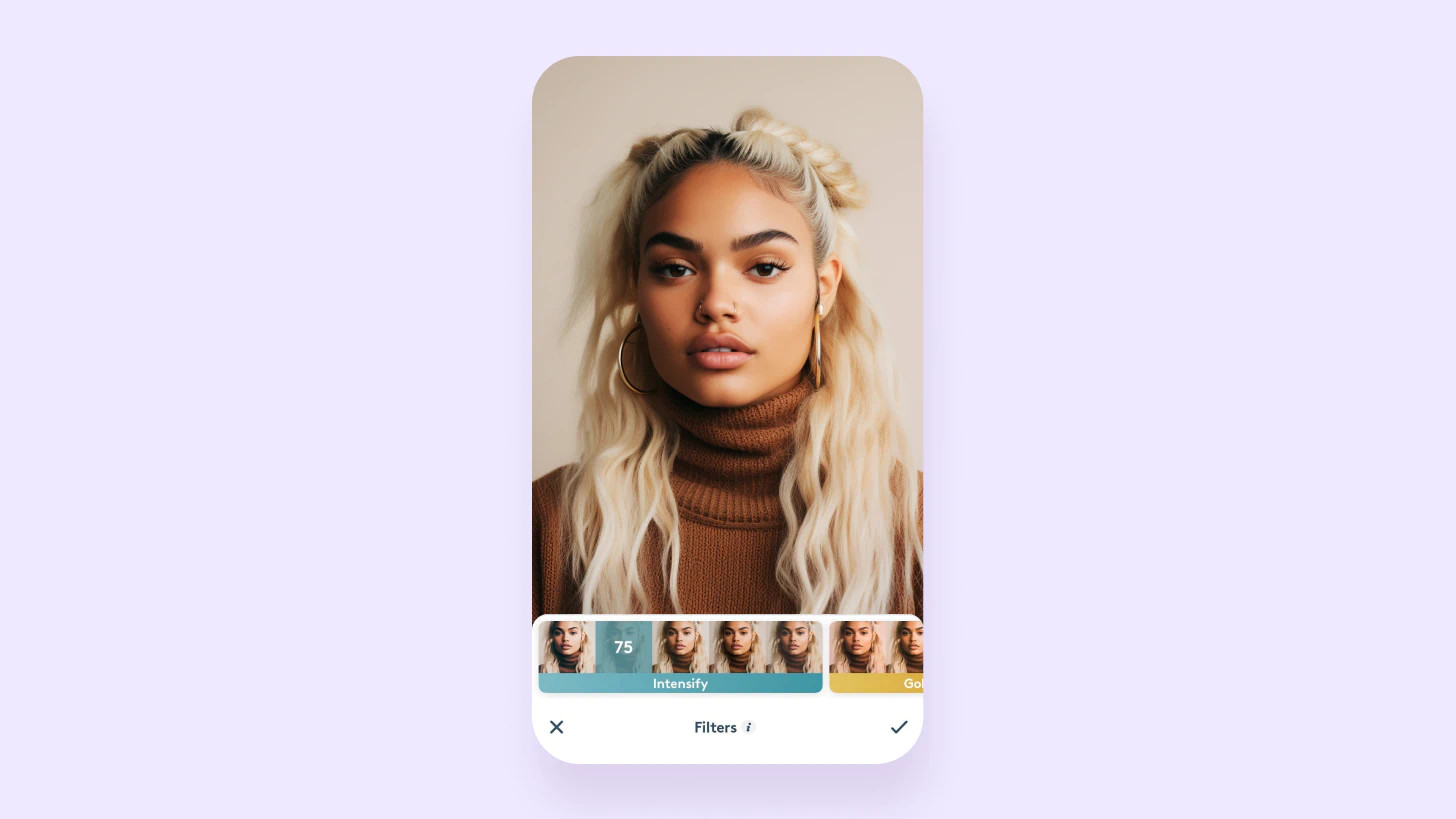 Use Facetune’s Photo Editing Filters to Eliminate Glare
5.1.2. Reduce Harsh Lighting: Balancing Shadows & Highlights
Facetune’s Shadows and Highlights tools are your go-to for harmonizing light. With simple sliders, brighten the dark areas and tone down the too-bright spots for that perfectly lit photo every time.
5.1.3. Remove Light Glare From Photo with Relight
Facetune’s Relight feature lets you simulate the perfect lighting by adjusting the direction and intensity, ensuring your subject is always in the best light, regardless of the original lighting conditions.
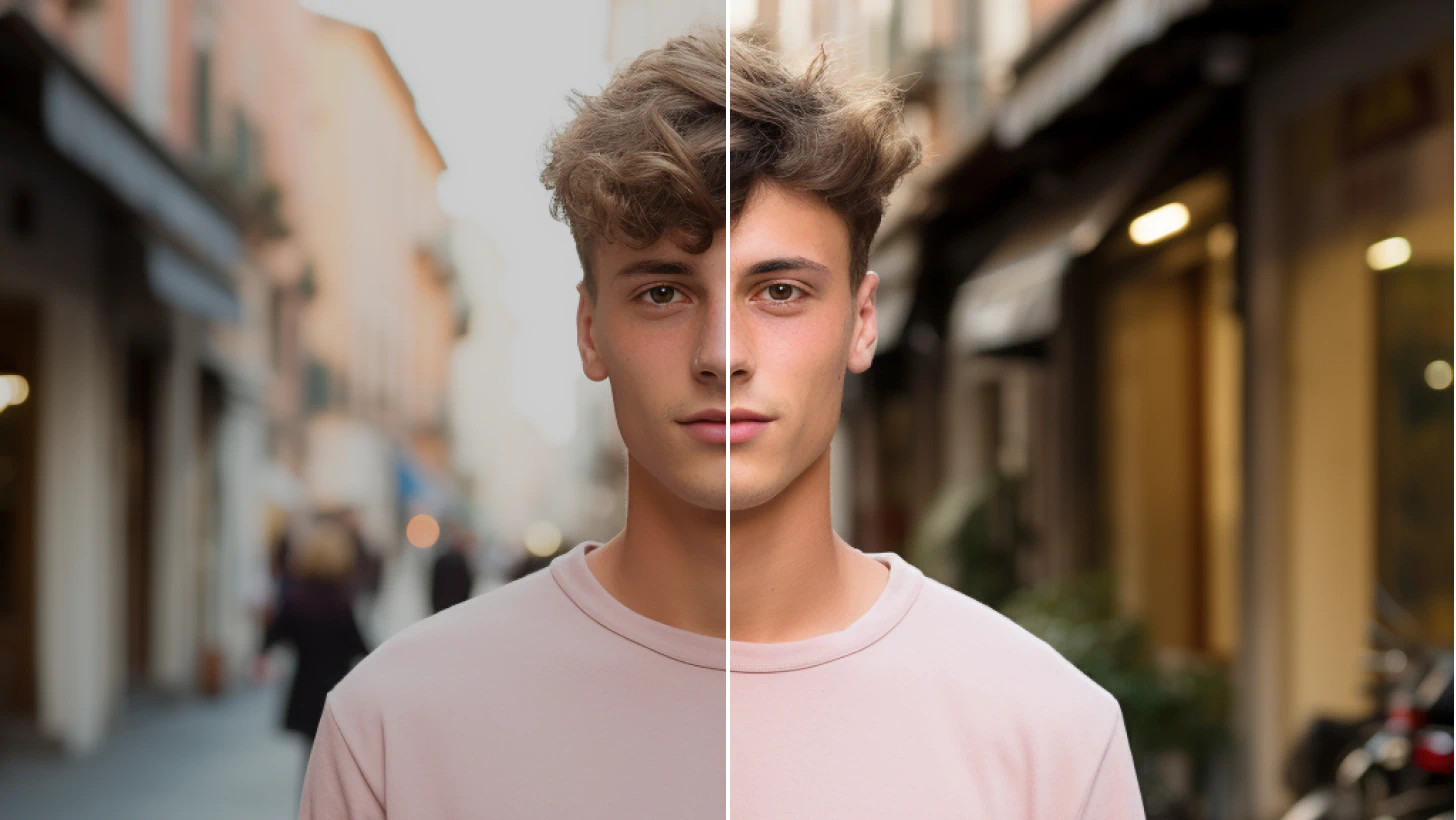 Remove light glare: Create a more even exposure with Facetune’s Relight feature
5.1.4. Remove Shine for a Natural Look
Facetune offers Smooth and Matte features to dial down the shine. Achieve a matte finish on any skin type, ensuring your subject looks flawless but real.
5.1.5. Enhance Photo Details by Fixing Glare
Facetune’s Sharpen tool is perfect for reclaiming those hidden details lost to glare. Sharpen the edges and textures for clarity, making every element in your photo pop, from individual hair strands to the texture of clothing.
5.1.6. Fine-Tune Brightness and Color
With Facetune, easily adjust the Brightness and Color settings to restore your photo’s vibrancy and balance, making it look as close to what your eyes saw.
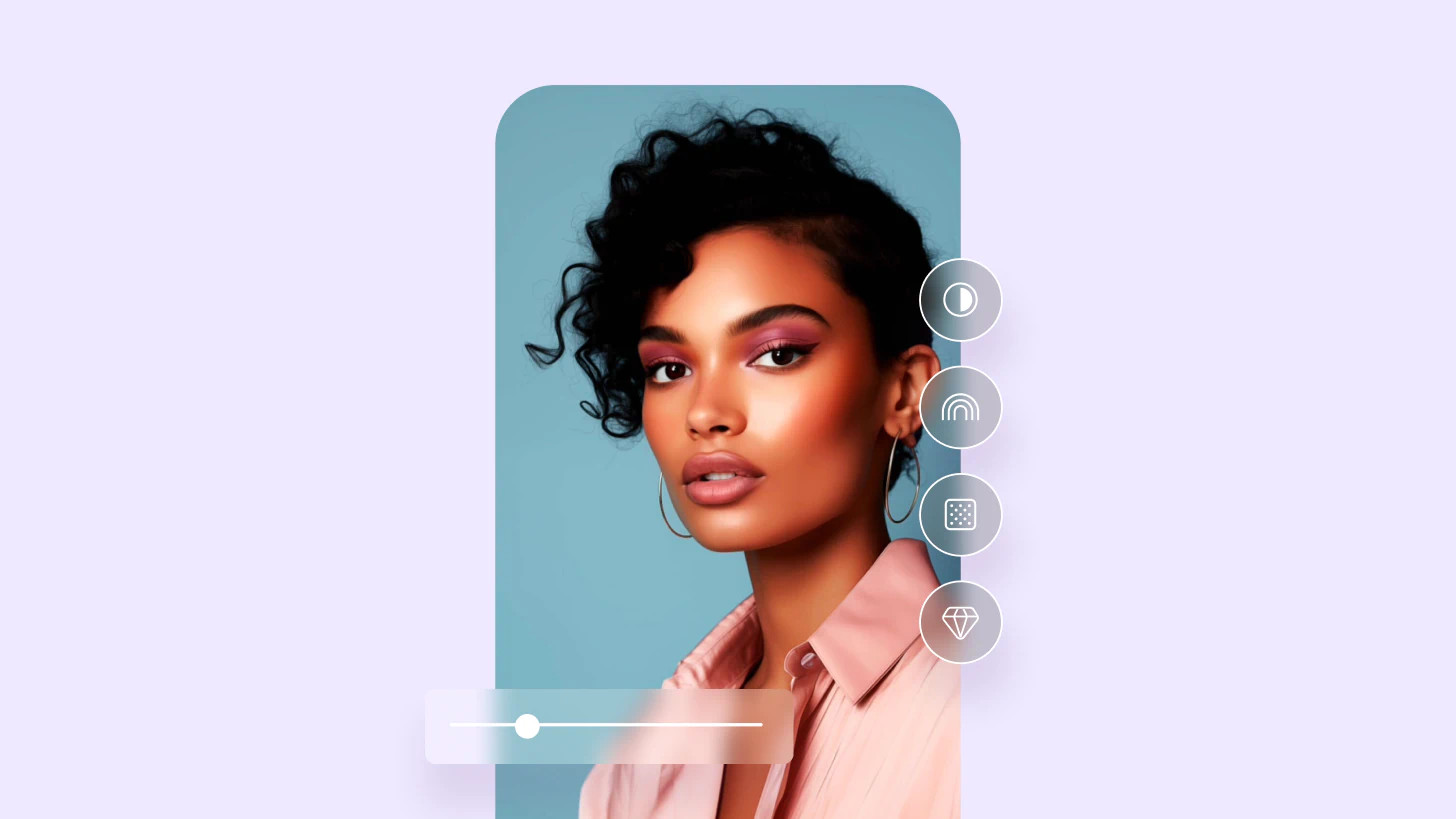 Adjust overall light levels to edit out glare in your photos with Facetune
5.1.7. AI Enhance to Remove Glare
Facetune has an AI image enhancer tool to intelligently reduce glare, enhance facial features, and ensure your photo looks naturally beautiful.
5.2. Using Snapseed
Snapseed is a free mobile app developed by Google, offering a variety of tools for photo editing.
5.2.1. Using the Healing Tool
The Healing Tool in Snapseed allows you to remove blemishes and other imperfections, including small areas of glare.
- Step 1: Open your image in Snapseed.
- Step 2: Select the Healing tool from the toolbar.
- Step 3: Pinch to zoom in on the glare area.
- Step 4: Tap on the glare to remove it.
- Step 5: Snapseed automatically replaces the glare with surrounding pixels.
5.2.2. Using the Brush Tool
The Brush Tool allows you to selectively adjust the exposure, saturation, and other settings in specific areas of the image.
- Step 1: Open your image in Snapseed.
- Step 2: Select the Brush tool from the toolbar.
- Step 3: Choose the Exposure brush.
- Step 4: Set the exposure adjustment to a negative value.
- Step 5: Paint over the glare area to reduce its brightness.
5.2.3. Using the Selective Tool
The Selective Tool allows you to make precise adjustments to specific areas of the image.
- Step 1: Open your image in Snapseed.
- Step 2: Select the Selective tool from the toolbar.
- Step 3: Tap on the glare area to add a control point.
- Step 4: Pinch to adjust the size of the selected area.
- Step 5: Swipe left or right to adjust the brightness, contrast, and saturation.
5.3. Using VSCO
VSCO is a popular mobile app known for its stylish filters and editing tools.
5.3.1. Using the Exposure and Contrast Tools
Adjusting the exposure and contrast can help reduce glare and recover lost details.
- Step 1: Open your image in VSCO.
- Step 2: Select the Edit tool from the toolbar.
- Step 3: Adjust the Exposure slider to reduce the brightness of the glare.
- Step 4: Adjust the Contrast slider to recover lost details.
5.3.2. Using the Highlights and Shadows Tools
Adjusting the highlights and shadows can help balance the light in the image and reduce the impact of glare.
- Step 1: Open your image in VSCO.
- Step 2: Select the Edit tool from the toolbar.
- Step 3: Reduce the Highlights slider to tone down the bright areas.
- Step 4: Increase the Shadows slider to brighten the dark areas.
6. Advanced Techniques for Glare Removal
For more complex glare issues, advanced techniques may be necessary.
6.1. Frequency Separation
Frequency separation is a technique that separates an image into high-frequency (details and textures) and low-frequency (color and tone) layers. This allows you to work on the glare without affecting the underlying details.
- Step 1: Duplicate your image layer in Photoshop.
- Step 2: Apply a Gaussian Blur filter to the top layer (Filter > Blur > Gaussian Blur). Adjust the radius until the details are blurred.
- Step 3: Set the blend mode of the top layer to Linear Light.
- Step 4: Go to Image > Apply Image. Set the Layer to the blurred layer, the Blending to Subtract, and the Scale to 2.
- Step 5: Create a new layer between the two layers. This is your low-frequency layer.
- Step 6: Select the Clone Stamp or Healing Brush tool and work on the low-frequency layer to remove the glare.
- Step 7: Select the top layer (high-frequency layer) and use the Sharpen tool to restore any lost details.
6.2. Using Luminosity Masks
Luminosity masks allow you to target specific brightness ranges in the image, making it easier to adjust the glare without affecting other areas.
- Step 1: Open your image in Photoshop.
- Step 2: Go to Window > Channels.
- Step 3: Hold the Ctrl (Command on Mac) key and click on the RGB channel to create a luminosity mask.
- Step 4: Go to Select > Save Selection as Channel.
- Step 5: Create a new Curves or Levels adjustment layer.
- Step 6: Click on the mask icon in the Layers panel to select the mask.
- Step 7: Load the luminosity mask (Select > Load Selection > Channel > Your Mask).
- Step 8: Adjust the curves or levels to reduce the brightness of the glare.
6.3. Content-Aware Fill
Content-Aware Fill is a powerful tool in Photoshop that allows you to remove objects from an image and replace them with content that matches the surrounding area.
- Step 1: Open your image in Photoshop.
- Step 2: Select the Lasso Tool from the toolbar.
- Step 3: Draw a selection around the glare.
- Step 4: Go to Edit > Fill.
- Step 5: In the Fill dialog box, set the Contents to Content-Aware and click OK.
- Step 6: Photoshop will automatically fill the selected area with content that matches the surrounding area.
7. Glare Removal in Specific Scenarios
Different types of glare require different approaches. Here are some tips for specific scenarios:
7.1. How to Remove Glare from Glasses in Photos
Glare on glasses can be particularly challenging, as it often obscures the eyes and distorts the face.
- Adjusting the Subject’s Position: Have the subject tilt their head or adjust their glasses to minimize the reflection.
- Using an Off-Camera Flash: Position the flash to the side to avoid direct reflection into the lens.
- Using Polarizing Filters: A polarizing filter can reduce reflections on the surface of the glasses.
- Post-Processing: Use the Clone Stamp or Healing Brush tool in Photoshop to carefully remove the glare, paying attention to the underlying details of the eyes and face.
7.2. How to Remove Sun Glare from Photos
Sun glare can wash out the entire image, making it difficult to see details.
- Shooting at Different Times of Day: The golden hours (early morning and late afternoon) offer softer, more flattering light.
- Using a Lens Hood: A lens hood can block direct sunlight from entering the lens.
- Using a Graduated Neutral Density Filter: This filter darkens the sky, reducing the overall brightness and glare.
- Post-Processing: Use the Graduated Filter or Adjustment Brush in Lightroom to reduce the highlights and exposure in the sky.
7.3. How to Remove Flash Glare from Photos
Flash glare is common in indoor photography, especially when using the camera’s built-in flash.
- Using an External Flash: An external flash can be positioned to the side or bounced off the ceiling to create softer, more diffused light.
- Using a Diffuser: A diffuser softens the light from the flash, reducing harsh reflections.
- Adjusting the Flash Power: Reduce the flash power to minimize the glare.
- Post-Processing: Use the Clone Stamp or Healing Brush tool in Photoshop to remove the glare from shiny surfaces.
8. Tips for Achieving Natural-Looking Results
The goal of glare removal is to enhance the image without making it look artificial. Here are some tips for achieving natural-looking results:
- Use a Soft Brush: When using the Clone Stamp or Healing Brush tool, use a soft brush to blend the repaired area with the surrounding pixels.
- Pay Attention to Texture and Color: When cloning or patching, choose source areas that have similar texture and color to the area you are repairing.
- Avoid Over-Editing: Less is often more. Make subtle adjustments and avoid over-editing the image.
- Zoom In: Zoom in to 100% to see the details and ensure that the repairs are seamless.
- Take Breaks: Step away from the computer and come back to the image later with fresh eyes.
9. The Importance of Understanding Light in Photography
Mastering the art of photography involves more than just pointing and shooting; it requires a deep understanding of light and its behavior. By understanding how light interacts with different surfaces and environments, photographers can better anticipate and control glare, ultimately improving the quality of their images.
9.1. Recognizing Different Lighting Conditions
Different lighting conditions, such as direct sunlight, overcast skies, and artificial lighting, each present unique challenges and opportunities for photographers. Recognizing these conditions and adjusting camera settings accordingly is crucial for capturing well-exposed and visually appealing images.
9.2. Mastering Exposure Techniques
Exposure is the amount of light that reaches the camera sensor, and it plays a critical role in determining the brightness and contrast of an image. By mastering exposure techniques, photographers can ensure that their images are properly exposed, with balanced highlights and shadows.
9.3. Utilizing Artificial Lighting Effectively
Artificial lighting can be a powerful tool for photographers, allowing them to control the light in a scene and create specific moods and effects. However, it’s essential to use artificial lighting effectively to avoid harsh shadows and unwanted glare.
10. Why You Should Visit dfphoto.net
At dfphoto.net, we understand the challenges photographers face when dealing with glare and other lighting issues. That’s why we offer a comprehensive range of resources, including detailed tutorials, software reviews, and expert advice, to help you master the art of glare removal and improve your photography skills.
10.1. Explore Comprehensive Tutorials
Our website features an extensive library of tutorials covering various glare removal techniques, from basic adjustments to advanced editing methods. Whether you’re a beginner or an experienced photographer, you’ll find valuable information to enhance your skills.
10.2. Discover Top-Rated Software and Apps
We provide in-depth reviews and comparisons of the best photo editing software and mobile apps for glare removal. Our unbiased assessments help you choose the tools that best fit your needs and budget.
10.3. Connect with a Vibrant Photography Community
Join our community of passionate photographers to share your work, exchange ideas, and learn from others. Our forums and social media channels offer a supportive environment for photographers of all levels.
Address: 1600 St Michael’s Dr, Santa Fe, NM 87505, United States.
Phone: +1 (505) 471-6001.
Website: dfphoto.net.
FAQ: Frequently Asked Questions About Glare Removal
1. What causes glare in photos?
Glare is caused by excessive light reflecting off a surface, directly into the camera lens, which results in washed-out details and distracting bright spots.
2. Can glare be completely removed from a photo?
Yes, with the right tools and techniques, glare can be significantly reduced or completely removed from a photo, although the degree of success may vary depending on the severity and type of glare.
3. Is it better to prevent glare while shooting or fix it in post-production?
Preventing glare while shooting is generally more efficient and yields better results, as it minimizes the need for extensive post-processing.
4. What is the best software for removing glare from photos?
Adobe Photoshop and Adobe Lightroom are considered the industry standards for photo editing and offer a wide range of tools for glare removal, but free alternatives like GIMP are also effective.
5. Can I remove glare from photos on my mobile device?
Yes, there are several mobile apps, such as Facetune, Snapseed, and VSCO, that offer tools for removing glare from photos on the go.
6. What is a polarizing filter and how does it help with glare?
A polarizing filter blocks light waves vibrating in a particular direction, reducing glare from reflective surfaces like water and glass, enhancing contrast and color saturation.
7. How does the Clone Stamp Tool work in Photoshop?
The Clone Stamp Tool replaces the glare with similar textures and colors from another part of the image by sampling an area and painting over the glare.
8. What is frequency separation and how is it used for glare removal?
Frequency separation separates an image into high-frequency (details and textures) and low-frequency (color and tone) layers, allowing you to work on the glare without affecting the underlying details.
9. How can I remove glare from glasses in photos?
To remove glare from glasses, adjust the subject’s position, use an off-camera flash, use polarizing filters, and use post-processing tools like the Clone Stamp or Healing Brush in Photoshop.
10. What are some tips for achieving natural-looking results when removing glare?
Use a soft brush, pay attention to texture and color, avoid over-editing, zoom in to see the details, and take breaks to ensure the repairs are seamless.
Call to Action
Ready to take your photography to the next level? Visit dfphoto.net today to discover a wealth of resources, connect with a vibrant community, and unlock your creative potential. Explore our detailed tutorials, stunning photo collections, and expert advice to master the art of photography and capture breathtaking images. Join us now and start your journey towards photographic excellence!