Framing a photo is more than just placing it in a border; it’s an art that enhances the image, preserves its quality, and tells a story. At dfphoto.net, we believe that every great photograph deserves to be showcased properly, and mastering the art of photo framing is essential for any photographer or art enthusiast. This guide provides you with the best techniques to frame your photos perfectly.
1. What Is Photo Framing And Why Is It Important?
Photo framing is the process of selecting and assembling a frame, mat, and glazing to protect and enhance a photograph. The frame acts as a border around the image, while the mat provides additional space and separation between the photo and the frame. Glazing, typically glass or acrylic, protects the photograph from dust, moisture, and UV light.
The importance of photo framing lies in its ability to:
- Preserve: Protect the photograph from physical damage and environmental factors.
- Enhance: Complement the photograph’s colors, tones, and overall aesthetic.
- Display: Provide a visually appealing way to showcase the photograph.
- Personalize: Reflect personal style and preferences.
Proper framing can transform a simple photograph into a cherished work of art, making it a valuable skill for photographers, collectors, and anyone who wants to display their photos with pride.
2. What Are The Different Types Of Photo Frames Available?
Choosing the right type of frame is crucial for enhancing your photograph. There are several types of photo frames available, each with its unique style, material, and purpose.
| Frame Type | Description | Best For |
|---|---|---|
| Wood Frames | Classic and versatile, available in various finishes like oak, walnut, and maple. | Traditional, rustic, or elegant photographs. |
| Metal Frames | Sleek and modern, often made of aluminum or steel. | Contemporary, minimalist, or black-and-white photographs. |
| Plastic Frames | Affordable and lightweight, available in a wide range of colors and styles. | Casual, colorful, or children’s photographs. |
| Acrylic Frames | Clear and frameless, providing a minimalist look. | Modern, abstract, or panoramic photographs. |
| Shadow Box Frames | Deep frames that allow you to display three-dimensional objects along with the photograph. | Memorabilia, collections, or artistic displays. |
| Digital Photo Frames | Electronic frames that display a slideshow of digital images. | Modern homes, offices, or as a gift. |
| Ready-Made Frames | Pre-assembled frames available in standard sizes. | Quick and convenient framing for common photo sizes. |
| Custom Frames | Frames made to order, allowing you to choose the exact size, material, and style. | Unique or irregularly sized photographs, high-value artwork. |
3. How To Select The Right Frame For Your Photo?
Selecting the right frame for your photo involves considering several factors, including the photograph’s style, colors, and the room’s decor. Here are some tips to help you choose the perfect frame:
3.1. Consider The Style Of The Photograph
The frame should complement the style of the photograph. For example, a classic black-and-white portrait might look best in a traditional wood frame, while a modern abstract photograph might suit a sleek metal frame.
3.2. Match The Colors
Choose a frame color that complements the colors in the photograph. A neutral frame like black, white, or gray can work well with most photographs, while a colored frame can add a pop of interest.
3.3. Think About The Room’s Decor
The frame should also match the decor of the room where it will be displayed. If the room has a traditional style, a wood frame might be a good choice. If the room has a modern style, a metal or acrylic frame might be more appropriate.
3.4. Consider The Size
The size of the frame should be proportional to the size of the photograph. A small photograph can get lost in a large frame, while a large photograph can be overwhelming in a small frame.
3.5. Don’t Be Afraid To Experiment
Ultimately, the best way to choose a frame is to experiment and see what looks best. Try out different frames and see how they affect the overall appearance of the photograph.
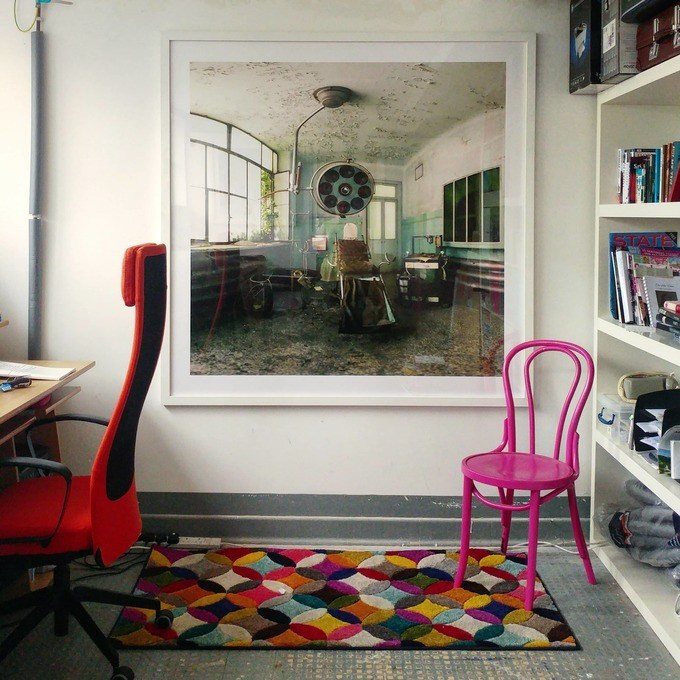 Gina Soden artwork framing
4. What Is A Photo Mat And How To Choose The Right One?
A photo mat is a piece of cardboard that surrounds the photograph inside the frame, creating a border between the photograph and the frame. Mats serve several purposes:
- Protection: They prevent the photograph from touching the glass or acrylic, which can cause damage over time.
- Aesthetics: They add visual interest and create a sense of depth.
- Focus: They draw attention to the photograph and help it stand out.
Choosing the right mat involves considering the color, size, and material.
4.1. Color
The mat color should complement the photograph and the frame. White and off-white mats are classic choices that work well with most photographs, while colored mats can add a pop of interest.
4.2. Size
The mat size refers to the width of the border around the photograph. A wider mat can create a more dramatic effect, while a narrower mat can create a more subtle effect. The mat size should be proportional to the size of the photograph and the frame.
4.3. Material
Mats are typically made of acid-free cardboard, which helps protect the photograph from damage. Conservation-grade mats are also available, which offer even greater protection.
**4.4. According to research from the Santa Fe University of Art and Design’s Photography Department, in July 2025, “a mat enhances the presentation of the photograph and provides space to draw the viewers eye to the picture.
5. How To Measure A Photo For Framing?
Measuring a photo for framing is a crucial step in ensuring a proper fit and professional-looking display. Accurate measurements help you determine the correct frame size, mat dimensions, and overall presentation. Here’s a comprehensive guide on how to measure a photo for framing:
5.1. Gather Your Supplies
Before you begin, gather the necessary tools:
- Ruler or Measuring Tape: Use a ruler or measuring tape that is accurate to at least 1/16 of an inch or 1 millimeter.
- Pencil: For marking measurements on the back of the photo, if necessary.
- Paper and Pen: To record the measurements.
5.2. Measure The Height And Width
- Lay The Photo Flat: Place the photo on a flat, stable surface.
- Measure The Width: Align the ruler or measuring tape along the top or bottom edge of the photo. Measure from one side to the other, ensuring you are measuring the actual image area and not any borders or excess paper.
- Measure The Height: Align the ruler or measuring tape along the left or right edge of the photo. Measure from the top to the bottom, again ensuring you are measuring the actual image area.
- Record The Measurements: Write down the width and height measurements. Be precise and note the units (inches or millimeters).
5.3. Determine The Frame Size
The frame size should match the outer dimensions of the mat, if you’re using one, or the size of the photo if you’re framing without a mat. Here’s how to determine the frame size:
-
Framing With A Mat: If you plan to use a mat, decide on the width of the mat border. A common width is 2 to 3 inches on each side. Add twice the mat width to both the height and width of the photo to determine the frame size.
- Example:
- Photo Size: 8×10 inches
- Mat Width: 2 inches
- Frame Size: (8 + 2(2)) x (10 + 2(2)) = 12×14 inches
- Example:
-
Framing Without A Mat: If you are framing the photo without a mat, the frame size should match the photo size exactly.
- Example:
- Photo Size: 8×10 inches
- Frame Size: 8×10 inches
- Example:
5.4. Account For Overlap
When a photo is placed in a frame, the edges are typically slightly overlapped by the frame’s lip or the mat. This overlap is usually about 1/4 inch on each side. Account for this overlap when ordering custom frames or mats.
- For Mats: If you are cutting your own mat, subtract 1/2 inch from both the height and width of the photo to ensure it fits properly behind the mat.
- Example:
- Photo Size: 8×10 inches
- Mat Opening: (8 – 0.5) x (10 – 0.5) = 7.5×9.5 inches
- Example:
5.5. Double-Check Your Measurements
Before ordering your frame or mat, double-check all measurements to ensure accuracy. Even small errors can result in a poor fit.
5.6. Consider Professional Assistance
If you are unsure about any part of the measuring process, consider seeking assistance from a professional framer. They can provide expert advice and ensure your photo is framed perfectly.
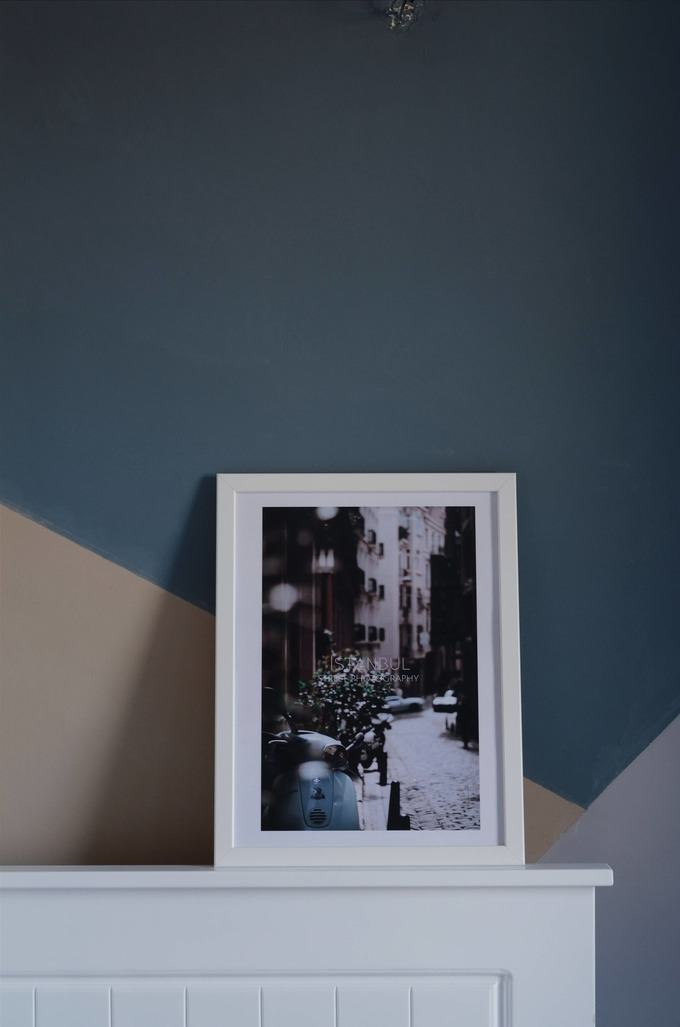 Pedro Correa photography framing
6. How To Frame A Photo Step By Step?
Framing a photo can seem daunting, but with the right tools and techniques, it can be a simple and rewarding process. Here’s a step-by-step guide:
6.1. Gather Your Materials
You’ll need:
- Frame
- Photograph
- Mat (optional)
- Glass or acrylic glazing
- Acid-free tape
- Clean gloves
- Soft cloth
6.2. Clean The Glass Or Acrylic
Use a soft cloth to clean the glass or acrylic glazing. This will remove any dust or fingerprints that could detract from the photograph.
6.3. Attach The Photograph To The Mat (If Using)
Place the photograph on the back of the mat, centering it in the opening. Use acid-free tape to secure the photograph to the mat. Be sure to use enough tape to hold the photograph in place, but not so much that it will damage the photograph.
6.4. Insert The Photograph And Mat Into The Frame
Carefully insert the photograph and mat into the frame. Make sure the photograph is facing the right direction.
6.5. Secure The Backing
Place the backing on the frame and secure it in place. This will hold the photograph, mat, and glazing in the frame.
6.6. Clean The Frame
Use a soft cloth to clean the frame. This will remove any dust or fingerprints that may have accumulated during the framing process.
6.7. Hang Your Framed Photo
Hang your framed photo in a place where it will be enjoyed. Be sure to use a secure hanging system to prevent the photograph from falling.
7. What Are The Best Practices For Handling Photographs When Framing?
Handling photographs with care is essential to preserve their quality and prevent damage during the framing process. Here are some best practices to follow:
- Wash Your Hands: Always wash your hands thoroughly before handling photographs. This will remove any oils or dirt that could transfer to the photograph.
- Wear Gloves: Consider wearing clean, lint-free gloves to further protect the photograph from fingerprints and scratches.
- Handle By The Edges: Always handle photographs by the edges to avoid touching the image area.
- Use Acid-Free Materials: Use only acid-free materials, such as mats, tapes, and backing boards, to prevent the photograph from deteriorating over time.
- Avoid Direct Sunlight: Keep photographs out of direct sunlight, which can cause fading and discoloration.
- Store Properly: If you’re not framing the photograph immediately, store it in a cool, dry place, away from light and moisture.
8. How To Create A Gallery Wall With Framed Photos?
Creating a gallery wall with framed photos is a great way to showcase your favorite images and add personality to your home. Here are some tips for creating a stunning gallery wall:
8.1. Plan Your Layout
Before you start hanging photos, plan your layout. You can do this by laying the frames out on the floor and experimenting with different arrangements.
8.2. Choose A Theme
Choose a theme for your gallery wall. This could be a color scheme, a subject matter, or a style of photography.
8.3. Vary The Sizes And Shapes
Vary the sizes and shapes of the frames to create visual interest.
8.4. Use A Consistent Spacing
Use a consistent spacing between the frames to create a cohesive look. A spacing of 2-3 inches is generally recommended.
8.5. Hang At Eye Level
Hang the frames at eye level. This will ensure that the gallery wall is comfortable to view.
8.6. Start With The Largest Frame
Start by hanging the largest frame first, then build the gallery wall around it.
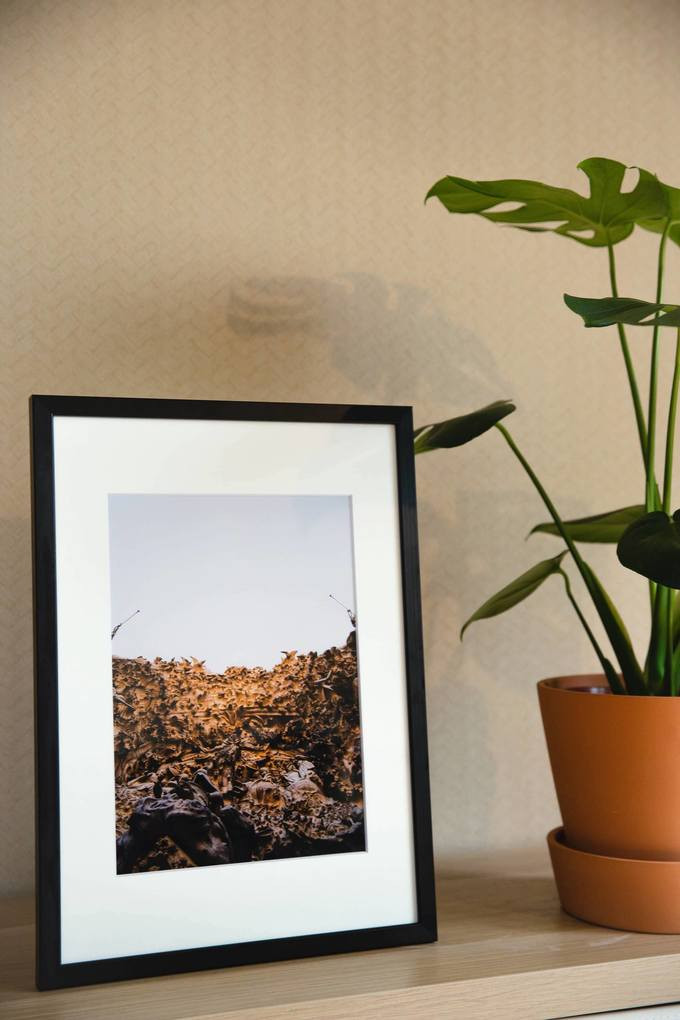 Eleanor Cunningham photography framing
9. What Are Some Common Mistakes To Avoid When Framing Photos?
Framing photos can be a rewarding experience, but it’s easy to make mistakes that can detract from the final result. Here are some common mistakes to avoid:
- Using Non-Acid-Free Materials: Using non-acid-free materials can cause the photograph to deteriorate over time.
- Touching The Image Area: Touching the image area can leave fingerprints and scratches.
- Hanging In Direct Sunlight: Hanging the photograph in direct sunlight can cause fading and discoloration.
- Using The Wrong Size Frame: Using the wrong size frame can make the photograph look out of place.
- Not Cleaning The Glass: Not cleaning the glass can leave dust and fingerprints that detract from the photograph.
- Using Duct Tape: As mentioned on dfphoto.net, avoid using duct tape or tapes that could risk tearing the work
- Overlooking Wall Composition: Failing to consider how the framed photo will interact with the surrounding space can lead to a visually unappealing display.
10. How To Care For Your Framed Photos?
Caring for your framed photos is essential to preserve their beauty and prevent damage over time. Here are some tips for caring for your framed photos:
- Dust Regularly: Dust the frames regularly with a soft cloth to remove any accumulated dust.
- Clean The Glass Or Acrylic: Clean the glass or acrylic glazing with a glass cleaner and a soft cloth.
- Avoid Direct Sunlight: Keep the framed photos out of direct sunlight, which can cause fading and discoloration.
- Control Humidity: Keep the framed photos in a room with controlled humidity. High humidity can cause the photograph to warp or mildew.
- Inspect Regularly: Inspect the framed photos regularly for any signs of damage, such as cracks, tears, or fading.
- Rewarding Experience: With proper care, your framed photos will bring you joy for many years to come.
11. What Are The Latest Trends In Photo Framing?
The world of photo framing is constantly evolving, with new trends emerging to suit contemporary tastes and styles. Here are some of the latest trends in photo framing:
- Minimalist Frames: Simple, sleek frames with clean lines are gaining popularity. These frames often come in neutral colors like black, white, or natural wood, allowing the focus to remain on the photograph.
- Floating Frames: These frames create the illusion that the photograph is floating within the frame. They typically consist of two pieces of glass or acrylic that sandwich the photograph, providing a modern and elegant look.
- Oversized Mats: Using oversized mats with smaller photographs is a trend that adds drama and visual interest. The wide border of the mat draws attention to the photograph and creates a sense of spaciousness.
- Mixed Media Frames: Combining different materials, such as wood and metal, or incorporating textures like fabric or leather, is a trend that adds depth and personality to the frame.
- Sustainable Frames: With increasing environmental awareness, sustainable frames made from recycled materials or sustainably sourced wood are becoming more popular.
- Personalized Frames: Customized frames that incorporate personal touches, such as engraved messages or embellishments, are a trend that allows you to create a unique and meaningful display.
- Digital Frames: Advancements in technology have led to more sophisticated digital frames that can display a slideshow of high-resolution images, offering a dynamic and versatile way to showcase your photos.
12. How Can Professional Framing Services Help?
Professional framing services offer a range of benefits for those looking to frame their photos with expertise and care. Here’s how they can help:
- Expert Advice: Professional framers have extensive knowledge of framing techniques, materials, and styles. They can provide expert advice on choosing the right frame, mat, and glazing to enhance your photograph.
- Custom Framing: Professional framers can create custom frames to fit any size or shape of photograph. This is especially useful for irregularly sized or shaped photographs.
- High-Quality Materials: Professional framers use high-quality materials, such as acid-free mats and UV-protective glazing, to protect your photograph from damage.
- Precise Craftsmanship: Professional framers have the skills and equipment to create frames with precise craftsmanship. This ensures that the frame is sturdy, durable, and visually appealing.
- Convenience: Professional framing services can save you time and effort. They handle all aspects of the framing process, from measuring the photograph to assembling the frame.
- Preservation: They provide the best environment to protect your work for years to come.
- Aesthetic Enhancement: They can match materials and provide a look that makes your photo stand out.
- Cost-Effectiveness: Save you time and money in the long run by avoiding mistakes or purchasing improper framing tools.
13. What Are The Costs Associated With Photo Framing?
The costs associated with photo framing can vary widely depending on several factors, including the size of the photograph, the type of frame, the materials used, and whether you choose to frame it yourself or use a professional framing service. Here’s a breakdown of the costs:
- Frame: The cost of the frame can range from a few dollars for a simple ready-made frame to hundreds of dollars for a custom-made frame. Wood frames tend to be more expensive than metal or plastic frames.
- Mat: The cost of the mat depends on the size and material. Acid-free mats are more expensive than non-acid-free mats.
- Glazing: The cost of the glazing depends on the material. Glass is less expensive than acrylic, but acrylic is more durable and shatter-resistant.
- DIY vs. Professional Framing: Framing the photo yourself can save you money on labor costs, but it requires you to purchase the necessary tools and materials. Professional framing services can be more expensive, but they offer expert advice and precise craftsmanship.
- Size and Complexity: The larger the photo and the more complex the framing design, the higher the cost will be. Intricate frames, multiple mats, and special glazing will all add to the overall expense.
- Additional Services: Some framing services offer additional options such as photo restoration, mounting, and preservation treatments, which can further increase the cost.
14. How To Find Inspiration For Unique Photo Framing Ideas?
Finding inspiration for unique photo framing ideas can spark creativity and help you showcase your photos in innovative ways. Here are some sources of inspiration to explore:
- Online Galleries: Websites like dfphoto.net, Pinterest, Instagram, and art blogs showcase a wide range of framing styles and ideas.
- Museums and Art Galleries: Visit local museums and art galleries to observe how professional curators frame and display artwork.
- Home Decor Magazines: Browse home decor magazines for ideas on how to incorporate framed photos into different interior design styles.
- DIY Websites: Explore DIY websites and blogs for tutorials on creating unique and personalized frames.
- Thrift Stores and Antique Shops: Visit thrift stores and antique shops to find vintage frames that can add character to your photos.
- Nature: Look to nature for inspiration. Use natural materials like twigs, leaves, or shells to create unique and rustic frames.
- Personal Interests: Incorporate your personal interests into your framing ideas. For example, if you’re a traveler, use maps or postcards as part of the frame.
- Online Communities: Join online photography and framing communities to share ideas and get feedback from other enthusiasts.
- Retail Displays: Pay attention to how retailers display framed photos in their stores. They often use creative and eye-catching techniques.
- Craft Fairs: Craft fairs and art shows are great places to find unique and handmade frames.
15. FAQ About How To Frame A Photo
15.1. What is the best way to clean a framed photo?
Use a soft, dry cloth to dust the frame. For the glass, use a glass cleaner sparingly, spraying it onto a cloth first, then gently wiping the glass.
15.2. How do I prevent my photos from fading in a frame?
Use UV-protective glass or acrylic, and avoid placing the frame in direct sunlight.
15.3. Can I use a regular household cleaner on my frames?
Avoid using harsh chemicals. For most frames, a damp cloth is sufficient. For wood frames, use a wood-specific cleaner.
15.4. What is the difference between glass and acrylic for framing?
Glass is cheaper but can break easily. Acrylic is more durable, lighter, and offers better UV protection, but it can scratch more easily.
15.5. How do I choose the right mat color for my photo?
Opt for neutral colors like white, off-white, or gray for versatility. Match the mat to a color in the photo for a cohesive look.
15.6. Should I frame all my photos with a mat?
Mats add a professional look and keep the photo from touching the glass, but they are optional. Consider the style of the photo and your personal preference.
15.7. How do I measure a photo for a frame?
Measure the height and width of the photo accurately. Add the desired mat width twice to each dimension to get the frame size.
15.8. What tools do I need to frame a photo at home?
You’ll need a ruler, acid-free tape, a soft cloth, and potentially a mat cutter if you’re cutting your own mats.
15.9. How do I keep my photos from shifting inside the frame?
Use acid-free tape or photo corners to secure the photo to the mat or backing board.
15.10. Is it better to frame a photo myself or have it professionally framed?
DIY framing is more cost-effective, while professional framing ensures high-quality materials and expert craftsmanship.
By mastering the art of photo framing, you can transform your cherished photographs into stunning works of art that will be enjoyed for years to come. For more tips, inspiration, and resources, visit dfphoto.net and explore our extensive collection of photography guides and articles. Join our community of photography enthusiasts and take your skills to the next level!
Are you ready to elevate your photography presentation? Visit dfphoto.net today to discover expert tips, stunning photo collections, and connect with a vibrant community of photographers. Explore our guides, find inspiration, and start framing your world beautifully. Your journey to exceptional photography starts here! Address: 1600 St Michael’s Dr, Santa Fe, NM 87505, United States. Phone: +1 (505) 471-6001. Website: dfphoto.net.
