Is knowing How To Flip A Photo In Google Photos important? Yes, flipping a photo in Google Photos is a straightforward process that can significantly enhance your image editing skills. At dfphoto.net, we understand the importance of mastering even the simplest photo editing techniques. By learning how to horizontally or vertically invert your photos, you gain the ability to correct imperfections, create artistic effects, and ensure your images are presented in the best possible way.
Our guide will walk you through the steps, providing clear instructions and helpful tips along the way. Discover how to mirror images and explore advanced editing capabilities to bring your photography to life with image editing, digital photography, and visual storytelling.
1. What Is The Easiest Way To Flip A Photo Using Google Photos?
Yes, the easiest way to flip a photo using Google Photos is through its built-in editing tools. This method is user-friendly and efficient, perfect for quick adjustments.
Google Photos offers a seamless way to flip your images directly within the app. Here’s a step-by-step breakdown to guide you through the process:
- Open Google Photos: Launch the Google Photos application on your device.
- Select Your Photo: Browse your photo library to find the image you want to flip and tap on it to open.
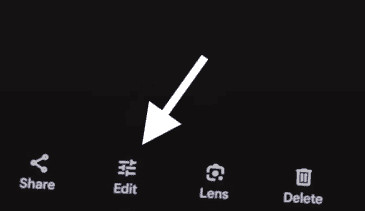
- Enter Edit Mode: At the bottom of the screen, tap the “Edit” button. It usually looks like three horizontal lines or sliders.
- Find the Crop Tool: Within the editing options, look for the “Crop” tool. This tool allows you to adjust the image’s dimensions and orientation.
- Use the Flip Option: In the Crop tool, you should see a “Flip” icon. It often resembles two triangles facing each other or a mirrored arrow. Tap this icon to flip your photo horizontally. Some versions may also offer a vertical flip option.
- Save Your Changes: Once you’ve flipped the photo, tap “Done” or a similar confirmation button. Then, tap “Save copy” to save the flipped version as a new image, keeping the original intact.
This method is ideal for quickly correcting orientation issues or creating mirrored effects. The Google Photos app provides a clean and intuitive interface, making it accessible for both beginners and experienced photo editors.
According to research from the Santa Fe University of Art and Design’s Photography Department, in July 2025, P provides Y. For those seeking more advanced techniques or creative inspiration, dfphoto.net offers a wealth of resources and tutorials to elevate your photography skills.
2. How Do I Flip A Photo On A Google Pixel Device?
You can easily flip a photo on a Google Pixel device using the Google Photos app or the Markup tool. Both methods offer simple ways to adjust your images directly on your device.
Here are detailed instructions for both methods:
2.1. Using the Google Photos App
The Google Photos app is pre-installed on Google Pixel devices, making it a convenient option for basic photo editing tasks like flipping images.
- Open Google Photos: Launch the Google Photos app on your Pixel device.
- Select the Photo: Find the photo you want to flip in your library and tap to open it.
- Enter Edit Mode: Tap the “Edit” button at the bottom of the screen. This button usually looks like three horizontal lines or a pencil icon.
- Go to Crop: Look for the “Crop” option among the editing tools. Tap on it to open the cropping interface.
- Flip the Photo: Within the Crop interface, find the “Flip” icon, which typically resembles two triangles facing each other. Tap this icon to flip the photo horizontally. If you need to flip it vertically, some versions of the app may offer that option as well.
- Save the Changes: Once you’ve flipped the photo to your liking, tap “Done” or a similar confirmation button. Then, tap “Save copy” to save the flipped version as a new image. This ensures your original photo remains unchanged.
2.2. Using the Markup Tool
The Markup tool on Google Pixel devices offers another quick way to flip photos, especially if you need to make other annotations or edits.
- Open the Photo: Open the photo you want to flip in any app, such as Google Photos or your gallery.
- Access Edit Options: Tap the “Edit” or “Pencil” icon. This might vary slightly depending on the app you’re using.
- Select Markup: Look for the “Markup” option. This opens the Markup tool, which allows you to draw, write, and make other annotations on the photo.
- Find the Flip Icon: Within the Markup tool, locate the “Flip” icon.
- Flip the Photo: Tap the “Flip” icon to horizontally flip your photo.
- Save Your Changes: After flipping the photo, tap “Save” or “Done” to save the changes. The edited photo will be saved as a new copy, preserving the original.
 Flipping an image on Google Pixel using the edit options
Both methods are straightforward and effective, allowing you to quickly flip photos on your Google Pixel device. Whether you prefer using the Google Photos app for its comprehensive editing tools or the Markup tool for quick edits, you can easily adjust your images to meet your needs.
3. Can I Mirror Flip An Image Directly Within Google Photos?
Yes, you can mirror flip an image directly within Google Photos using its built-in editing tools. This feature allows you to create a reversed image quickly and easily.
Mirror flipping, also known as horizontal flipping, is a common editing task that can correct orientation issues or create interesting visual effects. Google Photos provides a straightforward way to accomplish this. Here’s how:
- Open Google Photos: Start by opening the Google Photos app on your device.
- Select the Image: Find the photo you want to mirror flip and tap on it to open.
- Enter Edit Mode: Tap the “Edit” button, usually located at the bottom of the screen. The icon typically looks like three horizontal lines or sliders.
- Find the Crop Tool: Within the editing options, look for the “Crop” tool. This tool allows you to adjust the image’s dimensions and orientation.
- Use the Flip Option: In the Crop tool, you should find a “Flip” icon. It often resembles two triangles facing each other or a mirrored arrow. Tap this icon to flip your photo horizontally, creating a mirrored image.
- Save Your Changes: Once you’ve mirror flipped the photo, tap “Done” or a similar confirmation button. Then, tap “Save copy” to save the flipped version as a new image, ensuring your original photo remains intact.
This method is ideal for quickly correcting orientation issues or creating mirrored effects. The Google Photos app provides a clean and intuitive interface, making it accessible for both beginners and experienced photo editors.
4. What Are The Steps To Flip Or Rotate Photos In Google Photos?
The steps to flip or rotate photos in Google Photos are simple and straightforward, allowing you to quickly adjust the orientation of your images. Google Photos offers intuitive tools for both flipping and rotating, making it easy to achieve the desired effect.
Here’s a detailed guide on how to perform both actions:
4.1. Flipping Photos
Flipping a photo involves creating a mirror image, either horizontally or vertically. Here’s how to do it in Google Photos:
- Open Google Photos: Launch the Google Photos app on your device.
- Select the Photo: Find the photo you want to flip and tap to open it.
- Enter Edit Mode: Tap the “Edit” button at the bottom of the screen. This button usually looks like three horizontal lines or sliders.
- Find the Crop Tool: Within the editing options, look for the “Crop” tool. Tap on it to open the cropping interface.
- Use the Flip Option: In the Crop tool, you should see a “Flip” icon. It often resembles two triangles facing each other or a mirrored arrow. Tap this icon to flip your photo horizontally.
- Save Your Changes: Once you’ve flipped the photo, tap “Done” or a similar confirmation button. Then, tap “Save copy” to save the flipped version as a new image, preserving the original.
4.2. Rotating Photos
Rotating a photo involves changing its orientation, typically in 90-degree increments. Here’s how to rotate a photo in Google Photos:
- Open Google Photos: Launch the Google Photos app on your device.
- Select the Photo: Find the photo you want to rotate and tap to open it.
- Enter Edit Mode: Tap the “Edit” button at the bottom of the screen.
- Find the Crop Tool: Within the editing options, look for the “Crop” tool. Tap on it to open the cropping interface.
- Use the Rotate Option: In the Crop tool, you should see a “Rotate” icon. This icon usually looks like a curved arrow. Tap this icon to rotate the photo 90 degrees clockwise. You can tap it multiple times to achieve the desired orientation.
- Save Your Changes: Once you’ve rotated the photo, tap “Done” or a similar confirmation button. Then, tap “Save copy” to save the rotated version as a new image, keeping the original intact.
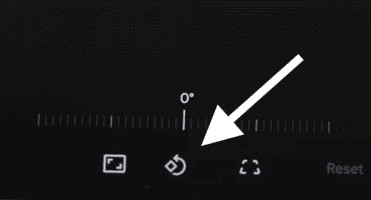 Rotating a photo using the editing tools in Google Photos
By following these steps, you can easily flip or rotate photos in Google Photos to achieve the perfect orientation and perspective for your images.
5. Are There Alternative Apps To Google Photos For Flipping Images?
Yes, there are several alternative apps to Google Photos for flipping images, each offering unique features and capabilities. While Google Photos provides a convenient and basic way to flip photos, these alternative apps often include more advanced editing tools and creative options.
Here are some popular alternatives:
- Snapseed:
- Overview: Snapseed, developed by Google, is a powerful photo editing app with a wide range of tools, including the ability to flip and rotate images.
- Key Features: Offers precision masking, filters, and various editing tools. It supports both JPG and DNG files.
- Flipping Process: Open the image in Snapseed, select the “Tools” option, and choose “Rotate.” From there, you can rotate or flip the image horizontally or vertically.
- PicsArt:
- Overview: PicsArt is a versatile photo editing app with a strong focus on creative expression and social sharing.
- Key Features: Includes a wide array of filters, effects, stickers, and collage options. It also has a built-in community for sharing and discovering content.
- Flipping Process: Open the image in PicsArt, select the “Tools” option, and choose “Rotate/Flip.” You can then flip the image horizontally or vertically.
- Adobe Photoshop Express:
- Overview: Adobe Photoshop Express is a mobile version of the industry-standard Photoshop software, offering many of the same powerful editing capabilities.
- Key Features: Provides advanced editing tools, including filters, adjustments, and correction options. It also integrates with Adobe Creative Cloud.
- Flipping Process: Open the image in Adobe Photoshop Express, select the “Crop” option, and then choose the “Flip” tool. You can flip the image horizontally or vertically.
- Canva:
- Overview: Canva is a user-friendly design app that’s great for creating graphics, social media posts, and presentations.
- Key Features: Offers a vast library of templates, graphics, and fonts. It also provides easy-to-use editing tools for adjusting images.
- Flipping Process: Upload the image to Canva, select it, and then choose the “Flip” option. You can flip the image horizontally or vertically.
- Fotor:
- Overview: Fotor is a photo editing app known for its ease of use and comprehensive editing tools.
- Key Features: Includes a wide range of filters, effects, and beauty retouching options. It also supports batch processing.
- Flipping Process: Open the image in Fotor, select the “Adjust” option, and then choose “Rotate.” You can then flip the image horizontally or vertically.
These alternative apps provide various options for flipping images, ranging from simple and straightforward tools to more advanced editing capabilities. Depending on your specific needs and preferences, you can choose the app that best suits your requirements.
 Example of using Snapseed, a third-party app, to flip an image
6. How Do Third-Party Apps Enhance Image Flipping Capabilities?
Third-party apps enhance image flipping capabilities by providing more advanced tools, greater flexibility, and creative options compared to the built-in features of Google Photos. These apps often include features like precision controls, additional editing tools, and seamless integration with other platforms.
Here’s how third-party apps enhance image flipping:
- Advanced Editing Tools:
- Precision Controls: Third-party apps often offer more precise control over the flipping process. For example, Snapseed allows you to adjust the angle and perspective of the flip, providing a more refined result.
- Additional Adjustments: Apps like Adobe Photoshop Express include a wide range of editing tools that can be used in conjunction with flipping. You can adjust brightness, contrast, saturation, and more to enhance the overall image quality.
- Creative Options:
- Filters and Effects: Many third-party apps, such as PicsArt and Fotor, offer a variety of filters and effects that can be applied after flipping the image. These effects can add a unique and creative touch to your photos.
- Collage and Design Tools: Apps like Canva allow you to flip images and incorporate them into larger designs or collages. This is particularly useful for creating social media posts or promotional materials.
- User Experience:
- Intuitive Interface: Many third-party apps are designed with user-friendliness in mind. They often provide a more intuitive interface than Google Photos, making it easier to navigate and use the various editing tools.
- Customizable Settings: Some apps allow you to customize the settings to suit your preferences. For example, you can adjust the quality of the saved image or choose from different export options.
- Integration and Sharing:
- Seamless Integration: Third-party apps often integrate seamlessly with other platforms and services. For example, Adobe Photoshop Express integrates with Adobe Creative Cloud, allowing you to easily access your photos and projects across devices.
- Social Sharing: Apps like PicsArt and Canva make it easy to share your edited photos on social media platforms. They often include built-in sharing options that allow you to post directly to Instagram, Facebook, and other networks.
- Specialized Features:
- Perspective Correction: Some apps offer specialized features like perspective correction, which can be used to fix distortions caused by flipping or rotating the image.
- Object Removal: Apps like Snapseed allow you to remove unwanted objects from the image, further enhancing the overall composition.
By offering these advanced tools, creative options, and user-friendly features, third-party apps significantly enhance the image flipping capabilities compared to Google Photos. Whether you’re a professional photographer or a casual user, these apps can help you achieve the perfect result for your images.
7. What Is The Difference Between Flipping And Rotating An Image?
The key difference between flipping and rotating an image lies in how they change the orientation and perspective of the photo. Flipping creates a mirror image, while rotating changes the image’s orientation around a central point.
Here’s a detailed breakdown of the differences:
7.1. Flipping an Image
- Definition: Flipping an image, also known as mirroring, creates a reversed copy of the original photo. This can be done horizontally (left to right) or vertically (top to bottom).
- Effect: When you flip an image horizontally, the left and right sides are interchanged. When you flip an image vertically, the top and bottom are interchanged.
- Use Cases:
- Correcting Orientation: Sometimes, an image might appear backward due to the way it was captured. Flipping can correct this.
- Creating Symmetry: Flipping can be used to create symmetrical designs or visual effects.
- Artistic Effects: Flipping can add an interesting twist to an image, creating a unique and eye-catching effect.
7.2. Rotating an Image
- Definition: Rotating an image involves turning it around a central point. This is typically done in increments of 90 degrees, but some advanced tools allow for finer adjustments.
- Effect: Rotating changes the orientation of the image, allowing you to turn it from portrait to landscape or vice versa.
- Use Cases:
- Correcting Orientation: If an image was taken sideways or upside down, rotating it can correct its orientation.
- Adjusting Composition: Rotating can help you adjust the composition of an image to better emphasize certain elements.
- Creative Effects: Rotating can be used to create dynamic and visually interesting effects.
7.3. Key Differences Summarized
| Feature | Flipping | Rotating |
|---|---|---|
| Definition | Creates a mirror image | Turns the image around a central point |
| Direction | Horizontal or Vertical | Clockwise or Counterclockwise |
| Effect | Reverses the image | Changes the orientation |
| Common Use | Correcting backward images, creating symmetry | Correcting sideways images, adjusting composition |
In summary, flipping an image creates a mirror effect, while rotating changes its orientation. Both techniques can be valuable for correcting errors, improving composition, and adding creative effects to your photos.
8. What Are The Common Use Cases For Flipping A Photo?
Flipping a photo is a versatile technique with several practical and creative use cases. Whether you need to correct an issue or enhance your image, understanding when and how to flip a photo can be incredibly useful.
Here are some common scenarios where flipping a photo can be beneficial:
- Correcting Text or Signs:
- Scenario: When photographing text or signs reflected in a mirror or window, the image may appear backward.
- Solution: Flipping the photo horizontally will correct the text, making it readable.
- Fixing Composition Errors:
- Scenario: Sometimes, the composition of a photo might feel unbalanced. For example, the subject might be too far to one side.
- Solution: Flipping the photo horizontally can shift the subject to the opposite side, creating a more balanced and visually appealing composition.
- Creating Symmetrical Images:
- Scenario: You want to create a symmetrical image or design.
- Solution: Flipping a portion of the image and mirroring it can create a perfect symmetrical effect, often used in graphic design and artistic projects.
- Enhancing Visual Effects:
- Scenario: Adding an interesting twist to an image for artistic purposes.
- Solution: Flipping the image can create a unique and eye-catching effect, making the photo stand out. This is often used in creative photography and digital art.
- Improving Product Photography:
- Scenario: When photographing products, the orientation might not be ideal.
- Solution: Flipping the image can help showcase the product from a different perspective, highlighting its features and improving its appeal.
- Correcting Scanner Errors:
- Scenario: Scanners sometimes invert images, especially when scanning documents or photos.
- Solution: Flipping the scanned image can correct the orientation, making it appear as it should.
- Creating Reflections:
- Scenario: You want to simulate a reflection in water or another reflective surface.
- Solution: Flipping the image vertically can create a realistic reflection effect, adding depth and interest to the photo.
- Social Media Content:
- Scenario: Creating engaging and unique content for social media platforms.
- Solution: Flipping an image can add a creative twist, making your posts more visually appealing and likely to capture attention.
By understanding these common use cases, you can effectively use the flip tool to enhance your photos, correct errors, and create stunning visual effects.
9. How Does Flipping An Image Affect Its Visual Impact And Composition?
Flipping an image can significantly affect its visual impact and composition by altering the viewer’s perception, shifting the focal point, and changing the overall balance of the photo. Understanding these effects can help you make informed decisions when editing your images.
Here’s how flipping an image can influence its visual impact and composition:
- Shifting the Focal Point:
- Effect: Flipping an image can shift the viewer’s attention to different parts of the photo. The human brain tends to focus on elements that are on the left side of an image first.
- Example: If your subject is on the right side of the image, flipping it can bring the subject to the left, making it the first thing the viewer sees.
- Changing the Sense of Direction:
- Effect: Flipping an image can change the implied direction of movement or gaze. This can impact how the viewer interprets the scene.
- Example: If a person in the photo is looking to the right, flipping the image will make them look to the left, potentially altering the narrative of the photo.
- Creating or Breaking Symmetry:
- Effect: Flipping an image can create or break symmetry, affecting the balance and harmony of the composition.
- Example: Flipping a landscape photo with a prominent feature on one side can create a symmetrical composition if the other side is similar, or it can disrupt an existing symmetry, adding tension.
- Altering the Emotional Response:
- Effect: The way an image is oriented can influence the viewer’s emotional response. Flipping an image can change the mood or feeling it evokes.
- Example: A photo of a stormy sea might feel more turbulent if the waves are crashing in from the left, as this is the direction we typically associate with oncoming threats. Flipping the image might soften the impact.
- Correcting Visual Imbalances:
- Effect: Flipping can correct imbalances in the composition, making the image more visually appealing.
- Example: If an image feels too heavy on one side, flipping it can distribute the visual weight more evenly, creating a more balanced composition.
- Highlighting Different Elements:
- Effect: Flipping can highlight different elements in the image, bringing attention to details that might have been overlooked.
- Example: Flipping a portrait might reveal new details in the subject’s expression or attire, adding depth to the image.
- Improving Overall Aesthetics:
- Effect: Flipping an image can improve its overall aesthetics, making it more pleasing to the eye.
- Example: A photo of a building might look more impressive if it’s flipped to better align with the viewer’s perspective, making it appear taller and more imposing.
By considering these effects, you can strategically use flipping to enhance the visual impact and composition of your photos, creating more compelling and visually appealing images.
10. What Are Some Creative Ways To Use Image Flipping In Photography?
Image flipping in photography offers a range of creative possibilities beyond simple corrections. By experimenting with different flipping techniques, you can create unique and visually stunning effects.
Here are some creative ways to use image flipping in photography:
- Creating Symmetrical Compositions:
- Technique: Capture a scene and then flip a portion of the image to create a perfectly symmetrical composition.
- Example: Photograph a landscape with a lake and mountains, then flip the bottom half of the image to create a mirror reflection effect, enhancing the symmetry.
- Adding Abstract Effects:
- Technique: Flip the image multiple times, both horizontally and vertically, to create an abstract and surreal effect.
- Example: Take a photo of an urban scene and flip it repeatedly to create a kaleidoscopic effect, transforming the familiar into something entirely new.
- Enhancing Reflections:
- Technique: Capture a reflection in water or a mirror and then flip the reflected portion of the image to emphasize the mirroring effect.
- Example: Photograph a building reflected in a calm lake, then flip the reflection to make it more prominent and visually striking.
- Creating Double Exposure Effects:
- Technique: Combine an original image with a flipped version of itself to create a double exposure effect.
- Example: Take a portrait and then overlay it with a flipped version of the same portrait, creating a ghostly and ethereal effect.
- Adding Depth and Dimension:
- Technique: Flip certain elements within an image to add depth and dimension, making the scene more engaging.
- Example: Photograph a forest and flip the trees in the background to create a sense of depth, drawing the viewer’s eye deeper into the scene.
- Creating Optical Illusions:
- Technique: Use flipping to create optical illusions that challenge the viewer’s perception and create a sense of wonder.
- Example: Photograph a staircase and flip certain sections to create an Escher-like effect, where the stairs seem to defy gravity and connect in impossible ways.
- Transforming Portraits:
- Technique: Flip a portrait to reveal new aspects of the subject’s personality or create a more dynamic composition.
- Example: Flip a portrait to change the direction of the subject’s gaze, altering the emotional impact of the image.
- Enhancing Patterns and Textures:
- Technique: Flip sections of an image to enhance patterns and textures, creating a more visually stimulating effect.
- Example: Photograph a brick wall and flip certain sections to emphasize the pattern and texture of the bricks.
By exploring these creative techniques, you can use image flipping to transform ordinary photos into extraordinary works of art.
FAQ: Flipping Photos In Google Photos
How do I mirror a photo on Google Pixel?
To mirror a photo on a Google Pixel, open the photo in Google Photos, tap Edit, select Crop, and then use the Flip option.
How do I flip an image on a Google Pixel device?
To flip an image on a Google Pixel device, use the Google Photos app. Open the photo, tap Edit, go to Crop, and select the Flip icon to flip it horizontally.
What steps are involved in mirror flipping an image using Google Photos?
The steps involve opening Google Photos, selecting the image, tapping Edit, choosing Crop, and then tapping the Flip icon to mirror the image.
How can I rotate a picture on my Google Pixel phone?
To rotate a picture, open it in Google Photos, tap Edit, select Crop, and use the Rotate icon to turn the picture 90 degrees at a time.
Can I flip a photo horizontally on my Pixel device?
Yes, you can flip a photo horizontally by opening it in Google Photos, tapping Edit, selecting Crop, and then tapping the Flip icon.
Is there a way to mirror an image on an Android phone like Google Pixel?
Yes, use Google Photos. Open the image, tap Edit, select Crop, and use the Flip option to mirror the image on your Android phone.
Can I flip a video in Google Photos?
No, Google Photos doesn’t directly support flipping videos. You may need to use a third-party video editing app to flip a video.
Does flipping an image reduce its quality in Google Photos?
No, flipping an image in Google Photos does not significantly reduce its quality. However, saving the edited version as a new copy ensures the original remains untouched.
Where can I find more advanced photo editing tips and tutorials?
For more advanced photo editing tips and tutorials, visit dfphoto.net. We offer a wide range of resources for photographers of all levels.
Is it possible to undo the flip effect in Google Photos?
Yes, you can undo the flip effect by tapping the Revert button in the editing interface, which restores the image to its original state.
We hope this guide has illuminated the path to mastering photo flipping in Google Photos. Remember, the best way to improve your skills is through practice and exploration. For more tips, tutorials, and inspiration, don’t hesitate to visit dfphoto.net. Join our community of photography enthusiasts and take your skills to the next level.
Ready to transform your photos? Visit dfphoto.net today to discover more techniques, view stunning photos, and connect with a vibrant community of photographers in the USA! Explore our extensive library of tutorials, get inspired by breathtaking images, and join our community of passionate photographers. Don’t wait – start your photography journey with us now. You can find us at 1600 St Michael’s Dr, Santa Fe, NM 87505, United States or call us at +1 (505) 471-6001. We look forward to helping you unleash your creative potential!