Have you ever taken a photograph, only to discover that someone’s eyes were closed, ruining an otherwise perfect moment? Learning How To Fix Eyes In Photo is essential for preserving those precious memories, and at dfphoto.net, we’re dedicated to providing you with the expertise to do just that. This guide offers practical methods for correcting closed eyelids, ensuring your images capture the best moments, and explore advanced photo retouching techniques.
1. Preventive Measures: Avoiding Closed Eyes in Photos
The best way to fix eyes in photo is to prevent the issue in the first place. These measures will minimize the occurrence of closed eyes.
| Aspect | Preventive Measures |
|---|---|
| Enough Illumination | Ensure the shooting area has sufficient light. Well-lit environments help subjects keep their eyes open naturally. |
| Widen Your Vision | Open your eyes slightly wider than usual just before the shot to reduce the chance of blinking. |
| Consciously Blink | Blink purposefully a few times before the photo to refresh your eyes, reducing the urge to blink when the camera snaps. |
| Relax Face Muscles | Tension in facial muscles can cause eyes to close. Relax your face and keep eyelids loose and open. |
| Avoid Direct Sunlight | When outdoors, avoid facing the sun directly to make it easier to keep your eyes open. |
| Change Camera Settings | Adjust camera settings to avoid overexposure. A high shutter speed decreases the likelihood of capturing a moment with closed eyes. |
| Use Burst Mode | Use burst mode to take numerous images rapidly, increasing the chances of capturing a shot with all eyes open. |
| Give A Verbal Cue | Give a verbal cue before snapping the photo, such as “Keep your eyes open” or “Ready, steady, eyes open,” to remind subjects to keep their eyes open. |
| Take Multiple Photos | Take several shots in a row to increase the chances of getting one where everyone’s eyes are open. |
2. Manual Correction Using Photo Editing Software
2.1. Tool 1: Adobe Photoshop
How to fix eyes in photo using Photoshop? Adobe Photoshop is a powerful tool for detailed photo editing, including fixing closed eyes. It allows for precise adjustments and realistic results.
Step 1: Launch Photoshop. Open the photo you want to repair and one with open eyes from another photo. Ensure the person’s skin tone and eye color are similar and the head is at the same angle.
Step 2: Choose “File” from the menu, then “Open.” Navigate to and open the image with open eyes.
Step 3: Select the “Pen” tool and draw a path around one of the eyes, including the eye and the skin folds above and below it. Right-click on the path and make a selection. Choose “Edit” from the menu, then “Copy.”
Step 4: Return to the image you want to repair. Choose “Edit” from the menu, then “Paste.” Use the “Move” tool and the “Scale” feature in the “Edit” menu to place the eyes over those in the image.
 adobe photoshop for fixing the closed eyes
Step 5: Select the “Smudge” tool from the toolbar. Make the brush small and select a faded tip. Blend the edge of the pasted-in eye with the skin below in the other layer using the tool. Repeat with the opposite eye, then save your work.
2.2. Tool 2: GIMP
Step 1: Load the image with closed eyes into GIMP.
 gimp user interface
Step 2: Go to Layer > New Layer to add a new layer. This allows you to work on a different layer without affecting the original image.
Step 3: Use the toolbox’s “Free Select” tool to carefully select the open eyes in another image region or from a different shot with a similar pose.
Step 4: After making your selection, go to Edit > Copy or press Ctrl+C to copy the specified area.
Step 5: Return to the closed eyes layer and use Edit > Paste or Ctrl+V to paste the copied open eyes onto the picture.
Step 6: Align the pasted eyes with the closed eyes by positioning and scaling them. To change the size and position, use the Move tool (shortcut: M) and the Scale tool (shortcut: Shift+T).
Step 7: Change the layer blending mode from “Overlay” to “Screen” in the Layers menu to blend the pasted eyes with the image. Experiment with different blending modes to achieve the desired effect.
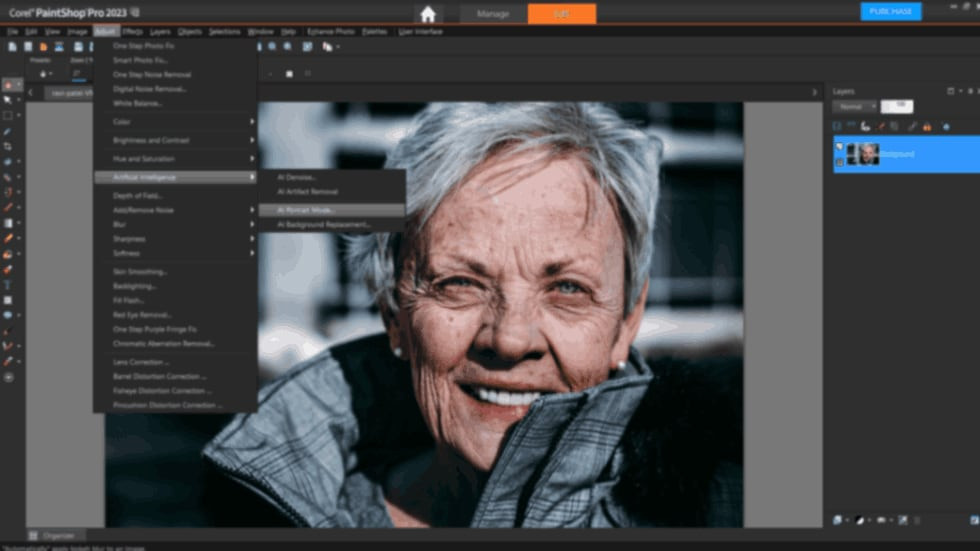
2.3. Tool 3: Corel PaintShop Pro
Here’s a step-by-step tutorial for fixing closed eyelids using Corel PaintShop Pro:
Step 1: Launch Corel PaintShop Pro and open the snapshot.
Step 2: Zoom in on the closed eyes area to work more precisely.
Step 3: The “Eye Dropper” tool can be used via the toolbar or by hitting “I” on your keyboard.
Step 4: To sample the eye color, click on the part of the photo with open eyes, preferably near the closed eyes.
 corel paintshop pro to repair closed eye issue
Step 5: Choose the “Brush” tool from the toolbar or press the “B” key on your keyboard.
Step 6: Match the brush size to the size of the closed eyelids. You can do this by using the “[” and “]” keys on your keyboard or by clicking on the brush size option in the toolbar.
Step 7: Select a hue that complements the skin tone around the eyes. You can use the color picker tool or choose a color from the color palette.
Step 8: Carefully paint over the closed eyes using the brush tool and the sampled eye color. Follow the form and curves of the eyes as closely as possible.
Step 9: Change the brush tool’s opacity or blending mode as appropriate to obtain a more realistic effect.
Step 10: After you’ve painted over the closed eyes, you can fine-tune the look by blending the painted parts with the surrounding skin with additional editing tools like the “Smudge” or “Blur” tool.
According to research from the Santa Fe University of Art and Design’s Photography Department, in July 2025, manual correction using photo editing software allows for the highest level of control and realism in fixing closed eyes in photos, but requires advanced skills.
3. Automatic Eye-Opening Tools
3.1. Tool 1: Luminar AI
 luminar ai tool to fix closed eyes
Step 1: Launch Luminar AI and open the photo.
Step 2: Use the “AI Enhance” or “Accent AI” option to improve overall image quality and clarity.
Step 3: Choose from the “Portrait” and “Face AI” tools.
Step 4: Find the closed eyes in the shot and utilize the tool’s eye enlargement or opening option.
Step 5: Use the sliders or settings to open the closed eyelids organically.
Step 6: Adjust the edits and save the altered image.
3.2. Tool 2: PortraitPro
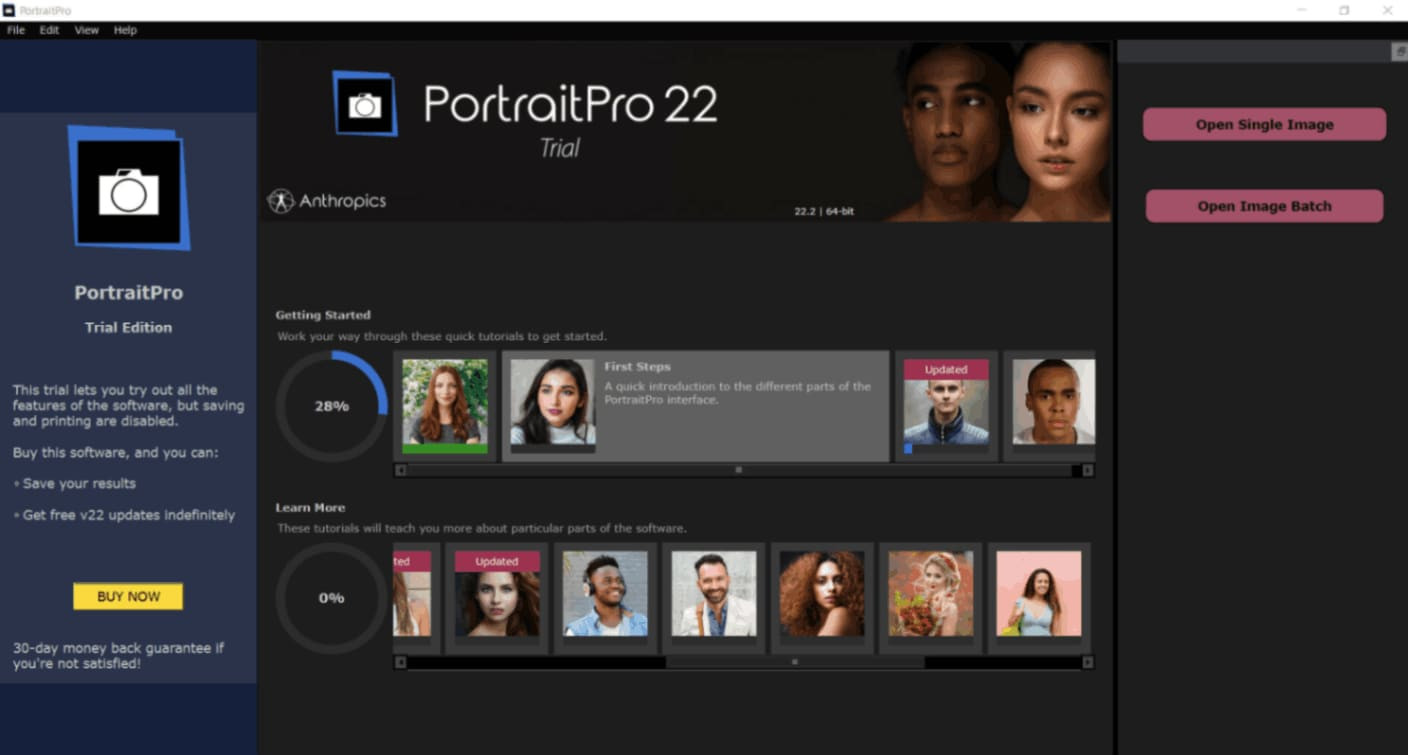 portrait pro user interface
Step 1: Open PortraitPro and select the photo to be edited.
Step 2: Navigate to the “Eyes” tab or tool.
Step 3: Locate the closed eyes and open them with the tool’s eye-opening feature or slider.
Step 4: If necessary, adjust the degree or severity of the eye-opening effect.
Step 5: Optionally, apply other PortraitPro tools or features to improve the entire portrait.
Step 6: Save the altered photo after previewing the changes.
3.3. Tool 3: Snapseed
 snapseed tool to fix closed eyes
Step 1: Open Snapseed and import the image.
Step 2: From the toolbar, select the “Selective” tool.
Step 3: Tap on each closed eye independently with the instrument.
Step 4: Adjust the eyes’ brightness, contrast, or structure to appear more open and natural.
Step 5: Do the same for the opposite closed eye.
Step 6: If desired, use additional editing tools or filters to improve the photo.
Step 7: Save or export your altered image.
4. Method Comparison: Manual vs. Automatic Tools
To help you understand the differences between manual correction and automatic eye-opening tools, the following table compares the two methods in terms of editing precision, required skills, and user experience. Choose the method that best suits your needs.
| Comparison | Manual Correction | Automatic Eye-Opening Tools |
|---|---|---|
| Tools | Adobe Photoshop, GIMP, Corel PaintShop Pro | Luminar AI, PortraitPro, Snapseed |
| Control Level | High – Allows precise adjustments like cloning, painting, and blending | Medium – Limited adjustability due to reliance on AI |
| Skill Requirement | Requires advanced photo editing skills | Beginner-friendly – Minimal skills needed |
| Time Required | Longer – Involves detailed manual work | Shorter – Quick processing with AI |
| Realism | High – Can achieve highly realistic and personalized results | Medium – May sometimes appear less natural or artificial |
| Flexibility | Fully customizable, suitable for complex edits | Limited flexibility; dependent on AI algorithm capabilities |
| Ideal Users | Professionals or those comfortable with advanced editing software | Beginners or casual users looking for fast, hassle-free solutions |
5. Tips for Natural and Realistic Results
Consider the following strategies to create natural and realistic results while utilizing eye opening tools or editing software.
- Avoid excessive exaggeration in favor of a more natural appearance.
- Pay attention to symmetry, making sure both eyes are consistent.
- Preserve the subject’s original ocular qualities, such as color and texture.
- Blend the modified parts with the remainder of the image.
- Consider lighting and shadows to retain a natural image.
- Take a step back and assess the adjustments regularly to ensure they are consistent with the overall picture.
- Exercise caution to avoid an overly processed or manufactured outcome.
These tips ensure that the edited eyes blend seamlessly with the rest of the photo, maintaining a natural and authentic look.
6. Bonus Tip: Wondershare Repairit for Corrupted Photos
If your photos get damaged accidentally, Repairit Photo Repair can rescue the situation. It’s free and very convenient to use.
Step 1: Upload A Photo
Drag your damaged photographs into the photo repair functional area or upload them by clicking the “+Add” button to begin.
 add damaged photos
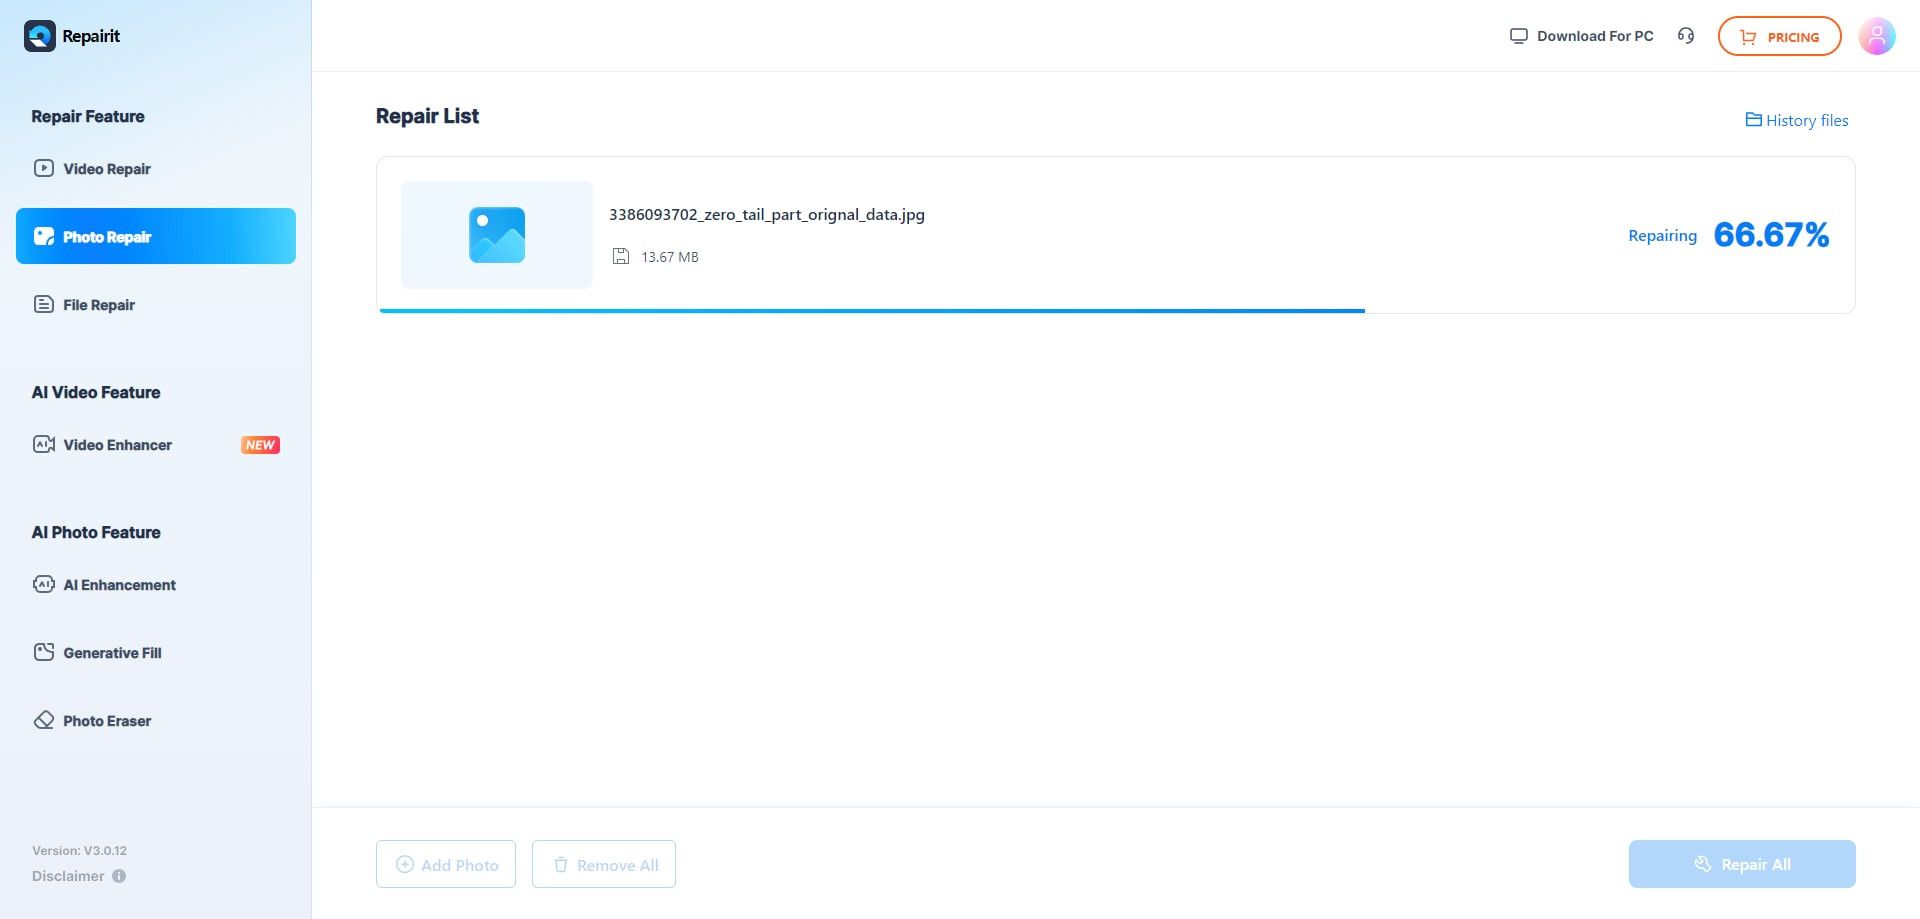
Step 2: Start the Repair Process
After you upload the corrupted photos, the interface will display all of the photo’s metadata. Wait for the process to complete before clicking the “Repair” button in the lower right corner.
 let the file to upload
Advanced Repair is required if severely damaged photos cannot be fixed. It’s simple to grasp. Then click on “Upload Sample Photo.” The sample image was captured using the same camera and format as the erroneous images.
After 1-2 minutes, click “Repair” to begin the advanced photo repair process.
 upload the sample photos
Step 3: View And Save The Image
Following the completion of the Quick Repair or Advanced Repair process. You can look through the photos and select which ones to save to your local computer.
To preview videos, click the “play” button, then the “download” icon. By clicking “Download All” at the same time, you can save the repaired photographs.
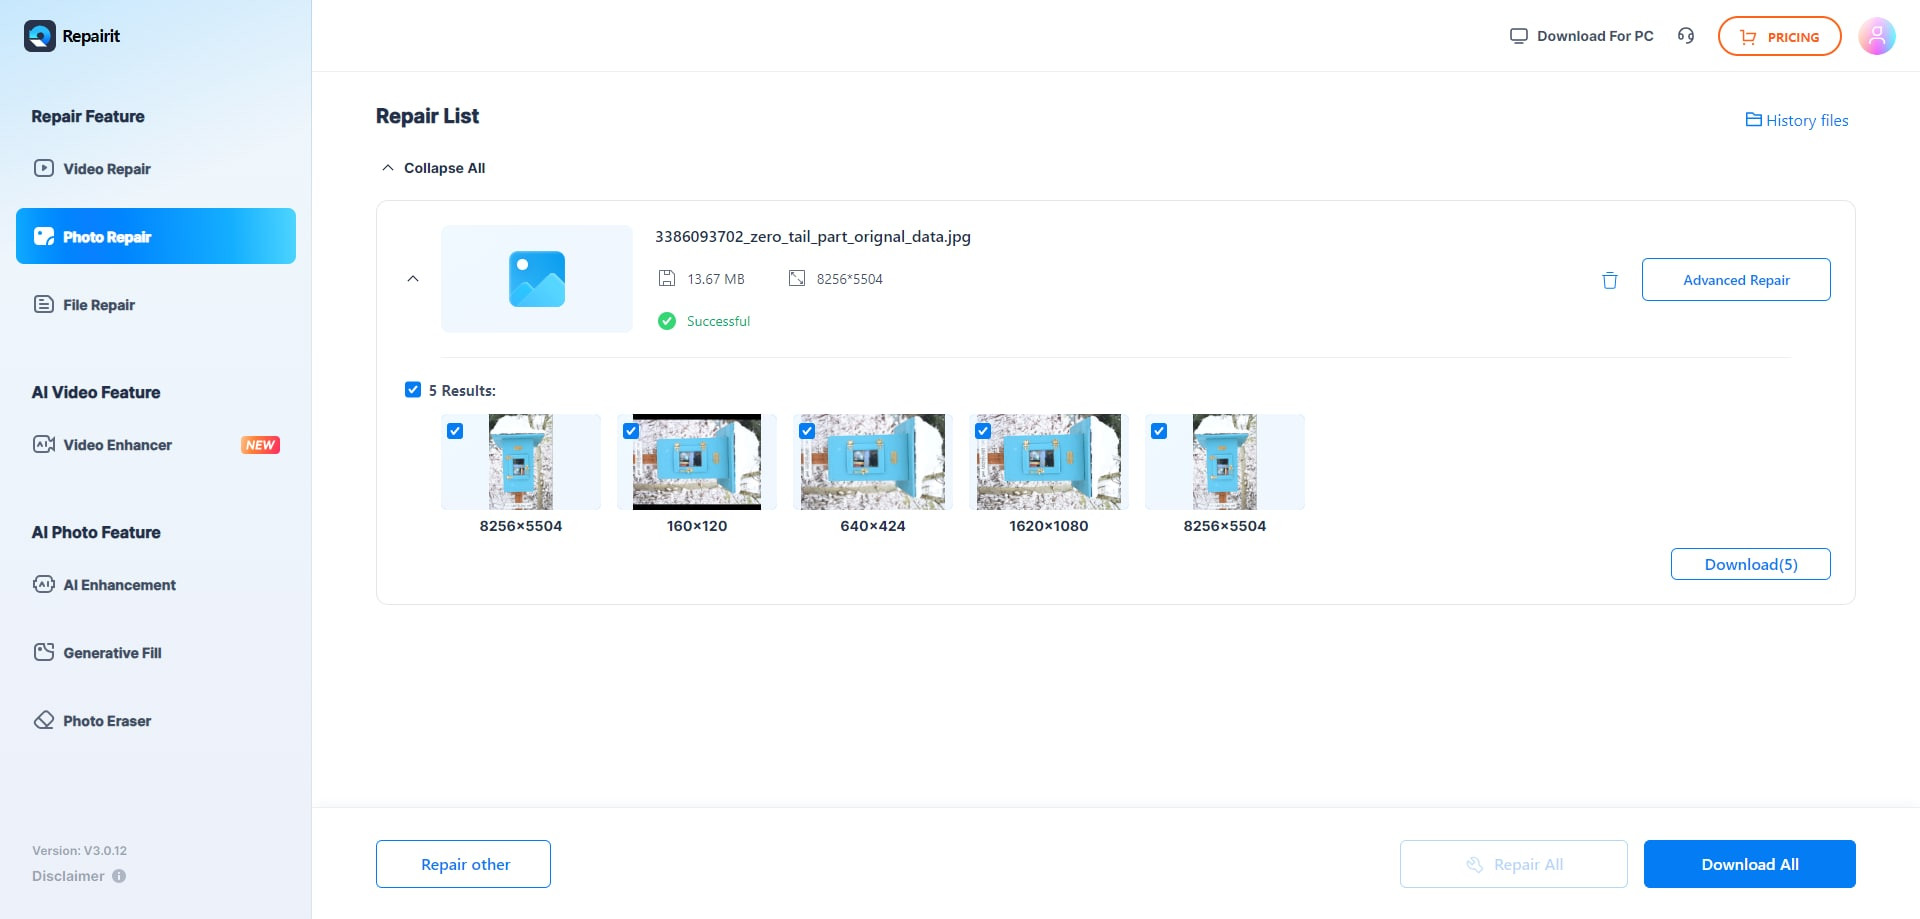 start repairing the damaged photos
Step 4: Improve The Repaired Image’s Resolution
It may also assist you in enlarging the patched photos before downloading them with the new “AI Image Upscaler” tool. Examine your rectified photo, then select the process option “2x”, “4x”, or “8x”, and then click the “Process” button.
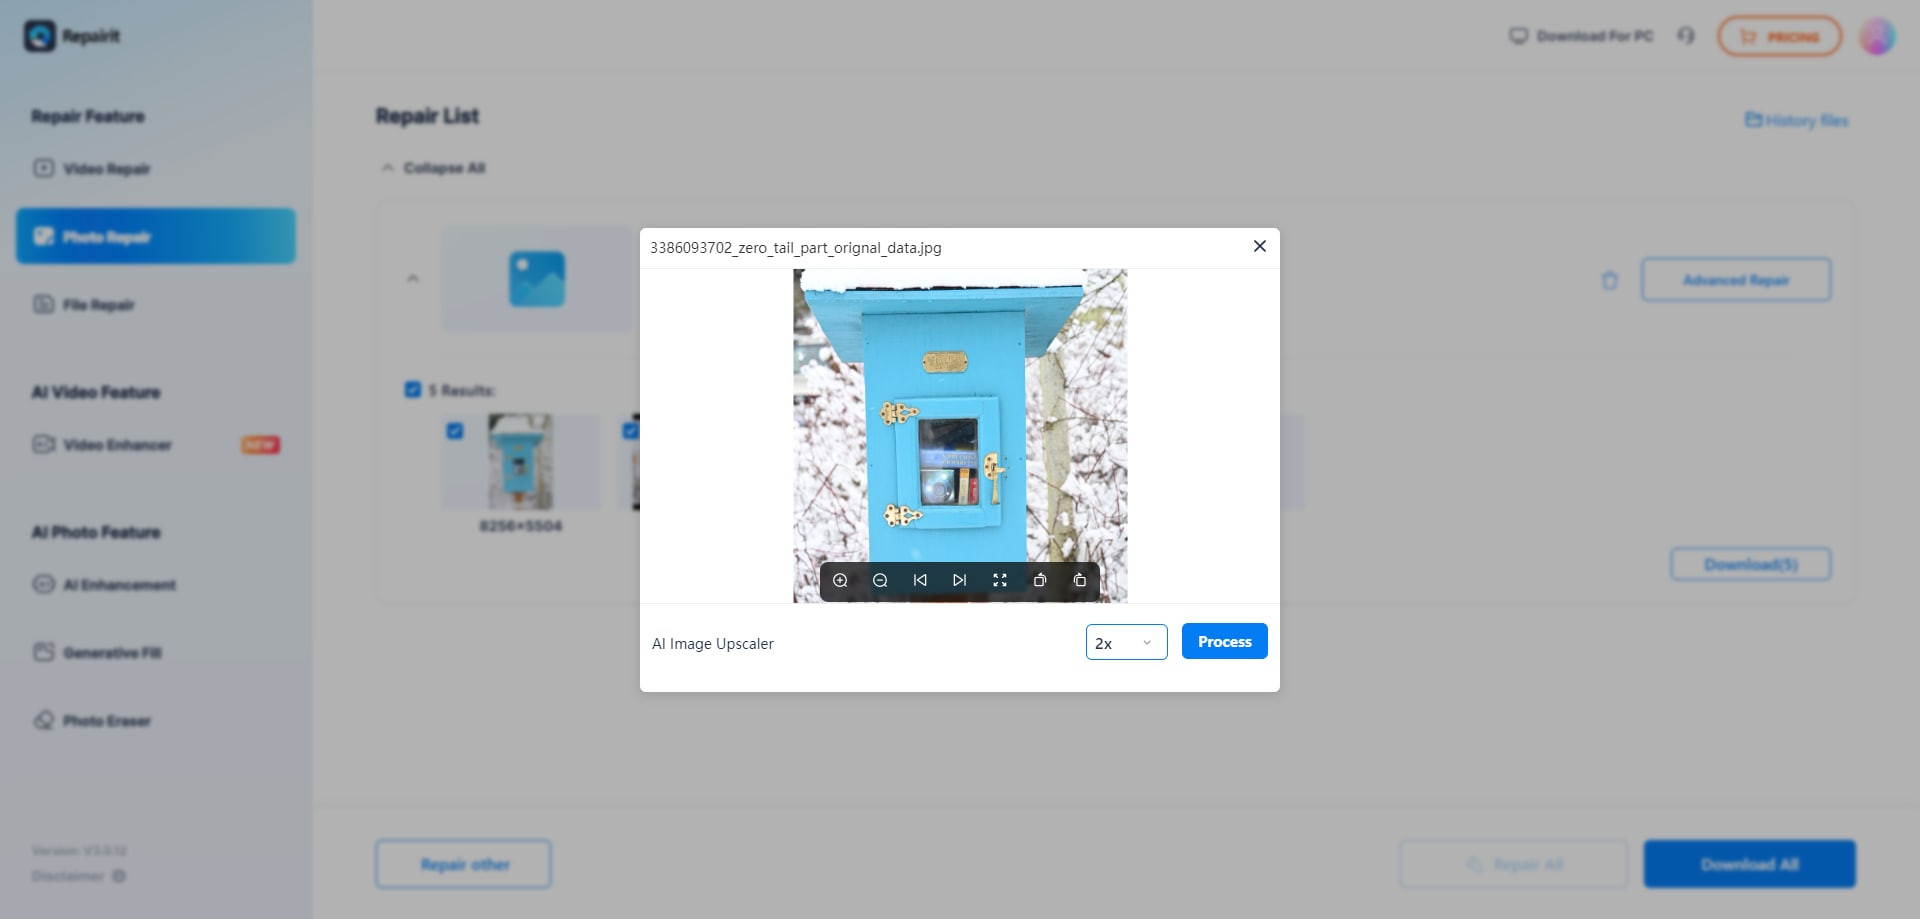 upscale the repaired photos
Repairit will begin upscaling image using AI technology.
upscale the repaired photos
Step 5: Save The AI Upscaled Image
After completing the AI photo upscale procedure, navigate to the results and select the upscaled and corrected images. Then click “Download All” to save them to your computer.
 preview and save the photos
This process ensures that even damaged photos can be recovered and enhanced, preserving your valuable memories.
7. The Art of Photo Retouching: A Deep Dive
Photo retouching is the process of altering an image to enhance its visual appeal. In the context of fixing closed eyes, retouching involves seamlessly integrating new eyes into the original photo, ensuring they match the lighting, color, and texture of the face. This requires a keen eye for detail and a mastery of editing tools.
7.1. Understanding Facial Anatomy
Successful eye replacement requires an understanding of facial anatomy. The eyes are not just shapes but complex structures that interact with the surrounding muscles and skin. Consider the following:
- Eye Shape: Different people have different eye shapes. Replicating this shape accurately is crucial.
- Skin Texture: The skin around the eyes has unique textures. Matching this texture in the replaced eyes ensures a natural look.
- Lighting and Shadows: The way light falls on the eyes and surrounding areas can dramatically affect the outcome.
7.2. Advanced Techniques in Photoshop
Photoshop offers several advanced techniques for eye replacement. These include:
- Layer Masking: Allows you to blend the new eyes seamlessly with the original image.
- Clipping Masks: Confines the adjustments to the eye area, preventing unwanted changes to the surrounding skin.
- Frequency Separation: Separates the image into high-frequency (details) and low-frequency (color and tone) layers, allowing for precise adjustments without affecting the overall image quality.
7.3. Best Practices for Color Correction
Color correction is essential for matching the new eyes to the original photo. Consider the following best practices:
- Use Adjustment Layers: Adjustment layers allow for non-destructive editing, meaning you can always revert to the original state.
- Match the White Balance: Ensure the white balance of the new eyes matches the original photo.
- Adjust Hue and Saturation: Use Hue/Saturation adjustment layers to fine-tune the color of the eyes.
According to Popular Photography magazine, mastering these techniques can significantly enhance the realism of your photo retouching efforts, making it nearly impossible to detect that the eyes have been altered.
8. The Role of AI in Modern Photo Editing
Artificial intelligence (AI) is revolutionizing photo editing, offering powerful tools for automated enhancements. AI-powered software like Luminar AI and PortraitPro can automatically detect faces, identify closed eyes, and suggest appropriate replacements.
8.1. AI-Driven Eye Replacement
AI algorithms analyze the facial structure and suggest eyes that match the subject’s features. These algorithms consider factors such as:
- Eye Size and Shape: AI can automatically match the size and shape of the new eyes to the original.
- Skin Tone: AI adjusts the skin tone of the new eyes to match the subject’s complexion.
- Lighting Conditions: AI can adapt the lighting of the new eyes to match the original photo.
8.2. Benefits and Limitations of AI Tools
While AI tools offer numerous benefits, they also have limitations. The benefits include:
- Speed and Efficiency: AI tools can quickly identify and replace closed eyes.
- User-Friendliness: These tools are often easier to use than traditional photo editing software.
- Consistent Results: AI algorithms provide consistent results, reducing the need for manual adjustments.
The limitations include:
- Lack of Control: AI tools offer less control than manual editing techniques.
- Artificial Look: AI-generated eyes can sometimes look artificial, especially in complex scenarios.
- Dependence on Algorithms: The quality of the results depends on the accuracy of the AI algorithms.
8.3. Future Trends in AI Photo Editing
The future of AI photo editing looks promising. As AI technology advances, we can expect:
- More Realistic Results: AI algorithms will become more sophisticated, producing more realistic eye replacements.
- Improved User Control: AI tools will offer greater control over the editing process.
- Integration with Other Software: AI features will be seamlessly integrated into traditional photo editing software.
9. Building a Professional Photography Portfolio
A professional photography portfolio is essential for showcasing your skills and attracting clients. Including retouched photos with fixed eyes can demonstrate your attention to detail and technical expertise.
9.1. Selecting Your Best Work
Choose photos that highlight your strengths and represent your style. Include a variety of subjects and settings to showcase your versatility.
9.2. Showcasing Retouched Photos
When including retouched photos, be transparent about the edits you’ve made. This builds trust with potential clients and demonstrates your ethical approach to photography.
9.3. Online Platforms for Photographers
Numerous online platforms can help you showcase your portfolio and connect with clients. Some popular options include:
- dfphoto.net: Offers a dedicated space for photographers to share their work and connect with a community of like-minded individuals.
- Behance: A platform for showcasing creative work, including photography.
- Instagram: A visual platform for sharing photos and videos.
- 500px: A community-driven platform for photographers to share and discover inspiring work.
By building a strong portfolio and showcasing your retouched photos, you can attract clients and establish yourself as a skilled and professional photographer.
10. Legal and Ethical Considerations in Photo Editing
Photo editing raises several legal and ethical considerations. It’s essential to be aware of these issues and adhere to ethical standards in your work.
10.1. Copyright and Usage Rights
Always respect copyright laws and usage rights when editing photos. Obtain permission from the copyright holder before making any alterations.
10.2. Transparency and Disclosure
Be transparent about the edits you’ve made to a photo, especially in commercial contexts. Disclose any significant alterations to avoid misleading viewers.
10.3. Ethical Guidelines for Photojournalism
Photojournalists have a responsibility to present accurate and unbiased representations of reality. Avoid making any edits that could distort the truth or mislead viewers.
10.4. The Impact of AI on Ethical Considerations
AI photo editing tools raise new ethical questions. Be mindful of the potential for AI to create deepfakes or manipulate images in ways that could be harmful or misleading.
Address: 1600 St Michael’s Dr, Santa Fe, NM 87505, United States.
Phone: +1 (505) 471-6001.
Website: dfphoto.net.
Conclusion
Fixing closed eyes in a picture can be challenging, but with the appropriate approaches, these shots can be salvaged and made to look more natural. Various photo editing software and programs provide capabilities intended expressly for this purpose. You can open closed eyes, replace them with open eyes from another photo, or even design realistic-looking eyes from scratch using these tools.
In more complex circumstances, where the photo is corrupted or damaged, a specialist online photo repair application, such as Wondershare Repairit, can be a convenient and effective option. With its simple interface, you can effortlessly upload your images, and Repairit will automatically evaluate and repair them. Don’t let closed eyes or damaged photos ruin your precious memories—try these methods and tools to bring your pictures back to life today!
Explore dfphoto.net for more tutorials, inspiration, and a vibrant community of photographers. Enhance your skills and create stunning images that capture the beauty of the world through your lens.
FAQ
Can I fix closed eyes in a group photo?
Yes, fixing closed eyes in a group photo is possible using photo editing software like Adobe Photoshop or GIMP. For best results, identify an image where the subject’s eyes are open, and use techniques like layering and blending to seamlessly replace the closed eyes with open ones.
Are there free tools available to fix closed eyes in photos?
Absolutely! Free tools like GIMP or Snapseed can help you fix closed eyes. While they may lack some advanced features of paid tools like Photoshop, they are beginner-friendly and effective for basic edits.
How do automatic tools compare to manual editing for fixing closed eyes?
Automatic tools like Luminar AI or PortraitPro offer quick and user-friendly solutions, but the results might appear less natural in complex edits. Manual editing, on the other hand, provides precise control, allowing for highly realistic outcomes but requires more time and advanced skills.
What is the best way to ensure the replaced eyes look natural?
To ensure the replaced eyes look natural, pay attention to the lighting, color, and texture of the original photo. Use blending techniques and adjust the opacity of the layers to seamlessly integrate the new eyes.
Can I use AI to automatically fix closed eyes in photos?
Yes, AI-powered tools like Luminar AI and PortraitPro offer automated eye-opening features. These tools analyze the facial structure and suggest appropriate replacements, making the process quick and user-friendly.
What should I do if my photos are corrupted or damaged?
If your photos are corrupted or damaged, use Wondershare Repairit to repair them. This tool can fix various types of photo corruption and help you recover your valuable memories.
How can I improve the resolution of my repaired photos?
After repairing your photos, use the “AI Image Upscaler” tool in Wondershare Repairit to improve their resolution. This tool uses AI technology to upscale the image, making it sharper and more detailed.
What are some ethical considerations when editing photos?
When editing photos, be transparent about the edits you’ve made, respect copyright laws, and avoid making any alterations that could distort the truth or mislead viewers.
How can I showcase my retouched photos in a professional portfolio?
Showcase your retouched photos on platforms like dfphoto.net, Behance, Instagram, and 500px. Highlight your skills and attention to detail by including before-and-after examples.
Where can I find more tutorials and inspiration for photo editing?
Visit dfphoto.net for more tutorials, inspiration, and a vibrant community of photographers. Enhance your skills and create stunning images that capture the beauty of the world through your lens.