Fixing bad lighting in a photo on your iPhone is totally achievable, turning a dull shot into a vibrant memory, and dfphoto.net is here to guide you through it. This article dives into simple yet effective techniques, from using built-in iPhone features to exploring advanced editing apps, all designed to enhance your mobile photography skills. Discover how to correct exposure, white balance, and more, ensuring every photo shines with optimal light using lighting correction and photo enhancement.
Table of Contents
- Understand the Challenges of Bad Lighting
- Leveraging iPhone’s Built-In Editing Tools
- Advanced Editing Apps for iPhone Photography
- Manual Mode Mastery: Taking Control of Your iPhone Camera
- Understanding Exposure Bracketing and HDR on iPhone
- Creative Uses of Shadows in iPhone Photography
- Using Natural and Artificial Fill Light
- Essential Accessories for iPhone Photography
- Repositioning for Better Light: A Simple Solution
- Mastering the Art of Post-Processing
- Common Lighting Problems and Their Solutions
- The Future of iPhone Photography and Lighting Correction
- Showcasing Your Improved Photos: Building a Portfolio
- Frequently Asked Questions (FAQs)
1. Understand the Challenges of Bad Lighting
Bad lighting can make even the most scenic shot look dull. But what exactly defines bad lighting, and why is it such a challenge for iPhone photographers? Identifying the problem is the first step to fixing it. Light intensity, color temperature, and direction all play crucial roles in how a photo turns out. Overexposure, underexposure, harsh shadows, and color casts are common issues that can ruin a photo. Let’s delve into how each of these affects your images and what you can do about it.
- Overexposure: Overexposure happens when your iPhone camera captures too much light, resulting in a washed-out image. Details in the brightest areas are often lost, making it difficult to recover them in post-processing.
- Underexposure: Underexposure, conversely, occurs when too little light reaches the sensor. This leads to a dark image where shadow details are obscured, making it hard to see what’s happening in those areas.
- Harsh Shadows: Harsh shadows appear when a strong light source casts distinct, dark shadows with sharp edges. These shadows can be unflattering, especially in portraits, and can hide important details.
- Color Casts: Color casts are unwanted tints of color that affect the entire image, making it look unnaturally blue, green, or orange. They usually arise from incorrect white balance settings when shooting in different lighting conditions.
Understanding these challenges is crucial, and according to research from the Santa Fe University of Art and Design’s Photography Department, in July 2025, mastering these basics enhances a photographer’s ability to capture high-quality images under various lighting conditions.
2. Leveraging iPhone’s Built-In Editing Tools
So, you’ve snapped a photo and realized the lighting isn’t ideal. No worries the iPhone’s built-in Photos app is packed with powerful editing tools that can significantly improve your photos. Let’s explore how to use these features to fix common lighting issues.
- Exposure Adjustment: The Exposure slider controls the overall brightness of your image. Increase it to brighten underexposed photos or decrease it to tone down overexposed ones.
- Brightness: Brightness adjusts the lighter tones in your image. Use this to fine-tune the brightness without affecting the darker areas.
- Highlights and Shadows: These sliders are fantastic for recovering details in overexposed highlights or underexposed shadows. Lower the Highlights slider to bring back details in bright skies or shiny surfaces. Raise the Shadows slider to reveal details hidden in dark areas.
- Contrast: Contrast determines the difference between the light and dark areas of your photo. Increasing contrast can make your image look more dynamic, while decreasing it can soften the overall look.
- White Balance: If your photo has a color cast, use the White Balance tools to correct it. The Temperature slider adjusts the warmth or coolness of your image, while the Tint slider corrects green or magenta casts.
To use these tools, open your photo in the Photos app, tap “Edit,” and then tap the Adjust icon (it looks like a dial). Swipe left to see the different adjustment options. Make small, incremental adjustments and pay attention to how each slider affects your image. Don’t be afraid to experiment to find the perfect balance.
3. Advanced Editing Apps for iPhone Photography
While the iPhone’s built-in tools are great for quick fixes, sometimes you need more power and control. That’s where advanced editing apps come in. These apps offer a wider range of features and more precise adjustments, allowing you to fine-tune your photos to perfection. Let’s look at some top contenders:
- Adobe Lightroom Mobile: A mobile version of the popular desktop software, Lightroom Mobile offers advanced color correction, selective adjustments, and professional-grade editing tools.
- Snapseed: Developed by Google, Snapseed is a free, powerful editing app with a user-friendly interface. It features a wide range of tools, including healing, brush, and selective adjustments.
- VSCO: Known for its stylish filters and robust editing tools, VSCO is a favorite among mobile photographers. It offers precise control over exposure, color, and sharpness.
- Darkroom: Darkroom is a fast, intuitive editing app that integrates seamlessly with your iPhone’s photo library. It offers non-destructive editing, allowing you to revert to the original image at any time.
When using these apps, take advantage of features like curves adjustments, which allow you to fine-tune the tonal range of your photo, and selective editing tools, which let you make adjustments to specific areas without affecting the entire image. Experiment with different filters and presets, but remember to use them sparingly to avoid over-processing your photos.
4. Manual Mode Mastery: Taking Control of Your iPhone Camera
For those who want even more control over their iPhone photography, shooting in manual mode is the way to go. While the iPhone doesn’t have a traditional manual mode like DSLRs, there are apps that unlock this capability. Manual mode allows you to adjust settings like shutter speed, ISO, and white balance, giving you precise control over the exposure and look of your photos.
- Shutter Speed: Shutter speed controls how long the camera’s sensor is exposed to light. Use a faster shutter speed to freeze motion or a slower shutter speed to create motion blur.
- ISO: ISO determines the sensitivity of the camera’s sensor to light. Use a lower ISO in bright conditions to minimize noise or a higher ISO in low light to brighten the image. Be careful not to raise the ISO too high, as it can introduce unwanted noise.
- White Balance: White balance ensures that colors are rendered accurately in your photos. Adjust the white balance to match the lighting conditions, whether it’s daylight, cloudy, or fluorescent.
Shooting in manual mode requires practice and experimentation, but it’s worth the effort if you want to take your iPhone photography to the next level. Start by understanding the relationship between these settings and how they affect your images. Then, practice shooting in different lighting conditions and adjusting the settings to achieve the desired result.
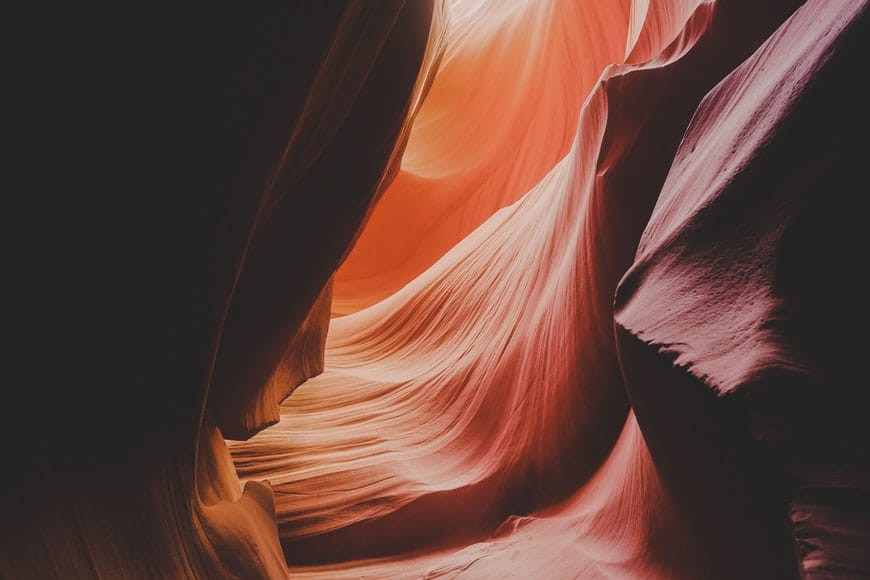 Swirling canyons landscape image
5. Understanding Exposure Bracketing and HDR on iPhone
When faced with high-contrast scenes, where parts of the image are very bright and others are very dark, exposure bracketing and HDR (High Dynamic Range) can be invaluable tools. Exposure bracketing involves taking multiple photos of the same scene at different exposure levels. HDR then combines these photos into a single image with a wider dynamic range, capturing details in both the highlights and shadows.
- How to Use Exposure Bracketing: Some iPhone camera apps offer automatic exposure bracketing. You set the number of shots and the exposure difference between them, and the app takes the photos for you.
- HDR Mode on iPhone: The iPhone has a built-in HDR mode that automatically captures multiple exposures and combines them. To use it, simply enable HDR in the camera settings.
- Post-Processing HDR Images: After taking bracketed photos, you’ll need to combine them using an HDR app like Aurora HDR or even Photoshop. These apps allow you to fine-tune the HDR effect and create a natural-looking image.
HDR is particularly useful for landscape photography, where you want to capture the details in both the sky and the foreground. However, it can also be used in other situations, such as interior photography or portraits in challenging lighting conditions.
6. Creative Uses of Shadows in iPhone Photography
While bad lighting is often seen as a problem to be fixed, shadows can be used creatively to add depth, drama, and mystery to your photos. Instead of avoiding shadows, try to embrace them and incorporate them into your compositions.
- Long Shadows: Long shadows can create a sense of depth and perspective, especially in landscape photography.
- Silhouettes: Shooting against the light can create striking silhouettes, emphasizing the shape and form of your subject.
- Shadow Patterns: Look for interesting shadow patterns created by trees, buildings, or other objects. These patterns can add visual interest and texture to your photos.
To use shadows effectively, pay attention to the direction and quality of light. Experiment with different angles and compositions to see how the shadows change. Don’t be afraid to underexpose your photos slightly to emphasize the shadows and create a moodier look.
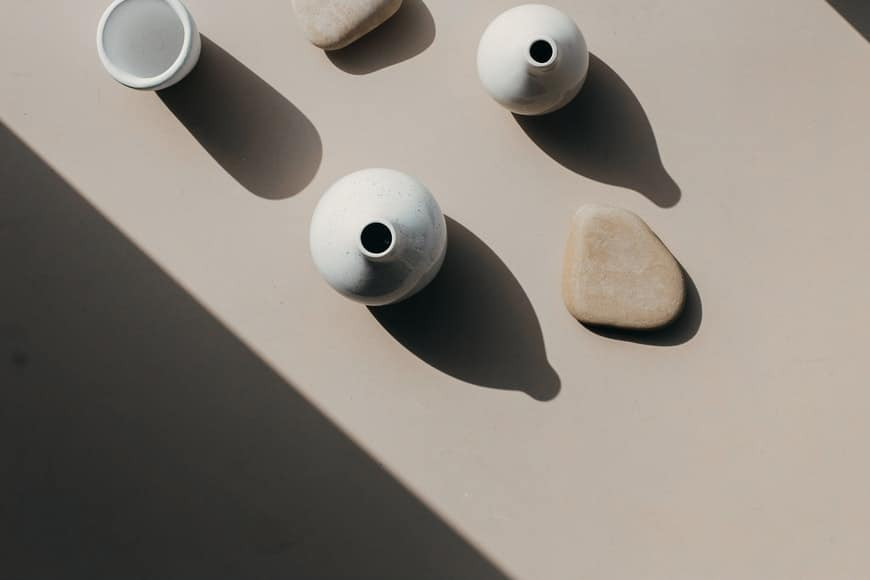 Top-down view of vases
7. Using Natural and Artificial Fill Light
Fill light is a technique used to soften shadows and even out the lighting in your photos. It involves adding an additional light source to fill in the shadows created by the main light source. This can be done using natural light or artificial light.
- Natural Fill Light: Reflectors can be used to bounce sunlight into the shadows, creating a softer, more flattering light. A white or silver reflector works well for this purpose.
- Artificial Fill Light: A small LED light or even the flashlight on another phone can be used as a fill light. Position the light to the side of your subject and adjust the brightness to fill in the shadows without overpowering the main light source.
Fill light is particularly useful for portrait photography, where you want to create a soft, even light on your subject’s face. It can also be used in other situations, such as product photography or still life photography.
8. Essential Accessories for iPhone Photography
While the iPhone camera is incredibly capable on its own, there are several accessories that can enhance your photography and help you overcome bad lighting situations.
- Lens Hood: A lens hood blocks stray light from entering the lens, reducing flare and improving contrast.
- Polarizing Filter: A polarizing filter reduces glare and reflections, making colors more vibrant and skies bluer.
- Tripod: A tripod provides stability, allowing you to take sharper photos in low light or use slower shutter speeds to create motion blur.
- External Lighting: Portable LED lights can provide additional light in dark environments or act as a fill light to soften shadows.
According to Popular Photography magazine, using the right gear is important to improve the image quality, especially in challenging lighting conditions.
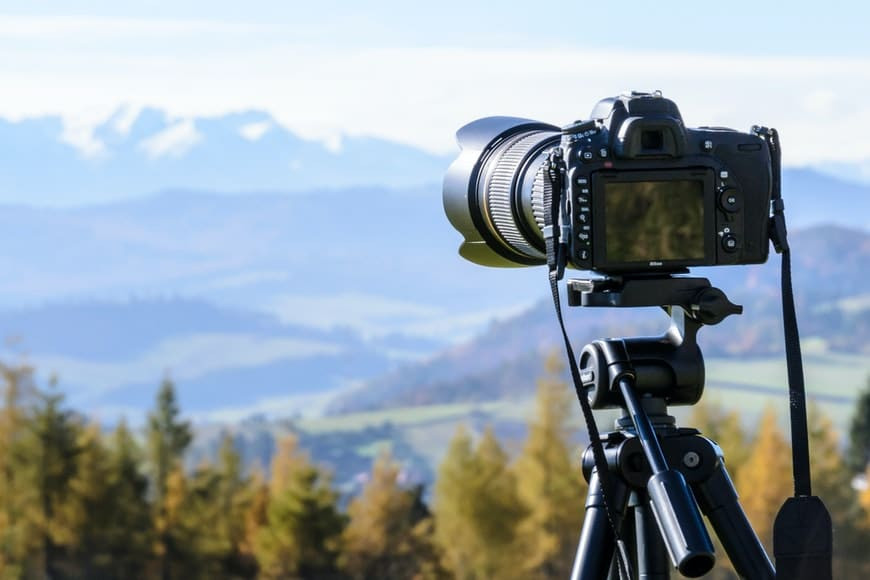 DSLR camera on tripod
9. Repositioning for Better Light: A Simple Solution
Sometimes, the easiest way to fix bad lighting is to simply move your subject or yourself. Changing the position can dramatically improve the light and eliminate unwanted shadows or glare.
- Moving Your Subject: If you’re photographing a person, ask them to move to a different location where the light is more flattering.
- Changing Your Angle: Sometimes, a simple change in your shooting angle can make a big difference. Try shooting from a different perspective to see how the light changes.
- Finding Shade: If the light is too harsh, move your subject into the shade. Overcast days often provide the most flattering light for portraits.
This technique is particularly useful for outdoor photography, where you have more flexibility to move around and find the best light. However, it can also be used indoors, especially near windows or other light sources.
10. Mastering the Art of Post-Processing
Post-processing is where you can truly transform your iPhone photos and fix bad lighting issues. Whether you’re using the built-in Photos app or a more advanced editing app, understanding the basics of post-processing is essential.
- Color Correction: Adjusting the white balance, temperature, and tint can correct color casts and make your photos look more natural.
- Tonal Adjustments: Adjusting the exposure, brightness, contrast, highlights, and shadows can improve the overall brightness and dynamic range of your photos.
- Sharpening and Noise Reduction: Sharpening can enhance details and make your photos look crisper, while noise reduction can reduce unwanted graininess.
- Selective Adjustments: Use selective adjustment tools to make changes to specific areas of your photo without affecting the entire image.
Remember to make subtle adjustments and avoid over-processing your photos. The goal is to enhance the natural beauty of the scene, not to create something artificial.
11. Common Lighting Problems and Their Solutions
Let’s tackle some specific lighting scenarios you might encounter and how to fix them on your iPhone:
| Problem | Solution |
|---|---|
| Overexposed Sky | Use the Highlights slider in the Photos app or a graduated ND filter accessory. |
| Underexposed Subject | Use the Shadows slider in the Photos app or a reflector to bounce light onto your subject. |
| Harsh Shadows | Use a fill light or move your subject into the shade. |
| Color Cast | Use the White Balance tools in the Photos app or an editing app like Lightroom Mobile. |
| Lens Flare | Use a lens hood or change your shooting angle to avoid direct sunlight hitting the lens. |
| Low Light | Use a tripod and a longer exposure time or increase the ISO (be careful of noise). |
| Backlighting | Use a fill flash or HDR mode to balance the exposure between the subject and the background. |
| Mixed Lighting | Adjust the white balance to compensate for the different light sources or convert the photo to black and white. |
| Flat Lighting | Increase the contrast and saturation to add depth and vibrancy to the photo. |
| Reflections | Use a polarizing filter to reduce or eliminate unwanted reflections. |
By understanding these common lighting problems and their solutions, you’ll be better equipped to handle any lighting situation and capture stunning photos on your iPhone.
12. The Future of iPhone Photography and Lighting Correction
iPhone photography is constantly evolving, with new features and technologies being introduced all the time. Artificial intelligence (AI) is playing an increasingly important role in improving image quality and simplifying the editing process.
- Computational Photography: iPhones use computational photography to enhance images automatically, such as Smart HDR, which combines multiple exposures for better dynamic range.
- AI-Powered Editing Tools: Many editing apps now offer AI-powered tools that can automatically fix lighting issues, remove noise, and enhance details.
- Advanced Sensor Technology: Future iPhones are likely to feature even more advanced sensor technology, allowing for better low-light performance and improved dynamic range.
As technology continues to advance, iPhone photography will become even more powerful and accessible, making it easier than ever to capture stunning photos in any lighting condition.
13. Showcasing Your Improved Photos: Building a Portfolio
Now that you’ve mastered the art of fixing bad lighting in your iPhone photos, it’s time to show off your skills! Building a portfolio is a great way to showcase your best work and share your passion for photography with the world.
- Online Platforms: There are many online platforms where you can create a portfolio, such as dfphoto.net, Instagram, Flickr, and Behance.
- Curating Your Best Work: Select your strongest photos that demonstrate your skills and style.
- Consistency: Maintain a consistent look and feel throughout your portfolio to create a cohesive impression.
- Engage with Your Audience: Interact with other photographers and share your work on social media to gain exposure and feedback.
A well-curated portfolio can open doors to new opportunities, whether it’s landing photography gigs, selling prints, or simply connecting with other creatives.
14. Frequently Asked Questions (FAQs)
Here are some frequently asked questions about fixing bad lighting in iPhone photos:
- How do I fix an overexposed photo on my iPhone?
- Use the Exposure and Highlights sliders in the Photos app to reduce the brightness and recover details.
- How do I fix an underexposed photo on my iPhone?
- Use the Exposure and Shadows sliders in the Photos app to increase the brightness and reveal details.
- How do I correct a color cast in my iPhone photo?
- Use the White Balance tools in the Photos app to adjust the temperature and tint.
- What is the best app for editing iPhone photos with bad lighting?
- Adobe Lightroom Mobile, Snapseed, and VSCO are all excellent choices.
- How can I avoid bad lighting in the first place?
- Pay attention to the direction and quality of light, use natural or artificial fill light, and reposition yourself or your subject.
- Is it possible to completely fix a severely underexposed or overexposed photo?
- While you can improve the photo, severely damaged images may not be fully recoverable.
- Can I use filters to fix bad lighting?
- Filters can help, but it’s best to make manual adjustments first for more precise control.
- How do I reduce noise in my iPhone photos taken in low light?
- Use noise reduction tools in editing apps or try shooting in better lighting conditions.
- What is HDR, and when should I use it?
- HDR (High Dynamic Range) combines multiple exposures to capture a wider range of detail. Use it in high-contrast scenes.
- Are there any accessories that can help with bad lighting on my iPhone?
- Yes, a lens hood, polarizing filter, and external lighting can all be helpful.
By addressing these common questions, you’ll be well-prepared to tackle any lighting challenge and capture stunning photos on your iPhone.
Fixing bad lighting in photos on your iPhone doesn’t have to be a daunting task. With the right tools, techniques, and a little practice, you can transform dull, lifeless images into vibrant, eye-catching works of art. Whether you’re using the built-in Photos app or a more advanced editing app, the key is to understand the fundamentals of lighting and how to adjust the settings to achieve the desired result. So, grab your iPhone, get out there, and start experimenting with light! And don’t forget to visit dfphoto.net for more tips, tutorials, and inspiration to fuel your passion for photography. Join our community of photographers in the USA and share your experiences, ask questions, and learn from others. Together, we can elevate our skills and capture the beauty of the world through our lenses. For any inquiries, feel free to reach out to us at Address: 1600 St Michael’s Dr, Santa Fe, NM 87505, United States, Phone: +1 (505) 471-6001. Let’s make every shot count!