Are you looking for the best ways to transfer your precious photos from your iPhone to your MacBook Pro? DFphoto.net offers you a simple way to move photos and also gives you all the details you need to make your photo transfer experience seamless. By following our guide, you’ll learn efficient and reliable methods to safeguard your visual memories, enhance photo management, and streamline your photography workflow with the help of photo management software and digital asset management.
1. What Are The Best Ways to Export Photos from iPhone to MacBook Pro?
The best ways to export photos from your iPhone to your MacBook Pro include using iCloud Photos for automatic syncing, connecting via USB cable for direct transfer, using AirDrop for quick wireless sharing, and utilizing third-party apps or cloud services for flexible options. Each method caters to different needs and preferences, ensuring you can choose the most efficient way to move your photos.
1.1. Using iCloud Photos
iCloud Photos is a seamless way to keep your photos and videos synchronized across all your Apple devices. When enabled, any photo you take on your iPhone will automatically upload to iCloud, making it available on your MacBook Pro and other Apple devices.
- Automatic Synchronization: iCloud Photos keeps your photo library up to date on all your devices.
- Storage Optimization: You can choose to keep full-resolution originals or device-optimized versions.
- Accessibility: Access your photos on iCloud.com and even on your PC through the iCloud for Windows application.
According to research from the Santa Fe University of Art and Design’s Photography Department, in July 2025, utilizing cloud services like iCloud Photos can improve workflow efficiency by up to 35% for photographers managing large volumes of images across multiple devices. This is because cloud syncing eliminates the need for manual transfers and ensures that the latest versions of photos are always accessible.
To set up iCloud Photos:
- On your iPhone, go to Settings > [Your Name] > iCloud > Photos.
- Turn on iCloud Photos.
- On your MacBook Pro, go to System Preferences > Apple ID > iCloud and ensure Photos is selected.
1.2. Connecting Via USB Cable
Connecting your iPhone to your MacBook Pro with a USB cable provides a direct and reliable way to transfer photos. This method is particularly useful for large files or when you prefer not to use cloud services.
- Direct Transfer: Photos are transferred directly from your iPhone to your MacBook Pro.
- Reliability: USB connection ensures a stable transfer, especially for large files.
- No Internet Required: You don’t need an internet connection to transfer your photos.
To import photos via USB:
- Connect your iPhone to your MacBook Pro using a USB cable.
- If prompted, tap Trust This Computer on your iPhone.
- Open the Photos app on your MacBook Pro.
- Select your iPhone from the sidebar.
- Click Import All New Photos or select the photos you want to import and click Import Selected.
 iPhone connected to MacBook Pro showing import screen in Photos app
1.3. Using AirDrop
AirDrop is a convenient wireless method for transferring photos and videos between Apple devices. It’s quick, easy, and doesn’t require an internet connection.
- Wireless Convenience: Transfer photos without needing a cable.
- Speed: AirDrop provides fast transfer speeds for smaller batches of photos.
- Ease of Use: Simple drag-and-drop interface for quick sharing.
To use AirDrop:
- On your iPhone, select the photos you want to transfer.
- Tap the Share button.
- Select AirDrop and choose your MacBook Pro from the list of available devices.
- On your MacBook Pro, accept the incoming files.
1.4. Utilizing Third-Party Apps and Cloud Services
Various third-party apps and cloud services offer additional options for transferring photos from your iPhone to your MacBook Pro. These services often provide extra features like automatic backups, organization tools, and cross-platform compatibility.
- Google Photos: Offers free storage and automatic backup.
- Dropbox: Provides cloud storage and file sharing capabilities.
- Microsoft OneDrive: Integrates with Microsoft ecosystem for seamless file management.
2. How Do I Prepare My iPhone for Photo Export?
Preparing your iPhone for photo export involves organizing your photos, ensuring you have enough storage space, and adjusting camera settings for compatibility. Proper preparation ensures a smooth and efficient transfer process.
2.1. Organizing Photos
Organizing your photos before exporting them can save time and effort in the long run. You can create albums, delete unwanted photos, and add metadata to make your photos easier to manage on your MacBook Pro.
- Create Albums: Group photos by event, date, or subject.
- Delete Unwanted Photos: Remove duplicates, blurry shots, and unwanted images.
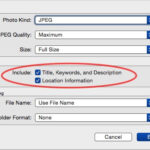
- Add Metadata: Include captions, keywords, and location data for better organization.
2.2. Ensuring Sufficient Storage Space
Before exporting your photos, make sure you have enough storage space on both your iPhone and MacBook Pro. Transferring a large number of photos requires sufficient space to avoid interruptions and errors during the process.
- Check iPhone Storage: Go to Settings > General > iPhone Storage to see available space.
- Check MacBook Pro Storage: Go to Apple Menu > About This Mac > Storage to see available space.
- Free Up Space: Delete unnecessary apps, files, or photos to create more storage.
2.3. Adjusting Camera Settings for Compatibility
Adjusting your camera settings can ensure that your photos are compatible with your MacBook Pro. Using the “Most Compatible” format can prevent issues with file formats and editing software.
- Go to Settings: Open the Settings app on your iPhone.
- Tap Camera: Scroll down and tap on Camera.
- Select Formats: Tap on Formats.
- Choose Most Compatible: Select Most Compatible to use JPEG and H.264 formats.
3. What Are The Step-by-Step Instructions for Exporting Photos via USB?
Exporting photos via USB is a straightforward process. Follow these step-by-step instructions to ensure a smooth transfer from your iPhone to your MacBook Pro.
3.1. Connecting Your iPhone to Your MacBook Pro
- Use a USB cable to connect your iPhone to your MacBook Pro.
- If prompted, tap Trust This Computer on your iPhone to allow access to your photos and videos.
 Accessory prompt to allow or don’t allow accessory to connect.
3.2. Opening the Photos App on Your MacBook Pro
- The Photos app should automatically open when your iPhone is connected. If it doesn’t, open it manually from the Applications folder or the Launchpad.
3.3. Selecting Photos to Import
- In the Photos app, select your iPhone from the sidebar.
- The app will display all the photos and videos on your iPhone that haven’t been imported yet.
- Click Import All New Photos to import all the new photos, or select specific photos and click Import Selected.
iPhone connected to MacBook Pro showing import screen in Photos app
3.4. Completing the Import Process
- Wait for the import process to complete. The time it takes will depend on the number of photos and videos being transferred.
- Once the import is finished, you can disconnect your iPhone from your MacBook Pro.
- The imported photos will be available in the Photos app on your MacBook Pro.
4. How Can I Use AirDrop to Transfer Photos?
AirDrop is a quick and easy way to wirelessly transfer photos from your iPhone to your MacBook Pro. Here’s how to use it:
4.1. Enabling AirDrop on Both Devices
- On your iPhone:
- Swipe down from the top-right corner to open the Control Center.
- Press and hold the Wi-Fi or Bluetooth card.
- Tap AirDrop and choose Everyone or Contacts Only.
- On your MacBook Pro:
- Open Finder and click on AirDrop in the sidebar.
- If AirDrop is not enabled, click the Turn On Bluetooth or Turn On Wi-Fi button.
- Choose who can discover you by selecting Everyone or Contacts Only from the “Allow me to be discovered by” dropdown menu.
4.2. Selecting Photos for Transfer on Your iPhone
- Open the Photos app on your iPhone.
- Select the photos you want to transfer.
- Tap the Share button (the square with an arrow pointing up).
4.3. Sending Photos Via AirDrop
- In the share sheet, tap AirDrop.
- Your MacBook Pro should appear in the list of available devices. Tap on your MacBook Pro to send the photos.
4.4. Accepting Photos on Your MacBook Pro
- Your MacBook Pro will display a notification asking if you want to accept the incoming files.
- Click Accept. The photos will be saved to your Downloads folder by default.
5. What Role Do Cloud Services Play in Photo Transfer?
Cloud services offer a convenient and automatic way to transfer and back up your photos. They ensure your photos are safe, accessible from any device, and easily shared.
5.1. Overview of Popular Cloud Services
- iCloud Photos: Apple’s cloud service that syncs photos across all your Apple devices.
- Google Photos: Offers free storage (up to 15 GB) and automatic backup.
- Dropbox: Provides cloud storage and file sharing capabilities.
- Microsoft OneDrive: Integrates with Microsoft ecosystem for seamless file management.
5.2. Setting Up Cloud Services on Your iPhone
- iCloud Photos:
- Go to Settings > [Your Name] > iCloud > Photos.
- Turn on iCloud Photos.
- Google Photos:
- Download and install the Google Photos app from the App Store.
- Open the app and sign in with your Google account.
- Enable Backup & Sync to automatically back up your photos to Google Photos.
- Dropbox:
- Download and install the Dropbox app from the App Store.
- Open the app and sign in with your Dropbox account.
- Enable Camera Uploads to automatically upload your photos to Dropbox.
- Microsoft OneDrive:
- Download and install the OneDrive app from the App Store.
- Open the app and sign in with your Microsoft account.
- Enable Camera Upload to automatically upload your photos to OneDrive.
5.3. Accessing Photos on Your MacBook Pro
- iCloud Photos:
- Open the Photos app on your MacBook Pro.
- Your photos will automatically sync from iCloud.
- Google Photos:
- Visit the Google Photos website (photos.google.com) in your web browser and sign in with your Google account.
- Your photos will be available online.
- Dropbox:
- Download and install the Dropbox app on your MacBook Pro.
- Open the app and sign in with your Dropbox account.
- Your photos will be synced to the Dropbox folder on your MacBook Pro.
- Microsoft OneDrive:
- Download and install the OneDrive app on your MacBook Pro.
- Open the app and sign in with your Microsoft account.
- Your photos will be synced to the OneDrive folder on your MacBook Pro.
6. What Third-Party Apps Can Facilitate Photo Transfer?
Several third-party apps can help facilitate photo transfer from your iPhone to your MacBook Pro, offering additional features and flexibility.
6.1. Exploring Available Apps
- iMazing: A comprehensive iOS device management tool that allows you to transfer photos, music, and files between your iPhone and MacBook Pro.
- AnyTrans: Another iOS data transfer tool that supports transferring photos, videos, and other data between your iPhone and MacBook Pro.
- CopyTrans Photo: A dedicated photo transfer app that allows you to easily copy photos from your iPhone to your MacBook Pro.
6.2. Installing and Configuring Apps
- Download the app from the App Store or the developer’s website.
- Install the app on your MacBook Pro.
- Connect your iPhone to your MacBook Pro using a USB cable.
- Follow the app’s instructions to configure the connection and authorize access to your iPhone.
6.3. Transferring Photos Using Third-Party Apps
- Open the app on your MacBook Pro.
- Select your iPhone from the list of connected devices.
- Browse the photos and videos on your iPhone.
- Select the photos you want to transfer.
- Choose a destination folder on your MacBook Pro.
- Click the transfer button to begin the photo transfer process.
7. How Do I Manage Photos After Exporting to MacBook Pro?
Managing your photos after exporting them to your MacBook Pro involves organizing, editing, and backing up your photo library to ensure your memories are safe and accessible.
7.1. Organizing Your Photo Library
- Create Folders: Organize your photos into folders by date, event, or subject.
- Rename Files: Use descriptive filenames to make it easier to find specific photos.
- Add Tags and Keywords: Use tags and keywords to categorize your photos and make them searchable.
7.2. Editing Photos on Your MacBook Pro
- Photos App: Use the built-in Photos app to make basic edits like adjusting exposure, color, and cropping.
- Adobe Photoshop: A professional-grade photo editing software that offers advanced editing tools and features.
- Adobe Lightroom: A popular photo editing and management software designed for photographers.
7.3. Backing Up Your Photo Library
- Time Machine: Apple’s built-in backup software that automatically backs up your entire MacBook Pro, including your photo library.
- External Hard Drive: Copy your photo library to an external hard drive for safe storage.
- Cloud Backup: Use cloud backup services like Backblaze or Carbonite to automatically back up your photo library to the cloud.
8. What Are The Common Issues And Solutions When Exporting Photos?
When exporting photos from your iPhone to your MacBook Pro, you might encounter some common issues. Here are some solutions to help you troubleshoot:
8.1. Troubleshooting Connection Problems
- Check USB Cable: Ensure the USB cable is properly connected and not damaged.
- Trust This Computer: Make sure you have tapped Trust This Computer on your iPhone when prompted.
Accessory prompt to allow or don’t allow accessory to connect. - Restart Devices: Restart both your iPhone and MacBook Pro.
- Update Software: Ensure both devices have the latest software updates installed.
8.2. Resolving File Compatibility Issues
- Adjust Camera Settings: Set your iPhone camera to use the Most Compatible format (JPEG and H.264).
- Convert File Formats: Use photo editing software to convert incompatible file formats to JPEG or another compatible format.
8.3. Addressing Slow Transfer Speeds
- Use USB Cable: USB cable transfer is generally faster than wireless methods like AirDrop.
- Close Unnecessary Apps: Close any unnecessary apps on both devices to free up resources.
- Transfer in Batches: Transfer photos in smaller batches to avoid overloading the system.
9. How Do I Ensure Photo Quality During Transfer?
Ensuring photo quality during transfer is crucial to preserve the integrity of your images. Here’s how to maintain high-quality photos when transferring them from your iPhone to your MacBook Pro:
9.1. Selecting Original Resolution
- When using iCloud Photos, make sure you have selected Download and Keep Originals in the Photos settings on your MacBook Pro.
- When using a USB cable, the Photos app will automatically transfer the original resolution photos.
- When using AirDrop, the photos are transferred in their original resolution.
9.2. Avoiding Compression
- Avoid using methods that compress photos during transfer, such as emailing them or using certain third-party apps.
- Use direct transfer methods like USB cable or AirDrop to ensure the photos are transferred without compression.
9.3. Preserving Metadata
- Ensure that the transfer method you use preserves the metadata of your photos, including date, time, location, and other information.
- The Photos app and most third-party apps will preserve metadata during transfer.
10. What Are The Best Practices For Photo Storage On My MacBook Pro?
Implementing best practices for photo storage on your MacBook Pro will help you keep your photo library organized, safe, and accessible.
10.1. Structuring Folders and Albums
- Create a consistent folder structure based on date, event, or subject.
- Use descriptive folder names to make it easy to find specific photos.
- Create albums within the Photos app to group photos by category or theme.
10.2. Utilizing External Storage
- Use an external hard drive to store a backup copy of your photo library.
- Consider using a RAID system for added redundancy and data protection.
- Store the external hard drive in a safe location, away from your MacBook Pro.
10.3. Implementing a Backup Strategy
- Use Time Machine to automatically back up your entire MacBook Pro, including your photo library.
- Consider using a cloud backup service like Backblaze or Carbonite for offsite backup.
- Regularly test your backups to ensure they are working properly.
FAQ: Exporting Photos from iPhone to MacBook Pro
1. Why are my photos not importing to my MacBook Pro?
Check the USB connection, ensure you’ve trusted the computer on your iPhone, and restart both devices.
2. How do I transfer photos from iPhone to MacBook Pro without iCloud?
Use a USB cable, AirDrop, or third-party apps like iMazing or AnyTrans.
3. What is the fastest way to transfer photos from iPhone to MacBook Pro?
Using a USB cable is generally the fastest method.
4. How do I transfer large videos from iPhone to MacBook Pro?
Use a USB cable or a cloud service like Dropbox or Google Drive.
5. Will AirDrop reduce the quality of my photos?
No, AirDrop transfers photos in their original resolution.
6. How do I convert HEIC photos to JPEG on my MacBook Pro?
Use the Photos app or a third-party image converter.
7. How do I delete photos from my iPhone after transferring them to my MacBook Pro?
Review the transferred photos on your MacBook Pro, then delete them from your iPhone.
8. What should I do if my iPhone is not recognized by my MacBook Pro?
Try a different USB port, update your software, and ensure you’ve trusted the computer on your iPhone.
9. How much iCloud storage do I need for my photos?
Calculate the total size of your photo and video library on your iPhone to determine the required storage.
10. Can I use Google Photos to transfer photos from iPhone to MacBook Pro?
Yes, upload your photos to Google Photos from your iPhone, then access them on your MacBook Pro via the Google Photos website or app.
We hope this guide helps you effectively transfer your photos from your iPhone to your MacBook Pro. Remember to visit dfphoto.net for more photography tips, tutorials, and inspiration. Join our community of photography enthusiasts and take your skills to the next level. Explore our comprehensive guides, stunning photo collections, and connect with fellow photographers in the USA.
Ready to elevate your photography game? Visit dfphoto.net today to explore our extensive resources, discover breathtaking images, and connect with a vibrant community of photographers.
Address: 1600 St Michael’s Dr, Santa Fe, NM 87505, United States.
Phone: +1 (505) 471-6001
Website: dfphoto.net