Exporting multiple photos from Lightroom is a crucial skill for any photographer, whether you’re a seasoned professional or just starting out. At dfphoto.net, we understand the importance of efficiency in your workflow, and mastering this technique can save you valuable time and effort. This guide provides various methods for exporting your images and optimizing your post-production process. Learn how to create stunning visual art effortlessly and streamline your digital asset management with these Lightroom export tricks.
1. What Are The Benefits Of Exporting Multiple Photos From Lightroom?
Exporting multiple photos from Lightroom offers significant benefits, primarily centered around time savings and workflow efficiency. Selecting and exporting images in batches streamlines your post-processing, allowing you to quickly share your work or prepare it for further use. According to research from the Santa Fe University of Art and Design’s Photography Department, in July 2025, batch processing in Lightroom can reduce editing time by up to 40%.
- Time Efficiency: Batch exporting saves considerable time compared to exporting images individually.
- Workflow Streamlining: Simplifies the process of preparing large volumes of photos for clients or personal projects.
- Consistency: Ensures uniform settings are applied across multiple images.
- Organization: Facilitates better organization of your photo library.
- Flexibility: Allows for varied export settings tailored to different output needs.
2. What Are The Three Main Ways To Select Multiple Photos In Lightroom?
There are three primary methods for selecting multiple photos in Lightroom: consecutive selection, non-consecutive selection, and selecting all photos in a collection or folder. Each method caters to different organizational needs and workflows.
- Consecutive Selection: Click the first photo, hold
SHIFT, and click the last photo to select all photos in between. - Non-Consecutive Selection: Click the first photo, hold
CMD(Mac) orCTRL(Windows), and click each additional photo you want to select. - Select All: Click any image and press
CMD-A(Mac) orCTRL-A(Windows) to select all photos in the current collection or folder.
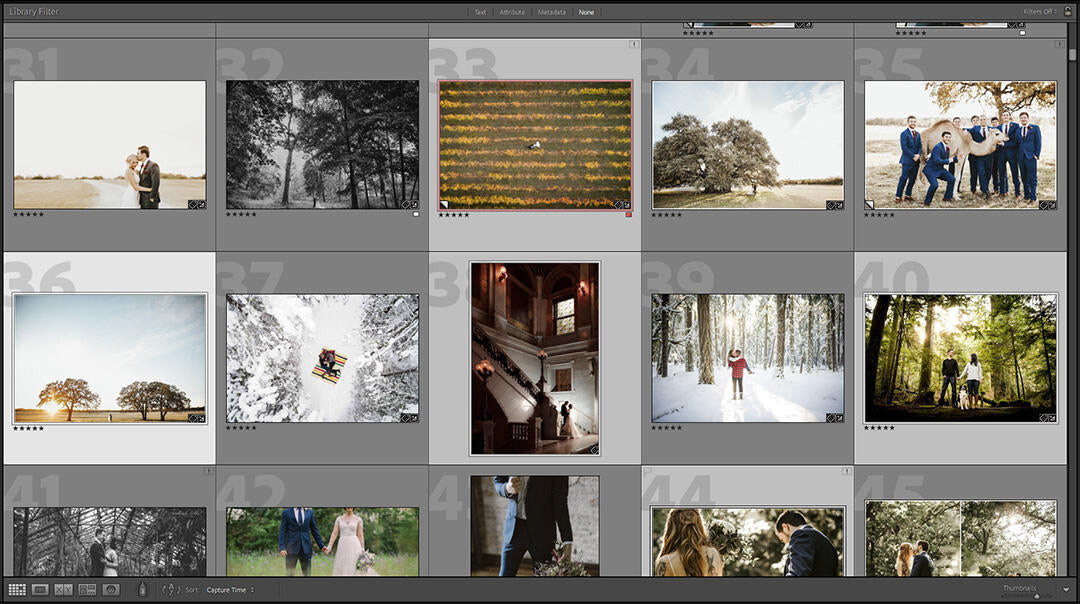
3. How Do I Export Multiple Photos In Lightroom Classic CC Using Grid View?
To export multiple photos in Lightroom Classic CC using Grid View, select your images, right-click, and choose “Export.” This method allows you to efficiently process and output your photos with customized settings.
- Select the First Photo: Click on the initial photo within the consecutive sequence you wish to export. Ensure the border around it changes to a lighter shade of gray, distinguishing it from the other images.
- Select the Last Photo: Hold down the
SHIFTkey while clicking on the final photo in the group. The border around your first selected photo will further lighten, while the remaining photos will turn light gray, indicating their selection. - Initiate Export: Right-click on any of the selected images. A context menu will appear; choose “Export.” Then, in the sub-menu that unfolds, click “Export.” This action prompts the Export dialog box to appear.
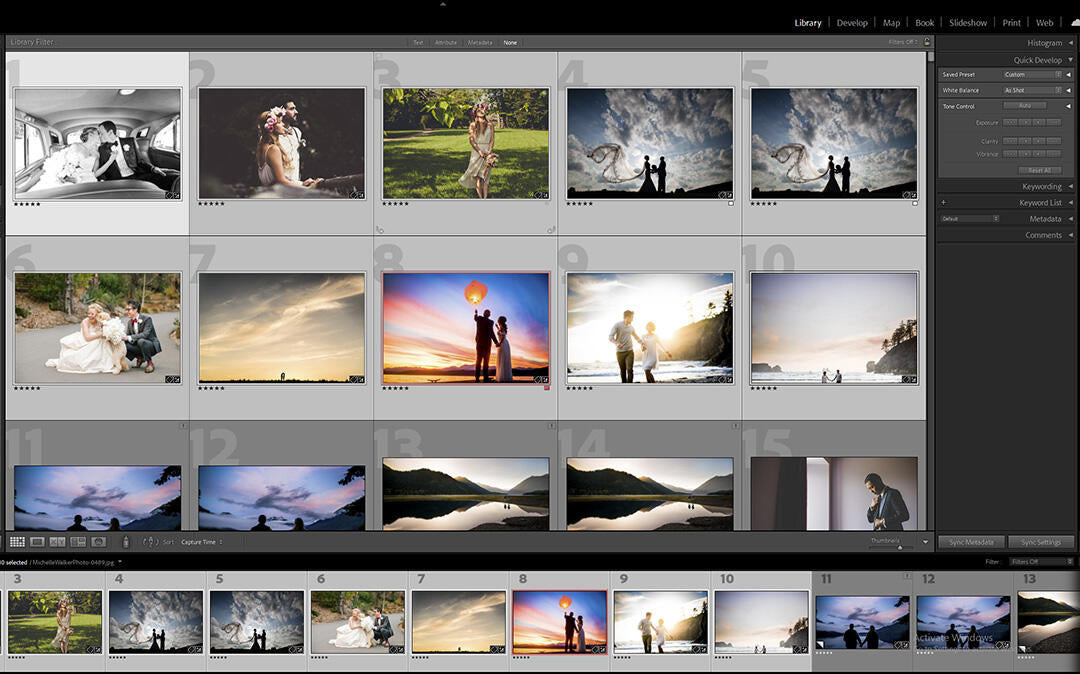
4. How Do I Export Multiple Photos In Lightroom Classic CC Using Filmstrip View?
Exporting multiple photos from the Filmstrip View in Lightroom Classic CC involves selecting your desired images and then using the export function. This method is useful when you are reviewing images in detail view and want to export a subset of them.
- Open Filmstrip View: When in Detail view, press the Forward Slash (/) key to open the Filmstrip at the bottom of the screen.
- Select the First Photo: In the Filmstrip View, click the first photo in a row of consecutive photos you want to select. Ensure the border around it turns a lighter shade of gray than the rest of the images.
- Select the Last Photo: Hold the
SHIFTkey while you click the last photo in the group you want to select. The border around your first photo will turn an even lighter shade of gray. The other photos you selected will turn light gray to indicate they’ve all been selected. (You’ll notice in the Grid Module above that the larger thumbnails corresponding to these photos will also be selected.) - Initiate Export: Right-click on any of the selected images and select “Export.” Then on the sub-menu that pops up click “Export.”
5. How Can I Export Photos From The Map Module In Lightroom Classic CC?
The Map Module in Lightroom Classic CC allows you to select and export photos based on their geographic location. This is particularly useful for organizing and exporting images from specific shoots or locations.
- Access the Map Module: Open Lightroom Classic CC and navigate to the Map Module.
- Locate Photos on the Map: Find a location on the map by searching for it by name or scrolling and zooming until you see an orange callout box with a number on it. This number represents the number of photos in your library from that particular location.
- Preview and Select Photos: Hover over the callout box, and a thumbnail preview of the first image in the series will pop up above with details of the image file. You can scroll through the images to verify they’re the ones you want to select.
- Select All Photos from Location: Click the orange callout box with the number. Now all the corresponding photos from that map location will be selected in the Filmstrip View at the bottom of the screen.
- Export Photos: ‘Right Click’ on any of the images and select “Export.” Then on the submenu that pops up click “Export.”
6. How Do I Export Multiple Photos In Lightroom CC (Cloud Version) Using Grid View?
Exporting multiple photos in Lightroom CC (the cloud-based version) in Grid View involves a slightly different process compared to Lightroom Classic CC. This method is designed to be streamlined and user-friendly.
- Select the First Photo: Click the first photo you want to select. You’ll see a thin white border appear around your selected image.
- Select Additional Photos: Hold the
CMDkey in Mac orCTRLkey in Windows while you click the other photos you want to select. Those images will also get a thin white border once selected. - Export Photos: ‘Right Click’ on any of the images and then ‘Save To’ your desired folder.
 Select non consecutive photos in lightroom
7. How Do I Export Multiple Photos In Lightroom CC Using Filmstrip View?
Exporting multiple photos from Lightroom CC using the Filmstrip View allows you to select images while in Detail view, providing a focused way to choose your photos.
- Open Filmstrip: When viewing an image in Detail view, press the Forward Slash (/) key to open the Filmstrip at the bottom of the screen.
- Select Photos: Hold the
CMDkey in Mac orCTRLkey in Windows as you click the other photos you want to select in the Filmstrip. Those images will also get a thin white border once selected. - Export Photos: ‘Right Click’ on any of the images and then ‘Save To’ your desired folder.
8. What Export Settings Should I Use For Web Sharing?
For web sharing, it’s essential to optimize your export settings to balance image quality with file size. This ensures fast loading times and a good viewing experience. According to Popular Photography magazine, using the sRGB color space is crucial for accurate color representation on most web browsers.
- File Format: JPEG
- Quality: 60-80% (adjust based on the visual complexity of your images)
- Color Space: sRGB
- Image Sizing: Resize to fit within a specific width or height (e.g., 2048 pixels wide for landscape images).
- Sharpening: Apply screen sharpening for optimal display on digital devices.
9. What Export Settings Should I Use For Printing?
When exporting photos for printing, it’s important to maximize image quality to ensure the best possible output. High resolution and appropriate color space are key to achieving professional-looking prints.
- File Format: TIFF or JPEG (TIFF is preferred for archival purposes and highest quality)
- Quality: 100% (for JPEGs)
- Color Space: Adobe RGB or sRGB (consult your print lab for their recommendation)
- Image Sizing: Set to the desired print dimensions at 300 dpi (dots per inch)
- Sharpening: Apply output sharpening for matte or glossy paper, as appropriate.
10. How Can I Create Export Presets For Different Uses?
Creating export presets in Lightroom can significantly speed up your workflow by saving your preferred settings for different output needs. This allows you to quickly apply the same settings each time you export photos for web, print, or other specific purposes.
- Open Export Dialog: Go to File > Export to open the Export dialog box.
- Define Settings: Choose your desired settings for file format, quality, color space, image sizing, and sharpening.
- Save Preset: In the left panel, click “Add” under the Preset section.
- Name Preset: Give your preset a descriptive name (e.g., “Web – sRGB – 2048px”) and click “Create.”
11. How Do I Manage And Organize My Export Presets?
Managing and organizing your export presets helps maintain an efficient workflow. Lightroom allows you to rename, update, and delete presets as needed.
- Rename Preset: Right-click on a preset in the Preset panel and select “Rename.”
- Update Preset: Select a preset, modify the settings in the Export dialog, and then right-click the preset and choose “Update with Current Settings.”
- Delete Preset: Right-click on a preset and select “Delete.”
12. How Can I Add Watermarks During Export?
Adding watermarks during export helps protect your images and promote your brand. Lightroom allows you to create and apply custom watermarks to your photos.
- Open Export Dialog: Go to File > Export to open the Export dialog box.
- Go to Watermarking: Scroll down to the “Watermarking” section.
- Select Watermark Option: Check the “Watermark” box and choose either “Text” or “Graphic.”
- Customize Watermark:
- Text Watermark: Enter your desired text and customize the font, size, color, and position.
- Graphic Watermark: Choose a PNG file with transparency for your logo or watermark image. Adjust the size, opacity, and position.
- Save Preset: Save your export settings as a preset for future use.
13. How Do I Resize Images During Export?
Resizing images during export is crucial for optimizing them for different uses, such as web sharing or printing. Lightroom provides several options for resizing your photos.
- Open Export Dialog: Go to File > Export to open the Export dialog box.
- Go to Image Sizing: Scroll down to the “Image Sizing” section.
- Choose Resize Option:
- Width & Height: Specify the maximum width and height for your images.
- Long Edge: Specify the maximum length for the longest edge of your images.
- Short Edge: Specify the maximum length for the shortest edge of your images.
- Megapixels: Specify the maximum megapixel count for your images.
- Set Resolution: Set the resolution in pixels per inch (ppi). 300 ppi is recommended for printing, while 72 ppi is suitable for web use.
14. How Can I Sharpen Images During Export?
Sharpening images during export can enhance their appearance, especially when preparing them for web display or printing. Lightroom offers different sharpening options tailored to the intended output.
- Open Export Dialog: Go to File > Export to open the Export dialog box.
- Go to Output Sharpening: Scroll down to the “Output Sharpening” section.
- Choose Sharpen For:
- Screen: For images intended for web display.
- Matte Paper: For images printed on matte paper.
- Glossy Paper: For images printed on glossy paper.
- Adjust Sharpening Amount: Choose from Low, Standard, or High sharpening amounts based on your image and output needs.
15. How Can I Change The File Names During Export?
Changing file names during export helps organize and identify your images more easily. Lightroom provides various options for customizing file names.
- Open Export Dialog: Go to File > Export to open the Export dialog box.
- Go to File Naming: Scroll down to the “File Naming” section.
- Choose Naming Option:
- Rename To: Select a preset naming option or create a custom name.
- Custom Name: Enter a base name for your files.
- Sequence: Add a sequence number to the file name.
- Customize Naming: Use the “Edit” option to create custom naming patterns with date, sequence numbers, and other metadata.
16. How Can I Add Metadata And Keywords During Export?
Adding metadata and keywords during export enhances the searchability and organization of your images. Lightroom allows you to include copyright information, descriptions, and keywords.
- Open Export Dialog: Go to File > Export to open the Export dialog box.
- Go to Metadata: Scroll down to the “Metadata” section.
- Choose Metadata Option:
- Include All Metadata: Includes all existing metadata in your files.
- Remove Location Info: Removes GPS data for privacy.
- Copyright Only: Includes only copyright information.
- Add Keywords: In the “Keywords” section, add relevant keywords to your images.
17. How Do I Choose The Right File Format For Exporting?
Choosing the right file format is essential for ensuring optimal image quality and compatibility. Lightroom supports several file formats, each with its own strengths and weaknesses.
- JPEG:
- Use Case: Web sharing, general use.
- Pros: Small file size, widely compatible.
- Cons: Lossy compression, quality degrades with each save.
- TIFF:
- Use Case: Archiving, high-quality printing.
- Pros: Lossless compression, preserves maximum image quality.
- Cons: Large file size, less compatible than JPEG.
- PNG:
- Use Case: Web graphics, images with transparency.
- Pros: Lossless compression, supports transparency.
- Cons: Larger file size than JPEG, not ideal for photographs.
- DNG:
- Use Case: Archiving raw files.
- Pros: Adobe’s universal raw format, preserves raw data.
- Cons: Not universally supported.
18. How Can I Export Photos To Specific Folders?
Exporting photos to specific folders helps maintain an organized file system. Lightroom allows you to choose the destination folder during the export process.
- Open Export Dialog: Go to File > Export to open the Export dialog box.
- Go to Export Location: In the “Export Location” section, choose:
- Specific Folder: Choose a specific folder on your computer.
- Same Folder as Original Photo: Saves the exported photos in the same folder as the original files.
- Put in Subfolder: Creates a new subfolder within the chosen location.
- Organize into Subfolders: Use options like “Organize by Date” or create custom subfolder structures.
19. How Can I Optimize Export For Social Media?
Optimizing exports for social media involves settings that ensure your images look their best on platforms like Instagram and Facebook.
- File Format: JPEG
- Quality: 70-80%
- Color Space: sRGB
- Image Sizing:
- Instagram: Resize to 1080 pixels wide for landscape and square images.
- Facebook: Resize to 2048 pixels wide for landscape images.
- Sharpening: Apply screen sharpening.
20. How Can I Troubleshoot Common Export Issues?
Encountering export issues can be frustrating. Here are some common problems and their solutions:
- Problem: Export fails or hangs.
- Solution: Check for corrupted files, insufficient disk space, or software conflicts. Restart Lightroom or your computer.
- Problem: Image quality is poor.
- Solution: Check your export settings, especially quality, resolution, and sharpening.
- Problem: Colors are incorrect.
- Solution: Ensure you are using the correct color space (sRGB for web, Adobe RGB for print).
- Problem: File names are not as expected.
- Solution: Review your file naming settings and custom naming patterns.
21. How Do Lightroom Export Settings Affect Image Quality?
Lightroom export settings significantly impact image quality by controlling file size, color information, and sharpness. Choosing the right settings ensures your photos retain their visual integrity while being optimized for their intended use.
- File Format: Lossy formats like JPEG reduce file size but can degrade image quality. Lossless formats like TIFF preserve quality but result in larger files.
- Quality: Higher quality settings in JPEG exports retain more detail but increase file size.
- Color Space: sRGB is suitable for web use and ensures consistent colors across devices. Adobe RGB offers a wider color range and is ideal for professional printing.
- Resolution: Higher resolution (ppi) results in sharper prints but increases file size. Lower resolution is suitable for web use.
- Sharpening: Proper sharpening enhances detail and clarity, but excessive sharpening can introduce artifacts.
22. What Are The Best Lightroom Export Plugins?
Lightroom plugins can extend its export capabilities, offering specialized features and workflows.
- Jeffrey Friedl’s Export Plugins: Offers advanced export options, including FTP uploading and watermarking.
- LR/Mogrify 2: Adds borders, text annotations, and watermarks to exported images.
- Social Media Plugins: Direct export to platforms like Facebook, Instagram, and Twitter.
23. How Can I Automate The Export Process?
Automating the export process can save significant time and effort, especially when dealing with large batches of photos.
- Export Presets: Create and use export presets to quickly apply the same settings to multiple exports.
- Batch Processing: Apply develop settings and metadata to multiple photos before exporting.
- Third-Party Tools: Use scripting or automation tools to create custom export workflows.
24. How Does Exporting Affect Metadata?
Exporting affects metadata by determining which information is included in the exported files. Lightroom provides options to include all metadata, remove location info, or only include copyright information.
- Include All Metadata: Retains all existing metadata, including camera settings, keywords, and descriptions.
- Remove Location Info: Protects privacy by removing GPS data.
- Copyright Only: Includes only copyright information, protecting your ownership.
25. What Are The Best Practices For Backing Up Exported Photos?
Backing up exported photos is crucial for preventing data loss and ensuring the long-term availability of your images.
- Multiple Backup Locations: Store backups in multiple locations, including local hard drives and cloud storage.
- Regular Backups: Schedule regular backups to capture recent changes.
- Backup Software: Use backup software to automate the process and ensure data integrity.
- Cloud Storage: Utilize cloud storage services for offsite backups and accessibility.
26. How To Optimize Lightroom For Faster Export Times?
Optimizing Lightroom for faster export times involves several strategies to improve performance.
- Hardware: Use a fast processor, ample RAM, and a solid-state drive (SSD) for faster processing.
- Lightroom Settings: Optimize Lightroom’s performance settings, such as cache size and GPU usage.
- Image Optimization: Reduce file size and complexity by applying develop settings efficiently.
- Close Unnecessary Programs: Close other applications to free up system resources.
27. How Do Different Lightroom Versions Affect Exporting?
Different Lightroom versions, such as Classic CC and CC (cloud-based), offer slightly different export workflows and features.
- Lightroom Classic CC: Provides more advanced export options and control over file management.
- Lightroom CC: Offers a streamlined, cloud-based workflow with simplified export settings.
28. What Are The Ethical Considerations When Exporting Photos?
Ethical considerations when exporting photos include respecting privacy, obtaining consent, and adhering to copyright laws.
- Privacy: Protect the privacy of individuals in your photos by removing location data or obtaining consent before sharing.
- Copyright: Respect copyright laws by obtaining permission to use copyrighted material and properly attributing images.
- Manipulation: Avoid manipulating images in ways that misrepresent reality or deceive viewers.
29. What Is The Role Of Color Management In Exporting?
Color management plays a critical role in exporting by ensuring accurate and consistent color reproduction across different devices and media.
- Color Profiles: Use appropriate color profiles (sRGB for web, Adobe RGB for print) to ensure accurate color representation.
- Calibration: Calibrate your monitor to ensure accurate color display.
- Soft Proofing: Use soft proofing to preview how your images will look on different devices and media.
30. How To Stay Updated With The Latest Export Features In Lightroom?
Staying updated with the latest export features in Lightroom ensures you can take advantage of new tools and workflows.
- Adobe Updates: Regularly update Lightroom to access the latest features and improvements.
- Adobe Blogs and Forums: Follow Adobe blogs and forums for news and tutorials.
- Photography Websites and Magazines: Read photography websites and magazines for reviews and tutorials.
- Online Courses and Workshops: Take online courses and workshops to learn new skills and techniques.
By mastering these techniques, you’ll be able to efficiently export multiple photos from Lightroom, optimizing your workflow and ensuring your images are perfectly prepared for any purpose. Visit dfphoto.net for more tips, tutorials, and inspiration to elevate your photography.
 Select and Export Multiple Images
We at dfphoto.net understand the challenges photographers face, from mastering complex techniques to staying current with the latest trends. That’s why we offer a comprehensive resource for photographers of all levels, with detailed tutorials, inspirational galleries, and a vibrant community. Whether you’re looking to refine your editing skills, discover new creative ideas, or connect with fellow photographers, dfphoto.net is your go-to destination.
Ready to take your photography to the next level? Explore dfphoto.net today for in-depth tutorials, stunning photo collections, and a thriving photography community. Elevate your skills and find your inspiration with us!
FAQ: Exporting Multiple Photos from Lightroom
1. Can I export multiple photos from Lightroom Mobile?
Yes, you can export multiple photos from Lightroom Mobile. Select the photos you want to export, tap the share icon, and choose your export settings.
2. How do I export multiple photos from Lightroom to Instagram?
Select the photos, export them with the settings optimized for social media (JPEG, sRGB, 1080px wide), and then upload them to Instagram from your mobile device or desktop.
3. What is the best file format for exporting photos from Lightroom?
The best file format depends on the intended use. JPEG is suitable for web and general use, while TIFF is preferred for high-quality printing and archiving.
4. How do I add a watermark to multiple photos in Lightroom?
In the Export dialog, go to the Watermarking section, check the Watermark box, and customize your watermark settings.
5. How do I resize multiple photos during export in Lightroom?
In the Export dialog, go to the Image Sizing section and choose your desired resize option (Width & Height, Long Edge, Short Edge, or Megapixels).
6. How do I sharpen multiple photos during export in Lightroom?
In the Export dialog, go to the Output Sharpening section and choose the sharpening amount and output medium (Screen, Matte Paper, or Glossy Paper).
7. How do I rename multiple photos during export in Lightroom?
In the Export dialog, go to the File Naming section and choose a naming option or create a custom naming pattern.
8. How do I include metadata when exporting multiple photos from Lightroom?
In the Export dialog, go to the Metadata section and choose the desired metadata option (Include All Metadata, Remove Location Info, or Copyright Only).
9. How do I change the export location for multiple photos in Lightroom?
In the Export dialog, go to the Export Location section and choose a specific folder or create a subfolder.
10. What are the best Lightroom export settings for printing?
For printing, use TIFF or JPEG at 100% quality, Adobe RGB color space (if recommended by your print lab), and a resolution of 300 dpi. Sharpen for matte or glossy paper, as appropriate.