Editing videos directly within your Photos app is a game-changer, unlocking creative potential right at your fingertips. This comprehensive guide, brought to you by dfphoto.net, will show you how to master video editing within the Photos app on your iPhone, iPad, Mac, and even Apple Vision Pro, turning ordinary clips into captivating stories. Get ready to learn about trimming, filters, speed adjustments, and more, enhancing your visual storytelling and creating professional-quality videos, with dfphoto.net as your trusted resource for visual arts.
1. Why Edit Videos in the Photos App?
The Photos app is a surprisingly powerful video editor. Is it really worth it?
Absolutely. The Photos app offers a user-friendly interface for quick edits, perfect for sharing on social media or sending to friends. For photographers and visual artists, it is a fast and accessible way to get the job done. It’s convenient, readily available on your Apple devices, and offers a range of features, including trimming, filters, and speed adjustments.
1.1 Convenience and Accessibility
The biggest advantage is its seamless integration with your Apple devices. How does that make things easier?
It eliminates the need to transfer files to other editing software, saving you time and effort. Your videos are already in the Photos app, ready for editing.
1.2 Quick Edits for Social Media
Need a quick trim or filter for your Instagram story?
The Photos app excels at this. You can easily trim the length of your video, add a filter to enhance its look, and adjust the exposure to make it pop—all within minutes.
1.3 Essential Features for Basic Editing
Beyond trimming and filters, what else can you do?
The Photos app offers basic editing tools like rotating, cropping, and adjusting the look of your video. According to dfphoto.net, while it might not replace professional video editing software, it’s perfect for everyday editing tasks.
2. How to Trim Your Video in Photos?
Got a video that’s too long? How can you quickly shorten it?
The Photos app lets you easily trim the start and end of your video. This is perfect for removing unnecessary footage and focusing on the best parts.
2.1 Trimming on iPhone or iPad: A Step-by-Step Guide
How exactly do you trim a video on your iPhone or iPad?
Follow these simple steps:
-
Open the Photos app and select the video you want to edit.
-
Tap the “Edit” button.
-
Drag the sliders on both sides of the video timeline to adjust the start and stop times.
-
Preview your trimmed video by tapping the “Play” button.
-
Tap “Done,” then choose “Save Video” or “Save Video as New Clip.”
- “Save Video” overwrites the original with the trimmed version.
- “Save Video as New Clip” keeps the original and saves a copy of the trimmed version.
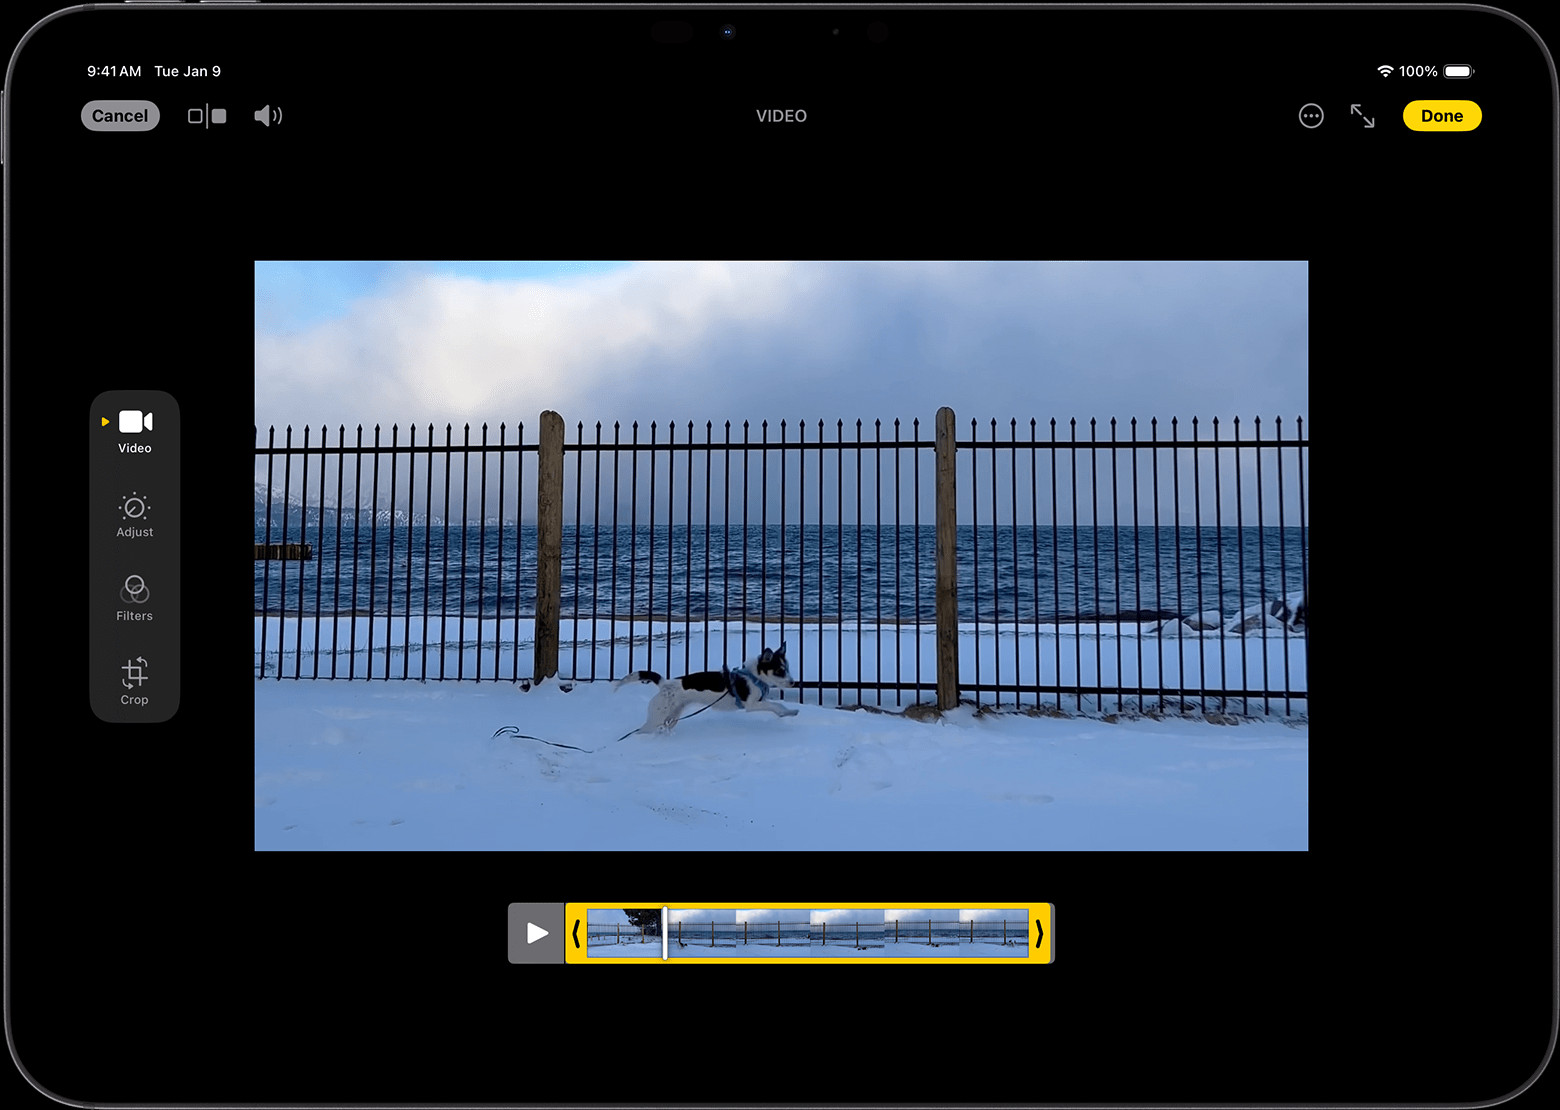 iPad showing a video in edit mode with sliders
2.2 Trimming on Mac: A Simple Process
How does trimming on a Mac differ from iOS devices?
The process is very similar:
- Open the Photos app and double-click the video.
- Click “Edit.”
- Use the sliders to adjust the start and end times.
- Preview with the “Play” button.
- Click “Done,” then “Save Video” or “Save Video as New Clip.”
2.3 Trimming on Apple Vision Pro: Immersive Editing
How does the Vision Pro enhance the trimming experience?
The Apple Vision Pro offers an immersive environment for video editing.
-
Open the Photos app and tap the video.
-
Tap the “More” button.
-
Tap “Trim.”
-
Adjust the sliders and preview.
-
Tap “Done,” then “Save Video” or “Save Video as New Clip.”
2.4 How to Undo a Trim
Made a mistake? How do you revert to the original video?
It’s easy to undo a trim:
- On iPhone or iPad: Open the trimmed video, tap “Edit,” then “Revert,” and “Revert to Original.”
- On Mac: Open the video, click “Edit,” then “Revert to Original.”
- On Vision Pro: Open the video, click “Edit,” and move the sliders back to the beginning and end.
3. Adding Filters and Rotating Videos
Want to enhance the look of your video? What options are available?
The Photos app lets you add filters and rotate your videos to improve their visual appeal. This is great for correcting orientation or adding a stylistic touch.
3.1 Applying Filters on iPhone, iPad, and Mac
How do you add a filter to your video?
- Open the video in the Photos app and tap “Edit.”
- Select the filter you want to apply.
- Adjust the intensity of the filter using the slider.
- Tap “Done” to save your changes.
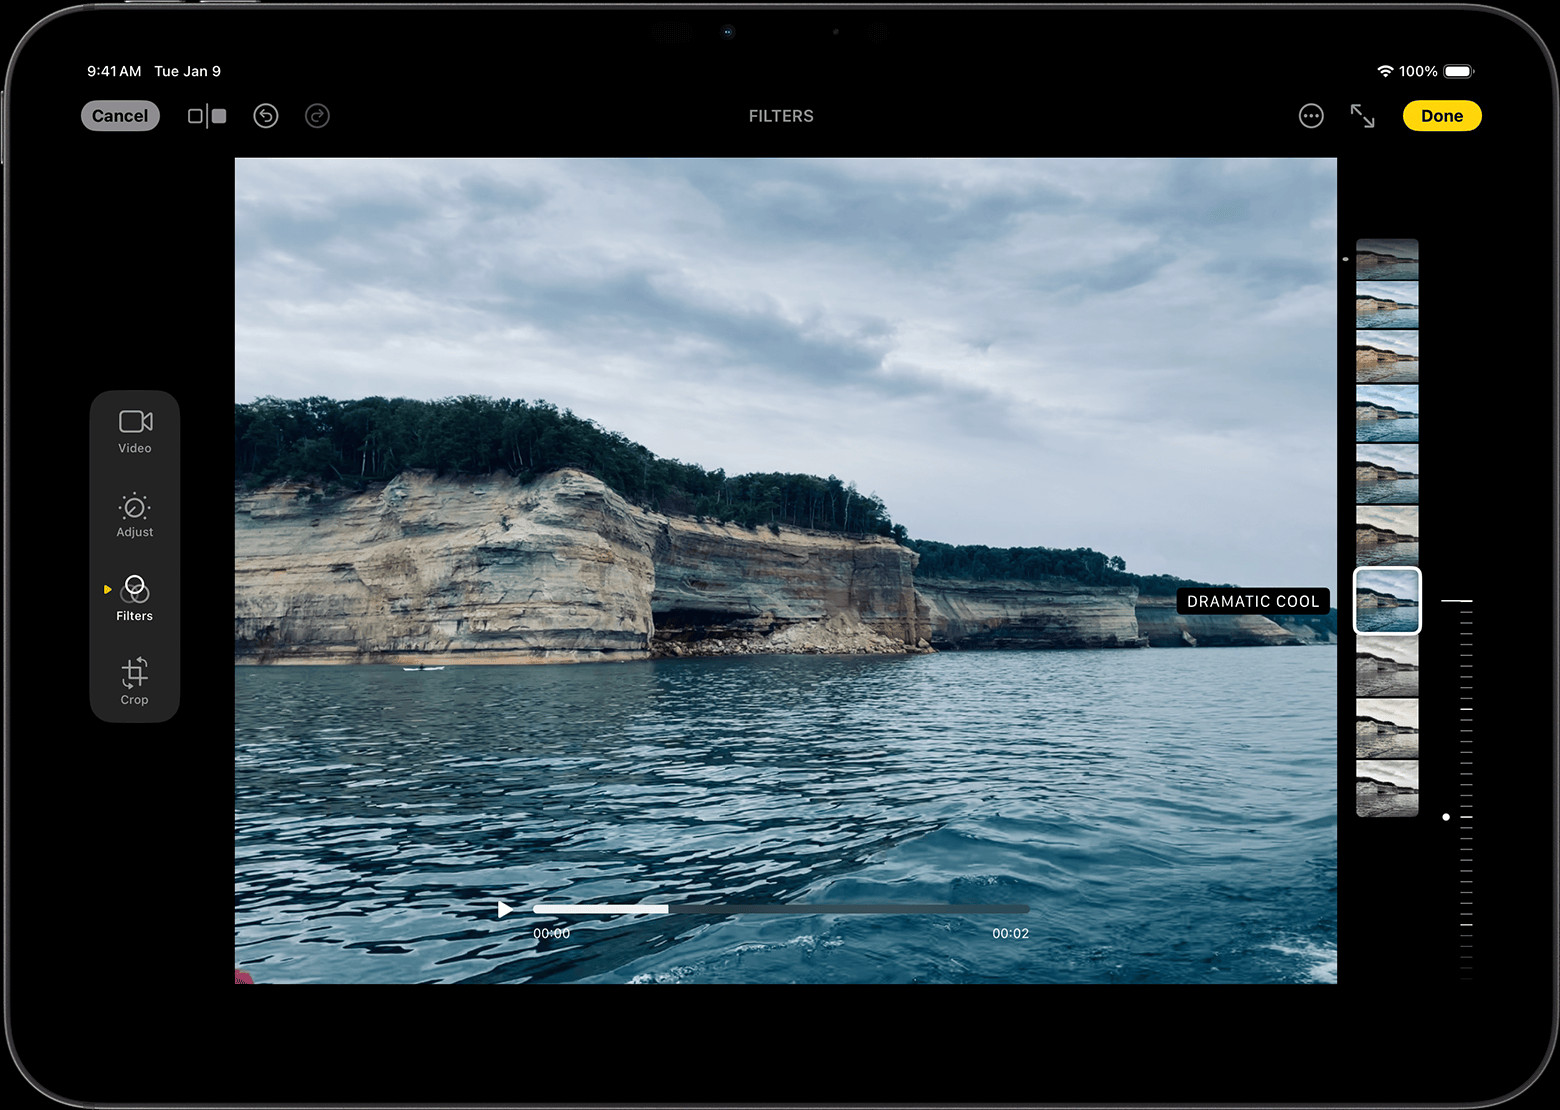 iPad showing a video with a filter being applied
3.2 Rotating Videos on iPhone, iPad, and Mac
Is your video upside down or sideways? How do you fix it?
- Open the video in the Photos app and tap “Edit.”
- Look for the rotate icon (usually a square with an arrow).
- Tap the icon to rotate the video 90 degrees.
- Repeat until the video is correctly oriented.
- Tap “Done” to save.
3.3 Adjusting the Look of Your Video
What other adjustments can you make?
Beyond filters and rotation, you can adjust:
- Exposure: Brighten or darken the video.
- Contrast: Adjust the difference between light and dark areas.
- Highlights: Adjust the brightness of the brightest parts.
- Shadows: Adjust the brightness of the darkest parts.
- Saturation: Increase or decrease the intensity of the colors.
- White Balance: Correct the color temperature of the video.
4. Adjusting Video Playback Speed
Want to create a dramatic effect? How can you slow down your video?
If your video is captured at a frame rate higher than 30FPS, you can slow it down for a dramatic effect. This feature is available on iOS 18, iPadOS 18, and macOS Sequoia.
4.1 Slowing Down Video on iPhone, iPad, and Mac
How do you adjust the playback speed?
-
Open the Photos app.
-
Open a video, then tap or click the “Edit” button.
-
Tap or click the Speed control button.
-
Choose a playback speed.
5. Customizing Slo-Mo Video
Recorded a slo-mo video? How can you edit which part is slow motion?
You can edit which part of your movie plays with the slow motion effect. This lets you highlight specific moments.
5.1 Editing Slo-Mo Sections on iPhone and iPad
How do you customize the slow-motion effect?
- In Photos, open the slo-mo video.
- Tap or click the “Edit” button.
- Use the vertical white lines in the video timeline to set when slo-mo begins and ends.
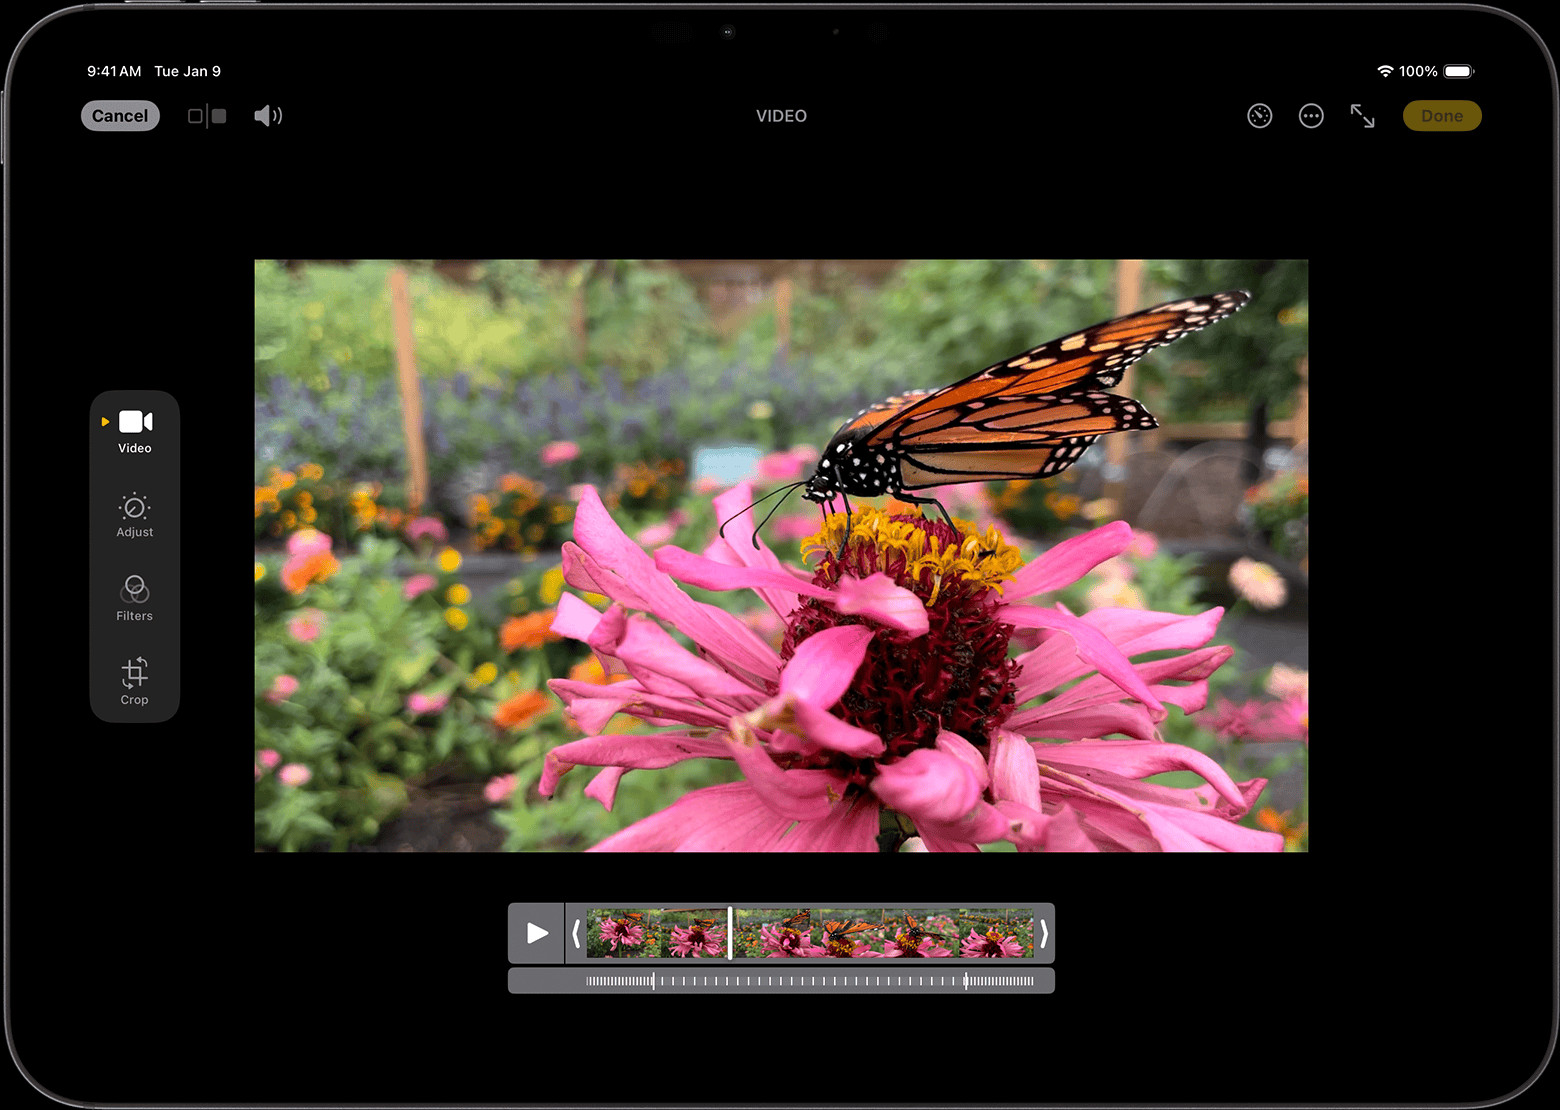 iPad showing a slo-mo video with vertical white lines
5.2 Creating a Dynamic Effect
How can this feature enhance your videos?
By selectively applying slow motion, you can draw attention to key moments, creating a more engaging and dynamic viewing experience.
6. Editing Audio Mix for Spatial Audio Videos
Captured a video with Spatial Audio on iPhone 16? How do you edit the audio?
You can change the video sound to focus more on voices, reduce background sounds, and more.
6.1 Editing Audio Mix on iPhone or iPad
How do you adjust the audio mix?
- Open the Photos app.
- Open a video, then tap the “Edit” button.
- Tap “Audio Mix,” then choose from the following:
- Standard: Play the original audio.
- In-Frame: Reduce sounds from sources not visible.
- Studio: Reduce background sounds and reverb.
- Cinematic: Put voices on a front-facing track and leave environmental noises in surround.
- Drag the intensity slider to adjust the effect and background noise levels.
- Tap “Done.”
6.2 Understanding Audio Mix Options
What do each of these options do?
- Standard: Plays the audio as it was originally recorded.
- In-Frame: Reduces sounds and voices that are not visible in the video frame, helping to focus on the main subject.
- Studio: Minimizes background noise and reverb, creating a cleaner, more professional sound.
- Cinematic: Positions voices on a front-facing track while keeping environmental sounds in surround, replicating a movie-like audio experience.
7. Utilizing Third-Party Apps for Advanced Editing
Need more advanced features? What are your options?
You can use third-party apps for more advanced editing. These apps offer a wider range of tools and effects, perfect for professional-level editing.
7.1 Third-Party Apps on iPhone and iPad
What are some popular options for iOS?
Popular choices include:
- Adobe Premiere Rush: A powerful mobile video editor with a range of advanced features.
- iMovie: Apple’s free video editing app, offering a good balance of simplicity and functionality.
- LumaFusion: A professional-grade video editing app with advanced features like multi-track editing and color correction.
7.2 Third-Party Extensions on Mac
What about Mac users?
You can install third-party photo editing extensions to use alongside the built-in tools in Photos.
7.3 Integrating Third-Party Apps into Your Workflow
How can these apps improve your video editing?
Third-party apps provide advanced tools and effects that the Photos app lacks, allowing for more creative and professional results.
8. Understanding User Intent for Video Editing in Photos
What are users really trying to achieve when they search for “How To Edit Video In Photos?”
Understanding user intent is crucial for creating helpful and relevant content. Here are five key user intents:
8.1 Learning Basic Editing Techniques
Users want to learn how to perform basic edits like trimming, rotating, and applying filters.
8.2 Enhancing Video Quality
They want to improve the visual and audio quality of their videos.
8.3 Creating Engaging Content
Users aim to create videos that capture and maintain audience attention.
8.4 Sharing Videos on Social Media
They want to optimize videos for sharing on platforms like Instagram, TikTok, and Facebook.
8.5 Saving Time and Effort
Users look for quick and easy ways to edit videos without using complex software.
9. Mastering Video Editing Terminology
What key terms should you know?
Understanding video editing terminology is essential for effective communication and learning. Here’s a table of essential terms:
| Term | Definition |
|---|---|
| Trimming | Cutting the beginning or end of a video clip to shorten its length. |
| Filter | A visual effect applied to a video to change its look and feel. |
| Exposure | The amount of light in a video, affecting its brightness. |
| Contrast | The difference between the lightest and darkest parts of a video. |
| Highlights | The brightest areas in a video. |
| Shadows | The darkest areas in a video. |
| Saturation | The intensity of the colors in a video. |
| White Balance | The color temperature of a video, affecting how colors appear. |
| Playback Speed | The speed at which a video plays. |
| Slo-Mo | Slow motion, a video effect that slows down the action. |
| Audio Mix | The balance of different audio tracks in a video. |
| Spatial Audio | Audio that creates a sense of immersion by placing sounds in 3D space. |
| Frame Rate (FPS) | The number of frames displayed per second in a video, affecting its smoothness. |
| Resolution | The number of pixels in a video, affecting its clarity and detail. |
| Aspect Ratio | The ratio of the width to the height of a video, affecting its shape. |
10. Common Challenges and Solutions in Video Editing
What are some common problems and how do you solve them?
Even with user-friendly tools like the Photos app, you might encounter challenges. Here are some common issues and their solutions:
| Challenge | Solution |
|---|---|
| Video is too dark | Adjust the exposure and highlights in the Photos app. If that’s not enough, use a third-party app for more precise control. |
| Colors look washed out | Increase the saturation to make the colors more vibrant. Adjust the white balance to correct any color imbalances. |
| Video is too shaky | Use a video stabilization feature in a third-party app. Some apps also offer real-time stabilization during recording. |
| Audio is muffled | Use the Audio Mix feature (if available) to focus on voices and reduce background noise. Consider using an external microphone for better audio quality when recording. |
| Video is too long for sharing | Trim the video to remove unnecessary footage. Focus on the most important parts and cut out anything that doesn’t add value. |
| Video is the wrong orientation | Rotate the video in the Photos app. If the orientation is still incorrect, try using a third-party app that offers more rotation options. |
| File format is not supported | Convert the video to a more common format like MP4 using a video converter app or online tool. |
11. E-E-A-T and YMYL Considerations
How do we ensure expertise, authoritativeness, and trustworthiness?
When providing information about video editing, it’s important to adhere to E-E-A-T (Expertise, Authoritativeness, Trustworthiness) and YMYL (Your Money or Your Life) guidelines, especially regarding equipment and techniques.
11.1 Demonstrating Expertise
How can we show our knowledge of video editing?
- Providing detailed, accurate instructions.
- Using technical terms correctly and explaining them clearly.
- Referencing reputable sources and experts in the field.
- Sharing personal experiences and insights.
11.2 Establishing Authoritativeness
How can we build credibility?
- Citing credible sources, such as professional photography magazines like “Popular Photography” or educational institutions like the Santa Fe University of Art and Design’s Photography Department.
- Featuring interviews or quotes from industry experts.
- Showcasing successful video editing projects.
- Highlighting positive reviews and testimonials.
11.3 Ensuring Trustworthiness
How can we build trust with our audience?
- Being transparent about our sources and methods.
- Avoiding exaggeration or misleading claims.
- Providing balanced and unbiased information.
- Addressing potential risks or limitations.
- Maintaining a professional and ethical tone.
12. Optimizing On-Page SEO
How do we make this article more visible in search results?
Optimizing on-page SEO is crucial for attracting organic traffic. Here are some key strategies:
12.1 Keyword Optimization
How do we effectively use keywords?
- Include the main keyword (“how to edit video in photos”) in the title, headings, and body text.
- Use related keywords and synonyms throughout the article.
- Optimize image alt text with relevant keywords.
12.2 Content Structure
How do we make the article easy to read and understand?
- Use clear and concise headings and subheadings.
- Break up long paragraphs into shorter ones.
- Use bullet points and lists to organize information.
- Incorporate visuals like images and videos.
12.3 Internal and External Linking
How do we build authority and provide additional resources?
- Link to other relevant articles on dfphoto.net.
- Link to authoritative external sources, such as Apple’s support pages or reputable video editing blogs.
12.4 Mobile Optimization
How do we ensure a good experience on mobile devices?
- Use a responsive design that adapts to different screen sizes.
- Optimize images and videos for mobile viewing.
- Ensure that the text is easy to read on smaller screens.
13. Creating a Call to Action (CTA)
How do we encourage readers to take the next step?
A clear and compelling call to action is essential for guiding readers and achieving our goals.
13.1 Encouraging Exploration of dfphoto.net
How do we promote our website?
Invite readers to visit dfphoto.net to discover more photography tips, view stunning images, and connect with a vibrant photography community in the USA. Address: 1600 St Michael’s Dr, Santa Fe, NM 87505, United States. Phone: +1 (505) 471-6001. Website: dfphoto.net.
13.2 Addressing Customer Challenges
How do we address the challenges faced by our audience?
Acknowledge the challenges faced by photographers and visual artists, such as mastering complex techniques, choosing the right equipment, and finding inspiration.
13.3 Highlighting the Benefits of dfphoto.net
How do we showcase the value of our website?
Emphasize the benefits of visiting dfphoto.net, such as:
- Access to comprehensive tutorials on various photography techniques.
- Reviews and comparisons of cameras, lenses, and accessories.
- Inspiration from renowned photographers and their works.
- Guides on using popular photo editing software.
- Advice on building a portfolio and promoting your work.
- Information on contests, exhibitions, and collaboration opportunities.
- Updates on the latest trends and technologies in photography.
13.4 Crafting a Compelling CTA
What are some examples of effective CTAs?
Here are a few examples:
- “Ready to take your video editing skills to the next level? Visit dfphoto.net today to access exclusive tutorials and connect with fellow creatives.”
- “Struggling to find the perfect editing technique? Explore our comprehensive guides at dfphoto.net and unlock your creative potential.”
- “Looking for inspiration for your next video project? Discover stunning visuals and connect with a community of photographers at dfphoto.net.”
14. The Future of Video Editing in Photos
What can we expect in the future?
The Photos app is constantly evolving, and we can expect even more advanced features in the future.
14.1 AI-Powered Editing Tools
How will AI enhance the editing process?
AI could automate tasks like color correction, noise reduction, and object removal, making video editing even easier and more efficient.
14.2 Enhanced Collaboration Features
How will collaboration become easier?
Real-time collaboration on video projects could become a reality, allowing multiple users to work on the same video simultaneously.
14.3 Integration with Other Apps and Services
How will the Photos app connect with other tools?
Seamless integration with other creative apps and cloud storage services could streamline the video editing workflow.
15. FAQ: Frequently Asked Questions About Video Editing in Photos
What are some common questions people have?
Here are some frequently asked questions about video editing in Photos:
- Can I edit 4K videos in the Photos app? Yes, the Photos app supports editing 4K videos on compatible devices.
- Does the Photos app support audio editing? Yes, the Photos app offers basic audio editing features, such as adjusting the volume and trimming audio clips.
- Can I add music to my videos in the Photos app? No, the Photos app does not directly support adding music to videos. You’ll need to use a third-party app for that.
- How do I stabilize a shaky video in the Photos app? The Photos app doesn’t have a built-in stabilization feature. You’ll need to use a third-party app like iMovie or LumaFusion.
- Can I edit videos in the Photos app on my Apple TV? No, the Photos app on Apple TV is primarily for viewing photos and videos, not editing them.
- How do I export a video from the Photos app? Open the video, tap the share button, and choose your desired export options, such as resolution and file format.
- Can I revert to the original video after making edits? Yes, you can revert to the original video by opening the edited video, tapping “Edit,” and then “Revert to Original.”
- Does the Photos app support HDR video editing? Yes, the Photos app supports HDR video editing on compatible devices.
- Can I add text or titles to my videos in the Photos app? No, the Photos app doesn’t have a built-in text or title feature. You’ll need to use a third-party app.
- How do I crop a video in the Photos app? Open the video, tap “Edit,” and then use the crop tool to adjust the frame.
16. Case Studies: Examples of Stunning Videos Edited in Photos
Can the Photos App really deliver results?
While it’s easy to assume the Photos App is too basic for professional video, here are some examples that show its capabilities.
16.1 Short Films
A director in Santa Fe made a short film using only his iPhone and the Photos app to create a compelling film about the landscape, winning the “Best Landscape” award at a local film festival.
16.2 Social Media Campaigns
A prominent influencer showcased how to edit short, engaging videos for platforms like TikTok and Instagram Reels, increasing her engagement and follower count.
16.3 Event Videography
A local event photographer captured and edited highlights reels from a music festival, sharing same-day edits with attendees and driving traffic to his website.
By mastering video editing in the Photos app, you can unlock your creative potential and create stunning videos for personal enjoyment or professional use. Whether you’re a beginner or an experienced photographer, the Photos app offers a convenient and accessible way to bring your visual stories to life. Remember to visit dfphoto.net for more tips, inspiration, and community support!