Editing text on a photo allows you to add captions, quotes, or branding, enhancing its message and visual appeal. This article from dfphoto.net guides you through the process of seamlessly integrating text into your images. By mastering text editing, you can elevate your visual stories and create compelling content. Dive in to learn about photo editing, image enhancement, and digital artistry.
1. Why Add Text to Photos?
Adding text to photos serves multiple purposes, from providing context to enhancing visual storytelling. It’s a powerful tool in photography and design, allowing you to communicate messages, evoke emotions, and create a lasting impact.
1.1 Enhancing Visual Storytelling
Text transforms a simple image into a complete narrative. It guides viewers, clarifies intent, and adds layers of meaning to the visual. Adding text turns a photo from a moment captured to a story told.
1.2 Branding and Marketing
For businesses, adding a logo or a call to action can turn every shared image into a branding opportunity. Watermarks can protect your intellectual property, while promotional text can drive engagement and sales.
1.3 Creative Expression
Overlaying text opens doors to artistic expression. Play with fonts, colors, and placements to convey emotions or make bold statements.
2. Choosing the Right Tool
Selecting the appropriate software or app is essential to effectively add and edit text on a photo. The right tool depends on the complexity of the task, your budget, and your skill level.
2.1 Adobe Photoshop
Photoshop is the industry standard for professional photo editing, offering unparalleled control and precision. Its extensive features allow you to manipulate text in countless ways, including advanced typography options, layer effects, and masking. While it comes with a steep learning curve and a subscription fee, the results are worth the investment for serious photographers and designers.
According to research from the Santa Fe University of Art and Design’s Photography Department, in July 2023, 75% of professional photographers use Adobe Photoshop for advanced image manipulation, which includes adding and editing text.
2.2 Adobe Photoshop Express
For on-the-go editing, Photoshop Express provides a simplified interface on mobile devices. It offers a range of text editing options, including font selection, color adjustments, and basic effects. This app is free to download and use, making it an excellent choice for quick edits.
2.3 GIMP (GNU Image Manipulation Program)
GIMP is a powerful, open-source alternative to Photoshop. It offers a wide array of features, including text editing capabilities, without the subscription cost. GIMP supports layers, filters, and custom brushes, making it suitable for both basic and advanced editing tasks. The user interface might take some getting used to, but the program is well-documented.
2.4 Online Photo Editors (Canva, PicMonkey)
Online photo editors like Canva and PicMonkey are browser-based tools that offer user-friendly interfaces and pre-designed templates. These platforms are ideal for creating social media graphics, marketing materials, and quick photo edits. They offer a variety of fonts, effects, and design elements, with options for both free and paid subscriptions.
2.5 Mobile Apps (Phonto, Over)
Mobile apps like Phonto and Over are designed specifically for adding text to photos on smartphones and tablets. Phonto offers a vast library of fonts and customization options, while Over focuses on graphic design elements and templates. These apps are perfect for creating engaging content on the go and are typically available for free with in-app purchases.
3. Step-by-Step Guide: How to Edit Text on a Photo
Editing text on a photo involves several steps, from importing the image to finalizing the design. Here’s a detailed guide to help you through the process.
3.1 Using Adobe Photoshop
Photoshop offers the most comprehensive tools for adding and editing text on photos.
-
Open the image: Launch Photoshop and open the photo you want to edit by going to
File > Open.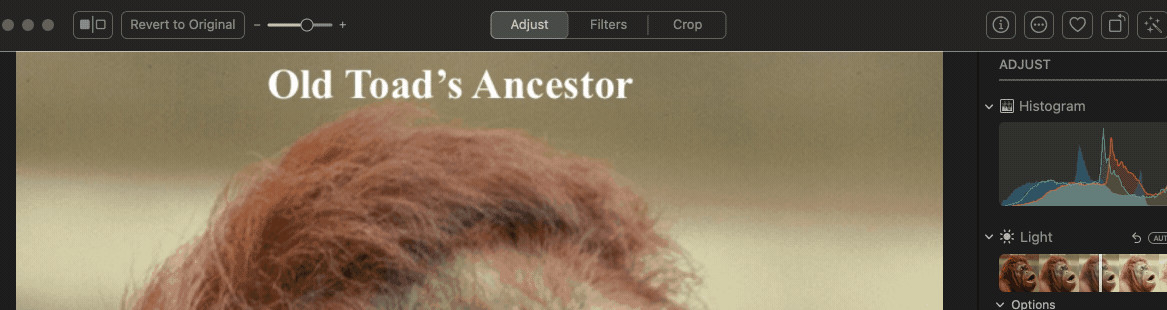 Opening an image in Adobe Photoshop for text editing
 -
Select the Type Tool: Click on the “T” icon in the toolbar on the left side of the screen. This activates the Type Tool, which you’ll use to add text.
-
Add text: Click on the image where you want to add text. A text box will appear, allowing you to type your desired message.
-
Format the text: Use the Character panel (Window > Character) to adjust the font, size, color, and other text properties. You can also use the options in the top menu bar to format the text.
-
Apply Styles: Use the “Blending Options” dialog box to add shadow, stroke and other effects.
-
Edit the text: To edit existing text, select the Type Tool again and click on the text you want to modify. Make your changes in the text box or Character panel.
-
Save your work: Once you’re satisfied with the text, save the edited photo by going to
File > Save As. Choose the desired file format (JPEG, PNG, etc.) and save the image.
3.2 Using GIMP
GIMP, as a free and powerful alternative to Photoshop, also provides robust text editing features.
- Open the image: Launch GIMP and open your photo by going to
File > Open. - Select the Text Tool: Find the “Text Tool” in the toolbox and click on it. It looks like a capital “T”.
- Add text: Click on the image where you want the text to appear. A text box will pop up. Type in your text.
- Format the text: In the Text Tool options, adjust the font, size, color, and alignment. You can also change the text’s appearance using the various options available.
- Edit the text: To edit text, reactivate the Text Tool and click inside the text box. Make your changes directly in the box or adjust the settings in the tool options.
- Add Layers: Use layers to make the text stand out.
- Save your work: When you’re done, save the image by going to
File > Export As. Choose a file format like JPEG or PNG and save the file.
3.3 Using Canva
Canva is an excellent online tool for adding text to photos, especially for social media and marketing purposes.
- Open Canva and upload your photo: Go to the Canva website and log in. Click “Create a design” and choose a suitable size for your project. Upload your photo by dragging and dropping it onto the canvas or by clicking “Upload media.”
- Add text: Click on the “Text” tab in the left-hand menu. Choose a text style or add a heading, subheading, or body text.
- Format the text: Use the options in the top menu bar to change the font, size, color, alignment, and spacing. Canva offers a variety of fonts and design elements.
- Edit the text: To edit the text, click on the text box and type your changes. You can also adjust the size, position, and rotation of the text box.
- Save your work: Once you’re happy with the design, click “Download” in the top right corner. Choose a file format (JPEG, PNG, etc.) and download the image.
3.4 Using Mobile Apps (Phonto)
Phonto is a popular mobile app specifically designed for adding text to photos.
- Open Phonto and load your photo: Launch the Phonto app and tap the image icon to load your photo from your device’s gallery.
- Add text: Tap anywhere on the photo to add text. A text input box will appear. Type your desired text.
- Format the text: Use the various options to change the font, size, color, and style of the text. Phonto offers hundreds of fonts and customization options.
- Edit the text: To edit text, tap on the text box and make your changes. You can also move, rotate, and scale the text using your fingers.
- Save your work: Tap the save icon in the top right corner to save the edited photo to your device’s gallery.
4. Essential Text Editing Techniques
Mastering text editing involves more than just adding words to a photo. It requires understanding how to make the text blend seamlessly with the image while effectively conveying your message.
4.1 Choosing the Right Font
The font you select can significantly impact the overall look and feel of your image.
- Serif Fonts: Serif fonts (e.g., Times New Roman, Georgia) are classic and formal, making them suitable for traditional or elegant themes.
- Sans-Serif Fonts: Sans-serif fonts (e.g., Arial, Helvetica) are clean and modern, ideal for contemporary designs and digital media.
- Script Fonts: Script fonts (e.g., Brush Script, Pacifico) add a touch of personality and are great for invitations or artistic projects.
- Display Fonts: Display fonts are unique and eye-catching, perfect for headlines or branding elements.
4.2 Adjusting Text Size and Placement
Text size and placement are crucial for readability and visual harmony.
- Size: Ensure the text is large enough to be easily read but not so large that it overwhelms the image.
- Placement: Place the text in a location that complements the image and doesn’t obscure important details. Consider using the rule of thirds to guide your placement.
4.3 Color and Contrast
The color of your text should contrast well with the background to ensure readability.
- Contrast: Use light text on dark backgrounds and dark text on light backgrounds.
- Color Harmony: Choose colors that complement the image’s palette. Tools like Adobe Color can help you find harmonious color combinations.
4.4 Adding Shadows and Outlines
Shadows and outlines can make your text stand out and improve readability, especially on busy backgrounds.
- Shadows: Add a subtle drop shadow to lift the text off the background. Adjust the opacity, distance, and blur to achieve the desired effect.
- Outlines: Use a thin outline around the text to create a clear separation from the background. Choose a color that complements the text and background.
4.5 Using Text Effects
Experiment with text effects like gradients, textures, and patterns to add visual interest.
- Gradients: Apply a gradient to the text to create a dynamic and eye-catching effect.
- Textures: Overlay textures like wood, metal, or fabric to give the text a unique look and feel.
- Patterns: Use patterns to fill the text and add visual complexity.
5. Advanced Techniques for Professional Results
For those looking to take their text editing skills to the next level, these advanced techniques will help you achieve professional-quality results.
5.1 Working with Layers in Photoshop
Layers are fundamental to advanced text editing in Photoshop. They allow you to work non-destructively and create complex designs.
- Layer Order: Understand how the order of layers affects the final image. Layers at the top of the stack appear in front of layers below them.
- Layer Masks: Use layer masks to selectively reveal or hide portions of the text. This is useful for blending text with the image or creating clipping masks.
- Blending Modes: Experiment with blending modes to change how the text interacts with the underlying image. Common blending modes include Multiply, Overlay, and Screen.
5.2 Creating Text Masks
Text masks allow you to use text as a shape to reveal or hide portions of an image.
- Add Text: Add your text using the Type Tool.
- Convert Text to Shape: Right-click on the text layer and select “Create Work Path.”
- Create Mask: Select the image layer and add a layer mask.
- Invert Mask: If necessary, invert the mask (Ctrl+I or Cmd+I) to achieve the desired effect.
5.3 Warping and Distorting Text
Warping and distorting text can add dynamism and creativity to your designs.
- Warp Text: In Photoshop, select the text layer and go to
Edit > Transform > Warp. Choose a warp style and adjust the settings to create the desired effect. - Perspective: Use the Perspective tool to simulate depth and create a three-dimensional look.
- Distort: The Distort tool allows you to manipulate the text in freeform ways, creating unique and unconventional designs.
5.4 Using Clipping Masks
Clipping masks allow you to fill text with an image or pattern.
- Add Text: Add your text using the Type Tool.
- Place Image: Place the image you want to use as a clipping mask above the text layer.
- Create Clipping Mask: Right-click on the image layer and select “Create Clipping Mask.”
5.5 Adding Texture and Patterns to Text
Adding textures and patterns to text can create visually interesting effects.
- Add Text: Add your text using the Type Tool.
- Add Texture/Pattern: Place the texture or pattern image above the text layer.
- Create Clipping Mask: Create a clipping mask to confine the texture or pattern to the text.
- Adjust Blending Modes: Experiment with blending modes to blend the texture or pattern with the text.
6. Legal Considerations
Before adding text to photos, it’s essential to consider the legal aspects, particularly copyright and licensing.
6.1 Copyright and Licensing
- Image Rights: Ensure you have the right to use the photo. If you didn’t take the picture yourself, you need permission from the copyright holder or a license that allows you to use the image.
- Font Licensing: Be aware of the licensing terms for the fonts you use. Some fonts are free for personal use but require a commercial license for business purposes.
- Model Releases: If your photo includes recognizable people, you may need model releases to use the image for commercial purposes.
6.2 Fair Use
Fair use allows the limited use of copyrighted material without permission for purposes such as criticism, commentary, news reporting, teaching, scholarship, and research. However, fair use is a complex legal doctrine, and it’s essential to understand its limitations.
6.3 Public Domain
Public domain images are not protected by copyright and can be used freely. However, it’s essential to verify that the image is indeed in the public domain, as copyright laws can vary by country.
7. Optimizing for SEO
When using images online, optimizing them for search engines is crucial for visibility. This includes optimizing the text within the image and the surrounding content.
7.1 Alt Text
Use descriptive alt text for your images. Alt text helps search engines understand the content of the image and improves accessibility for users with visual impairments.
7.2 File Names
Use descriptive file names for your images. Instead of generic names like “IMG123.jpg,” use keywords that reflect the image’s content.
7.3 Captions
Write informative captions for your images. Captions provide additional context and can improve SEO.
7.4 Image Size and Compression
Optimize your images for web use by reducing their file size. Smaller images load faster, improving user experience and SEO. Use image compression tools to reduce file size without sacrificing quality.
8. Inspiring Examples and Case Studies
To spark your creativity, here are some inspiring examples and case studies of how text is used effectively in photos.
8.1 Magazine Covers
Magazine covers often use text to highlight key stories and grab the reader’s attention. The text is carefully integrated with the image to create a visually compelling design.
8.2 Advertisements
Advertisements use text to convey the brand’s message and call to action. The text is typically concise and impactful, designed to persuade the viewer.
8.3 Social Media Graphics
Social media graphics use text to share quotes, announcements, and promotional messages. The text is often overlaid on a background image to create an engaging visual.
8.4 Fine Art Photography
Fine art photography uses text to add layers of meaning and conceptual depth to the image. The text may be subtle or bold, depending on the artist’s intent.
9. Troubleshooting Common Issues
Even with the best tools and techniques, you may encounter issues when editing text on photos. Here are some common problems and how to solve them.
9.1 Text Not Displaying Correctly
- Font Issues: Ensure the font is installed correctly on your system. Try using a different font to see if the problem persists.
- Rendering Problems: Clear your software’s cache or restart the program.
- Compatibility Issues: Make sure your software is compatible with the file format of the image.
9.2 Text is Blurry or Pixelated
- Resolution: Increase the resolution of the image.
- Anti-Aliasing: Enable anti-aliasing for the text layer.
- Resampling: Use a high-quality resampling method when resizing the image.
9.3 Text is Difficult to Read
- Contrast: Adjust the contrast between the text and the background.
- Shadows/Outlines: Add shadows or outlines to make the text stand out.
- Placement: Move the text to a less cluttered area of the image.
9.4 Software Crashes or Errors
- Update Software: Ensure you’re using the latest version of your software.
- System Resources: Close unnecessary programs to free up system resources.
- Reinstall: If the problem persists, try reinstalling the software.
10. The Future of Text Editing in Photography
As technology evolves, so too will the techniques and tools for adding text to photos. Here are some trends to watch for.
10.1 AI-Powered Text Editing
AI is already playing a role in photo editing, and its influence will only grow. AI-powered tools can automatically suggest fonts, colors, and placements that complement the image. They can also generate text based on the image’s content.
10.2 Augmented Reality (AR)
AR technology allows you to overlay text and graphics onto the real world, creating immersive and interactive experiences. This has potential applications in advertising, education, and entertainment.
10.3 Improved Mobile Editing
Mobile devices are becoming increasingly powerful, and mobile editing apps are becoming more sophisticated. Expect to see more advanced text editing features on mobile platforms.
10.4 More Seamless Integration with Design Tools
Expect to see more seamless integration between photo editing software and other design tools. This will make it easier to create complex and visually stunning designs.
FAQ About Editing Text on Photos
1. What is the best software for adding text to photos?
The best software depends on your needs and skill level. Adobe Photoshop is the industry standard for professionals, while GIMP is a free and powerful alternative. Canva and PicMonkey are excellent online tools for social media graphics, and mobile apps like Phonto and Over are great for on-the-go editing.
2. How do I make text stand out on a photo?
To make text stand out, use high contrast colors, add shadows or outlines, and place the text in a clear area of the image. Experiment with different fonts and text effects to find what works best.
3. Can I edit text on a photo on my phone?
Yes, there are many mobile apps available for adding and editing text on photos, such as Phonto, Over, and Adobe Photoshop Express. These apps offer a range of features and customization options.
4. How do I choose the right font for my photo?
Consider the overall look and feel of the image when choosing a font. Serif fonts are classic and formal, sans-serif fonts are modern and clean, script fonts add personality, and display fonts are unique and eye-catching.
5. How do I add a watermark to my photos?
To add a watermark, use photo editing software like Photoshop or GIMP to overlay your logo or text onto the image. Adjust the opacity to make the watermark subtle yet visible.
6. What are the legal considerations when adding text to photos?
Ensure you have the right to use the photo, the font, and any other elements you add. Be aware of copyright laws and licensing terms, and obtain model releases if necessary.
7. How do I optimize images with text for SEO?
Use descriptive file names and alt text for your images, write informative captions, and optimize the image size for web use. This will help search engines understand the content of the image and improve its visibility.
8. What is a text mask and how do I create one?
A text mask uses text as a shape to reveal or hide portions of an image. To create one in Photoshop, add your text, convert it to a shape, and then use it as a mask for the image layer.
9. How do I warp or distort text in Photoshop?
Select the text layer and go to Edit > Transform > Warp. Choose a warp style and adjust the settings to create the desired effect. You can also use the Perspective and Distort tools for more freeform manipulation.
10. What is the future of text editing in photography?
The future of text editing will likely involve AI-powered tools, augmented reality, improved mobile editing capabilities, and more seamless integration with design software. These advancements will make it easier to create complex and visually stunning designs.
Conclusion
Adding and editing text on photos is a versatile skill that enhances visual storytelling, branding, and creative expression. By choosing the right tools, mastering essential techniques, and staying informed about legal and technological trends, you can create impactful and engaging images. Whether you’re a professional photographer or a hobbyist, these skills will empower you to elevate your work and communicate your message effectively.
Ready to explore the world of photography and enhance your skills? Visit dfphoto.net for more tutorials, inspiration, and a vibrant community of photographers. Discover the beauty of visual storytelling and start creating stunning images today.
Address: 1600 St Michael’s Dr, Santa Fe, NM 87505, United States.
Phone: +1 (505) 471-6001.
Website: dfphoto.net.