Editing photos directly within Google Drive might seem limited, but it’s absolutely possible and can be quite efficient with the right approach. At dfphoto.net, we understand the importance of seamless workflows, and we’re here to guide you through several methods to enhance your images without ever leaving your Google Drive environment. This article will explore Google’s built-in tools and third-party integrations to transform your photos into stunning visuals with enhanced imagery.
1. Utilizing Google Drawings for Basic Photo Editing
Google Drawings is a surprisingly useful tool for simple photo editing tasks within Google Drive. While it may not be as feature-rich as dedicated photo editing software, it provides a convenient way to make basic adjustments and annotations directly in your cloud storage.
1.1. Accessing Google Drawings
How do I open Google Drawings from Google Drive?
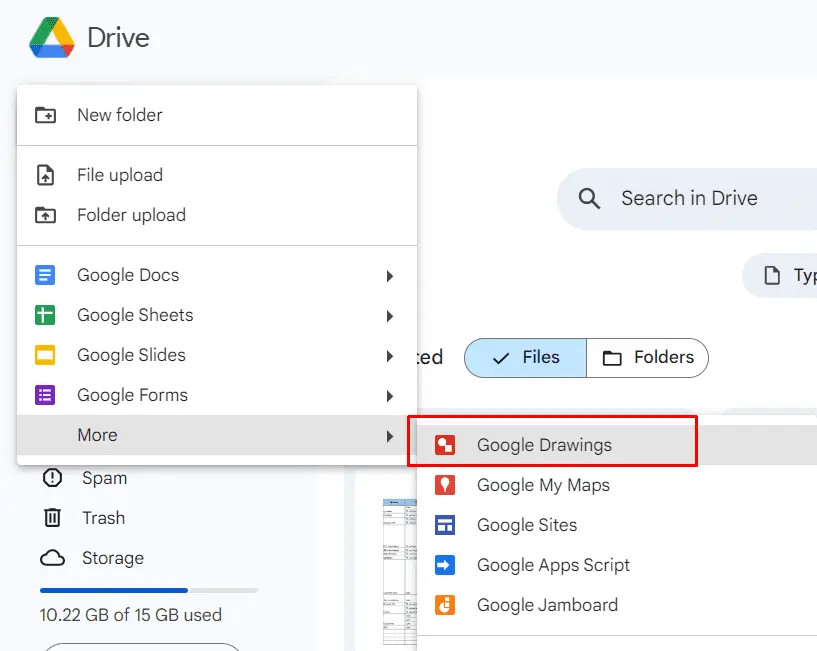
To start, open your Google Drive account. Click the “New” button, hover over “More,” and select “Google Drawings”. This will open a new drawing canvas where you can begin editing your photo. Think of it as a digital canvas right at your fingertips, perfect for quick edits and annotations.
1.2. Inserting Your Photo
How do I insert a photo into Google Drawings?
In the Google Drawings window, go to the “Insert” menu, select “Image,” and then choose “Drive.” This opens a panel on the right where you can browse and select the photo you want to edit from your Google Drive.
 Inserting image into Google Drawings from Google Drive for editing
1.3. Basic Editing Tools in Google Drawings
What editing options are available in Google Drawings?
Google Drawings offers a range of basic editing tools, including cropping, resizing, adding text, shapes, lines, and arrows. You can also adjust the order of elements and group them for easier manipulation. This is especially helpful for adding annotations or creating simple graphics with your photos.
 Adding text to image using Google Drawings editor
1.4. Adding Text and Annotations
How do I add text and annotations to my photo?
To add text, click the “Text box” tool and draw a box on your photo. You can then type in your text and customize the font, size, color, and alignment. Use the “Line” and “Shape” tools to add arrows, circles, or other annotations to highlight specific areas of your photo.
1.5. Saving and Sharing Your Edited Photo
How do I save my edited photo from Google Drawings?
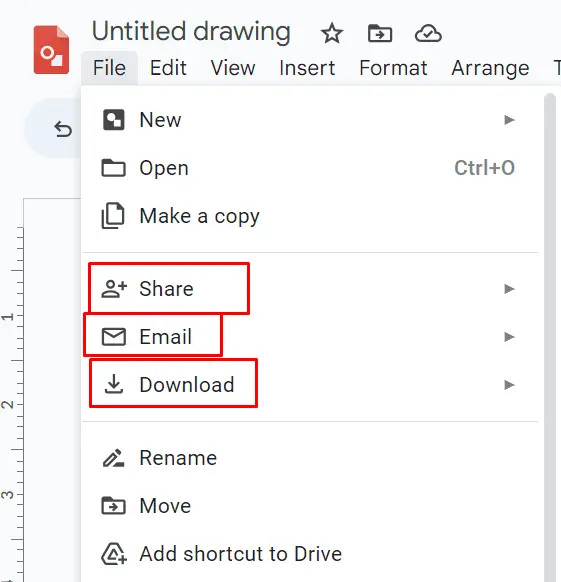
Once you’re done editing, your changes are automatically saved to your Google Drive. To download the edited photo, go to “File,” select “Download,” and choose the desired file format (e.g., JPEG, PNG). You can also share the drawing directly from Google Drive with others, allowing them to view or edit the photo collaboratively.
 Downloading image from Google Drawings to PC or share with another user
2. Enhancing Photos with Google Photos Editor
Google Photos provides a more robust set of editing tools than Google Drawings, making it a great option for enhancing your photos directly within the Google ecosystem. It is perfect for quick enhancements and creative effects.
2.1. Uploading Photos to Google Photos
How do I upload photos from Google Drive to Google Photos?
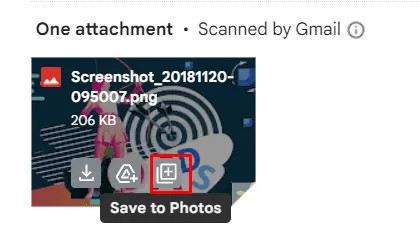
If your photos are already in Google Drive, you can upload them to Google Photos by opening Google Photos, clicking the “Upload” button, and selecting “Google Drive.” Then, navigate to the folder containing your photos and select the ones you want to upload. This ensures your photos are ready for editing in Google Photos.
 Saving a photo to Google Photos after sending to Gmail
2.2. Accessing the Editing Tools
How do I access the editing tools in Google Photos?
Open the photo you want to edit in Google Photos and click the “Edit” button (the icon with three sliders) in the top-right corner. This will open the Google Photos editor, where you’ll find a variety of tools and filters to enhance your image.
2.3. Adjusting Color and Lighting
What are the adjustment options in Google Photos?
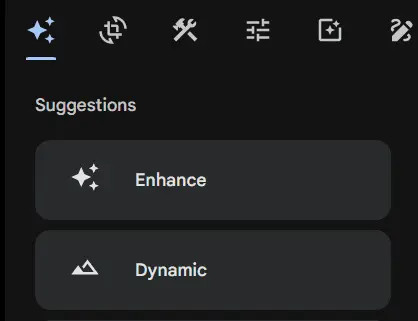
The Google Photos editor offers a range of adjustment tools, including brightness, contrast, highlights, shadows, white point, black point, saturation, warmth, and tint. Experiment with these sliders to fine-tune the color and lighting of your photo to achieve the desired look.
 List of filters selected by AI in Google Photos
2.4. Applying Filters and Presets
How do I use filters and presets in Google Photos?
Google Photos includes a selection of filters and presets that can quickly enhance your photo with a single tap. Browse through the available options and choose one that complements your image. You can also adjust the intensity of the filter to customize the effect.
2.5. Cropping and Rotating
How do I crop and rotate my photo in Google Photos?
The “Crop” tool allows you to crop your photo to improve its composition or remove unwanted elements. You can also rotate the photo to correct its orientation or create a more dynamic angle. Google Photos also offers suggested crops based on the content of your image, which can be a helpful starting point.
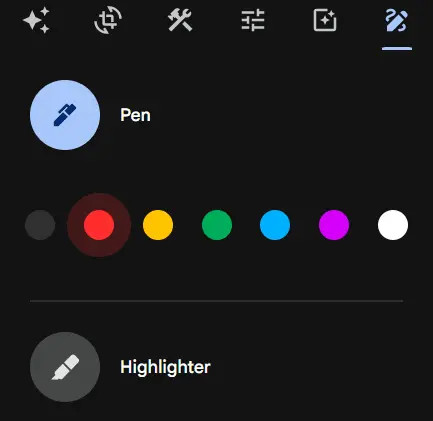 Choosing optimal aspect ratio for publishing, applying filters and using drawing tools
2.6. Saving and Sharing Your Edited Photo
How do I save my edited photo and share it?
Once you’re satisfied with your edits, click the “Save” button to save the changes to your Google Photos library. The original photo will be preserved, and a new edited version will be created. To share the edited photo, click the “Share” button and choose your preferred sharing method (e.g., email, social media, link).
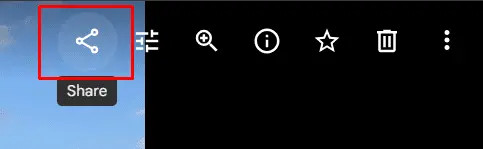 Sharing image from Google Photos
2.7. Creating Collages in Google Photos
How can I combine multiple photos into a collage using Google Photos?
Google Photos has a Collage feature. In the main menu, select “Utilities,” then “Collage.” Choose the photos you want to include, and Google Photos will automatically create a collage for you. You can adjust the layout, edit individual photos within the collage, and add a background color or pattern.
3. Extending Google Drive with Third-Party Photo Editors
For more advanced photo editing capabilities, you can integrate third-party photo editors with Google Drive. The integration enhances the power of Google Drive, extending its functionality to meet a wide range of user needs.
3.1. Exploring Google Workspace Marketplace
Where can I find third-party photo editors for Google Drive?
The Google Workspace Marketplace offers a variety of photo editing apps that can be integrated with Google Drive. To access the marketplace, open Google Drive and click the “Get add-ons” button in the right sidebar. This will open the marketplace, where you can browse and search for photo editing apps.
3.2. Popular Photo Editing Extensions
Which third-party photo editors are popular for Google Drive?
Several popular photo editing extensions are available for Google Drive, including:
- BeFunky Photo Editor: A user-friendly editor with a wide range of tools and templates.
- Photo Editor with Drive: A basic editor for quick edits and adjustments.
- Image Enhancer: An AI-powered tool for improving photo quality.
3.3. Installing and Authorizing Extensions
How do I install and authorize a photo editing extension?
To install an extension, click on its listing in the Google Workspace Marketplace and click the “Install” button. You’ll be prompted to grant the extension certain permissions to access your Google Drive files. Review these permissions carefully before granting them.
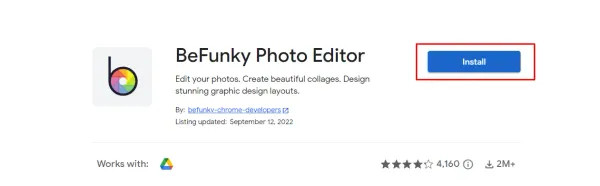 Install and grant permissions for apps in Google Workspace Marketplace
3.4. Opening Photos with Extensions
How do I open a photo with a third-party extension?
Once you’ve installed a photo editing extension, you can open photos with it directly from Google Drive. Right-click on the photo you want to edit, select “Open with,” and choose the installed extension. This will open the photo in the extension’s editor, where you can make your desired edits.
3.5. Saving Changes Back to Google Drive
How do I save the edited photo back to Google Drive?
After you’ve finished editing your photo in the extension, save the changes. The extension will typically save the edited photo back to your Google Drive, either as a new file or by overwriting the original. Be sure to check the extension’s settings to configure how it saves changes.
4. Downloading and Editing Photos Locally
For users who prefer to use dedicated photo editing software, downloading photos from Google Drive and editing them locally is a viable option. This method allows you to leverage the full power of desktop applications for complex editing tasks.
4.1. Downloading Photos from Google Drive
How do I download photos from Google Drive to my computer?
To download a photo from Google Drive, right-click on the photo and select “Download.” The photo will be downloaded to your computer in its original file format. You can also download multiple photos at once by selecting them and then clicking the “Download” button.
4.2. Using Desktop Photo Editors
Which desktop photo editors can I use to edit photos from Google Drive?
Numerous desktop photo editors are available, ranging from free options like GIMP and Paint.NET to professional-grade software like Adobe Photoshop and Lightroom. Choose the editor that best suits your needs and skill level.
4.3. Editing Photos Locally
How do I edit the downloaded photo using a desktop editor?
Open the downloaded photo in your chosen desktop photo editor and use its tools and features to make your desired edits. This may include adjusting color and lighting, cropping, retouching, applying filters, and adding text or graphics.
4.4. Re-uploading Edited Photos to Google Drive
How do I upload the edited photo back to Google Drive?
Once you’ve finished editing your photo, save it to your computer. Then, open Google Drive, click the “New” button, and select “File upload.” Choose the edited photo from your computer and click “Open” to upload it to Google Drive.
5. Leveraging Pics.io DAM for Advanced Photo Editing within Google Drive
Pics.io Digital Asset Management (DAM) system provides a powerful solution for managing and editing photos directly within Google Drive. It offers a range of advanced features that go beyond the capabilities of Google’s built-in tools.
5.1. Understanding Pics.io DAM
What is Pics.io DAM, and how does it work with Google Drive?
Pics.io DAM is a digital asset management system that integrates with Google Drive to provide enhanced organization, search, and editing capabilities for your photos and other digital assets. It allows you to create a centralized library of your photos, add metadata, and collaborate with team members.
5.2. Integrating Pics.io with Google Drive
How do I integrate Pics.io DAM with my Google Drive account?
To integrate Pics.io with Google Drive, sign up for a Pics.io account and follow the instructions to connect it to your Google Drive. Once connected, Pics.io will index your Google Drive files and create a searchable library within the Pics.io interface.
5.3. Advanced Editing Features in Pics.io
What advanced editing features does Pics.io offer?
Pics.io DAM includes a built-in graphic editor with a range of advanced features, such as:
- File settings adjustments
- Drawing tools
- Watermarking
- Collage creation
- Proportion changes
- RAW photo editing
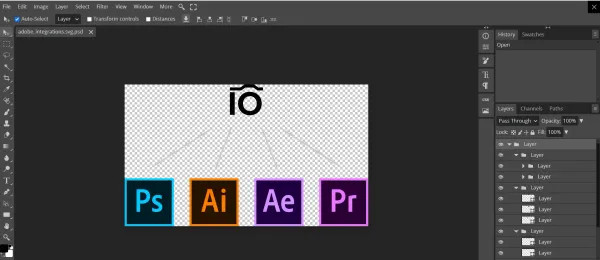 Pics.io DAM image editor
5.4. Version Control and Collaboration
How does Pics.io handle version control and collaboration?
Pics.io DAM includes a version control feature that allows you to track changes to your photos and revert to previous versions if needed. It also supports collaboration by allowing multiple users to access and edit photos simultaneously.
5.5. Integration with Other Tools
Does Pics.io integrate with other design and editing tools?
Pics.io offers integrations with popular design and editing tools like Adobe Photoshop, Illustrator, Canva, and Figma. This allows you to seamlessly edit your photos in these tools and then sync the changes back to Pics.io.
6. Optimizing Images for Google Discovery
Optimizing your images for Google Discovery involves several steps to ensure they are visually appealing, relevant, and easily discoverable. High-quality images are more likely to capture users’ attention and drive engagement.
6.1. Image Optimization Techniques
What are some image optimization techniques for Google Discovery?
Several techniques can help optimize your images for Google Discovery, including:
- Using high-quality images: High-resolution images are more visually appealing and professional.
- Choosing relevant images: Select images that accurately represent the content of your article.
- Optimizing image file names: Use descriptive file names that include relevant keywords.
- Writing descriptive alt text: Alt text provides context for search engines and screen readers.
- Compressing images: Compressed images load faster, improving user experience and SEO.
6.2. Image Dimensions and File Size
What are the recommended image dimensions and file size for Google Discovery?
Google recommends using images that are at least 1200 pixels wide for Google Discovery. The file size should be as small as possible without sacrificing image quality, ideally under 1 MB.
6.3. Alt Text Optimization
How do I write effective alt text for my images?
Alt text should be descriptive, concise, and relevant to the image and the surrounding content. Include relevant keywords where appropriate, but avoid keyword stuffing.
6.4. Image File Name Optimization
How do I optimize image file names for SEO?
Use descriptive file names that include relevant keywords. For example, instead of “IMG_1234.jpg,” use “santa-fe-sunset-photography.jpg.”
7. Understanding User Search Intent
Understanding user search intent is crucial for creating content that meets their needs and ranks well in search results. By understanding what users are looking for, you can tailor your content to provide the most relevant and helpful information.
7.1. Identifying Search Intent
How do I identify the search intent behind “How To Edit Photos In Google Drive”?
The search intent behind “how to edit photos in Google Drive” can be categorized into several key areas:
- Informational: Users are seeking information on how to perform photo editing tasks within Google Drive.
- Tutorial: Users are looking for step-by-step instructions on how to use different tools and techniques.
- Comparison: Users are comparing different methods and tools for editing photos in Google Drive.
- Alternative: Users are seeking alternative solutions for photo editing within the Google ecosystem.
- Troubleshooting: Users are looking for solutions to specific problems or issues they are encountering.
7.2. Tailoring Content to Match Search Intent
How do I tailor my content to match the search intent?
To tailor your content to match the search intent, address each of the key areas identified above. Provide clear, concise instructions, compare different methods and tools, offer alternative solutions, and address common troubleshooting issues.
7.3. Using Keywords and LSI Keywords
How do I use keywords and LSI keywords to optimize my content?
Use the primary keyword “how to edit photos in Google Drive” throughout your content, but also incorporate related keywords and LSI keywords, such as:
- Google Photos editor
- Google Drawings
- Third-party photo editors
- Google Workspace Marketplace
- Pics.io DAM
- Image optimization
- Photo editing techniques
8. E-E-A-T and YMYL Considerations
E-E-A-T (Experience, Expertise, Authoritativeness, and Trustworthiness) and YMYL (Your Money or Your Life) are important considerations for creating high-quality content that ranks well in search results. E-E-A-T helps to ensure that content is accurate, reliable, and trustworthy, while YMYL focuses on content that can impact a person’s health, financial stability, or safety.
8.1. Demonstrating Experience
How do I demonstrate experience in my content?
Share personal experiences, case studies, and real-world examples to demonstrate your expertise. Provide specific details and insights that show you have hands-on experience with the topic.
8.2. Showcasing Expertise
How do I showcase expertise in my content?
Cite reputable sources, provide accurate information, and demonstrate a deep understanding of the topic. Use proper grammar and spelling, and avoid making unsubstantiated claims.
8.3. Building Authoritativeness
How do I build authoritativeness in my content?
Obtain backlinks from reputable websites, get mentioned in industry publications, and establish yourself as a thought leader in your field.
8.4. Establishing Trustworthiness
How do I establish trustworthiness in my content?
Be transparent about your sources, disclose any conflicts of interest, and provide accurate and up-to-date information. Ensure your website is secure and has a clear privacy policy.
8.5. YMYL Considerations for Photo Editing
What are the YMYL considerations for content about photo editing?
While photo editing may not seem like a YMYL topic, it’s important to ensure that your content is accurate and doesn’t provide misleading or harmful advice. For example, avoid promoting unrealistic beauty standards or providing instructions that could damage equipment.
9. Creating a Compelling Call to Action
A compelling call to action (CTA) is essential for driving engagement and encouraging users to take the next step. Your CTA should be clear, concise, and relevant to the content.
9.1. Importance of a Clear CTA
Why is a clear CTA important?
A clear CTA tells users exactly what you want them to do next. It removes ambiguity and makes it easy for them to take the desired action.
9.2. Types of CTAs for a Photo Editing Article
What are some effective CTAs for an article about editing photos in Google Drive?
Some effective CTAs for this type of article include:
- “Try Pics.io DAM for free”
- “Explore our photo editing tutorials”
- “Join our photography community”
- “Download our free photo editing guide”
- “Contact us for a demo”
9.3. Placement of CTAs
Where should I place CTAs in my article?
Place CTAs throughout your article, including:
- At the beginning of the article to capture attention
- In the middle of the article to reinforce the message
- At the end of the article to encourage action
10. Frequently Asked Questions (FAQ) about Editing Photos in Google Drive
10.1. Can I edit photos directly in Google Drive?
While Google Drive doesn’t have a built-in photo editor, you can use Google Drawings, Google Photos, or third-party extensions to edit photos stored in Google Drive.
10.2. How do I crop a photo in Google Drive?
You can crop a photo using Google Drawings or Google Photos. In Google Drawings, insert the image and use the crop tool. In Google Photos, open the photo in the editor and use the crop tool.
10.3. How do I adjust the brightness and contrast of a photo in Google Drive?
Use Google Photos to adjust brightness and contrast. Open the photo in Google Photos, click “Edit,” and use the brightness and contrast sliders.
10.4. Can I add filters to photos in Google Drive?
Yes, you can add filters to photos using Google Photos. Open the photo in Google Photos, click “Edit,” and select from the available filters.
10.5. How do I add text to a photo in Google Drive?
Use Google Drawings to add text to a photo. Insert the image into Google Drawings, select the text box tool, and add your text.
10.6. What are the best third-party photo editors for Google Drive?
Some popular third-party photo editors for Google Drive include BeFunky Photo Editor, Photo Editor with Drive, and Image Enhancer.
10.7. How do I save edited photos back to Google Drive?
When using Google Drawings or Google Photos, edited photos are automatically saved back to Google Drive. For third-party editors, follow the extension’s instructions for saving changes.
10.8. Is it possible to edit RAW photos in Google Drive?
Yes, with Pics.io DAM, you can edit RAW photos directly within Google Drive.
10.9. How can I collaborate on photo editing in Google Drive?
Use Google Drawings or Pics.io DAM to collaborate on photo editing. These tools allow multiple users to access and edit photos simultaneously.
10.10. What is Pics.io DAM, and how does it enhance photo editing in Google Drive?
Pics.io DAM is a digital asset management system that integrates with Google Drive to provide enhanced organization, search, and editing capabilities for your photos. It offers advanced editing features, version control, and collaboration tools.
At dfphoto.net, we are committed to providing you with the latest tips, techniques, and resources to enhance your photography skills. Whether you’re a beginner or a professional, we have something for everyone. Explore our website for more articles, tutorials, and inspiration. Connect with our vibrant photography community and share your passion with fellow enthusiasts. For more in-depth information and to explore advanced photo editing solutions, visit dfphoto.net today. Discover a world of creative possibilities and take your photography to the next level. Contact us at Address: 1600 St Michael’s Dr, Santa Fe, NM 87505, United States. Phone: +1 (505) 471-6001. Website: dfphoto.net. Give Pics.io DAM a try.