Canva has become a go-to platform for individuals and businesses seeking user-friendly graphic design tools. While known for its versatility in creating logos, social media graphics, and presentations, Canva also boasts a surprisingly robust photo editor. It might not replace professional software like Photoshop for intricate manipulations, but for quick enhancements, creative tweaks, and web-ready visuals, Canva offers an accessible and powerful solution.
This guide will walk you through the essentials of photo editing in Canva, demonstrating how you can easily transform your images and achieve impressive results without needing advanced skills or expensive software. Let’s dive into how you can leverage Canva to edit your photos effectively.
Getting Started with Canva Photo Editing
Canva’s photo editing capabilities are seamlessly integrated into its design platform. Whether you are a complete beginner or have some photo editing experience, Canva’s intuitive interface makes it easy to jump right in. The best part? You can access a wide array of editing tools even with a free Canva account.
Step 1: Upload Your Photo to Canva
The first step is to get your chosen photo into Canva. Once you’re logged into your Canva account, you’ll land on the main dashboard filled with design templates. Instead of choosing a template, look for the “Create a design” button, typically located on the top right. Click on it and then select “Start with an image”.
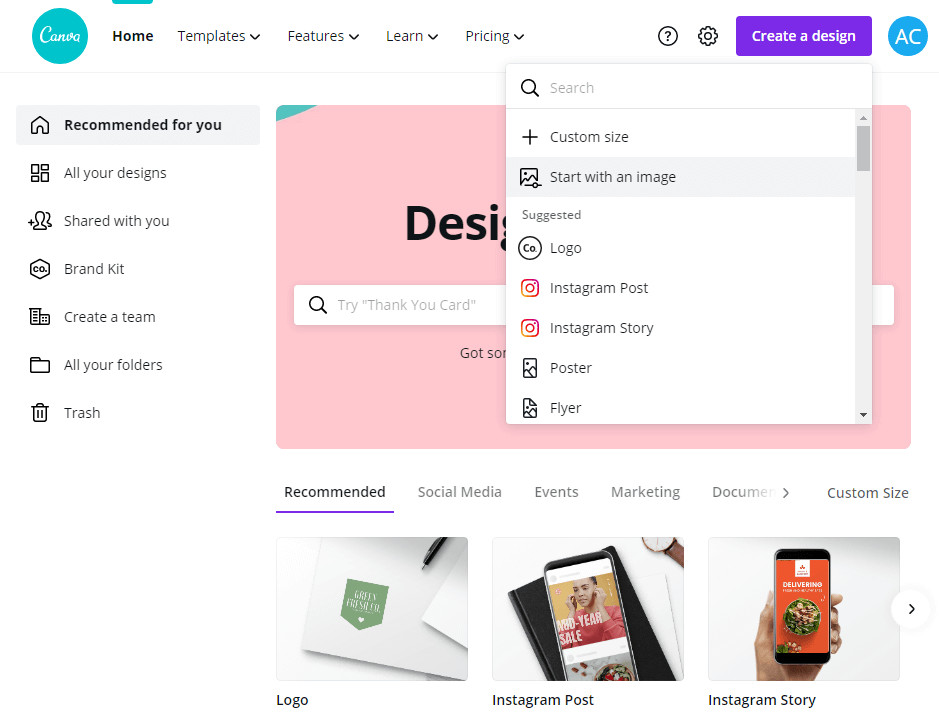 The main Canva menu
Alt text: Canva’s main dashboard interface with the ‘Create a design’ button highlighted, showing options for different design types including starting with an image.
Canva will then prompt you to upload an image from your computer. Select the photo you want to edit, and Canva will open it in its editor. You’ll notice a clean and organized workspace. On the left side is the editor menu, packed with tools, and on the right, your uploaded image takes center stage, ready for editing.
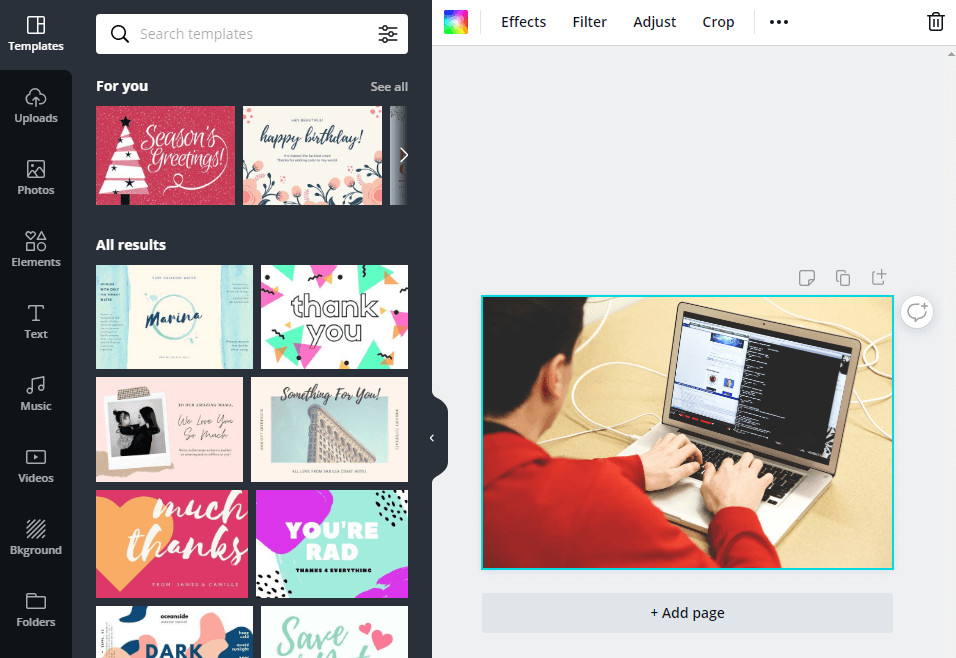 Canva editor interface with uploaded image
Alt text: Canva editor interface displaying an uploaded image, with the editing menu on the left side showcasing various image manipulation tools and options.
Step 2: Basic Photo Adjustments – Crop and Flip
Often, the simplest adjustments can make a significant difference. Canva provides essential tools for cropping and flipping your photos, easily accessible from the menu bar directly above your image in the editor.
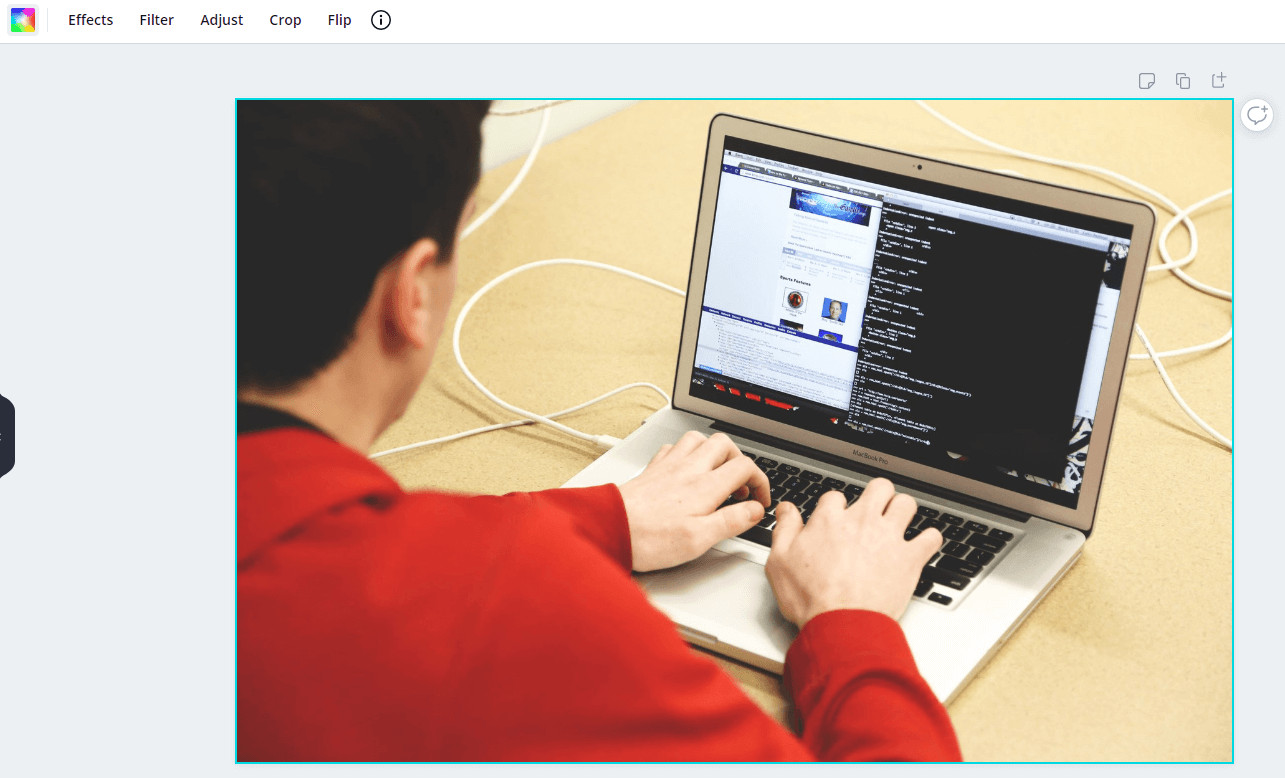 Cropping tool in Canva interface
Alt text: Canva’s cropping tool interface activated on an image, showing the crop handles and options to adjust image composition.
Clicking the “Crop” option allows you to trim unwanted areas from your photo, refining its composition and focusing attention on the key subject. Simply drag the crop handles at the corners and edges of your image to define the desired area.
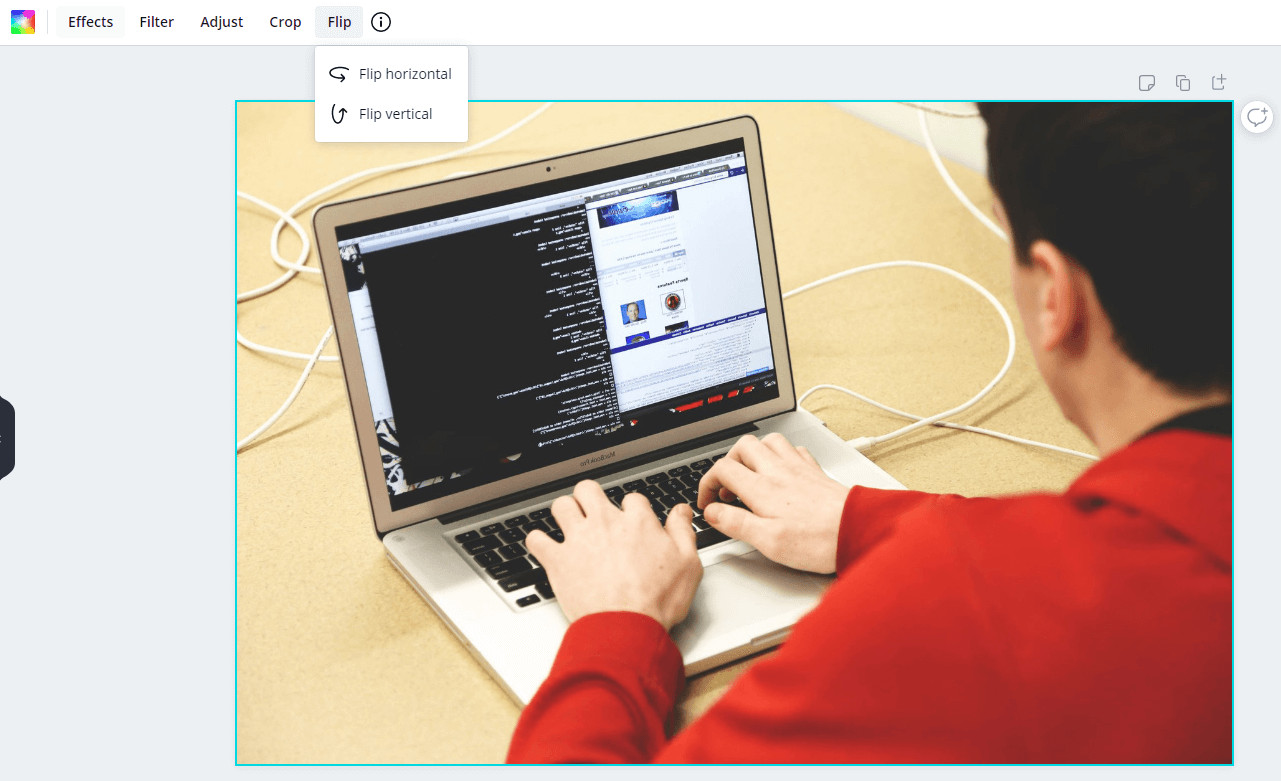 Flipping tool in Canva interface
Alt text: Canva’s flipping tool options displayed, showing icons for horizontal and vertical image flipping to change image perspective.
Next to “Crop”, you’ll find the “Flip” option. This tool lets you mirror your image horizontally or vertically. Flipping can be useful for correcting orientation, creating interesting visual effects, or simply adjusting the perspective of your photo. While Canva lacks a direct resizing feature within these basic tools, these crop and flip functionalities are fundamental for initial image refinement.
Step 3: Enhancing Your Photos with Filters and Adjustments
To elevate your photo’s visual appeal, Canva offers a range of filters and adjustment tools. These options, located in the same menu bar as “Crop” and “Flip,” are labeled “Effects,” “Filters,” and “Adjust.”
The “Adjust” panel is your go-to for fine-tuning your photo’s coloration and lighting.
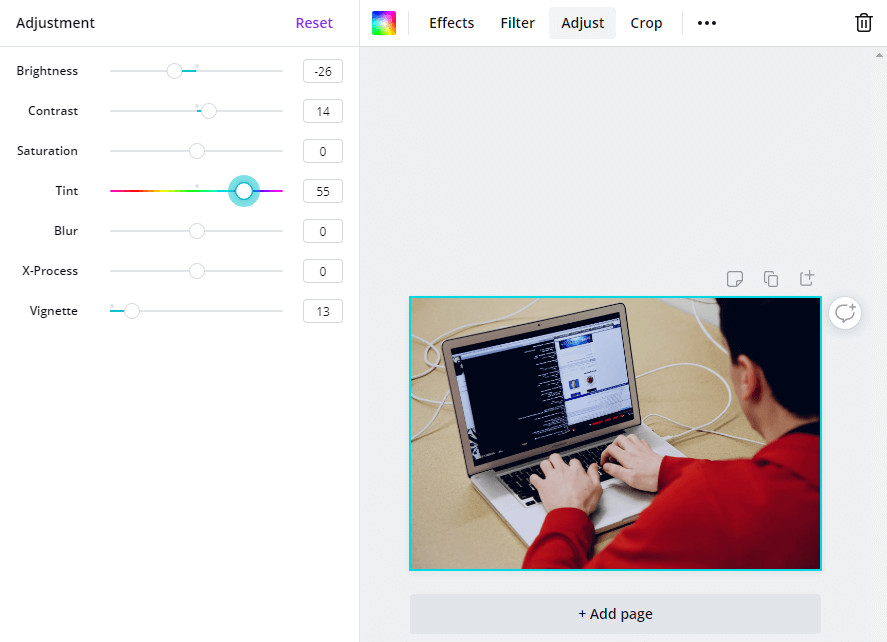 Adjust panel in Canva for photo editing
Alt text: Canva’s Adjust panel with sliders for brightness, contrast, saturation, and other color and lighting adjustments for image enhancement.
Here you’ll find sliders to control aspects like brightness, contrast, saturation, and more. These intuitive sliders allow you to make subtle or dramatic changes to your image’s overall look and feel, correcting exposure issues or enhancing specific color tones.
Canva’s “Filters” provide pre-designed stylistic overlays for your photos. You’ll recognize many common filter styles like “Greyscale,” “Retro,” and various color tints.
Once you select a filter, you can adjust its intensity to achieve the perfect balance for your image. Experiment with different filters to quickly alter the mood and style of your photos.
It’s worth noting that while Canva offers basic “Effects” for free users, advanced effects like background removal are typically reserved for premium Canva accounts.
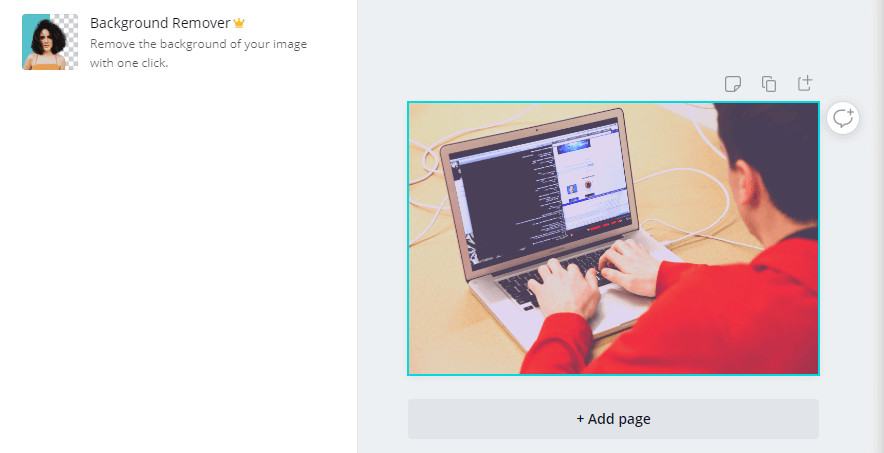 Background remover effect in Canva premium feature
Alt text: Canva’s background remover effect being applied to an image, demonstrating the premium feature for isolating subjects from their backgrounds.
However, even with the free version, the combination of filters and adjustment tools provides ample creative control for enhancing your photos. Canva’s user-friendly interface ensures that applying these edits is straightforward, even for those without prior photo editing experience.
Step 4: Unleash Creativity – Adding Elements and Text
What sets Canva apart is its integration of photo editing with graphic design capabilities. While editing your photo, you have access to Canva’s extensive library of design elements, allowing you to transform a simple photo into a dynamic visual.
By navigating to the “Elements” tab in the left-hand menu, you can browse through a vast collection of icons, illustrations, shapes, and even animations to overlay on your photos.
Simply select an element, drag it onto your image, and resize or reposition it as needed. These elements can add context, decoration, or visual interest to your photos, making them more engaging and informative.
Adding text to your photos is equally simple. The “Text” tab offers various text styles, from headings to body text, and pre-designed font combinations.
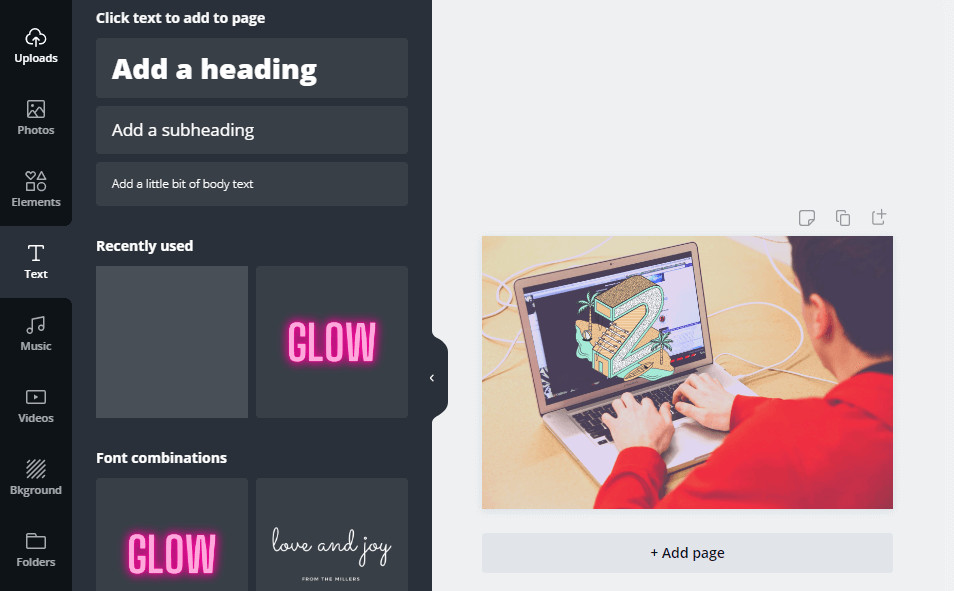 Adding text to an image in Canva editor
Alt text: Canva’s text tool interface showing font style options and text being added to an image, illustrating text overlay capabilities.
You can easily add text to create captions, add branding, or convey messages directly within your images. Combining text and graphic elements with your edited photos opens up a world of creative possibilities for social media content, marketing materials, and more.
Beyond the Basics: Exploring Canva’s Design Features
While this guide focuses on photo editing, remember that Canva is a comprehensive design platform. Once you’ve mastered the basics of photo editing, explore other Canva features to further enhance your visuals. You can experiment with:
- Templates: Use Canva’s templates to place your edited photos within pre-designed layouts for social media posts, flyers, and more.
- Backgrounds: Change or enhance photo backgrounds using Canva’s background library or by uploading your own.
- Collaboration: Share your designs and collaborate with others directly within Canva.
Conclusion
Canva’s photo editor provides a fantastic entry point into the world of image manipulation and design. It’s an ideal tool for bloggers, social media marketers, and anyone looking to quickly enhance their photos for online use. While it may not match the depth of professional-grade software, Canva’s ease of use, combined with its robust set of features – even in the free version – makes it an invaluable asset for creating visually appealing content.
If you’re looking for a user-friendly, free (with premium options) tool to edit photos and create stunning graphics, Canva is definitely worth exploring. Its intuitive interface and versatile features empower you to enhance your photos and unleash your creativity without a steep learning curve.
Have you tried editing photos in Canva? What are your favorite features? Share your experiences in the comments below!
Article thumbnail image by 200dgr / shutterstock.com