Are you looking to enhance your iPhone photos but feeling lost with the editing tools? You’re not alone. Many users, especially after iOS updates, find themselves puzzled by the photo editing process on their iPhones. This guide will walk you through everything you need to know about how to edit photos directly on your iPhone, making your snapshots truly shine.
Understanding the Basics of iPhone Photo Editing
The iPhone’s built-in Photos app offers a surprisingly robust set of editing tools, perfect for quick enhancements and more detailed adjustments. Whether you’re a casual user or aiming for a more polished look, understanding these tools is the first step.
Accessing the Edit Function
Finding the edit function is the initial hurdle for many. In the Photos app, select the photo you wish to edit. Look at the bottom of your screen; you’ll see a cluster of icons in the middle. The Edit button is represented by the icon with three sliders. Tap this icon to enter the photo editing interface.
Once you tap the sliders icon, you’ll notice a range of editing options at the bottom of your screen. These are categorized into:
- Adjust: This section provides tools for fine-tuning your photo’s Light, Color, and B&W (Black and White).
- Filters: Apply preset filters to quickly change the mood and style of your image.
- Crop: Adjust the composition, straighten horizons, and change the aspect ratio of your photo.
Diving into the Adjust Tools
The Adjust section is where you can make detailed enhancements to your photos. Let’s explore the main tools within this section:
Light Adjustments
Under Light, you’ll find controls to modify the overall brightness and contrast of your image. Key adjustments include:
- Exposure: Brighten or darken the entire image.
- Brilliance: Intelligently adjusts shadows and highlights to reveal more detail without overexposing highlights or underexposing shadows.
- Highlights: Adjust the brightness of the brightest areas in your photo.
- Shadows: Adjust the brightness of the darkest areas in your photo, bringing out detail in shadows.
- Contrast: Modify the difference between the light and dark areas, impacting the image’s dynamism.
- Brightness: Similar to Exposure but often affects mid-tones more.
- Black Point: Sets the darkest point in your image, influencing the overall tone.
Experiment with these sliders to achieve the desired lighting for your photo. Subtle adjustments can often make a significant difference.
Color Adjustments
The Color section allows you to refine the colors in your photo, enhancing vibrancy and correcting color casts. Key adjustments include:
- Saturation: Controls the intensity of colors in your image.
- Vibrance: Similar to Saturation but more intelligently boosts muted colors while protecting already saturated tones.
- Warmth: Adjust the color temperature, making your photo warmer (more yellow) or cooler (more blue).
- Tint: Correct green or magenta color casts.
- Sharpness: Increase the clarity and definition of edges and details in your photo.
- Definition: Enhances texture and detail, particularly in mid-tones.
- Noise Reduction: Reduces graininess or unwanted noise, especially in low-light photos.
Use these tools to make your colors pop or to achieve a more balanced and natural look.
Black & White Adjustments
For classic monochrome looks, the B&W section offers specialized controls:
- Intensity: Adjust the overall strength of the black and white effect.
- Neutrals: Control the brightness of neutral tones in the black and white conversion.
- Tones: Adjust the contrast and tonal range within the black and white image.
- Grain: Add artificial film grain for a vintage or artistic effect.
Black and white editing can dramatically transform your photos, emphasizing form and texture.
Utilizing Filters for Quick Styles
If you’re looking for fast and stylish edits, the Filters section is your go-to. iPhone offers a range of built-in filters that can instantly change the mood and aesthetic of your photos. Simply tap on a filter to apply it, and use the slider to adjust its intensity. Filters are a great starting point, and you can further refine the look using the Adjust tools afterward.
Cropping and Straightening
The Crop tool is essential for improving composition and fixing perspective issues.
- Straighten: Use the dial to level horizons and correct tilted images.
- Crop: Drag the corners to reframe your photo, removing unwanted elements and focusing on the subject.
- Aspect Ratio: Choose from preset aspect ratios or keep it free to maintain the original proportions. You can also flip your image horizontally or vertically within the Crop tool.
Good cropping can dramatically improve the impact of your photos.
Accessing Third-Party Editing Apps
While the built-in tools are powerful, you might want to use specialized third-party photo editing apps for more advanced features. To access these apps directly from the Photos app:
- Edit a Photo: Open a photo and tap the “Edit” (sliders) icon.
- Tap the Three Dots: Look for a circle with three dots “…” in the top right corner of the edit screen. Tap it.
- Select “Extensions”: In the drop-down menu, choose “Extensions.”
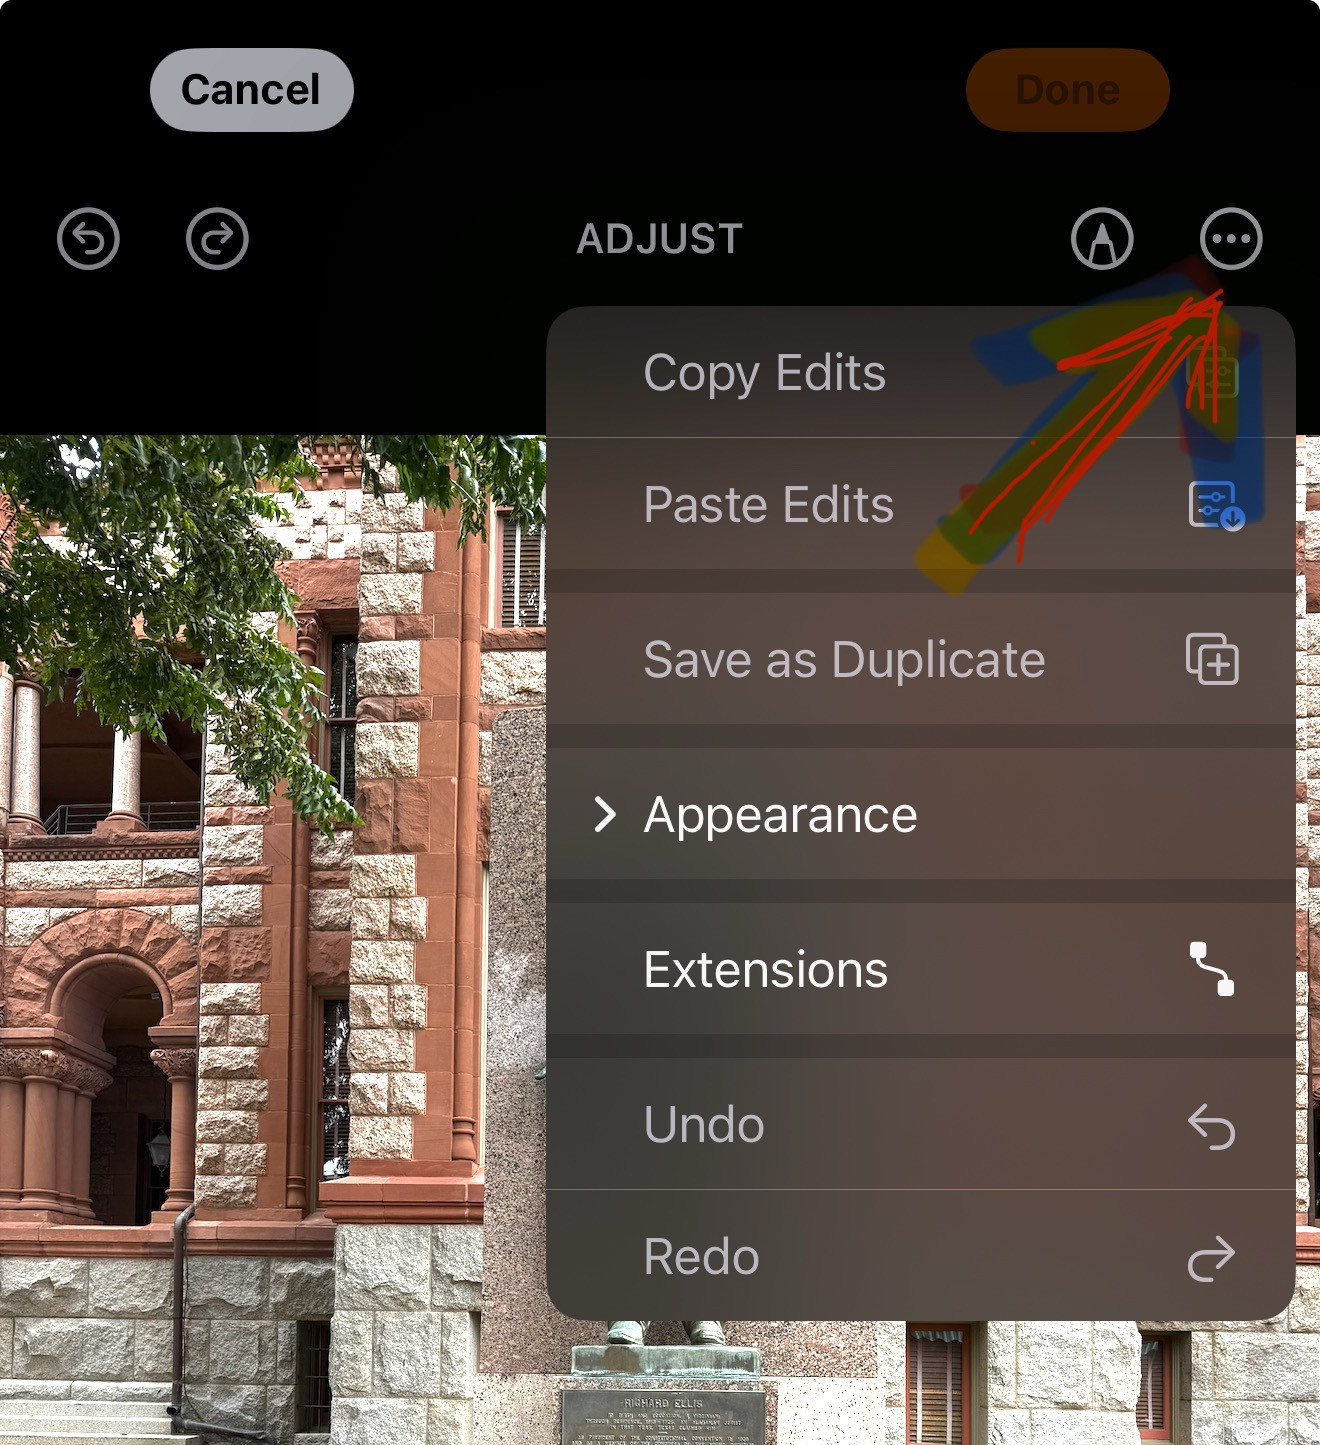 iPhone edit extensions menu
This will display a list of compatible photo editing apps installed on your iPhone. Select your desired app to open your photo in that app for further editing. Many popular apps like Adobe Lightroom Mobile, VSCO, and Snapseed can be accessed this way.
Troubleshooting Common Editing Issues
Some users have reported issues with photo editing after iOS updates. Here are a few common problems and potential solutions:
- “Edit” button missing: Ensure you are in the Photos app and have selected a specific photo. The edit icon (sliders) should always be present at the bottom center when viewing a photo. If it’s truly missing, restarting your iPhone might resolve temporary glitches.
- Loading issues during editing: This could be due to processing large image files or temporary software bugs. Try closing and reopening the Photos app. Ensure you have sufficient storage space on your iPhone. If the problem persists, check for iOS updates and install the latest version.
- Difficulty finding albums: Apple has reorganized the Photos app in recent updates. Scroll down in the Photos app to find your albums under the “Albums” section. You can also use the “Search” tab to quickly locate specific albums or photos.
Tips for Better iPhone Photo Editing
- Start with subtle adjustments: Avoid over-editing. Small tweaks often produce the most natural and pleasing results.
- Utilize Brilliance: This tool is excellent for quickly improving dynamic range and revealing detail in both shadows and highlights.
- Experiment with filters: Filters can be a quick way to find a style, but don’t rely on them exclusively. Use them as a starting point and fine-tune with Adjust tools.
- Learn about composition: Understanding basic composition principles like the rule of thirds can greatly enhance your photos before you even start editing.
- Practice regularly: The more you edit, the better you’ll become at recognizing what adjustments your photos need.
Conclusion
Editing photos on your iPhone is a powerful way to enhance your visual storytelling. By understanding the built-in tools and how to access them, you can transform your everyday snapshots into impressive images. Don’t be afraid to experiment and explore the different features to discover your own editing style. With a little practice, you’ll be editing photos like a pro right on your iPhone.