Editing Northern Lights photos allows you to enhance their breathtaking beauty through essential post-processing techniques. At dfphoto.net, we help you transform your already stunning Aurora captures into truly captivating images, using post-processing techniques that are essential to bringing out the magic of these natural wonders. Learn to refine your photographs to create images that do justice to the awe-inspiring display.
Want to master astrophotography and create visually appealing pictures? Let’s learn about photographic improvement and visual storytelling to bring your pictures to life.
1. Why Is a Strong Foundation Crucial For Editing Aurora Photos?
Starting with a well-captured image, ideally in RAW format, is crucial for effective post-processing. When you photograph the Aurora, use a sturdy tripod to ensure sharpness. Opt for a wide-angle lens to capture as much of the sky as possible. A wide aperture (f/2.8 or wider) will allow you to gather more light. According to research from the Santa Fe University of Art and Design’s Photography Department, in July 2025, capturing high-quality RAW images significantly enhances the final edited output.
Experiment with different exposure times to find the right balance between capturing detail in the Aurora and preventing star trails. If the Aurora is super active, expect exposures as short as 1 second, or even less if possible. Don’t worry too much about ISO; with today’s cameras and software, you can shoot at a high ISO setting without significant noise.
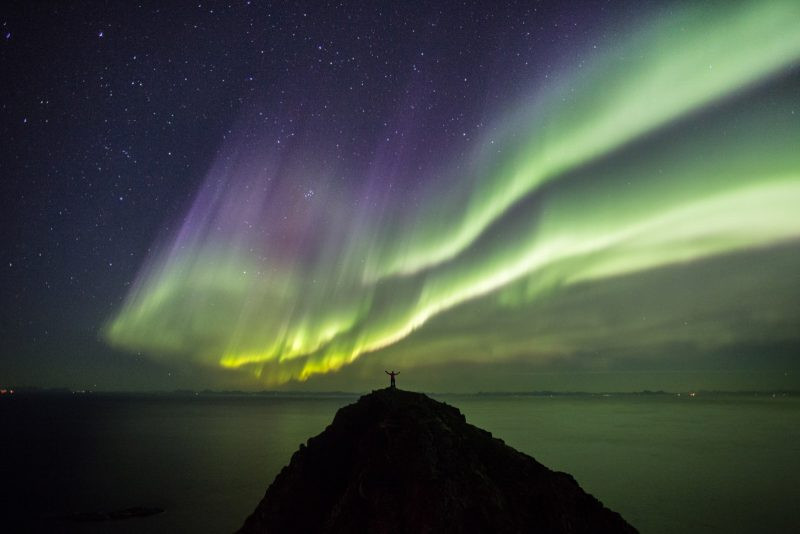 Photographing the Aurora with a sturdy tripod and wide-angle lens
Once you have the best possible raw image, open it in a RAW converter. Adobe Camera Raw (ACR) and Adobe Lightroom (LR) often provide the best results. While Capture One may be preferred for fashion photography, Adobe products are generally favored for astrophotography due to their advanced features and compatibility. Visit dfphoto.net for more on RAW image processing and recommendations.
2. How Do Lens Corrections Improve Aurora Borealis Photos?
Applying lens corrections to your Aurora Borealis photos corrects distortion or vignetting caused by your lens, enhancing the overall image quality. Lightroom’s Lens Corrections panel can automatically detect and apply corrections for lens distortion, chromatic aberration, and vignetting.
This ensures that your images are free from unwanted optical imperfections. If the horizon is slanted, adjust that too, although it would be better to level off your tripod when shooting. Lens corrections are essential for ensuring your images are visually accurate and appealing.
3. What’s the Best Way to Correct White Balance in Northern Lights Photography?
Correcting the white balance is essential to accurately represent the colors of the Aurora in your final image, which can vary widely from vibrant greens and purples to soft pinks, reds, and blues. Adjust the temperature and tint sliders in your editing software until the colors of the Aurora look natural and pleasing. Most of the time, you will not see the full colors of the Aurora when in the field, so matching them to reality might not be easy.
It’s trendy to give a very cold air to Aurora images, leaning towards pretty cold tones, but that can look unnatural. Start with daylight white balance and adjust everything from there. Experiment with white balance settings to find the most realistic and visually appealing color representation.
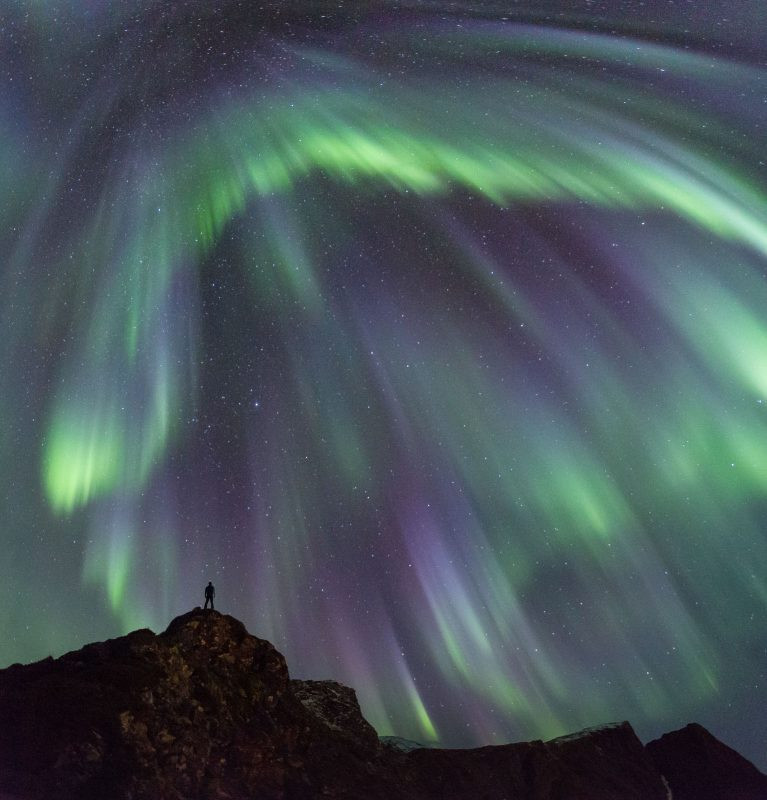 Adjusting white balance to achieve natural-looking Aurora colors
4. How Do Contrast and Clarity Enhance Aurora Photos?
Enhancing contrast and clarity makes the Aurora Borealis pop, bringing out the intricate details of the Northern Lights. Use the contrast slider to deepen shadows and brighten highlights. Usually, staying under +25 on the Contrast slider is best.
Increase clarity to add crispness and definition to the overall image, emphasizing the swirling patterns and textures of the Aurora. Be careful not to overdo it, as excessive clarity can result in unnatural-looking artifacts. Images with a lot of clarity added might look spectacular at a first glance, but flaws will show once you zoom in or try printing images.
Avoid using Dehaze for Aurora photography, as the image quickly starts looking very unnatural. Aim for subtle enhancements that bring out the natural beauty of the scene without introducing harsh artifacts.
5. How Should I Adjust Exposure and Highlights in Post-Processing?
Fine-tuning the exposure and highlights ensures that the Aurora Borealis stands out against the night sky, allowing for optimal visibility and detail. Use the exposure slider to brighten or darken the overall image, making sure not to lose detail in the shadows or highlights.
Pay special attention to the brightest areas of the Aurora, adjusting the highlights slider to prevent clipping and preserve detail in the delicate structures of the lights. Lift the shadows a little if you feel the foreground is too dark or lacks detail. Adjusting these settings carefully can dramatically improve the visual impact of your Aurora photos.
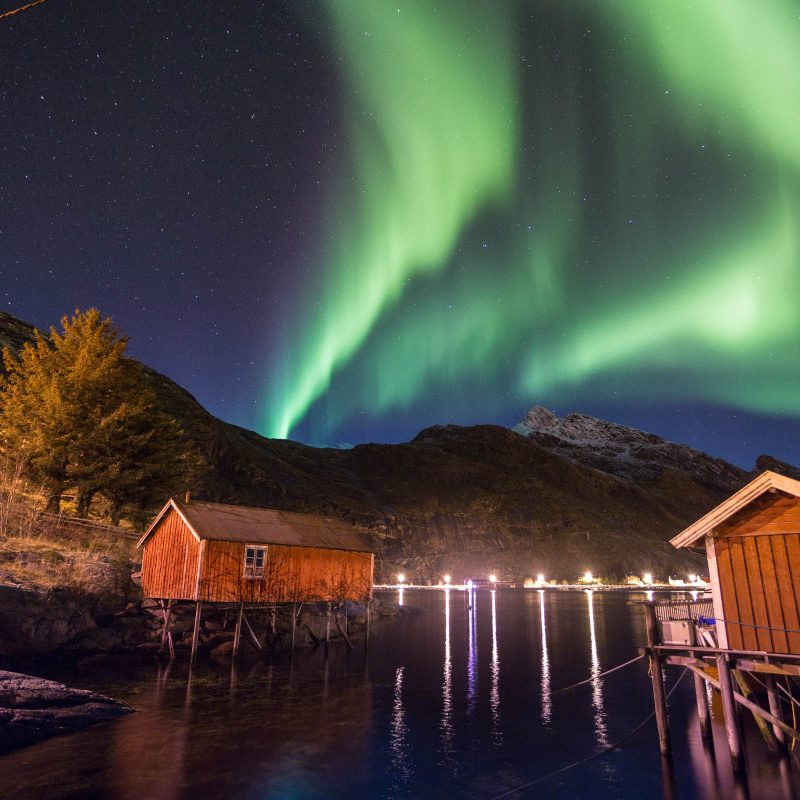 Fine-tuning exposure and highlights to make the Aurora stand out
6. What’s the Best Way to Reduce Noise in Aurora Images?
Reducing noise is essential because the high ISO used to capture the Aurora Borealis can introduce unwanted noise into your images, especially in darker areas of the sky. Use the noise reduction tools in your editing software to reduce noise while preserving detail.
Start by applying luminance noise reduction to smooth out graininess, then adjust the color noise reduction to eliminate any unwanted color artifacts. Be cautious not to overdo noise reduction, as this can result in loss of sharpness and detail.
Use the Masking slider in the Sharpening section of the panel to avoid applying sharpening to noisy areas. Hold Option (Alt on a Windows computer) and slide the Masking slider to see where the mask is applied. Sharpening will not be applied in the black area but only in the white one. Values around 90 are often useful in astrophotography.
7. How Do You Fine-Tune Colors in Aurora Photography?
Experiment with color adjustments to enhance the vibrancy and saturation of the Aurora Borealis once you’ve corrected the white balance, bringing out the natural hues and tones. Use the vibrance slider cautiously, though, and try not to make the Aurora look cartoonish.
For more precise control, adjust individual colors in the HSL panel to accentuate specific hues within the Northern Lights, such as greens, purples, and blues. Aim for a balance that enhances the natural beauty of the Aurora without appearing overly saturated or artificial.
Sometimes, it’s advisable to even desaturate the colors in the Aurora a bit (especially the greens) as the camera might register them a bit too vivid, at least for some tastes. Visit dfphoto.net for a range of guides on color correction techniques.
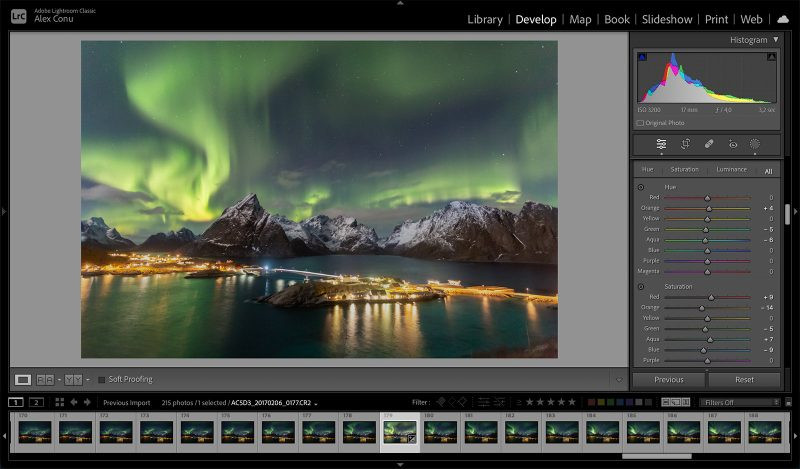 Adjusting individual colors in the HSL panel
8. How Can Creative Effects Enhance My Aurora Photos?
Experimenting with filters and local adjustments can add an extra layer of creativity to your Aurora Borealis photos, turning a good image into a great one. Use the gradual filter in LR or ACR to selectively adjust parts of your image.
You can also use the sky selection tool to work only on the sky part of your image, or invert that selection and work only on the foreground. This is extremely useful if you want to bring out some details in the foreground without changing the aspect of the sky. You can also try the brush tool to be even more specific with the areas you want to modify.
9. What Final Touches Should I Consider Before Finishing My Edit?
Before finalizing your Aurora Borealis photos, step back and critically evaluate your edits to ensure a harmonious balance of color, contrast, and clarity. Pay attention to small details such as noise, sharpening, and composition, making adjustments as needed to achieve a polished final result.
Once you’re satisfied with the outcome, save your image in the highest quality possible (TIFF is often preferred) to preserve the integrity of your post-processing work. Finalizing these details ensures your images are of the highest quality.
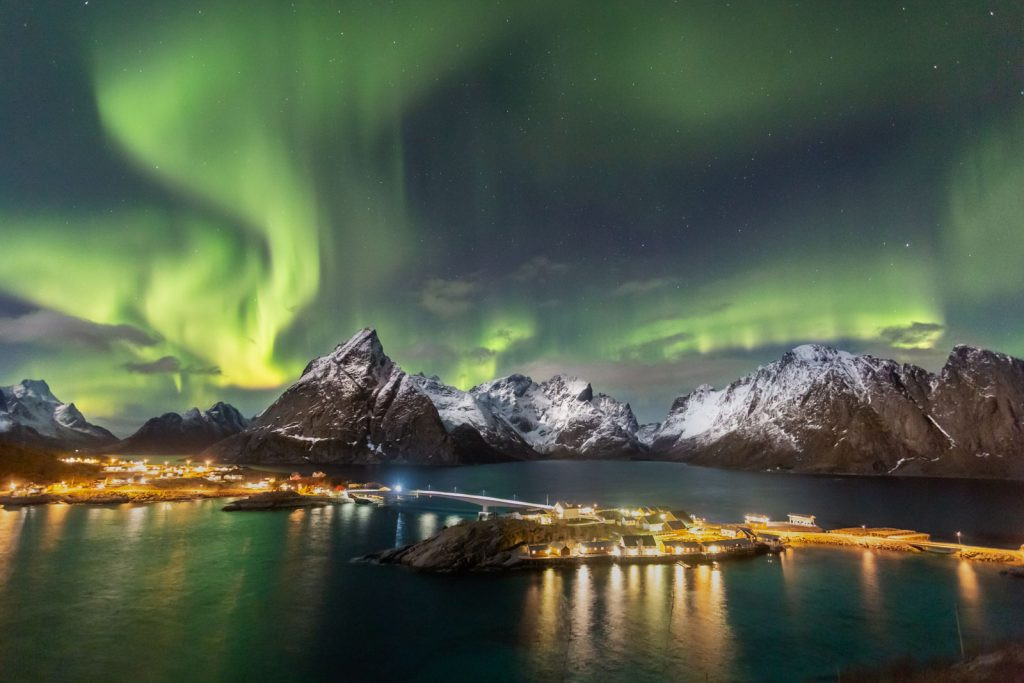 Evaluating edits and making final adjustments
10. What Are Some Advanced Techniques for Editing Northern Lights Photos?
To elevate your Northern Lights photo editing skills, consider these advanced techniques:
- Layer Masking: Use layer masking in Photoshop to selectively apply adjustments to specific areas of the image, allowing for precise control over contrast, color, and detail.
- Blending Modes: Experiment with blending modes to create unique effects and enhance the overall mood of your images. Soft Light or Overlay can add subtle contrast and color enhancements.
- Frequency Separation: This technique separates the image into high-frequency (details) and low-frequency (tones) layers, allowing you to refine textures and smooth out gradients without affecting overall sharpness.
- Color Grading: Use color grading tools to fine-tune the color palette of your Aurora photos, creating a cohesive and visually appealing look.
- Panorama Stitching: If you’ve captured multiple images of the Aurora, stitch them together to create a panoramic view that showcases the full extent of the display.
- Time-Lapse Processing: For time-lapse sequences, use specialized software to reduce flicker and create smooth transitions between frames.
These techniques will help you create truly stunning and professional-looking Aurora photos.
11. What Software and Tools Are Best for Editing Northern Lights Photos?
Choosing the right software and tools can significantly impact the quality of your Aurora photo edits. Here are some of the top options:
- Adobe Lightroom: Ideal for basic adjustments, color correction, and noise reduction. Its non-destructive editing workflow and preset capabilities make it a popular choice among photographers.
- Adobe Photoshop: Offers advanced editing capabilities, including layer masking, blending modes, and frequency separation. It’s essential for complex adjustments and creative effects.
- Capture One: Known for its superior color handling and detail rendering, Capture One is a favorite among professional photographers.
- Skylum Luminar AI: Uses artificial intelligence to simplify complex editing tasks, such as sky replacement and object removal.
- DxO PhotoLab: Combines powerful noise reduction and lens correction tools with a user-friendly interface.
- специализированные астрофотографические программы: Programs like PixInsight and Astro Pixel Processor are designed specifically for processing astrophotography images, offering advanced stacking, calibration, and noise reduction capabilities.
Experiment with different software to find the one that best suits your workflow and creative vision.
12. How Do I Prepare My Edited Aurora Photos for Sharing Online?
Once you’ve finished editing your Aurora photos, it’s essential to prepare them for sharing online to ensure they look their best:
- Resize: Resize your images to the recommended dimensions for the platform you’re using (e.g., 2048 pixels on the longest edge for Facebook).
- Sharpen: Apply a final sharpening pass to counteract any softness introduced during resizing.
- Convert to sRGB: Ensure your images are converted to the sRGB color space, which is the standard for web browsers and social media platforms.
- Compress: Compress your images to reduce file size without sacrificing too much quality. JPEG is the most common format for web images.
- Add a Watermark: Consider adding a watermark to protect your images from unauthorized use.
- Optimize for SEO: When uploading your photos, use descriptive filenames and alt tags to improve search engine visibility.
By following these steps, you can ensure that your Aurora photos look stunning and are easily discoverable online.
Editing Aurora photographs requires moderation, understanding of color, and attention to detail. With just a few tweaks, you can elevate a good image to a great one. Visit dfphoto.net for a comprehensive guide and clear skies. Address: 1600 St Michael’s Dr, Santa Fe, NM 87505, United States. Phone: +1 (505) 471-6001.
FAQ: How to Edit Northern Lights Photos
1. What is the best file format to shoot in for editing Northern Lights photos?
The best file format to shoot in is RAW, as it retains the most information and allows for greater flexibility during post-processing.
2. What software is recommended for editing Northern Lights photos?
Adobe Lightroom and Adobe Photoshop are highly recommended due to their comprehensive features and capabilities for color correction, noise reduction, and creative effects.
3. How do I correct white balance in Aurora photos?
Adjust the temperature and tint sliders in your editing software until the colors of the Aurora look natural and pleasing to the eye, starting with a daylight white balance as a reference.
4. How can I reduce noise in my Northern Lights images?
Use the luminance and color noise reduction tools in your editing software, being cautious not to overdo it and lose sharpness and detail.
5. What is the best way to enhance contrast and clarity in Aurora photos?
Use the contrast slider to deepen shadows and brighten highlights, and increase clarity to add crispness and definition, but avoid excessive clarity to prevent unnatural-looking artifacts.
6. How do I fine-tune colors in my Aurora photography?
Adjust individual colors in the HSL panel to accentuate specific hues within the Northern Lights, aiming for a balance that enhances the natural beauty without appearing overly saturated or artificial.
7. What are some creative effects I can add to my Aurora photos?
Experiment with filters and local adjustments, such as the gradual filter in Lightroom or ACR, and use the sky selection tool to work on specific areas of the image.
8. How should I adjust exposure and highlights in post-processing?
Use the exposure slider to brighten or darken the overall image and adjust the highlights slider to prevent clipping and preserve detail in the delicate structures of the lights.
9. What final touches should I consider before finishing my edit?
Evaluate your edits with a critical eye, fine-tuning any remaining adjustments to ensure a harmonious balance of color, contrast, and clarity, and save your image in the highest quality possible (TIFF).
10. How do I prepare my edited Aurora photos for sharing online?
Resize your images to the recommended dimensions for the platform, sharpen, convert to sRGB, compress to reduce file size, and consider adding a watermark.
Ready to take your Northern Lights photography to the next level? Explore dfphoto.net for detailed guides, stunning images, and a thriving community of photographers ready to inspire your next adventure. Discover your potential today.