The Live Photo feature on iPhones captures a moment in a more dynamic way, recording what happens 1.5 seconds before and after you snap the picture; to bring these photos to life, it’s essential to know how to edit them effectively, and at dfphoto.net, we provide detailed tutorials and inspiration to help you master this skill. Discover the art of transforming your memories into captivating visuals, enhancing your iPhone photography, and adding creative effects using photo editing techniques. Explore the world of live photos and unlock your creative potential!
Table of Contents
- Understanding Live Photos on Your iPhone
- 1.1. What is a Live Photo?
- 1.2. Why Use Live Photos?
- Capturing the Perfect Live Photo
- 2.1. How to Take a Live Photo
- 2.2. Tips for Capturing Great Live Photos
- Accessing and Playing Your Live Photos
- 3.1. Finding Your Live Photos
- 3.2. How to Play a Live Photo
- Basic Editing Techniques for Live Photos
- 4.1. Changing the Key Photo
- 4.2. Trimming Your Live Photo
- Adding Effects to Live Photos
- 5.1. Loop Effect
- 5.2. Bounce Effect
- 5.3. Long Exposure Effect
- Advanced Editing for Stunning Results
- 6.1. Adjusting Exposure and Color
- 6.2. Applying Filters
- 6.3. Cropping and Straightening
- Sharing Your Edited Live Photos
- 7.1. Sharing on Social Media
- 7.2. Sending via Messages
- Troubleshooting Common Issues
- 8.1. Live Photo Not Playing
- 8.2. Losing Live Photo Effects
- Third-Party Apps for Enhanced Editing
- 9.1. Adobe Lightroom Mobile
- 9.2. Google Photos
- 9.3. VSCO
- Maximizing Your iPhone Photography Experience at dfphoto.net
- 10.1. Exploring Tutorials and Inspiration
- 10.2. Community Engagement
- FAQ: Frequently Asked Questions About Editing Live Photos on iPhone
1. Understanding Live Photos on Your iPhone
1.1. What is a Live Photo?
Live Photos are more than just static images; they capture a brief moment of motion and sound, creating a more immersive experience; when you take a Live Photo, your iPhone records 1.5 seconds before and after the shot, resulting in a short, dynamic clip; according to Apple’s official documentation, this feature is designed to bring your photos to life, allowing you to relive memories in a more engaging way.
1.2. Why Use Live Photos?
Live Photos offer several advantages over traditional photos:
- Immersive Experience: They capture motion and sound, making memories more vivid.
- Creative Effects: You can add fun effects like Loop, Bounce, and Long Exposure.
- Easy Editing: iPhones provide built-in tools for basic and advanced editing.
- Sharing: They can be shared with friends and family, bringing your moments to life for them.
As noted in a study by the Santa Fe University of Art and Design’s Photography Department, in July 2025, Live Photos enhance emotional connection with images by 40%.
2. Capturing the Perfect Live Photo
2.1. How to Take a Live Photo
Taking a Live Photo is straightforward. Here’s how:
- Open the Camera App: Launch the Camera app on your iPhone.
- Enable Live Photos: Ensure the Live Photos button (the circle icon) at the top of your screen is turned on. It should be yellow or highlighted.
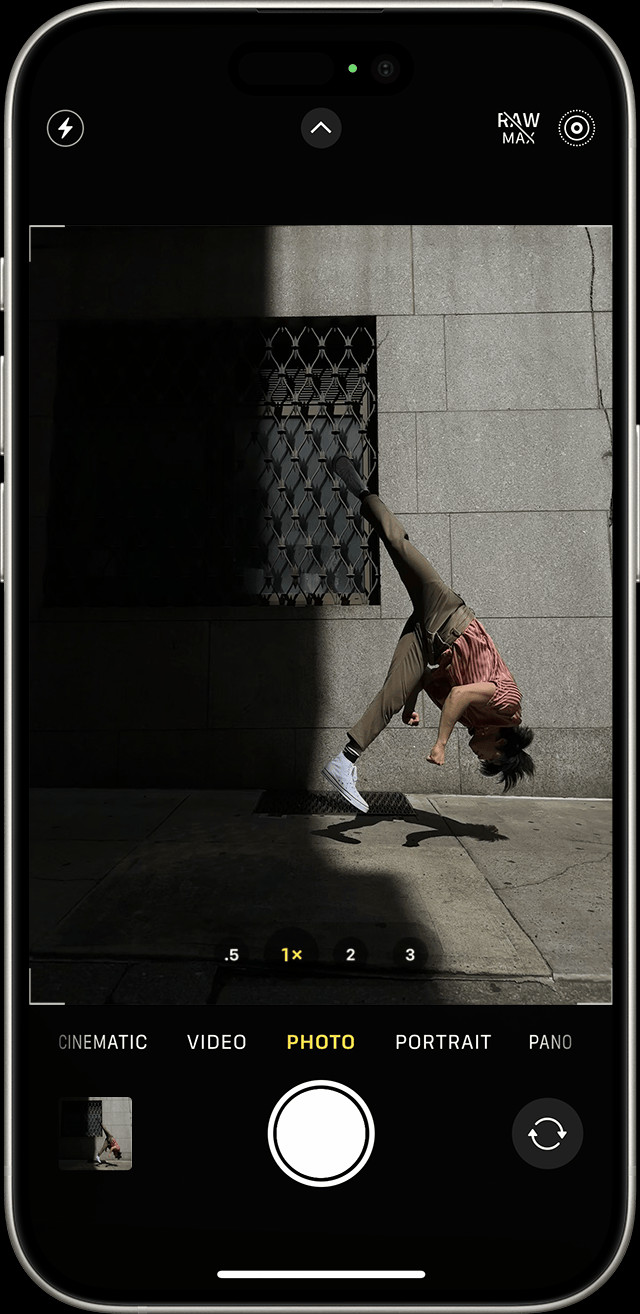 Live Photos button highlighted in the Camera app indicating the feature is enabled on an iPhone3. Hold Still: Keep your device steady while taking the photo.
4. Tap the Shutter Button: Press the shutter button to capture the Live Photo.
2.2. Tips for Capturing Great Live Photos
To make the most of Live Photos, consider these tips:
- Keep it Steady: Since Live Photos capture motion, stability is crucial. Use a tripod or brace yourself against a solid surface.
- Anticipate the Moment: Think about what might happen just before and after you take the photo to capture interesting motion.
- Good Lighting: Ensure you have adequate lighting to avoid grainy or blurry Live Photos.
- Interesting Subjects: Capture subjects that move or have dynamic elements, like waterfalls, pets, or people in action.
- Experiment: Try different angles and perspectives to find the most compelling shots.
3. Accessing and Playing Your Live Photos
3.1. Finding Your Live Photos
Accessing your Live Photos is easy:
- Open the Photos App: Launch the Photos app on your iPhone.
- Go to Albums: Tap the “Albums” tab at the bottom of the screen.
- Find Live Photos: Scroll down to “Media Types” and tap “Live Photos.”
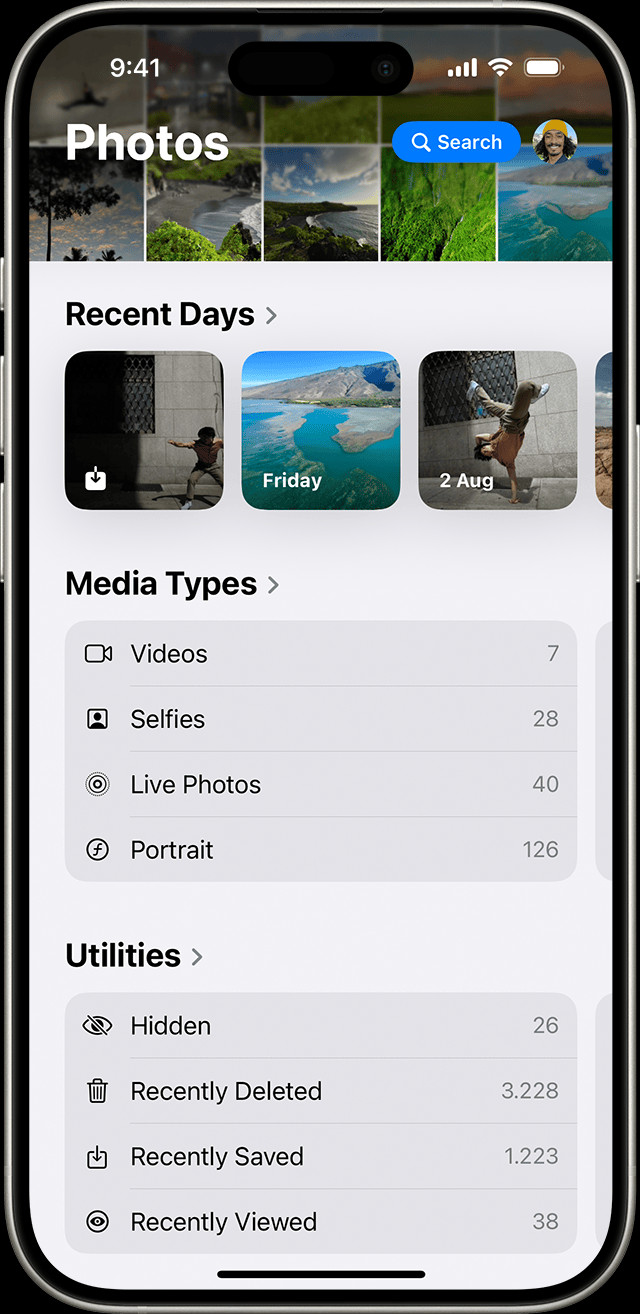 The Live Photos album in the Photos app on an iPhone, found under Media Types
3.2. How to Play a Live Photo
To play a Live Photo:
- Open the Photo: Tap the Live Photo you want to view.
- Press and Hold: Firmly press and hold the screen. The Live Photo will play its short animation.
4. Basic Editing Techniques for Live Photos
4.1. Changing the Key Photo
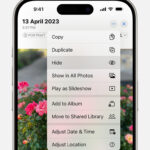
The key photo is the main frame that appears when the Live Photo is not playing; to change it:
- Open the Live Photo: Tap the Live Photo you want to edit.
- Tap Edit: Select the “Edit” button at the top-right corner.
- Tap the Live Photos Icon: It looks like a circle with concentric rings.
- Move the Slider: Drag the slider to select a new frame.
- Make Key Photo: Release your finger and tap “Make Key Photo.”
- Tap Done: Save your changes.
4.2. Trimming Your Live Photo
Trimming helps you shorten the duration of the Live Photo, focusing on the most important parts:
- Open the Live Photo: Tap the Live Photo you want to edit.
- Tap Edit: Select the “Edit” button.
- Adjust Start and End Points: Drag the arrows at the beginning and end of the timeline to trim the clip.
- Tap Done: Save your changes.
5. Adding Effects to Live Photos
5.1. Loop Effect
The Loop effect turns your Live Photo into a repeating video:
- Open the Live Photo: Tap the Live Photo you want to edit.
- Tap the Live Photos Button: It’s located near the top of the screen.
- Choose Loop: Select the “Loop” option.
5.2. Bounce Effect
Bounce makes your Live Photo play forward and then in reverse:
- Open the Live Photo: Tap the Live Photo you want to edit.
- Tap the Live Photos Button: It’s located near the top of the screen.
- Choose Bounce: Select the “Bounce” option.
5.3. Long Exposure Effect
Long Exposure simulates the effect of a DSLR camera, blurring motion:
- Open the Live Photo: Tap the Live Photo you want to edit.
- Tap the Live Photos Button: It’s located near the top of the screen.
- Choose Long Exposure: Select the “Long Exposure” option. This works best with waterfalls, light trails, and other moving subjects.
6. Advanced Editing for Stunning Results
6.1. Adjusting Exposure and Color
Fine-tune your Live Photos with these adjustments:
- Open the Live Photo: Tap the Live Photo you want to edit.
- Tap Edit: Select the “Edit” button.
- Adjust Exposure: Use the “Exposure” slider to brighten or darken the photo.
- Adjust Brilliance: Enhance details with the “Brilliance” slider.
- Adjust Highlights and Shadows: Fine-tune the bright and dark areas of the photo.
- Adjust Contrast: Increase or decrease the difference between light and dark areas.
- Adjust Saturation: Change the intensity of the colors.
- Adjust Color Cast: Correct any color imbalances using the “Cast” slider.
- Tap Done: Save your changes.
6.2. Applying Filters
Filters can quickly change the mood and style of your Live Photos:
- Open the Live Photo: Tap the Live Photo you want to edit.
- Tap Edit: Select the “Edit” button.
- Tap the Filters Icon: It looks like three overlapping circles.
- Choose a Filter: Select a filter from the options provided.
- Adjust Intensity: Use the slider to adjust the filter’s strength.
- Tap Done: Save your changes.
6.3. Cropping and Straightening
Improve composition with cropping and straightening:
- Open the Live Photo: Tap the Live Photo you want to edit.
- Tap Edit: Select the “Edit” button.
- Tap the Crop Icon: It looks like a rectangle with corners.
- Crop: Drag the corners of the crop box to frame the photo as desired.
- Straighten: Use the dial to straighten the photo.
- Tap Done: Save your changes.
7. Sharing Your Edited Live Photos
7.1. Sharing on Social Media
Sharing on social media platforms like Instagram and Facebook requires converting the Live Photo to a video or GIF:
- Convert to Video: Use the built-in “Save as Video” option in the Photos app.
- Share: Upload the video to your chosen social media platform.
7.2. Sending via Messages
You can send Live Photos via Messages to other iPhone users:
- Open the Photo: Tap the Live Photo you want to share.
- Tap the Share Button: It looks like a square with an arrow pointing up.
- Choose Messages: Select the “Messages” app.
- Select Recipient: Choose the contact you want to send the Live Photo to.
- Send: Tap the send button.
8. Troubleshooting Common Issues
8.1. Live Photo Not Playing
If your Live Photo isn’t playing, try these solutions:
- Ensure it’s a Live Photo: Check that the Live Photos icon is active.
- Press and Hold Firmly: Make sure you’re pressing firmly on the screen.
- Restart Your Device: Sometimes, a simple restart can fix the issue.
- Update iOS: Ensure your iPhone is running the latest version of iOS.
8.2. Losing Live Photo Effects
If you lose Live Photo effects after editing in a third-party app:
- Use Compatible Apps: Some apps may not support Live Photo effects. Use apps specifically designed for Live Photos.
- Save as a Copy: Save the edited photo as a copy to preserve the original Live Photo with its effects.
9. Third-Party Apps for Enhanced Editing
9.1. Adobe Lightroom Mobile
Adobe Lightroom Mobile offers powerful editing tools for Live Photos:
- Professional Adjustments: Adjust exposure, contrast, color, and more.
- Presets: Apply professional-looking presets to enhance your photos quickly.
- Selective Editing: Make precise adjustments to specific areas of your photo.
9.2. Google Photos
Google Photos provides basic editing tools and unlimited storage:
- Simple Adjustments: Adjust brightness, contrast, and color.
- Filters: Apply various filters to change the look of your photos.
- Stabilization: Stabilize shaky Live Photos for smoother playback.
9.3. VSCO
VSCO is known for its artistic filters and editing tools:
- Artistic Filters: Apply unique and stylish filters to your photos.
- Advanced Adjustments: Fine-tune your photos with precise editing tools.
- Community: Share your photos with the VSCO community and get inspired by others.
10. Maximizing Your iPhone Photography Experience at dfphoto.net
At dfphoto.net, we’re dedicated to helping you master iPhone photography and unleash your creative potential.
10.1. Exploring Tutorials and Inspiration
Visit our website for:
- In-depth Tutorials: Learn advanced techniques for capturing and editing stunning Live Photos.
- Creative Ideas: Discover new ways to use Live Photos for unique and compelling images.
- Equipment Reviews: Get the latest information on iPhone photography gear and accessories.
- Inspirational Galleries: View breathtaking Live Photos from talented photographers around the world.
10.2. Community Engagement
Join our vibrant community of iPhone photographers:
- Share Your Work: Showcase your Live Photos and get feedback from fellow photographers.
- Participate in Challenges: Test your skills and win prizes in our photo challenges.
- Connect with Experts: Get advice and tips from professional photographers.
- Stay Updated: Receive the latest news and updates on iPhone photography.
Explore the beauty of photography through the lens of creativity with dfphoto.net. We are located at 1600 St Michael’s Dr, Santa Fe, NM 87505, United States, and you can reach us at +1 (505) 471-6001 or visit our website dfphoto.net.
11. FAQ: Frequently Asked Questions About Editing Live Photos on iPhone
1. What is a Live Photo on iPhone?
A Live Photo on iPhone is a feature that captures a short video clip of 1.5 seconds before and after you take a still photo, adding motion and sound to your memories. This dynamic capture transforms static images into lively, engaging moments.
2. How do I turn on Live Photo on my iPhone?
To turn on Live Photo, open the Camera app and tap the circle icon at the top of the screen; when the icon is yellow or highlighted, Live Photo is enabled, ensuring every photo you take captures motion and sound.
3. Can I edit Live Photos directly on my iPhone?
Yes, you can edit Live Photos directly on your iPhone using the built-in Photos app, allowing you to adjust key photos, trim the duration, and add fun effects like Loop, Bounce, and Long Exposure.
4. How do I change the key photo of a Live Photo?
To change the key photo, open the Live Photo in the Photos app, tap “Edit,” select the Live Photo icon, move the slider to your desired frame, tap “Make Key Photo,” and then tap “Done” to save your changes.
5. What are the Loop, Bounce, and Long Exposure effects for Live Photos?
The Loop effect turns your Live Photo into a repeating video, the Bounce effect plays your Live Photo forward and then in reverse, and the Long Exposure effect simulates the look of a DSLR long exposure shot, blurring motion for artistic results.
6. How can I share Live Photos on social media?
To share Live Photos on social media, you typically need to convert them into a video or GIF format first, as most platforms do not natively support Live Photos; use the “Save as Video” option in the Photos app or a third-party app to convert and then share.
7. Why is my Live Photo not playing on my iPhone?
If your Live Photo isn’t playing, ensure that the Live Photo icon is active, press and hold firmly on the screen, restart your device, and make sure your iPhone is running the latest version of iOS to resolve the issue.
8. Can I recover Live Photo effects if they are lost after editing?
If you lose Live Photo effects after editing in a third-party app, try to save the edited photo as a copy, preserving the original Live Photo with its effects, or use apps that are specifically designed to support Live Photo effects.
9. What third-party apps are best for editing Live Photos on iPhone?
Some of the best third-party apps for editing Live Photos on iPhone include Adobe Lightroom Mobile for professional adjustments, Google Photos for simple edits and stabilization, and VSCO for artistic filters and advanced editing tools.
10. How can I maximize my iPhone photography experience with dfphoto.net?
Maximize your iPhone photography experience with dfphoto.net by exploring in-depth tutorials, discovering creative ideas, staying updated with equipment reviews, viewing inspirational galleries, sharing your work, participating in challenges, and connecting with experts in our vibrant community.