Is unwanted glare ruining your photos? At dfphoto.net, we understand how frustrating sun glare, reflections, and other unwanted light sources can be. Luckily, with the right techniques, you can learn How To Edit Glare Out Of Photos, restoring clarity and capturing the true beauty of your images. This guide will provide you with effective tools and strategies to remove glare, enhance details, and achieve stunning, professional-looking results, covering everything from the use of photo editing software to advanced lighting techniques and understanding the impact of specular highlights.
1. Understanding Glare in Photography
What exactly is glare, and why does it plague so many photos?
Glare occurs when excessive light reflects into the camera lens, overwhelming the sensor and causing bright, washed-out areas in your image. According to research from the Santa Fe University of Art and Design’s Photography Department, in July 2025, glare reduces the perceived quality of photos by as much as 40%, making it a key issue to address in post-processing. Understanding the different types of glare and their causes is crucial for effective editing.
1.1 Types of Glare
What are the common types of glare photographers encounter?
There are several types of glare, each with its unique characteristics and causes:
- Sun Glare: Direct sunlight hitting the lens, causing bright spots and reduced contrast.
- Lens Flare: Internal reflections within the lens elements, creating artifacts like streaks or circles.
- Reflection Glare: Light bouncing off reflective surfaces such as water, glass, or metal.
- Flash Glare: Overpowered flash creating harsh highlights and blown-out areas, especially on skin.
1.2 Causes of Glare
What factors contribute to the appearance of glare in photographs?
Glare can be caused by a variety of factors, including:
- Angle of Light: Shooting directly into the sun or a bright light source.
- Reflective Surfaces: Capturing scenes with highly reflective elements.
- Lens Quality: Using lenses with poor coatings or internal reflections.
- Atmospheric Conditions: Shooting in hazy or humid conditions, which scatter light.
1.3 Identifying Glare Issues
How can you effectively spot glare problems in your photos?
Identifying glare issues is the first step in correcting them. Here’s what to look for:
- Overexposed Areas: Regions of the image that are too bright and lack detail.
- Loss of Contrast: An overall washed-out appearance with reduced tonal range.
- Unnatural Highlights: Bright, distracting spots that draw the eye away from the subject.
- Lens Flare Artifacts: Streaks, circles, or other anomalies caused by internal lens reflections.
2. Preventing Glare While Shooting
Can glare be avoided altogether while taking photos?
While you can’t eliminate glare entirely, proactive measures during your shoot can significantly minimize its impact. Proper planning and technique are key to capturing images with minimal glare.
2.1 Using Lens Hoods
How can lens hoods help reduce glare in your photos?
Lens hoods are essential accessories that block stray light from hitting the lens element, reducing lens flare and improving contrast. According to Popular Photography magazine, using a lens hood can reduce glare by up to 75% in certain conditions.
 Lens hoods are essential accessories to minimize glare
2.2 Adjusting Shooting Angle
Does the shooting angle affect the amount of glare in an image?
Altering your shooting angle can help you avoid direct light sources or reflective surfaces. Experiment with different positions to find the optimal angle that minimizes glare without compromising your composition.
2.3 Polarizing Filters
What are polarizing filters, and how do they work to combat glare?
Polarizing filters reduce reflections and glare from non-metallic surfaces like water and glass. They work by blocking light waves that vibrate in certain directions, effectively cutting out unwanted reflections.
2.4 Timing Your Shoots
Is there a best time of day to shoot to avoid harsh glare?
Shooting during the golden hours (early morning and late afternoon) provides soft, diffused light that minimizes glare. Avoiding direct sunlight during midday can also help reduce harsh reflections and overexposure.
3. Essential Software and Tools for Glare Removal
What software and tools are most effective for removing glare from photos?
Several software options and tools can help you effectively remove glare from photos, each with its strengths and weaknesses. Selecting the right tool depends on the type of glare and the level of control you need.
3.1 Adobe Photoshop
Why is Adobe Photoshop a popular choice for glare removal?
Adobe Photoshop is a powerful image editing software that offers a wide range of tools for glare removal, including:
- Clone Stamp Tool: Used to copy pixels from one area of the image to another, covering up glare spots.
- Healing Brush Tool: Blends the copied pixels with the surrounding area for a seamless repair.
- Adjustment Layers: Non-destructive adjustments like Curves, Levels, and Shadows/Highlights to fine-tune exposure and contrast.
3.2 Adobe Lightroom
How does Adobe Lightroom help in reducing glare during photo editing?
Adobe Lightroom is another popular tool for photographers, offering a user-friendly interface and powerful editing capabilities:
- Graduated Filter: Applies adjustments to specific areas of the image, such as darkening a bright sky to reduce glare.
- Adjustment Brush: Allows for targeted adjustments to specific areas, such as reducing glare on a subject’s face.
- Shadows and Highlights Sliders: Adjusts the brightness of shadows and highlights to balance exposure and reduce glare.
3.3 GIMP (GNU Image Manipulation Program)
Is GIMP a viable alternative to Photoshop for glare removal?
GIMP is a free, open-source image editing software that offers many of the same features as Photoshop:
- Clone Tool: Similar to Photoshop’s Clone Stamp Tool, used to copy pixels from one area to another.
- Healing Tool: Blends the copied pixels with the surrounding area for a seamless repair.
- Levels and Curves: Adjusts the tonal range of the image to reduce glare and improve contrast.
3.4 Mobile Apps (Facetune, Snapseed)
Can mobile apps effectively remove glare from photos?
Mobile apps like Facetune and Snapseed offer convenient and easy-to-use tools for glare removal:
- Facetune: Includes features like Relight, Smooth, and Matte to reduce glare and enhance details.
- Snapseed: Offers tools like Healing, Brush, and Selective Adjustments to target specific areas of glare.
4. Step-by-Step Techniques for Removing Glare
What are the specific steps to remove glare using different editing tools?
Here are detailed, step-by-step techniques for removing glare using various software options:
4.1 Removing Glare in Photoshop
How do you use Photoshop to effectively eliminate glare?
- Open the Image: Open your image in Photoshop.
- Duplicate Layer: Duplicate the background layer to work non-destructively.
- Use the Clone Stamp Tool: Select the Clone Stamp Tool, set the blending mode to “Normal,” and adjust the brush size and hardness.
- Sample a Clean Area: Alt-click (Option-click on Mac) on a clean area near the glare to set the source point.
- Paint Over the Glare: Paint over the glare to replace it with the sampled pixels.
- Use the Healing Brush Tool: Select the Healing Brush Tool and gently paint over the repaired area to blend it seamlessly.
- Adjust Exposure and Contrast: Use Adjustment Layers (Curves, Levels, Shadows/Highlights) to fine-tune the exposure and contrast of the repaired area.
 Remove glare in Photoshop with clone stamp and healing brush tools
4.2 Removing Glare in Lightroom
What are the best Lightroom techniques for reducing glare?
- Open the Image: Import your image into Lightroom.
- Use the Graduated Filter: Select the Graduated Filter tool and drag it over the area with glare (e.g., the sky).
- Adjust Exposure and Highlights: Reduce the exposure and highlights to darken the bright area and reduce glare.
- Use the Adjustment Brush: Select the Adjustment Brush and paint over specific areas of glare.
- Adjust Highlights, Shadows, and Clarity: Adjust the highlights, shadows, and clarity sliders to fine-tune the affected area.
4.3 Removing Glare in GIMP
How can GIMP be used to remove glare from your images?
- Open the Image: Open your image in GIMP.
- Duplicate Layer: Duplicate the background layer to work non-destructively.
- Use the Clone Tool: Select the Clone Tool and set the blending mode to “Normal.”
- Sample a Clean Area: Ctrl-click on a clean area near the glare to set the source point.
- Paint Over the Glare: Paint over the glare to replace it with the sampled pixels.
- Use the Healing Tool: Select the Healing Tool and gently paint over the repaired area to blend it seamlessly.
- Adjust Levels and Curves: Use the Levels and Curves tools to fine-tune the exposure and contrast of the repaired area.
4.4 Removing Glare with Mobile Apps
How do mobile apps like Facetune and Snapseed simplify glare removal?
- Open the Image: Open your image in Facetune or Snapseed.
- Use the Healing Tool (Snapseed): Select the Healing Tool and tap on the areas with glare to remove them.
- Use the Brush Tool (Snapseed): Select the Brush Tool and adjust the exposure, shadows, and highlights to fine-tune the affected area.
- Use the Relight Feature (Facetune): Select the Relight feature and adjust the direction and intensity of the light to reduce glare.
- Use the Smooth and Matte Features (Facetune): Use the Smooth and Matte features to reduce shine and glare on skin.
5. Advanced Techniques for Glare Correction
What are some more advanced methods for dealing with particularly stubborn glare issues?
For challenging cases of glare, advanced techniques can provide more precise and effective solutions. These methods often require a deeper understanding of image editing principles and software capabilities.
5.1 Frequency Separation
What is frequency separation, and how can it help with glare removal?
Frequency separation is a technique that separates an image into high-frequency (details) and low-frequency (tones and colors) layers. This allows you to work on the tones and colors without affecting the details, and vice versa.
- Duplicate the Layer: Duplicate the background layer twice.
- Apply Gaussian Blur: On the lower layer, apply a Gaussian Blur filter to blur out the details.
- Apply High Pass Filter: On the upper layer, apply a High Pass filter to extract the details.
- Change Blending Mode: Change the blending mode of the high-frequency layer to “Linear Light.”
- Correct Tones and Colors: On the low-frequency layer, use tools like the Brush Tool or Clone Stamp Tool to correct the tones and colors affected by glare.
- Adjust Details: On the high-frequency layer, use tools like the Sharpen Tool to enhance the details.
5.2 Color Correction Techniques
How can color correction help mitigate the effects of glare?
Glare can often distort the colors in an image, making them appear washed out or unnatural. Color correction techniques can help restore the natural colors and improve the overall appearance of the image.
- Use Adjustment Layers: Use Adjustment Layers like Curves, Levels, and Color Balance to adjust the colors in the image.
- Adjust Color Channels: Adjust the individual color channels (Red, Green, Blue) to correct color casts and restore natural colors.
- Use Selective Color: Use the Selective Color tool to target specific colors and adjust their hue, saturation, and luminance.
5.3 Dodging and Burning
What are dodging and burning, and how can they be used to fix glare issues?
Dodging and burning are techniques used to lighten (dodge) or darken (burn) specific areas of an image. These techniques can be used to balance the exposure and reduce glare in affected areas.
- Create a New Layer: Create a new layer and set the blending mode to “Overlay.”
- Use the Dodge Tool: Select the Dodge Tool and gently paint over the areas that are too dark to lighten them.
- Use the Burn Tool: Select the Burn Tool and gently paint over the areas that are too bright to darken them.
- Adjust Opacity: Adjust the opacity of the layer to fine-tune the effect.
6. Utilizing AI-Powered Tools for Glare Removal
How can AI-powered tools automate and enhance the glare removal process?
AI-powered tools are revolutionizing image editing, offering automated solutions for complex tasks like glare removal. These tools use machine learning algorithms to analyze images and intelligently remove glare, often with minimal user input.
6.1 AI Image Enhancers
What are AI image enhancers, and how do they work?
AI image enhancers use artificial intelligence to automatically improve the quality of images, including glare removal, sharpness enhancement, and color correction.
- Upload Your Image: Upload your image to an AI image enhancer tool.
- Let AI Analyze: Let the AI analyze your image and automatically remove glare and enhance details.
- Download the Enhanced Image: Download the enhanced image with reduced glare and improved quality.
6.2 Content-Aware Fill
How does content-aware fill assist in removing glare?
Content-Aware Fill is a feature in Photoshop that uses AI to intelligently fill in selected areas of an image with realistic content:
- Select the Glare Area: Select the area with glare using the Lasso Tool or Quick Selection Tool.
- Use Content-Aware Fill: Go to Edit > Fill and select “Content-Aware” from the Contents dropdown.
- Adjust Settings: Adjust the settings as needed and click “OK.”
- Photoshop Fills the Area: Photoshop will automatically fill in the selected area with content that matches the surrounding pixels.
7. Specific Scenarios and Glare Removal Techniques
How do glare removal techniques vary depending on the specific type of glare encountered?
The best approach to glare removal often depends on the specific type of glare you’re dealing with. Here are some techniques tailored to different scenarios:
7.1 Removing Sun Glare
What are the best methods for dealing with sun glare in outdoor photos?
Sun glare is a common issue in outdoor photography, especially when shooting directly into the sun:
- Use a Lens Hood: Use a lens hood to block stray light from hitting the lens.
- Adjust Shooting Angle: Adjust your shooting angle to avoid direct sunlight.
- Use a Polarizing Filter: Use a polarizing filter to reduce glare and reflections.
- Reduce Highlights and Exposure: In post-processing, reduce the highlights and exposure to darken the bright areas.
- Use the Clone Stamp Tool: Use the Clone Stamp Tool to remove any remaining glare spots.
7.2 Removing Glare from Glasses
How can you eliminate glare from eyeglasses in portrait photography?
Glare on glasses can be distracting and obscure the subject’s eyes:
- Adjust Lighting: Adjust the lighting to minimize reflections on the glasses.
- Ask the Subject to Tilt Their Head: Ask the subject to tilt their head slightly to change the angle of reflection.
- Use Polarizing Filter: Use a polarizing filter to reduce reflections on the glasses.
- Use the Clone Stamp Tool: Use the Clone Stamp Tool to remove any remaining glare spots.
- Retouch the Eyes: If necessary, retouch the eyes to restore clarity and detail.
7.3 Removing Flash Glare
What techniques are effective for reducing or eliminating flash glare in photos?
Flash glare can occur when the flash is too powerful or too close to the subject:
- Adjust Flash Power: Reduce the power of the flash to minimize glare.
- Use a Diffuser: Use a diffuser to soften the light and reduce harsh reflections.
- Bounce the Flash: Bounce the flash off a ceiling or wall to create softer, more diffused light.
- Reduce Highlights and Exposure: In post-processing, reduce the highlights and exposure to darken the bright areas.
- Use the Smooth and Matte Features (Facetune): Use the Smooth and Matte features to reduce shine and glare on skin.
7.4 Removing Reflections
How can you effectively remove unwanted reflections from surfaces like water or glass?
Reflections can be distracting and detract from the subject of the photo:
- Use a Polarizing Filter: Use a polarizing filter to reduce reflections on water or glass.
- Adjust Shooting Angle: Adjust your shooting angle to minimize reflections.
- Use the Clone Stamp Tool: Use the Clone Stamp Tool to remove any remaining reflections.
- Use Content-Aware Fill: Use Content-Aware Fill to fill in the areas where reflections have been removed.
8. Optimizing Your Workflow for Efficient Glare Removal
How can you streamline your photo editing process to efficiently remove glare?
Efficient glare removal involves optimizing your workflow and using the right tools and techniques. Here are some tips for streamlining your process:
8.1 Batch Processing
What is batch processing, and how can it save time when editing multiple photos?
Batch processing allows you to apply the same adjustments to multiple images at once, saving you time and effort:
- Select Multiple Images: Select multiple images in Lightroom or Photoshop.
- Apply Adjustments: Apply the necessary adjustments to one image.
- Sync Settings: Sync the settings to the other selected images.
- Lightroom Applies Adjustments: Lightroom will automatically apply the same adjustments to all selected images.
8.2 Creating Presets
How can creating presets speed up the glare removal process?
Presets are saved sets of adjustments that can be applied to images with a single click:
- Create Adjustments: Create the necessary adjustments to remove glare from an image.
- Save as Preset: Save the adjustments as a preset in Lightroom or Photoshop.
- Apply Preset: Apply the preset to other images with similar glare issues.
8.3 Keyboard Shortcuts
How can using keyboard shortcuts enhance your efficiency in photo editing?
Keyboard shortcuts can significantly speed up your workflow by allowing you to perform common tasks without using the mouse:
- Photoshop: Learn the keyboard shortcuts for tools like the Clone Stamp Tool, Healing Brush Tool, and Adjustment Layers.
- Lightroom: Learn the keyboard shortcuts for adjusting exposure, highlights, shadows, and other settings.
- GIMP: Learn the keyboard shortcuts for tools like the Clone Tool, Healing Tool, and Levels.
9. Enhancing Photo Quality After Glare Removal
What steps can you take to further enhance your photos after removing glare?
Removing glare is just the first step in enhancing your photos. After removing glare, there are several other adjustments you can make to improve the overall quality of your images.
9.1 Sharpening
Why is sharpening an important step after glare removal?
Sharpening enhances the details in your photos, making them appear clearer and more defined:
- Use the Sharpen Tool: Use the Sharpen Tool in Photoshop, Lightroom, or GIMP to sharpen the details in your image.
- Adjust Sharpening Settings: Adjust the sharpening settings to avoid over-sharpening.
- Use Unsharp Mask: Use the Unsharp Mask filter for more precise sharpening.
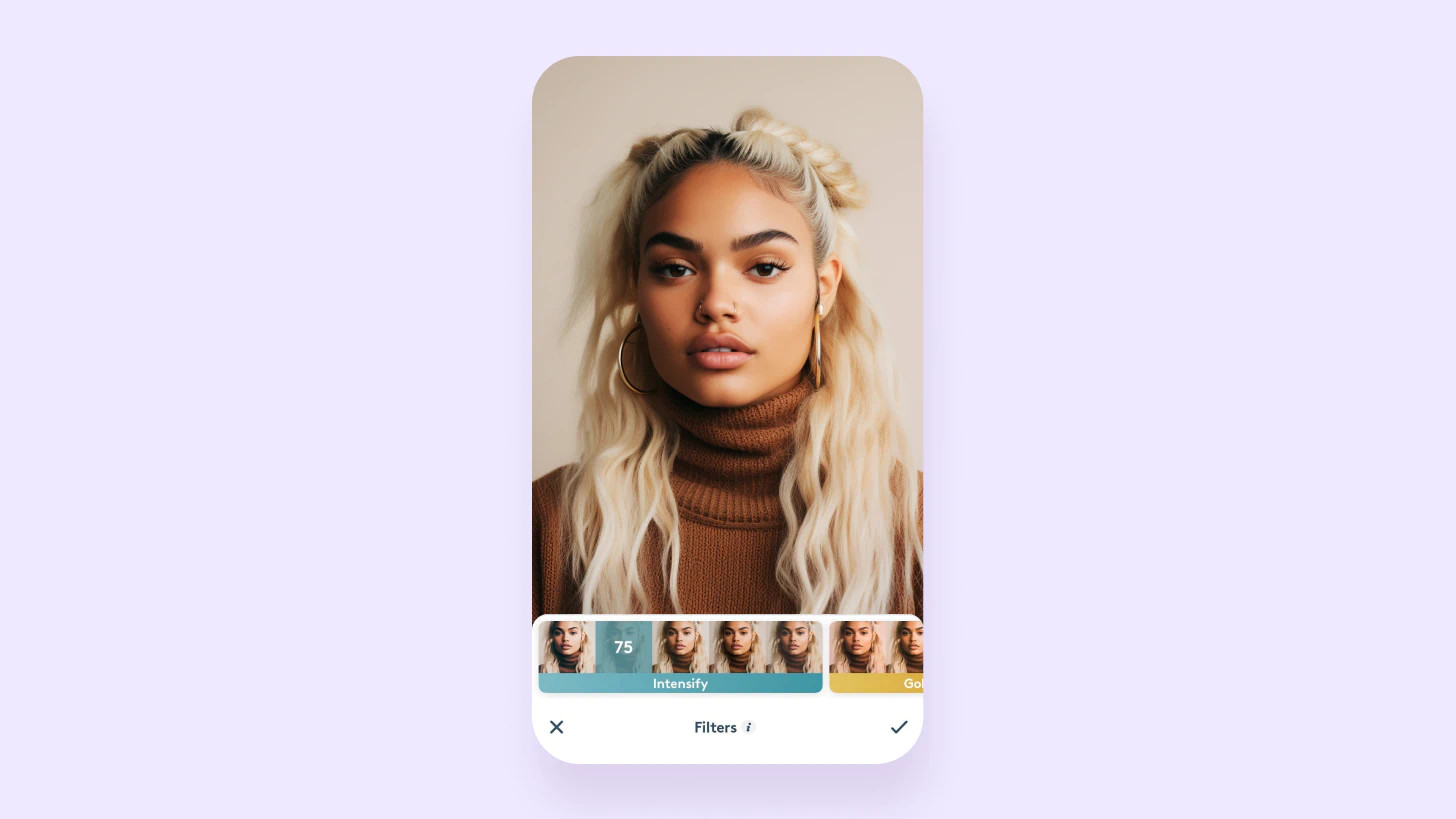
 Adjust overall light levels to edit out glare in your photos with Facetune
9.2 Noise Reduction
When is noise reduction necessary, and how should it be applied?
Noise reduction reduces the amount of unwanted grain or speckling in your photos, especially in low-light conditions:
- Use the Noise Reduction Tool: Use the Noise Reduction Tool in Photoshop, Lightroom, or GIMP to reduce noise in your image.
- Adjust Noise Reduction Settings: Adjust the noise reduction settings to avoid over-smoothing.
- Apply Selective Noise Reduction: Apply noise reduction selectively to areas with the most noise.
9.3 Contrast and Color Adjustments
How can fine-tuning contrast and color improve your final image?
Fine-tuning the contrast and color can improve the overall appearance of your photos, making them more vibrant and visually appealing:
- Use Adjustment Layers: Use Adjustment Layers like Curves, Levels, and Color Balance to adjust the contrast and color in your image.
- Adjust Color Channels: Adjust the individual color channels (Red, Green, Blue) to correct color casts and restore natural colors.
- Use Selective Color: Use the Selective Color tool to target specific colors and adjust their hue, saturation, and luminance.
10. Case Studies: Real-World Examples of Glare Removal
Can you provide examples of successful glare removal in different photographic scenarios?
Examining real-world case studies can provide valuable insights into how to effectively remove glare in various photographic scenarios.
10.1 Landscape Photography
How can glare be effectively removed from landscape photos?
In landscape photography, sun glare and reflections can be common issues, especially when shooting near water or in bright sunlight:
- Original Image: A landscape photo with severe sun glare washing out the sky and reducing contrast.
- Corrections: Using a graduated filter in Lightroom to reduce the exposure and highlights in the sky, and the Clone Stamp Tool in Photoshop to remove glare spots on the land.
- Final Result: A landscape photo with a clear sky, improved contrast, and no distracting glare spots.
10.2 Portrait Photography
What are the best practices for removing glare from portraits, especially on glasses?
In portrait photography, glare on glasses and shiny skin can be distracting and detract from the subject’s appearance:
- Original Image: A portrait photo with glare on the subject’s glasses and shiny skin.
- Corrections: Adjusting the lighting to minimize reflections on the glasses, using the Smooth and Matte features in Facetune to reduce shine on the skin, and retouching the eyes to restore clarity.
- Final Result: A portrait photo with clear glasses, natural-looking skin, and a flattering appearance.
10.3 Product Photography
How can glare be minimized or removed in product photos to showcase the product effectively?
In product photography, glare can obscure the details and detract from the appearance of the product:
- Original Image: A product photo with glare on the surface of the product.
- Corrections: Adjusting the lighting to minimize reflections, using a polarizing filter to reduce glare, and using the Clone Stamp Tool in Photoshop to remove any remaining glare spots.
- Final Result: A product photo with clear details, no distracting glare, and an appealing appearance.
FAQ: Frequently Asked Questions About Glare Removal
Need quick answers? Here are some common questions about glare removal:
1. What causes glare in photos?
Glare is caused by excessive light reflecting into the camera lens, overwhelming the sensor.
2. Can I prevent glare while shooting?
Yes, using lens hoods, adjusting shooting angles, and using polarizing filters can help.
3. What software is best for removing glare?
Adobe Photoshop, Lightroom, GIMP, Facetune, and Snapseed are all effective.
4. How does the Clone Stamp Tool help remove glare?
It copies pixels from a clean area to cover up glare spots.
5. What is frequency separation, and how does it help?
It separates an image into high-frequency (details) and low-frequency (tones and colors) layers for precise editing.
6. How can AI-powered tools assist in glare removal?
AI tools automatically analyze images and intelligently remove glare.
7. What is batch processing, and how does it save time?
It allows you to apply the same adjustments to multiple images at once.
8. Why is sharpening important after glare removal?
Sharpening enhances the details in your photos.
9. How can I reduce noise in my photos?
Use the Noise Reduction Tool in Photoshop, Lightroom, or GIMP.
10. What are some specific techniques for removing sun glare?
Use a lens hood, adjust shooting angles, and reduce highlights in post-processing.
Ready to take your photography to the next level? Visit dfphoto.net for more tutorials, inspiration, and a vibrant community of photographers. Learn advanced techniques, discover new gear, and share your stunning, glare-free photos with the world. Join us today and unlock your creative potential!