It’s frustrating to find your photos are too dark after uploading them. This often happens when shooting in AUTO mode. While cameras today are sophisticated, they can misjudge the ideal exposure. Factors like skin tone and backlighting can trick the camera, resulting in underexposed images. Dark photos also appear even darker when printed compared to how they look on bright screens.
Fortunately, fixing dark photos is easier than you think. With a few simple steps, you can dramatically improve their appearance in under a minute.
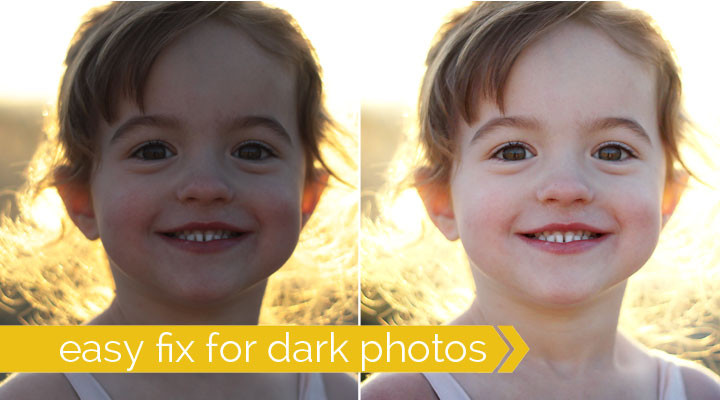
 A comparison of a dark photo and a brightened version
Even images that don’t seem overly dark can benefit from brightening. Many photos taken in AUTO mode tend to be slightly underexposed. You might not realize it until you see the improved version. (Note: If the brighter examples in this article seem overly bright, your monitor’s brightness might be too high. Adjust it for a more accurate representation of printed results.)
Brightening Your Photos: A Step-by-Step Guide
While some photo editing software offers simple sliders for brightening, using the histogram provides more control and precision. Here’s how:
Accessing the Histogram
In Photoshop Elements, press Ctrl+L. In iPhoto, go to Edit > Adjust. Other photo editing applications will have similar functionality.
Understanding the Histogram
The histogram is a graphical representation of the tonal range in your image. It resembles a mountain range:
- Left side (Shadows): Represents the dark areas in your photo.
- Right side (Highlights): Represents the light areas in your photo.
A well-exposed image with a balanced tonal range will have a histogram that stretches across the entire graph. Underexposed images will have the “mountains” clustered on the left.
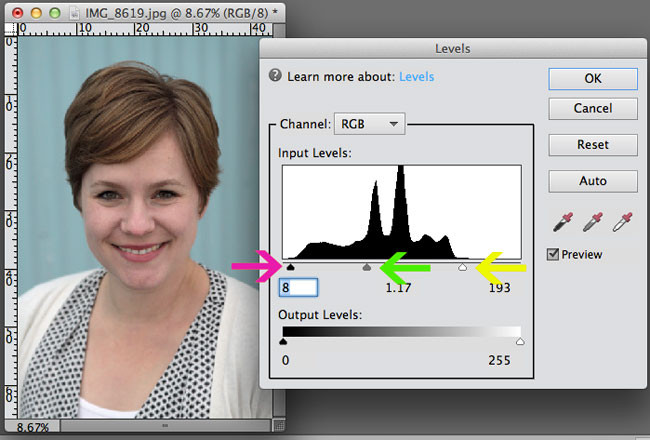 A histogram showing how to adjust the levels for a brighter image
Adjusting the Levels
Below the histogram, you’ll usually find three sliders:
- Highlights (Rightmost slider): Drag this slider left until it meets the edge of the “mountain” representing the highlights. This brightens the lightest parts of your image.
- Midtones (Middle slider): Drag this slider left to brighten the mid-range tones, focusing on achieving natural-looking skin tones. Don’t worry if shadows appear washed out at this stage.
- Shadows (Leftmost slider): Drag this slider right until it meets the edge of the “mountain” representing the shadows. This darkens the shadows and restores contrast.
By carefully adjusting these sliders, you can significantly brighten a dark photo while maintaining detail and contrast.
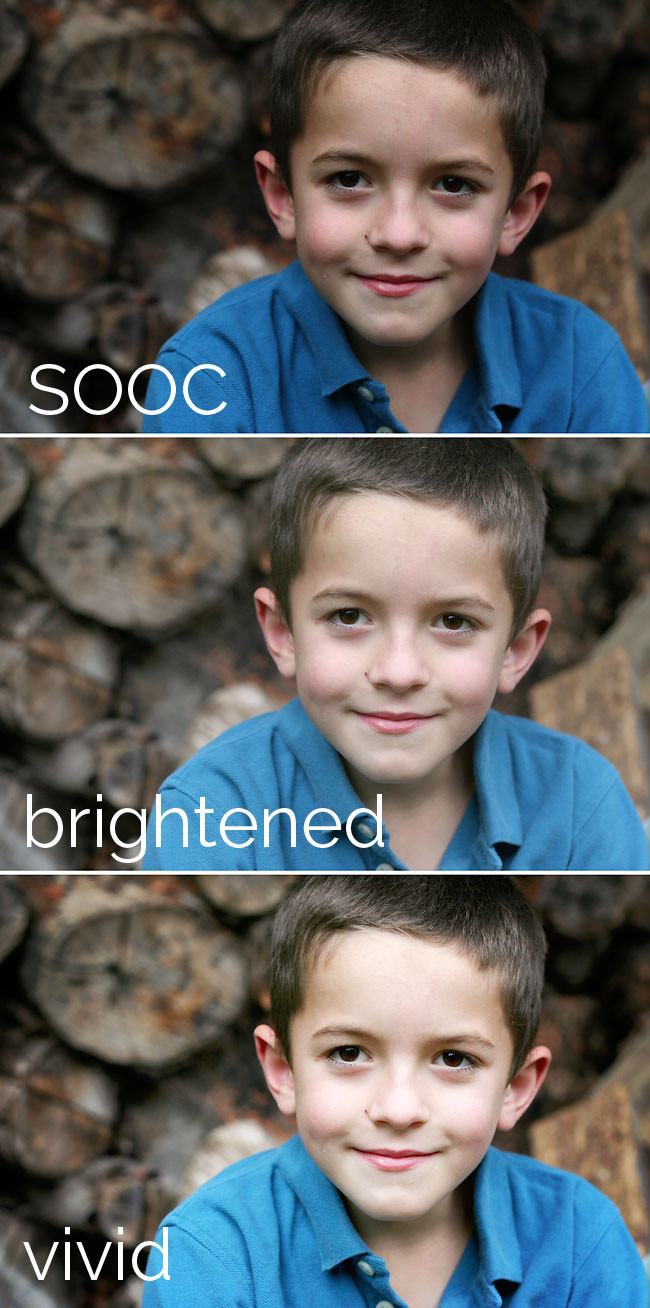
Enhancing Brightness with Photoshop Actions
For advanced editing, Photoshop actions can further enhance your results. Free actions like the Vivid 2 Action from The Coffeeshop Blog can add vibrancy and a subtle glow to your photos. Experiment with different opacity levels for optimal results.
 Before and after comparison of a photo brightened using editing techniques
A Word of Caution
When adjusting the highlights slider, avoid pushing it too far past the edge of the highlight “mountain.” This can lead to overexposure, making the brightest parts of your image appear washed out.
With practice, you’ll master these techniques and quickly transform dark, underexposed photos into vibrant, well-lit images.
