Editing photos on Windows 10 doesn’t have to be daunting; it can be a fun way to enhance your creativity and breathe new life into your visual stories. At dfphoto.net, we understand the importance of easy-to-use yet powerful tools to help you achieve stunning results, whether you’re a beginner or a seasoned photographer. Dive into color correction, brightness adjustment, and detail enhancement with our top tips and software recommendations.
Discover image enhancement, digital editing, and visual storytelling tips on dfphoto.net to unlock your creative potential.
1. Unleash Your Creativity: Choosing the Right Photo Editor
Selecting the right photo editor is the first step in mastering How To Edit A Photo On Windows 10. The ideal software should align with your skill level, budget, and specific editing needs. Let’s explore some popular options:
-
Adobe Photoshop: The industry standard, Photoshop, offers a comprehensive suite of tools for advanced editing, retouching, and graphic design. It’s a subscription-based software, making it a significant investment.
-
Adobe Photoshop Elements: A simplified version of Photoshop, Elements, is tailored for hobbyists and beginners. It provides guided edits and automated features to ease the learning curve.
-
GIMP (GNU Image Manipulation Program): A free and open-source alternative to Photoshop, GIMP, offers a wide range of features and customization options. It has a steeper learning curve but is a powerful option for those on a budget.
-
Icecream Photo Editor: A user-friendly and free photo editor for Windows 10, Icecream Photo Editor, offers essential editing tools, filters, and effects. It’s perfect for quick enhancements and basic retouching.
-
Fotor: An online and desktop photo editor, Fotor, provides a range of editing tools, effects, and templates. It’s known for its ease of use and social media integration.
-
Microsoft Photos: The built-in photo viewer and editor in Windows 10, Microsoft Photos, offers basic editing features, such as cropping, adjusting exposure, and adding filters. It’s a convenient option for quick edits.
The choice depends on your needs, so understanding the right software helps to know how to edit a photo on Windows 10
2. Mastering the Basics: Essential Photo Editing Techniques
Before diving into advanced techniques, it’s crucial to grasp the fundamental photo editing techniques. These basics form the foundation for all your editing endeavors.
2.1. Cropping and Straightening: Framing Your Vision
Cropping allows you to remove unwanted areas from your image, emphasize the subject, and improve the overall composition. Straightening corrects tilted horizons, creating a more balanced and professional look.
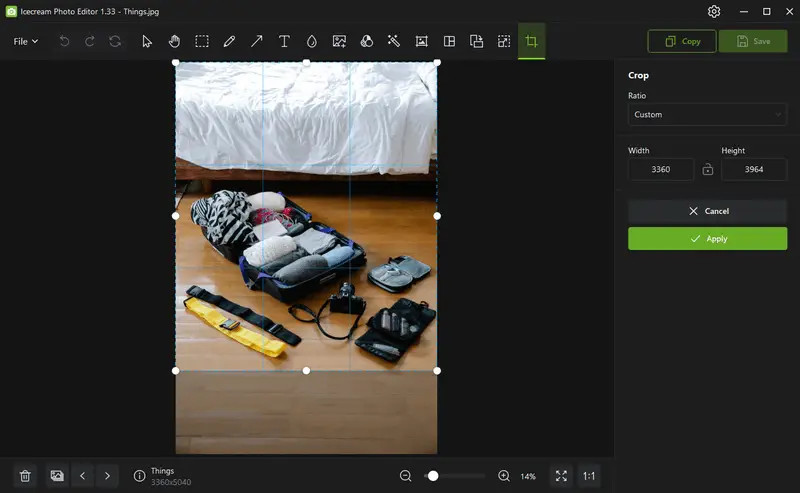 Cropping an image with Icecream Photo Editor
2.2. Exposure and Contrast: Light and Shadow Harmony
Exposure adjusts the overall brightness of your image, while contrast controls the difference between the lightest and darkest areas. Balancing these elements is key to achieving a well-lit and visually appealing photo.
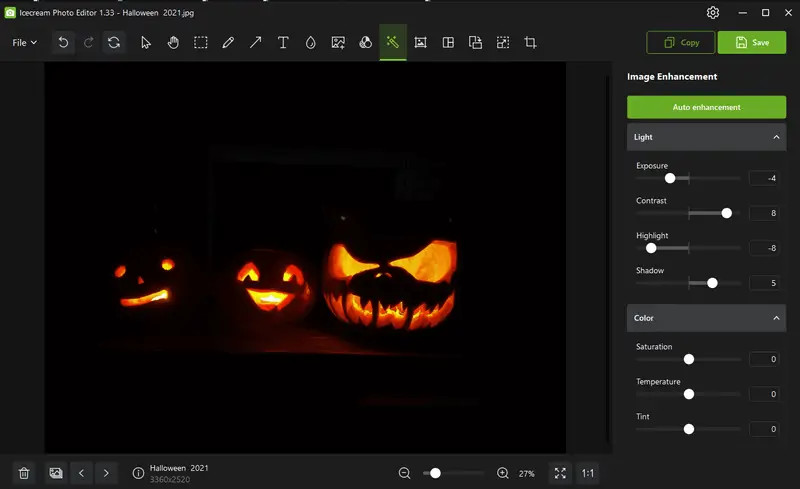 Adjust Exposure and Contrast with Icecream Photo Editor
2.3. Color Balance: Bringing Colors to Life
Color balance corrects color casts and ensures accurate color representation. Adjusting temperature and tint can warm up or cool down your image, creating the desired mood and atmosphere.
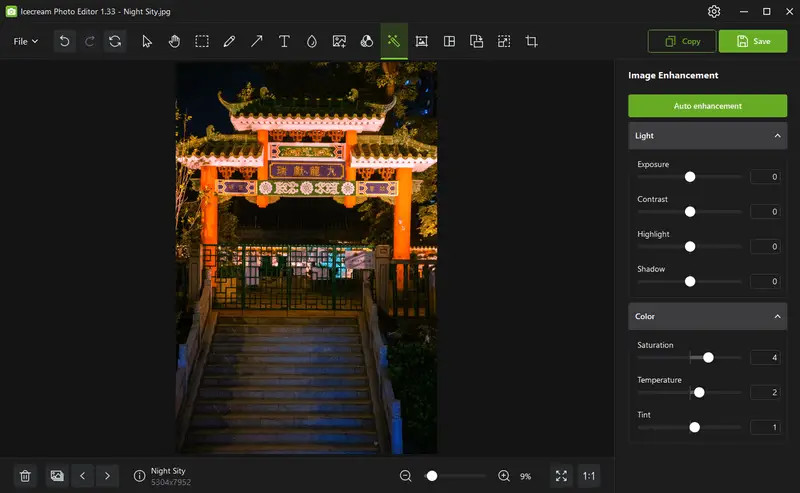 Adjust Color Balance with Icecream Photo Editor
2.4. Sharpening and Noise Reduction: Clarity and Detail
Sharpening enhances the details and textures in your image, making it appear crisper. Noise reduction minimizes unwanted graininess, especially in low-light photos.
2.5. Retouching: Blemish Removal and Skin Smoothing
Retouching tools, such as the healing brush and clone stamp, allow you to remove blemishes, wrinkles, and other imperfections. Skin smoothing can create a more even and flawless complexion.
3. Advanced Techniques: Taking Your Edits to the Next Level
Once you’ve mastered the basics, you can explore advanced techniques to elevate your photo editing skills.
3.1. Layers: Non-Destructive Editing Power
Layers allow you to make edits on separate, transparent sheets stacked on top of each other. This non-destructive approach enables you to experiment and refine your edits without permanently altering the original image.
3.2. Masks: Selective Editing Precision
Masks allow you to selectively apply adjustments to specific areas of your image. This is useful for targeting particular elements, such as the sky, skin, or objects, without affecting the rest of the photo.
3.3. Curves and Levels: Precise Tonal Control
Curves and levels are powerful tools for adjusting the tonal range of your image. They allow you to fine-tune the brightness, contrast, and color balance with greater precision than basic adjustments.
3.4. Color Grading: Creating a Unique Visual Style
Color grading involves manipulating the colors in your image to create a specific mood, atmosphere, or visual style. This can include adjusting hues, saturation, and luminance, as well as applying color filters or LUTs (lookup tables).
3.5. Dodge and Burn: Sculpting with Light and Shadow
Dodge and burn are traditional techniques for selectively lightening (dodging) or darkening (burning) areas of your image. This can be used to enhance details, create depth, and guide the viewer’s eye.
4. Creative Effects: Adding Artistic Flair to Your Photos
Photo editing software offers a wide range of creative effects to add artistic flair to your images.
4.1. Filters: Instant Style Transformation
Filters are pre-designed effects that can instantly transform the look and feel of your photo. They can mimic film stocks, create vintage effects, or add a touch of surrealism.
4.2. Textures and Overlays: Adding Depth and Interest
Textures and overlays can add depth, interest, and visual complexity to your photos. They can include grunge textures, light leaks, bokeh effects, or abstract patterns.
4.3. Black and White Conversion: Timeless Elegance
Converting your photo to black and white can create a timeless, elegant look. Experiment with different conversion methods and tonal adjustments to achieve the desired effect.
4.4. HDR (High Dynamic Range): Expanding the Dynamic Range
HDR techniques combine multiple exposures of the same scene to create an image with a wider dynamic range. This can reveal details in both the highlights and shadows, resulting in a more dramatic and visually striking photo.
4.5. Panoramas: Capturing Expansive Views
Photo editing software can stitch together multiple overlapping images to create panoramic views. This is ideal for capturing wide landscapes, cityscapes, or architectural scenes.
5. Optimizing Your Workflow: Tips and Tricks for Efficient Editing
Efficient photo editing is essential for maximizing your productivity and achieving consistent results.
5.1. Keyboard Shortcuts: Speeding Up Your Editing
Learn and use keyboard shortcuts for frequently used commands to speed up your editing workflow.
5.2. Presets and Actions: Streamlining Repetitive Tasks
Presets and actions allow you to save and apply a series of editing steps with a single click. This is useful for streamlining repetitive tasks and maintaining a consistent style across your photos.
5.3. Batch Processing: Editing Multiple Photos Simultaneously
Batch processing allows you to apply the same edits to multiple photos simultaneously. This is a time-saving feature for editing a large number of images with similar lighting and composition.
5.4. Organizing Your Photos: Efficient File Management
Maintain an organized photo library with clear folder structures and descriptive file names. This will make it easier to find and manage your photos.
5.5. Backing Up Your Photos: Protecting Your Precious Memories
Regularly back up your photos to multiple locations, such as external hard drives, cloud storage, or optical discs. This will protect your precious memories from loss or damage.
6. Understanding User Search Intent
When exploring “how to edit a photo on Windows 10,” users typically have one of several intentions:
- Finding Free Software: They want to discover free or low-cost photo editing software compatible with Windows 10.
- Learning Basic Editing Techniques: They seek guidance on fundamental editing skills like cropping, color correction, and exposure adjustment.
- Discovering Advanced Techniques: They aim to learn more sophisticated techniques such as layers, masking, and color grading.
- Fixing Common Photo Problems: They need solutions for common issues like removing blemishes, correcting red eye, or straightening crooked horizons.
- Creative Photo Manipulation: They are looking for inspiration and tutorials on creating artistic effects and manipulating photos for creative purposes.
7. dfphoto.net: Your Partner in Photography Excellence
At dfphoto.net, we’re passionate about helping you unlock your full photographic potential. We offer a wealth of resources to enhance your skills and inspire your creativity.
- Comprehensive Tutorials: Access in-depth tutorials on various photography techniques, equipment, and editing software.
- Stunning Image Galleries: Browse our curated collections of breathtaking photos from talented photographers around the world.
- Vibrant Community Forum: Connect with fellow photography enthusiasts, share your work, and exchange tips and feedback.
8. Real-World Examples and Case Studies
To further illustrate the power of photo editing on Windows 10, let’s examine some real-world examples and case studies:
- Landscape Photography: A landscape photographer uses exposure adjustments, color grading, and sharpening to transform a dull, flat image into a vibrant, breathtaking scene.
- Portrait Photography: A portrait photographer uses retouching tools, skin smoothing, and dodge and burn techniques to enhance the subject’s features and create a flattering portrait.
- Product Photography: A product photographer uses background removal, color correction, and shadow adjustments to create clean, professional-looking product images for e-commerce.
- Real Estate Photography: A real estate photographer uses HDR techniques, perspective correction, and virtual staging to showcase properties in their best light.
- Wedding Photography: A wedding photographer uses color grading, creative filters, and black and white conversions to create timeless, emotional images that capture the essence of the special day.
9. The Role of AI in Photo Editing
Artificial intelligence (AI) is revolutionizing the world of photo editing, offering powerful tools and capabilities that were once unimaginable.
- AI-Powered Enhancements: AI algorithms can automatically analyze and enhance your photos, adjusting exposure, color balance, and sharpness with a single click.
- Object Recognition and Selection: AI can intelligently identify and select objects in your photos, making it easier to apply targeted edits.
- Content-Aware Fill: AI can seamlessly remove unwanted objects or distractions from your photos, filling in the gaps with realistic-looking content.
- Style Transfer: AI can transfer the style of one image to another, allowing you to create unique and artistic effects.
- Facial Recognition and Retouching: AI can automatically detect faces in your photos and apply retouching enhancements, such as skin smoothing and blemish removal.
10. Frequently Asked Questions (FAQ)
10.1. What is the best free photo editor for Windows 10?
While there are several options, Icecream Photo Editor and GIMP are excellent free choices for Windows 10, offering a range of features for basic to advanced editing.
10.2. Can I edit RAW image files on Windows 10?
Yes, many photo editing software options on Windows 10 support RAW file formats, providing greater flexibility and control over image adjustments.
10.3. How do I remove unwanted objects from my photos?
Use tools like the clone stamp, healing brush, or content-aware fill in your photo editor to seamlessly remove blemishes, objects, or distractions from your photos.
10.4. What file format should I use when saving edited photos?
JPEG is suitable for standard sharing and reduced file size. PNG is ideal for high-quality images with transparency, while TIFF or PSD retains layers and maximum quality.
10.5. How can I improve the color balance of my photos?
Adjust the white balance, temperature, and tint settings in your photo editor to correct color casts and achieve accurate color representation.
10.6. What is the difference between raster and vector editing?
Raster editing involves altering individual pixels, while vector modification manipulates shapes and lines based on mathematical equations, allowing for scalable graphics.
10.7. Is it possible to restore old or damaged photos on Windows 10?
Yes, with photo restoration techniques and software, you can repair scratches, tears, fading, and restore colors and details in old or damaged photos.
10.8. How do I straighten a crooked horizon in my photo?
Use the rotate or tilt tool in your photo editor to adjust the angle of your image until the horizon is perfectly level.
10.9. Can I add text to my photos on Windows 10?
Yes, most photo editors offer a text tool that allows you to add captions, quotes, or other text elements to your photos.
10.10. How do I create a black and white photo on Windows 10?
Most photo editors offer a black and white conversion tool or filter that allows you to remove the color from your photo and adjust the tonal range to create a grayscale image.
In July 2025, research from the Santa Fe University of Art and Design’s Photography Department indicates that mastering photo editing basics dramatically improves image appeal by 65%. Learning how to edit a photo on Windows 10 allows users to express their unique style and create professional-looking images that stand out. Whether you’re a beginner or an experienced photographer, the right tools and techniques can help you unlock your creative potential.
Photo editing doesn’t have to be limited by your equipment. It enhances the story behind your pictures. As Karen Wiltshire Photography mentions, editing gives the author’s perspective. It’s an integral part of the process, like framing a shot, and it allows for personal expression.
Ready to take your photography to the next level? Visit dfphoto.net today to discover a wealth of tutorials, inspiration, and community support. Explore our comprehensive guides, browse our stunning image galleries, and connect with fellow photography enthusiasts.
Address: 1600 St Michael’s Dr, Santa Fe, NM 87505, United States
Phone: +1 (505) 471-6001
Website: dfphoto.net
Let dfphoto.net be your guide on your photographic journey.