The Photos app on your Mac provides a straightforward and powerful way to enhance your images. Whether you need to quickly rotate a photo, crop it for better composition, or dive into more detailed adjustments like exposure and color correction, the built-in editing tools have you covered. You can even remove blemishes and red-eye, ensuring your photos look their best.
One of the great features of editing in Photos on Mac is its non-destructive nature. The app always saves your original photo, allowing you to experiment freely and revert back to the unedited version at any time. This makes it easy to try different editing styles and find what works best for your images.
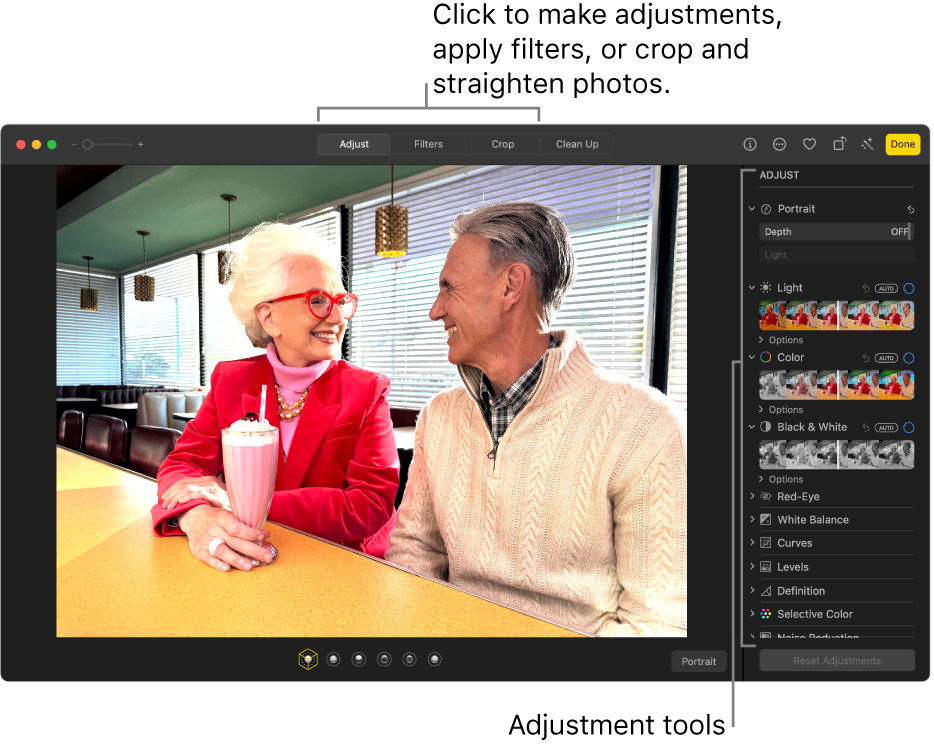 A photo in editing view in Photos app on Mac, highlighting the Adjust tools for exposure and color.
Accessing Edit Mode to Start Photo Editing on Mac
To begin editing a photo on your Mac, follow these simple steps to enter the edit mode within the Photos app:
- Open the Photos App: Launch the Photos application on your Mac.
- Select Your Photo: Find the photo you wish to edit and double-click on its thumbnail to view it in detail. Alternatively, you can select the thumbnail and press the Return key.
- Click “Edit”: Once the photo is open, look for the “Edit” button in the toolbar located at the top right corner of the Photos app window and click it. This action will switch the view to the editing interface, providing you with access to all the editing tools.
After entering edit mode, you’re ready to explore the various editing options available to enhance your chosen photo on your Mac.
Performing Basic Edits in Photos on Mac
Once you are in the editing interface, you can perform a range of basic edits to improve your photos. Here are some of the fundamental editing actions you can take:
Rotating and Cropping:
Photos on Mac allows you to easily adjust the orientation and composition of your images. You can rotate photos clockwise or counterclockwise to correct the orientation or create artistic effects. The crop tool lets you trim away unwanted parts of the image, focusing attention on the subject and improving the overall framing.
Adjusting Exposure and Color:
Enhance the lighting and colors in your photos using the adjustment tools. You can modify exposure to brighten or darken the image, adjust contrast to enhance details, and tweak saturation to make colors more vibrant or muted. Color adjustments also include white balance correction to ensure accurate colors under different lighting conditions.
Retouching and Red-Eye Removal:
For portrait photos or images with minor imperfections, the retouch tool is invaluable. It allows you to remove blemishes, spots, or distractions from the image, creating a cleaner and more polished look. Additionally, the red-eye removal tool can quickly fix the common issue of red-eye in flash photography, making eyes appear natural again.
Duplicating Photos for Experimentation
Before making significant edits, especially when you’re trying out different styles, duplicating your photo is a smart practice. This creates a copy of your original image, allowing you to edit the duplicate while preserving the original, unedited version.
- Select the Photo: In the Photos app, select the photo you want to duplicate.
- Duplicate: Go to the “Image” menu in the menu bar at the top of your screen. Choose “Duplicate 1 Photo” (or press Command-D). For Live Photos, you’ll have the option to “Duplicate” to include the video portion or “Duplicate as Still Photo” for just the still image.
Now you can edit the duplicated photo without worrying about altering your original image.
Comparing Edited Photos with the Original
During the editing process, it’s often helpful to compare your edited version with the original photo to see the improvements and ensure you’re moving in the right direction. Photos on Mac makes this comparison very easy:
- Enter Edit Mode: Open the photo in edit mode as described earlier.
- Press and Hold ‘M’: While in edit mode, simply press and hold the ‘M’ key on your keyboard. This action will temporarily display the original, unedited photo.
- Release ‘M’: Release the ‘M’ key, and you’ll instantly see your photo with all the edits applied again.
This quick compare feature lets you toggle back and forth between the edited and original states, helping you make informed decisions about your edits.
Copying and Pasting Edits for Efficiency
If you’ve developed a set of edits that you like and want to apply to multiple photos, Photos on Mac allows you to copy and paste edits. This is a time-saving feature when you’re working with a series of photos taken in similar conditions or when you want to apply a consistent style across your images.
- Copy Edits: Select a photo that you’ve already edited. Go to the “Image” menu and choose “Copy Edits.”
- Choose Edits to Copy: A dialog box will appear, allowing you to select specific adjustments to copy. Choose the edits you want to transfer and click “Copy”. Note that certain edits like retouch, crop, and red-eye adjustments cannot be copied and pasted.
- Paste Edits: Select the photo or photos you want to apply these edits to. Go to the “Image” menu and choose “Paste Edits.” The copied adjustments will be applied to the selected images. You can also Control-click a photo in edit view to access Copy Edits and Paste Edits options.
Undoing Changes and Reverting to Original
One of the most reassuring aspects of editing photos on Mac is the ability to easily undo changes. Whether you make a mistake or simply decide you don’t like a particular edit, you can quickly undo your actions.
- Undo Last Change: To undo the very last edit you made, go to the “Edit” menu and select “Undo” (or press Command-Z). You can repeatedly undo to step back through your edits one by one.
- Revert to Original: If you want to completely discard all edits and return to the original, unedited photo, select the photo and go to the “Image” menu, then choose “Revert to Original.” This will remove all changes you’ve made and restore the photo to its initial state.
With these basic editing tools in Photos on Mac, you can significantly enhance your photos and achieve the look you desire. Experiment with the different adjustments and discover how easy it is to improve your images right on your Mac.