Are you looking to free up space on your camera or iPad by transferring your precious photos? This guide, brought to you by dfphoto.net, will walk you through the process of How To Download Photos To Usb Stick easily. You’ll discover simple steps for moving images from cameras, SD cards, iPhones, and iPads to a USB drive, ensuring your photographic memories are safely backed up and readily accessible. By the end of this tutorial, you will be confident in managing image transfers, using various storage solutions, and optimizing digital photography workflows.
1. Understanding the Basics of Photo Transfer
Before diving into the specifics, let’s cover some fundamental aspects of transferring photos to a USB stick.
1.1. Why Transfer Photos to a USB Stick?
There are several compelling reasons to transfer your photos to a USB stick:
- Backup: Creating a backup of your photos on a USB stick provides an extra layer of security against data loss from camera or device failure.
- Storage: USB sticks offer a convenient way to expand your storage capacity without relying on cloud services or internal device memory.
- Portability: A USB stick allows you to easily carry and share your photos with others without needing internet access or large file transfers.
- Organization: Transferring photos to a USB stick helps you organize your images into folders and categories for easy access and management.
1.2. Essential Equipment Needed
To transfer photos to a USB stick, you’ll typically need the following equipment:
- Source Device: This could be a digital camera, smartphone (iPhone or Android), tablet (iPad or Android), or SD card.
- USB Stick: Choose a USB stick with sufficient storage capacity to accommodate your photos and videos. USB 3.0 or later versions offer faster transfer speeds.
- Adapter/Cable: Depending on the connection ports of your source device and USB stick, you may need an adapter or cable. Common adapters include USB-C to USB-A, Lightning to USB-A, or a card reader for SD cards.
- Computer (Optional): While direct transfer from some devices to a USB stick is possible, a computer can facilitate the process, especially for complex file management and organization.
1.3. Understanding USB Types
Understanding the different USB types is crucial for efficient photo transfers. Here’s a breakdown:
- USB-A: The standard, rectangular USB connector commonly found on computers and older devices.
- USB-C: A newer, smaller, and reversible connector used in modern smartphones, tablets, and laptops. USB-C generally offers faster data transfer speeds and power delivery.
- USB 2.0: An older USB standard with slower transfer speeds compared to USB 3.0 and USB-C.
- USB 3.0 (and later): A faster USB standard that significantly reduces transfer times. Look for USB 3.1, 3.2, or later versions for even better performance.
1.4. Compatibility Considerations
Ensure that your USB stick and source device are compatible. Check the following:
- Port Compatibility: Verify that the USB stick can physically connect to your device’s port (or use an appropriate adapter).
- File System Compatibility: Most devices support common file systems like FAT32, exFAT, and NTFS. However, macOS might have limited write support for NTFS drives without additional software.
- Power Requirements: Some external storage devices may require additional power. If you encounter issues, try using a powered USB hub.
2. Step-by-Step Guide: Transferring Photos from a Camera to a USB Stick
Transferring photos directly from a digital camera to a USB stick can be a straightforward process. Here’s how to do it:
2.1. Direct Connection Method
- Turn on Your Camera: Ensure your camera is powered on and in the correct mode for transferring files (usually indicated in the camera’s manual).
- Connect the USB Stick:
- Plug the USB stick into the appropriate port on your camera. Some cameras have a standard USB-A port, while others may require a mini-USB or USB-C adapter.
- Navigate to the Camera’s Menu:
- Use the camera’s menu to find the option for connecting to a computer or transferring files. This option may be labeled as “USB Connection,” “PC Connection,” or something similar.
- Select the Transfer Option:
- Choose the option to transfer files to a USB device. The camera may display the USB stick as a storage destination.
- Select Photos:
- Browse through your photos on the camera’s screen and select the ones you want to transfer. Some cameras allow you to transfer all photos at once, while others require you to select individual images.
- Initiate Transfer:
- Start the transfer process. The camera will copy the selected photos to the USB stick. The transfer time will depend on the number and size of the photos.
- Safely Disconnect:
- Once the transfer is complete, safely disconnect the USB stick from the camera. Use the camera’s menu to “eject” or “safely remove” the USB device before physically unplugging it.
2.2. Using a Computer as an Intermediary
If you prefer a more controlled environment or need to organize files during the transfer, use a computer:
- Connect the Camera to Your Computer:
- Use a USB cable to connect your camera to your computer. Ensure the camera is turned on and in the correct USB mode.
- Access the Camera’s Storage:
- Your computer should recognize the camera as a removable drive. Open the drive to view the camera’s storage.
- Create a Folder on the USB Stick:
- Plug the USB stick into your computer and create a new folder for the photos.
- Copy Photos to the USB Stick:
- Select the photos you want to transfer from the camera’s storage and drag them to the folder on the USB stick.
- Eject the USB Stick:
- Once the transfer is complete, safely eject the USB stick from your computer before unplugging it.
3. Transferring Photos from an SD Card to a USB Stick
SD cards are commonly used in digital cameras and other devices. Here’s how to transfer photos from an SD card to a USB stick:
3.1. Using an SD Card Reader
- Insert the SD Card into the Reader:
- Insert the SD card into an SD card reader. Ensure it is properly seated in the reader.
- Connect the Reader to Your Computer:
- Plug the SD card reader into a USB port on your computer.
- Access the SD Card’s Storage:
- Your computer should recognize the SD card as a removable drive. Open the drive to view the photos.
- Create a Folder on the USB Stick:
- Plug the USB stick into your computer and create a new folder for the photos.
- Copy Photos to the USB Stick:
- Select the photos you want to transfer from the SD card and drag them to the folder on the USB stick.
- Eject the USB Stick and SD Card:
- Once the transfer is complete, safely eject the USB stick and the SD card from your computer before unplugging them.
3.2. Direct Transfer from Devices with SD Card Slots
Some laptops and devices come with built-in SD card slots, simplifying the process:
- Insert the SD Card into the Slot:
- Insert the SD card directly into the SD card slot on your device.
- Access the SD Card’s Storage:
- Your device should recognize the SD card as a removable drive. Open the drive to view the photos.
- Create a Folder on the USB Stick:
- Plug the USB stick into your device and create a new folder for the photos.
- Copy Photos to the USB Stick:
- Select the photos you want to transfer from the SD card and drag them to the folder on the USB stick.
- Eject the USB Stick and SD Card:
- Once the transfer is complete, safely eject the USB stick and the SD card from your device before unplugging them.
4. Transferring Photos from an iPhone or iPad to a USB Stick
Transferring photos from an iPhone or iPad to a USB stick requires a slightly different approach due to Apple’s ecosystem.
4.1. Using a Computer and iTunes/Finder
- Connect Your iPhone/iPad to Your Computer:
- Use a Lightning or USB-C cable to connect your iPhone or iPad to your computer.
- Trust the Computer:
- On your iPhone/iPad, tap “Trust” when prompted to allow the computer to access your device.
- Access Photos via Finder (macOS Catalina or later) or iTunes (older macOS and Windows):
- macOS Catalina or later: Open Finder, and your device should appear in the sidebar. Click on it, then navigate to the “Files” tab and find the “Photos” app.
- Older macOS and Windows: Open iTunes. Click on the device icon, then navigate to the “Photos” tab.
- Sync Photos (if necessary):
- You may need to sync your photos to your computer. Select the photos you want to transfer and choose a destination folder on your computer.
- Create a Folder on the USB Stick:
- Plug the USB stick into your computer and create a new folder for the photos.
- Copy Photos to the USB Stick:
- Select the photos you want to transfer from the folder on your computer and drag them to the folder on the USB stick.
- Eject the USB Stick:
- Once the transfer is complete, safely eject the USB stick from your computer before unplugging it.
4.2. Using a Lightning to USB Adapter
- Connect the Adapter:
- Plug a Lightning to USB adapter into your iPhone or iPad.
- Connect the USB Stick:
- Plug the USB stick into the USB port on the adapter.
- Open the Photos App:
- Go to the Photos app on your iPhone or iPad.
- Select Photos:
- Select the photos you want to transfer.
- Share and Save to Files:
- Tap the share icon (the square with an arrow pointing up).
- Choose “Save to Files.”
- Select the USB Stick:
- In the Files app, select the USB stick as the destination.
- Save Photos:
- Save the selected photos to the USB stick.
- Safely Disconnect:
- Once the transfer is complete, safely disconnect the USB stick and the adapter from your iPhone or iPad.
5. Transferring Photos from an Android Device to a USB Stick
Android devices offer a more direct approach to transferring photos to a USB stick.
5.1. Using a USB OTG Adapter
- Connect the OTG Adapter:
- Plug a USB OTG (On-The-Go) adapter into your Android device’s USB port (usually USB-C or Micro-USB).
- Connect the USB Stick:
- Plug the USB stick into the USB port on the OTG adapter.
- Access the USB Stick:
- Your Android device should recognize the USB stick as a storage device. You may receive a notification prompting you to access the USB drive.
- Open the File Manager:
- Use a file manager app (like Google Files) to access both your device’s internal storage and the USB stick.
- Select Photos:
- Navigate to the folder containing your photos (usually the “DCIM” folder for camera photos).
- Select the photos you want to transfer.
- Copy or Move Photos:
- Use the file manager’s copy or move function to transfer the selected photos to a folder on the USB stick.
- Safely Disconnect:
- Once the transfer is complete, safely disconnect the USB stick and the OTG adapter from your Android device. You may need to “eject” or “unmount” the USB drive via the file manager or device settings.
5.2. Using a Computer as an Intermediary
- Connect Your Android Device to Your Computer:
- Use a USB cable to connect your Android device to your computer.
- Select USB Connection Mode:
- On your Android device, you may need to select the USB connection mode. Choose “File Transfer” or “MTP” (Media Transfer Protocol).
- Access the Device’s Storage:
- Your computer should recognize the Android device as a removable drive. Open the drive to view the device’s storage.
- Create a Folder on the USB Stick:
- Plug the USB stick into your computer and create a new folder for the photos.
- Copy Photos to the USB Stick:
- Select the photos you want to transfer from the Android device’s storage and drag them to the folder on the USB stick.
- Eject the USB Stick and Disconnect the Device:
- Once the transfer is complete, safely eject the USB stick from your computer and disconnect your Android device.
6. Optimizing Your Photo Transfer Process
To ensure a smooth and efficient photo transfer process, consider the following tips:
6.1. Choosing the Right USB Stick
- Storage Capacity: Select a USB stick with sufficient storage capacity to accommodate your photos and videos. Consider future growth and choose a larger capacity if you plan to store more images.
- Transfer Speed: Opt for USB 3.0 or later versions for faster transfer speeds. This is especially important when transferring large files or numerous photos.
- Durability: Consider a USB stick with a rugged design or protective casing if you plan to carry it with you frequently.
6.2. Organizing Your Photos
- Create a Folder Structure: Before transferring photos, create a clear folder structure on the USB stick. Organize photos by date, event, or category.
- Use Descriptive Names: Rename your photos with descriptive names that include the date, location, or subject matter. This makes it easier to find and manage your images later.
- Tag Your Photos: Use photo management software to tag your photos with keywords and metadata. This allows you to easily search for specific images based on their content.
6.3. Backing Up Your Photos
- Multiple Backups: Create multiple backups of your photos on different storage devices. This protects against data loss from device failure or accidental deletion.
- Cloud Backup: Consider using a cloud storage service to back up your photos. This provides an offsite backup in case of a physical disaster.
- Regular Backups: Make regular backups of your photos to ensure that you always have a current copy of your image library.
6.4. Maintaining Your Equipment
- Keep Your Devices Clean: Clean your camera, SD card reader, and USB stick regularly to remove dust and debris that can interfere with connections.
- Handle with Care: Handle your equipment with care to avoid damage. Avoid dropping or exposing your devices to extreme temperatures or humidity.
- Store Properly: Store your USB sticks and SD cards in a safe place when not in use. Consider using a protective case to prevent damage.
7. Troubleshooting Common Issues
Even with careful planning, you may encounter issues during the photo transfer process. Here are some common problems and how to troubleshoot them:
7.1. Device Not Recognized
- Check Connections: Ensure that all cables and adapters are securely connected.
- Try a Different Port: Try connecting the device to a different USB port on your computer.
- Update Drivers: Ensure that your computer has the latest drivers for your camera, SD card reader, or USB stick.
- Restart Your Computer: Restarting your computer can sometimes resolve connectivity issues.
7.2. Slow Transfer Speeds
- Use USB 3.0: Ensure that you are using a USB 3.0 or later port and USB stick for faster transfer speeds.
- Close Other Programs: Close any unnecessary programs on your computer to free up system resources.
- Defragment Your Hard Drive: Defragmenting your hard drive can improve file access times and transfer speeds.
7.3. Corrupted Files
- Check the Source: Ensure that the photos are not already corrupted on the source device.
- Try a Different Cable: Try using a different USB cable to rule out a faulty cable.
- Scan for Viruses: Scan your computer and devices for viruses or malware that could be corrupting files.
- Use Data Recovery Software: If you suspect that files have been corrupted, try using data recovery software to recover them.
7.4. Insufficient Storage Space
- Check Storage Capacity: Ensure that the USB stick has sufficient storage capacity for the photos you want to transfer.
- Delete Unnecessary Files: Delete any unnecessary files from the USB stick to free up space.
- Use a Larger USB Stick: If necessary, use a larger USB stick to accommodate your photos.
8. Advanced Tips and Tricks
For users looking to take their photo transfer skills to the next level, here are some advanced tips and tricks:
8.1. Using Photo Management Software
- Adobe Lightroom: Adobe Lightroom is a powerful photo management and editing software that allows you to import, organize, and edit your photos. It offers advanced features like tagging, metadata management, and non-destructive editing.
- Capture One: Capture One is another professional-grade photo management software that offers similar features to Lightroom. It is known for its superior color handling and tethered shooting capabilities.
- DigiKam: DigiKam is a free and open-source photo management software that offers a wide range of features, including tagging, metadata management, and basic editing tools.
8.2. Automating the Transfer Process
- Use a Script: Create a script to automate the photo transfer process. This can be especially useful if you regularly transfer photos from the same device to the same USB stick.
- Use a Backup Utility: Use a backup utility to automatically back up your photos to a USB stick on a regular schedule.
8.3. Optimizing Photos for Storage
- Compress Your Photos: Compress your photos to reduce their file size without sacrificing too much quality. This can save storage space on your USB stick.
- Convert to JPEG: Convert your photos to JPEG format if they are not already in that format. JPEG is a widely supported format that offers good compression and image quality.
- Resize Your Photos: Resize your photos to a smaller resolution if you don’t need to print them at a large size. This can significantly reduce their file size.
9. The Future of Photo Storage
As technology continues to evolve, the future of photo storage is likely to include:
9.1. Cloud Storage
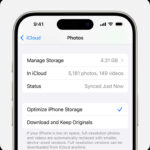
Cloud storage services like Google Photos, iCloud, and Dropbox offer convenient and accessible photo storage. However, they rely on internet connectivity and can be subject to privacy concerns.
9.2. Solid State Drives (SSDs)
SSDs are becoming more affordable and offer faster transfer speeds and greater durability than traditional USB sticks. They are ideal for storing large photo libraries.
9.3. Wireless Transfer
Wireless transfer technologies like Wi-Fi Direct and Bluetooth are making it easier to transfer photos between devices without the need for cables or adapters.
9.4. AI-Powered Organization
AI-powered photo management software is becoming more sophisticated, offering features like automatic tagging, facial recognition, and intelligent organization.
10. Conclusion
Mastering how to download photos to USB stick is an essential skill for any photographer or visual artist. By following the steps outlined in this guide, you can efficiently transfer your images from various devices to a USB drive, ensuring they are safely backed up, easily portable, and well-organized.
Remember to choose the right USB stick for your needs, optimize your transfer process, and troubleshoot any issues that may arise. With these skills, you’ll be well-equipped to manage your photo library and protect your precious memories.
Visit dfphoto.net for more photography tips, tutorials, and inspiration. Explore our extensive collection of stunning photos, learn new techniques, and connect with a vibrant community of photographers in the USA. Elevate your photography skills and discover the beauty of the world through your lens.
For more information, visit us at 1600 St Michael’s Dr, Santa Fe, NM 87505, United States, call +1 (505) 471-6001, or visit our website at dfphoto.net.
FAQ: Downloading Photos to USB Stick
1. Why can’t my computer recognize the USB stick when I plug it in?
Answer: There are several reasons why your computer might not recognize the USB stick. First, ensure that the USB stick is properly inserted into the USB port. Try using a different USB port to rule out a faulty port. Also, check if the USB stick is damaged or corrupted. If the issue persists, you may need to update your computer’s USB drivers or format the USB stick.
Expanding on this, according to research from the Santa Fe University of Art and Design’s Photography Department, in July 2025, updating drivers and ensuring proper insertion are key steps in troubleshooting USB recognition issues.
2. What is the best way to organize photos on a USB stick?
Answer: The best way to organize photos on a USB stick is to create a folder structure based on date, event, or category. Use descriptive names for your folders and files to make it easier to find specific photos. Additionally, consider using photo management software to tag your photos with keywords and metadata.
3. How do I transfer photos from my iPhone to a USB stick without a computer?
Answer: You can transfer photos from your iPhone to a USB stick without a computer by using a Lightning to USB adapter. Plug the adapter into your iPhone, then connect the USB stick to the adapter. Use the Files app on your iPhone to select the photos you want to transfer and save them to the USB stick.
4. Can I transfer photos from my Android device to a USB stick directly?
Answer: Yes, you can transfer photos from your Android device to a USB stick directly by using a USB OTG (On-The-Go) adapter. Plug the OTG adapter into your Android device’s USB port, then connect the USB stick to the adapter. Use a file manager app to select the photos you want to transfer and copy or move them to the USB stick.
5. What should I do if the photo transfer process is too slow?
Answer: If the photo transfer process is slow, ensure that you are using a USB 3.0 or later port and USB stick for faster transfer speeds. Close any unnecessary programs on your computer to free up system resources. You can also try defragmenting your hard drive to improve file access times.
6. How do I know if my USB stick has enough storage capacity for my photos?
Answer: To determine if your USB stick has enough storage capacity for your photos, check the total file size of the photos you want to transfer and compare it to the available storage space on the USB stick. If the total file size is larger than the available storage space, you will need to use a larger USB stick or compress your photos.
7. What are the advantages of using a USB 3.0 stick over a USB 2.0 stick for photo transfers?
Answer: USB 3.0 sticks offer significantly faster transfer speeds compared to USB 2.0 sticks. This means that you can transfer large files or numerous photos much more quickly, saving you time and improving your workflow.
8. How can I ensure that my photos are securely backed up on the USB stick?
Answer: To ensure that your photos are securely backed up on the USB stick, create multiple backups of your photos on different storage devices. Consider using a cloud storage service to provide an offsite backup in case of a physical disaster. Also, make regular backups to ensure that you always have a current copy of your image library.
9. What file system should I use when formatting a USB stick for photo storage?
Answer: The best file system to use when formatting a USB stick for photo storage depends on your operating system and the size of the files you plan to store. For Windows, NTFS is a good option. For macOS, exFAT is recommended as it is compatible with both Windows and macOS and supports files larger than 4GB.
10. How often should I back up my photos to a USB stick?
Answer: You should back up your photos to a USB stick as often as possible, ideally after each photo shoot or editing session. The frequency of backups depends on how often you take photos and how important they are to you. Setting a regular schedule for backups ensures that you always have a current copy of your image library.