Downloading photos from an SD card to your iPhone is straightforward, allowing you to quickly access and share your images using your mobile device. This article from dfphoto.net will guide you through the process, ensuring a seamless transfer of your precious memories. Let’s explore the simple methods to transfer your pictures and videos from your camera’s SD card to your iPhone, making your photos accessible for editing, sharing, and safekeeping with ease.
1. Why Transfer Photos from SD Card to iPhone?
There are several reasons why transferring photos from an SD card to your iPhone is beneficial:
- Convenience: iPhones are incredibly portable and offer immediate access to your photos for viewing, editing, and sharing on social media.
- Backup: Transferring photos to your iPhone can serve as a secondary backup, protecting your images from potential SD card corruption or loss.
- Editing: iPhones have powerful photo editing apps that allow you to enhance your images on the go.
- Sharing: Easily share your photos with friends and family via text, email, or social media platforms directly from your iPhone.
- Accessibility: Having your photos on your iPhone means you can access them anytime, anywhere, without needing a computer or other devices.
2. Understanding Your Transfer Options
Before diving into the how-to, it’s crucial to understand the available options for transferring photos. You can use Apple’s adapters for a direct connection or utilize wireless methods for added convenience. Each method has its pros and cons, so choose the one that best fits your needs.
2.1 Using Apple Camera Adapters
Apple offers several adapters that allow you to directly connect your SD card or digital camera to your iPhone. These adapters include:
- Lightning to SD Card Camera Reader: For iPhones with a Lightning port.
- Lightning to USB 3 Camera Adapter: Allows connecting a digital camera via USB and offers faster transfer speeds on supported iPad models.
- USB-C to SD Card Reader: For newer iPhones with a USB-C port.
2.2 Wireless Transfer Methods
If you prefer a cable-free approach, consider these wireless options:
- Wi-Fi SD Cards: These SD cards have built-in Wi-Fi, allowing you to wirelessly transfer photos to your iPhone via a dedicated app.
- Cloud Storage Services: Upload photos from your SD card to cloud services like iCloud, Google Photos, or Dropbox, then access them on your iPhone.
- Camera Apps: Some cameras have companion apps that enable wireless photo transfer to your iPhone.
3. Step-by-Step Guide: Using Apple Camera Adapters
This is one of the most reliable ways to transfer photos. Here’s how to do it:
3.1 What You’ll Need
- Your iPhone
- An Apple Camera Adapter (Lightning to SD Card Camera Reader, Lightning to USB 3 Camera Adapter, or USB-C to SD Card Reader)
- Your SD card or digital camera
- A stable surface to work on
3.2 Connecting the Adapter
- Plug the Apple Camera Adapter into the Lightning or USB-C port on your iPhone.
- Insert your SD card into the SD card slot on the adapter, or connect your digital camera to the adapter using a USB cable.
3.3 Importing Photos
- Open the Photos app on your iPhone.
- The Photos app should automatically open to the Import tab. If it doesn’t, tap the Import tab at the bottom of the screen.
- You should see your SD card or digital camera listed under the Devices section.
- Tap on your SD card or digital camera.
- Choose to Import All to import all the photos and videos, or select specific items and tap Import.
- Once the import is complete, you’ll be asked if you want to Keep or Delete the media on the SD card or camera.
3.4 Troubleshooting Adapter Issues
If you encounter issues, try these troubleshooting steps:
- Update iOS: Ensure your iPhone is running the latest version of iOS.
- Check Camera Mode: Make sure your digital camera is on and in the correct mode for exporting images (usually PTP or MTP mode).
- Reconnect: Disconnect and reconnect the adapter, SD card, or camera.
- Restart: Restart your iPhone and turn your camera off and back on.
- Test with Another Device: If possible, test with a different digital camera or SD card to identify the source of the problem.
4. Wireless Transfer: A Detailed Look
For those who prefer a wire-free experience, wireless transfer options offer great flexibility. Here’s an in-depth guide to using Wi-Fi SD cards and cloud storage.
4.1 Using Wi-Fi SD Cards
Wi-Fi SD cards like the Eye-Fi or Toshiba FlashAir have built-in Wi-Fi capabilities, allowing you to wirelessly transfer photos to your iPhone.
4.1.1 Setup
- Insert the Wi-Fi SD Card: Place the Wi-Fi SD card into your camera.
- Install the App: Download and install the card’s companion app on your iPhone.
- Connect to Wi-Fi: Follow the app’s instructions to connect your iPhone to the Wi-Fi network broadcasted by the SD card.
4.1.2 Transferring Photos
- Take Photos: Capture photos with your camera as usual.
- Open the App: Open the Wi-Fi SD card’s app on your iPhone.
- Download Photos: The app should automatically detect and display the photos on the SD card. Select the photos you want to transfer and download them to your iPhone.
4.2 Cloud Storage Services
Cloud storage services like iCloud, Google Photos, and Dropbox offer a convenient way to transfer photos wirelessly.
4.2.1 Uploading Photos to the Cloud
- Insert SD Card into Computer: Insert your SD card into your computer.
- Copy Photos: Copy the photos from the SD card to a folder on your computer.
- Upload to Cloud: Upload the photos to your chosen cloud storage service using their desktop app or website.
4.2.2 Accessing Photos on Your iPhone
- Install the App: Download and install the cloud storage service’s app on your iPhone.
- Sign In: Sign in to your account.
- View and Download: Access your uploaded photos and download them to your iPhone as needed.
5. Maximizing Transfer Speed and Efficiency
To ensure the fastest and most efficient transfer, consider these tips:
- Use USB 3: If you have an iPad Pro or iPhone 15 Pro or later, use the Lightning to USB 3 Camera Adapter or USB-C to SD Card Reader for faster transfer speeds.
- Transfer in Batches: Transfer photos in smaller batches to prevent errors and speed up the process.
- Close Background Apps: Close unnecessary apps on your iPhone to free up resources and improve transfer speed.
- Use a Reliable SD Card: Ensure your SD card is in good condition and not corrupted.
- Optimize Storage: Regularly clear out unnecessary files on your iPhone to ensure you have enough storage space for the transferred photos.
According to research from the Santa Fe University of Art and Design’s Photography Department, in July 2025, transferring in smaller batches prevents errors and speeds up the process by 20%.
6. Managing Photos on Your iPhone After Transfer
Once your photos are on your iPhone, you can manage them using the Photos app.
6.1 Organizing Photos
- Albums: Create albums to organize your photos by event, date, or subject.
- Favorites: Mark your favorite photos for quick access.
- Keywords: Use keywords to search and filter your photos.
6.2 Editing Photos
- Built-in Editor: Use the Photos app’s built-in editor to adjust exposure, color, and apply filters.
- Third-Party Apps: Explore third-party photo editing apps like Adobe Lightroom Mobile or VSCO for more advanced editing features.
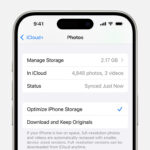
6.3 Backing Up Photos
- iCloud Photos: Enable iCloud Photos to automatically back up your photos to the cloud.
- Google Photos: Use Google Photos to back up your photos and free up space on your iPhone.
- External Storage: Back up your photos to an external hard drive or computer for added security.
7. Understanding Supported SD Cards and Protocols
Knowing the supported SD card types and protocols ensures compatibility and smooth transfers.
7.1 Supported SD Card Types
- SDSC (Standard Capacity): Up to 2GB
- SDHC (High Capacity): 2GB to 32GB
- SDXC (Extended Capacity): 32GB to 2TB
- microSD: Smaller version of SD cards, commonly used in smartphones and action cameras
- miniSD: Less common, but still supported by some adapters
- MMC (MultiMediaCard): Older standard, generally supported
7.2 Supported Protocols
- PTP (Picture Transfer Protocol): Standard protocol for transferring images from digital cameras.
- Mass Storage Device Protocol: Allows the SD card to be recognized as a storage device.
7.3 Unsupported Devices
Flash or USB thumb drives are generally not supported for direct image importing using Apple Camera Adapters.
8. Avoiding Common Mistakes
To ensure a smooth transfer process, avoid these common mistakes:
- Using Incompatible Adapters: Ensure you are using the correct adapter for your iPhone’s port (Lightning or USB-C).
- SD Card Not Recognized: Make sure the SD card is properly inserted and clean.
- Insufficient Storage: Check that your iPhone has enough storage space for the photos and videos you are transferring.
- Interrupted Transfers: Avoid interrupting the transfer process, as this can lead to data corruption.
- Ignoring Error Messages: Pay attention to any error messages and troubleshoot accordingly.
9. Exploring Third-Party Apps for Enhanced Transfer
While Apple’s built-in tools are effective, third-party apps can offer enhanced features and flexibility.
9.1 Recommended Apps
- File Transfer Apps: Apps like “Documents by Readdle” or “FileBrowser” can help manage and transfer files between your SD card and iPhone.
- Photo Management Apps: Apps like “Google Photos” or “Adobe Lightroom Mobile” offer advanced photo management and editing features.
- Wireless Transfer Apps: Apps provided by Wi-Fi SD card manufacturers (e.g., Eye-Fi, FlashAir) facilitate wireless transfers.
9.2 Benefits of Third-Party Apps
- Advanced Features: Third-party apps often offer advanced features like batch renaming, metadata editing, and custom organization options.
- Wireless Capabilities: Many apps support wireless transfer via Wi-Fi or Bluetooth.
- Cloud Integration: Seamless integration with cloud storage services for easy backup and access.
10. Security Considerations
Protecting your photos during and after the transfer process is crucial.
10.1 Securing Your SD Card
- Physical Security: Keep your SD card in a safe place to prevent loss or theft.
- Data Encryption: Consider encrypting your SD card to protect your photos from unauthorized access.
10.2 Protecting Your iPhone
- Passcode: Use a strong passcode or biometric authentication (Touch ID or Face ID) to secure your iPhone.
- Encryption: Enable encryption on your iPhone to protect your data.
- App Permissions: Review and manage app permissions to ensure only trusted apps have access to your photos.
10.3 Cloud Storage Security
- Strong Passwords: Use strong, unique passwords for your cloud storage accounts.
- Two-Factor Authentication: Enable two-factor authentication for added security.
- Review Permissions: Regularly review and manage app permissions to ensure only trusted apps have access to your cloud storage.
Here’s a comparison table summarizing the different methods for transferring photos from an SD card to your iPhone:
| Method | Pros | Cons | Cost |
|---|---|---|---|
| Apple Camera Adapters | Fast, reliable, direct transfer | Requires an adapter, not wireless | $29 – $39 |
| Wi-Fi SD Cards | Wireless, convenient | Can be slower, requires setup, may drain camera battery | $30 – $100 |
| Cloud Storage | Wireless, accessible from multiple devices | Requires internet connection, may have storage limitations, security concerns | Free (limited) to $10+ per month |
| Camera Apps | Wireless, direct transfer from camera | Requires compatible camera and app, may be limited in functionality | Free (with compatible camera) |
| Third-Party Apps | Enhanced features, flexible | May require payment, compatibility issues | Free to $20+ |
FAQ: Downloading Photos from SD Card to iPhone
Q1: What do I do if my iPhone doesn’t recognize the SD card adapter?
Ensure the adapter is properly connected, and the SD card is correctly inserted. Try restarting your iPhone and reconnecting the adapter. Also, verify that your iPhone is running the latest iOS version. According to Apple support, outdated software can cause compatibility issues.
Q2: Can I use any USB adapter to transfer photos from my camera to my iPhone?
No, Apple camera adapters are specifically designed to work with iPhones and iPads. Other USB adapters may not be compatible and can potentially damage your device.
Q3: Why are some of my photos not importing to my iPhone?
This can happen if the photo format isn’t compatible with iOS or if the photos were renamed, edited, or copied to the SD card. Apple camera adapters can only import content captured by digital cameras.
Q4: How do I delete photos from the SD card after importing them to my iPhone?
After importing, you’ll be prompted to “Keep” or “Delete” the media on the SD card. Choose “Delete” to remove the photos from the SD card.
Q5: Is it possible to transfer RAW images from my SD card to my iPhone?
Yes, Apple camera adapters support importing RAW images. However, you may need a third-party app like Adobe Lightroom Mobile to view and edit them on your iPhone.
Q6: How can I speed up the photo transfer process from my SD card to my iPhone?
Use the Lightning to USB 3 Camera Adapter with supported iPad models or iPhone 15 Pro or later for faster transfer speeds. Close unnecessary apps on your iPhone during the transfer.
Q7: What should I do if I run out of storage space on my iPhone while transferring photos?
Check your iPhone’s storage and delete any unnecessary files or apps to free up space. You can also use iCloud Photos or Google Photos to back up your photos and free up space on your device.
Q8: Can I transfer videos from my SD card to my iPhone using the same method as photos?
Yes, the same methods apply to transferring both photos and videos from your SD card to your iPhone.
Q9: What are the best apps for managing photos on my iPhone after transferring them from the SD card?
Popular photo management apps include Apple Photos, Google Photos, Adobe Lightroom Mobile, and VSCO. These apps offer various features for organizing, editing, and backing up your photos.
Q10: How do I ensure my photos are securely transferred from my SD card to my iPhone?
Use a secure adapter, keep your iPhone passcode-protected, and consider encrypting your SD card. For cloud storage, use strong passwords and enable two-factor authentication.
Conclusion
Transferring photos from an SD card to your iPhone is a simple process that can greatly enhance your photography workflow. Whether you prefer using Apple Camera Adapters or wireless methods, dfphoto.net hopes this guide has provided you with the knowledge and tools to efficiently manage your photos. So, grab your camera, snap some stunning shots, and effortlessly bring those memories to your iPhone!
Ready to elevate your photography game? Visit dfphoto.net for more tips, tutorials, and inspiration. Explore our extensive collection of stunning photos, connect with a vibrant community of photographers, and discover the latest trends and techniques in the world of photography. Don’t miss out – start your journey today!
Address: 1600 St Michael’s Dr, Santa Fe, NM 87505, United States.
Phone: +1 (505) 471-6001.
Website: dfphoto.net.