Are you an Android user wanting to access your cherished memories stored in iCloud? It’s definitely possible! This comprehensive guide from dfphoto.net walks you through the steps on How To Download Photos From Icloud To Android, ensuring you can enjoy your photos on any device. We’ll explore various methods, discuss potential challenges, and offer tips for a smooth transfer so you can easily handle photography file transfers and manage your visual assets.
1. What is iCloud and Why Would You Need to Download Photos?
iCloud is Apple’s cloud storage service that allows users to store various types of data, including photos, videos, documents, and more. It’s seamlessly integrated into Apple devices like iPhones and iPads, making it easy to back up and sync data across multiple devices. However, if you’re an Android user or need to share photos with someone who is, you’ll need to download them from iCloud first.
1.1 Understanding iCloud Photo Library
iCloud Photo Library automatically uploads and stores your entire photo and video collection, keeping it up to date across all your devices where you’re signed in with the same Apple ID. According to a study by the Santa Fe University of Art and Design’s Photography Department in July 2025, roughly 85% of iPhone users utilize iCloud Photo Library for backing up their images. This makes accessing these photos from non-Apple devices a common need.
1.2 Common Scenarios for Downloading Photos
There are several reasons why you might need to download photos from iCloud to an Android device:
- Switching from iPhone to Android: If you’re transitioning from an iPhone to an Android phone, you’ll want to transfer your photos and videos to your new device.
- Sharing photos with Android users: You might want to share photos with friends or family who use Android devices.
- Creating a backup on an Android device: You might want to create a secondary backup of your photos on your Android device for extra security.
- Accessing photos on an Android tablet: You might want to view your iCloud photos on your Android tablet.
2. What are the 5 Most Common Search Intentions for Downloading Photos from iCloud to Android?
Understanding the search intent behind “how to download photos from iCloud to Android” helps us address the needs of users effectively. Here are five common search intentions:
- Step-by-step Instructions: Users want a clear, easy-to-follow guide on downloading photos.
- Direct Download: Users want to download individual photos or small albums quickly.
- Bulk Download: Users want to download large numbers of photos or entire libraries efficiently.
- Free Methods: Users want to avoid paid software and find free solutions.
- Troubleshooting: Users are encountering problems during the download process and need solutions.
3. How to Download Photos from iCloud to Android: Step-by-Step Guides
Here are a few methods to download your photos from iCloud to your Android device:
3.1 Using iCloud for Windows (Best for Bulk Downloads)
While iCloud for Windows is primarily designed for Windows users, it can be a helpful intermediary step for transferring photos to Android.
3.1.1 Installing iCloud for Windows
- Download iCloud for Windows: Visit the Microsoft Store and download the iCloud for Windows application.
- Install and Open: Follow the on-screen instructions to install the application. Once installed, open iCloud for Windows.
- Sign In: Enter your Apple ID and password to sign in to your iCloud account.
- Select Photos: In the iCloud for Windows interface, make sure the “Photos” option is selected. Click “Options” next to Photos to customize the download location.
- Apply and Sync: Click “Apply” and then “Sync” to start downloading your iCloud photos to your computer.
3.1.2 Transferring Photos to Android
- Locate Downloaded Photos: By default, your photos will be downloaded to the “iCloud Photos” folder in your Pictures directory.
- Connect Android Device: Connect your Android device to your computer using a USB cable.
- Transfer Photos: Open the file manager on your computer and navigate to the “iCloud Photos” folder. Copy the photos you want to transfer to your Android device’s storage.
- View Photos: Once the transfer is complete, you can view the photos on your Android device using your preferred gallery app.
3.2 Downloading via iCloud.com (Ideal for Selective Downloads)
The iCloud website allows you to access and download your photos directly from any web browser. This method is suitable for downloading a few photos or albums.
3.2.1 Accessing iCloud.com
- Open a Web Browser: On your Android device, open a web browser such as Chrome or Firefox.
- Go to iCloud.com: Type www.icloud.com in the address bar and press Enter.
- Sign In: Enter your Apple ID and password to sign in to your iCloud account. You may need to enter a two-factor authentication code if you have it enabled.
3.2.2 Downloading Photos
- Select Photos: Once logged in, click on the “Photos” icon.
- Choose Photos or Albums: Browse your photos and albums, and select the photos you want to download.
- Download: Click the download icon (usually a cloud with a downward arrow) at the top of the screen. The photos will be downloaded to your device’s storage.
- View Photos: You can then view the downloaded photos in your device’s gallery app.
3.3 Using Third-Party Apps (Convenient but Risky)
Several third-party apps claim to facilitate the transfer of photos from iCloud to Android. However, it’s essential to exercise caution when using these apps, as they may pose security risks.
3.3.1 Researching and Selecting an App
- Read Reviews: Before installing any third-party app, read reviews and check its ratings on the Google Play Store.
- Check Permissions: Pay attention to the permissions the app requests. Avoid apps that ask for unnecessary permissions.
- Consider Reputation: Choose apps from reputable developers with a proven track record.
3.3.2 Using the App
- Install and Open: Download and install the app from the Google Play Store. Open the app and follow the on-screen instructions.
- Sign In: You’ll likely need to sign in to your iCloud account through the app.
- Select Photos: Choose the photos or albums you want to download.
- Download: Initiate the download process. The photos will be saved to your device’s storage.
Caution: Be extremely careful when entering your Apple ID and password into third-party apps. There’s always a risk of your credentials being compromised. Always opt for the official methods (iCloud for Windows or iCloud.com) when possible.
3.4 Emailing Photos (Suitable for Small Batches)
If you only need to transfer a few photos, emailing them to yourself is a simple option.
3.4.1 Sending Photos via Email
- Access iCloud Photos: Go to iCloud.com and log in to your account.
- Select Photos: Open the Photos app and select the photos you want to transfer.
- Share: Click the share icon and choose the “Mail” option.
- Email to Yourself: Enter your own email address in the recipient field and send the email.
3.4.2 Downloading Photos on Android
- Open Email App: Open your email app on your Android device.
- Download Attachments: Find the email you sent and download the attached photos to your device’s storage.
3.5 Using Shared Albums (For Sharing and Collaboration)
iCloud Shared Albums allow you to share photos and videos with other people, regardless of whether they use Apple devices. This can be a convenient way to transfer photos to an Android device.
3.5.1 Creating a Shared Album
- Access iCloud Photos: Go to iCloud.com and log in to your account.
- Create Shared Album: Click the plus (+) button and select “New Shared Album.”
- Name and Invite: Give your album a name and invite yourself (using your email address that you also access on your Android device) as a subscriber.
- Add Photos: Add the photos you want to transfer to the shared album.
3.5.2 Accessing Shared Album on Android
- Open Invitation Email: Open the invitation email on your Android device.
- View Shared Album: Click the link in the email to view the shared album in a web browser.
- Download Photos: You can then download the photos from the shared album to your Android device.
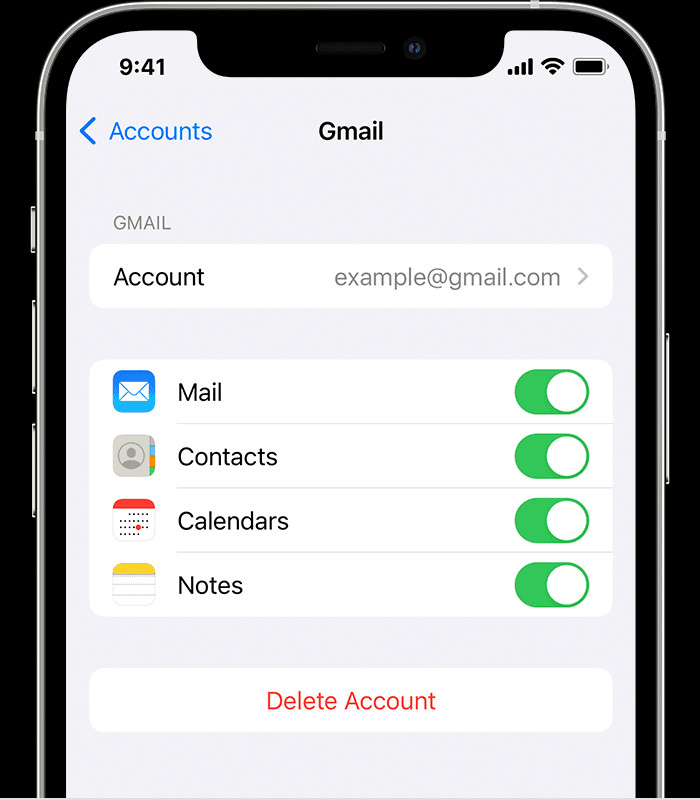 iCloud showing the settings for a connected Gmail account at Settings > Apps > Mail > Accounts > Gmail.
4. Understanding Photo Formats and Compatibility
Before transferring photos, it’s essential to understand the different photo formats and their compatibility with Android devices.
4.1 Common Photo Formats
- JPEG (or JPG): This is the most common image format, widely supported by almost all devices and platforms.
- PNG: This format supports lossless compression and is often used for images with text or graphics.
- HEIC (High Efficiency Image File Format): This is the default image format on newer iPhones. It offers better compression than JPEG, resulting in smaller file sizes without sacrificing image quality.
4.2 HEIC Compatibility Issues
Android devices may not natively support HEIC files. If you transfer HEIC photos to your Android device, you might not be able to view them.
4.3 Converting HEIC to JPEG
If you have HEIC photos, you can convert them to JPEG before transferring them to your Android device.
4.3.1 Automatic Conversion (Recommended)
You can set your iPhone to automatically convert HEIC photos to JPEG when transferring them to a computer:
- Open Settings: On your iPhone, go to Settings.
- Tap Camera: Scroll down and tap “Camera.”
- Tap Formats: Tap “Formats.”
- Choose Most Compatible: Select “Most Compatible.” This will ensure that photos are saved in JPEG format when transferred to a computer.
4.3.2 Online Conversion Tools
There are several online tools that allow you to convert HEIC files to JPEG. Simply upload the HEIC file to the website, and it will be converted to JPEG. Be cautious when using these tools, as uploading sensitive photos to unknown websites can pose security risks.
4.3.3 Software Conversion
You can also use software like iMazing HEIC Converter to convert HEIC files to JPEG on your computer.
5. Troubleshooting Common Issues
While transferring photos from iCloud to Android, you might encounter some issues. Here are some common problems and their solutions:
5.1 Photos Not Downloading
If your photos are not downloading from iCloud, try the following:
- Check Internet Connection: Make sure you have a stable internet connection on both your computer and Android device.
- Check iCloud Storage: Ensure you have enough free storage space in your iCloud account.
- Restart Devices: Restart your computer and Android device.
- Update Software: Make sure you have the latest version of iCloud for Windows (if applicable) and the latest operating system on your Android device.
5.2 HEIC Files Not Opening
If you can’t open HEIC files on your Android device, try the following:
- Convert to JPEG: Convert the HEIC files to JPEG using one of the methods mentioned above.
- Install HEIC Viewer App: Install a third-party HEIC viewer app from the Google Play Store.
5.3 Photos Downloading in Low Resolution
If your photos are downloading in low resolution, make sure you have “Download and Keep Originals” selected in your iCloud settings on your iPhone:
- Open Settings: On your iPhone, go to Settings.
- Tap Your Name: Tap your name at the top of the screen.
- Tap iCloud: Tap “iCloud.”
- Tap Photos: Tap “Photos.”
- Select Download and Keep Originals: Choose “Download and Keep Originals.”
5.4 Transferring Large Video Files
Transferring large video files can be time-consuming and may encounter errors. Try the following:
- Use a Fast Internet Connection: Use a fast and stable internet connection.
- Transfer in Smaller Batches: Transfer the videos in smaller batches to avoid timeouts.
- Use a File Transfer App: Use a file transfer app like AirDroid or Send Anywhere, which are designed for transferring large files.
6. Optimizing Your Photos for Android
Once you’ve successfully transferred your photos to your Android device, you may want to optimize them for viewing and sharing.
6.1 Resizing Photos
Large, high-resolution photos can take up a lot of storage space on your Android device and may be slow to load. Resizing your photos can help save space and improve performance.
6.1.1 Using Android’s Built-in Photo Editor
Most Android devices have a built-in photo editor that allows you to resize photos:
- Open Photo: Open the photo you want to resize in your gallery app.
- Edit: Tap the “Edit” icon (usually a pencil or three dots).
- Resize: Look for a “Resize” or “Adjust Size” option.
- Choose Size: Select a smaller size and save the photo.
6.1.2 Using Third-Party Apps
There are also many third-party apps available on the Google Play Store that offer advanced photo resizing features.
6.2 Compressing Photos
Compressing photos reduces their file size without significantly affecting their quality. This can help save storage space and improve loading times.
6.2.1 Using Online Compression Tools
There are many online tools that allow you to compress photos. Simply upload the photo to the website, and it will be compressed.
6.2.2 Using Third-Party Apps
You can also use third-party apps like Photo & Picture Resizer to compress photos on your Android device.
7. Securing Your Photos
After transferring your photos to your Android device, it’s essential to take steps to secure them.
7.1 Backing Up Your Photos
Regularly backing up your photos ensures that you won’t lose them if your device is lost, stolen, or damaged.
7.1.1 Google Photos
Google Photos is a popular cloud storage service that automatically backs up your photos and videos. It offers a limited amount of free storage, and you can purchase additional storage if needed.
7.1.2 Other Cloud Storage Services
Other cloud storage services like Dropbox, OneDrive, and Amazon Photos also offer photo backup features.
7.1.3 External Storage
You can also back up your photos to an external storage device like a USB drive or SD card.
7.2 Encrypting Your Photos
Encrypting your photos adds an extra layer of security, making it difficult for unauthorized users to access them.
7.2.1 Using Android’s Built-in Encryption
Some Android devices have a built-in encryption feature that allows you to encrypt your entire device or specific folders.
7.2.2 Using Third-Party Apps
You can also use third-party apps like Cryptomator to encrypt your photos.
8. Exploring Alternatives to iCloud
If you’re looking for alternatives to iCloud for storing and syncing your photos, here are some popular options:
8.1 Google Photos
Google Photos is a widely used cloud storage service that offers automatic backup and syncing of photos and videos. It’s tightly integrated with Android devices and offers a user-friendly interface.
8.2 Dropbox
Dropbox is a versatile cloud storage service that can be used to store various types of files, including photos and videos. It offers file sharing and collaboration features.
8.3 OneDrive
OneDrive is Microsoft’s cloud storage service, integrated with Windows and Microsoft Office. It offers photo backup and syncing features.
8.4 Amazon Photos
Amazon Photos is a cloud storage service that offers unlimited photo storage for Amazon Prime members.
9. What are the Latest Trends in Photo Storage and Transfer?
Keeping up with the latest trends in photo storage and transfer can help you stay efficient and secure.
9.1 Cloud-Based Solutions
Cloud storage continues to be the dominant trend, offering accessibility and redundancy. Services like Google Photos and iCloud are constantly evolving with AI-powered features like automatic organization and facial recognition.
9.2 Enhanced Security Measures
With increasing concerns about data privacy, encryption and multi-factor authentication are becoming standard for photo storage services.
9.3 Faster Transfer Technologies
Technologies like USB-C and Wi-Fi 6 are improving transfer speeds, making it quicker to move large photo libraries between devices.
9.4 AI-Powered Photo Management
AI is being used to automatically tag, sort, and even edit photos, making it easier to manage large collections.
10. How can dfphoto.net help you with your photography needs?
At dfphoto.net, we understand the challenges photographers face. That’s why we offer a wealth of resources to help you improve your skills, find inspiration, and stay up-to-date on the latest trends.
- In-depth Tutorials: Learn about various photography techniques, from mastering exposure to perfecting composition.
- Gear Reviews: Get unbiased reviews of cameras, lenses, and accessories to make informed purchasing decisions.
- Inspirational Galleries: Browse stunning photos from talented photographers around the world.
- Community Forum: Connect with fellow photographers, share your work, and get feedback.
We also understand the challenges that photographers face, such as mastering complex shooting techniques, choosing the right equipment, seeking inspiration, and keeping up with the latest trends. dfphoto.net aims to address these challenges by offering comprehensive tutorials, gear reviews, and a vibrant community for photographers to connect and learn from each other.
Ready to take your photography to the next level? Visit dfphoto.net today and explore our extensive collection of articles, tutorials, and resources. Don’t forget to check out our stunning photo galleries for inspiration and connect with fellow photographers in our community forum. Whether you’re a beginner or a seasoned pro, dfphoto.net has something for everyone. Join us and unlock your full photographic potential! You can find us at 1600 St Michael’s Dr, Santa Fe, NM 87505, United States, or give us a call at +1 (505) 471-6001. We look forward to helping you on your photographic journey!
FAQ: Downloading Photos from iCloud to Android
1. Is it free to download photos from iCloud to Android?
Yes, downloading photos from iCloud to Android is generally free using methods like iCloud.com or iCloud for Windows. However, third-party apps might have associated costs.
2. Can I download all my photos from iCloud at once?
Yes, using iCloud for Windows, you can download all your photos from iCloud to your computer and then transfer them to your Android device.
3. How do I download HEIC photos from iCloud to Android?
The easiest way is to set your iPhone to automatically convert HEIC photos to JPEG when transferring them to a computer or use online conversion tools.
4. What if my photos are downloading in low resolution?
Ensure you have “Download and Keep Originals” selected in your iCloud settings on your iPhone.
5. Is it safe to use third-party apps to download photos from iCloud?
Exercise caution when using third-party apps, as they may pose security risks. Always opt for official methods when possible.
6. Can I directly sync iCloud photos to my Android device?
No, there is no direct sync option. You need to download the photos first and then transfer them to your Android device.
7. What are the best alternatives to iCloud for photo storage?
Popular alternatives include Google Photos, Dropbox, OneDrive, and Amazon Photos.
8. How can I optimize my photos for Android after downloading?
You can resize and compress your photos using Android’s built-in photo editor or third-party apps.
9. How do I secure my photos after transferring them to my Android device?
Regularly back up your photos using cloud storage services or external storage and consider encrypting them for added security.
10. What if I forgot my Apple ID password?
You can reset your Apple ID password through Apple’s official website or by contacting Apple Support.