Google Photos is a fantastic service for backing up, organizing, and sharing your precious memories. Its seamless integration across devices and powerful AI features make it a top choice for photo management. However, there are several reasons why you might want to download your photos from Google Photos to your computer. Whether you’re looking to create a local backup, migrate to a different service, or simply want offline access to your images, having a copy of your Google Photos library on your PC or Mac is a smart move.
This comprehensive guide will walk you through the most effective methods to download your photos from Google Photos to your computer. We’ll cover downloading your entire library, individual photos, and even complete albums, ensuring you have all the information you need for a smooth and efficient process. Let’s dive in and learn how to safeguard your digital memories!
Downloading All Google Photos at Once Using Google Takeout
For those with extensive Google Photos libraries, downloading everything at once is the most efficient approach. Google Takeout is a service provided by Google that allows you to export your data from various Google services, including Google Photos. Here’s a step-by-step guide to download all your Google Photos using Google Takeout:
Step 1: Navigate to Google Takeout
Start by opening your web browser and going to the Google Account page. You can easily find it by searching “Google Account” or directly typing myaccount.google.com into your address bar. Once you’re on your Google Account page, look for the “Data & Personalization” option in the left-hand menu or center panel and click on it.
Access the Data & Personalization section within your Google Account settings to begin the photo download process.
On the “Data & Personalization” page, scroll down until you find the section labeled “Download your data.” Click on “Download your data” to proceed to Google Takeout.
Choose the “Download your data” option to initiate the export of your Google Photos and other Google service data.
Step 2: Deselect All and Choose Google Photos
You will now be on the Google Takeout page, where you can select which Google services you want to download data from. By default, all services are usually selected. To download only your Google Photos, click the “Deselect all” button at the top of the list.
Deselect all pre-selected Google services and then specifically select Google Photos to download only your photo library.
After deselecting all, scroll down the list of services until you find “Google Photos.” Check the box next to “Google Photos” to select it for download. You can customize the export further by clicking the “All photo albums included” option. This allows you to choose specific albums or download all of them. If you want everything, leave it as is.
Step 3: Customize Your Export Settings
Once you’ve selected Google Photos, scroll down to the bottom of the page and click the “Next step” button.
 Proceed to Next Step in Google Takeout
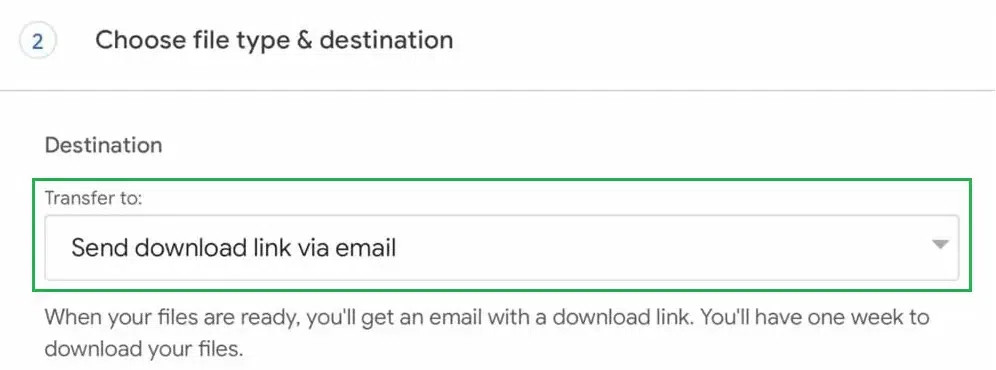
On the next page, you’ll configure your export settings. First, choose your delivery method. The default and recommended option is “Send download link via email.” This is generally the easiest method as Google will email you when your export is ready with a download link. You can also choose to add the export to cloud storage services like Google Drive, Dropbox, or Microsoft OneDrive, if you prefer.
Next, select the export frequency. “Export once” is suitable for a one-time download. You can also set up scheduled exports if you want to regularly back up your Google Photos.
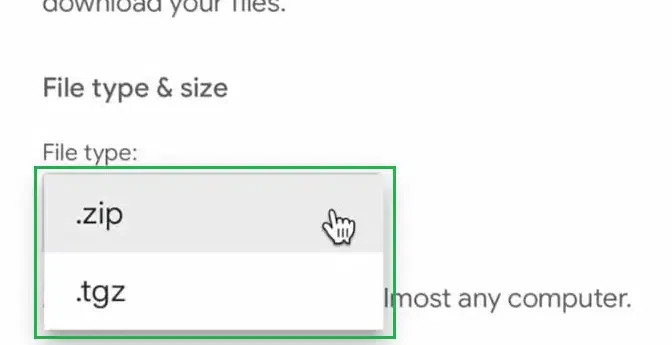
Then, choose the file type and size. For file type, .zip is a common and widely compatible option. For larger libraries, Google Takeout splits your download into multiple files. You can choose the maximum file size for these archives. Smaller file sizes might be easier to download on slower connections, but for faster downloads, you can choose a larger size like 50GB.
 Choose File Type and Size for Google Photos Export
Step 4: Create Export and Wait for Download Link
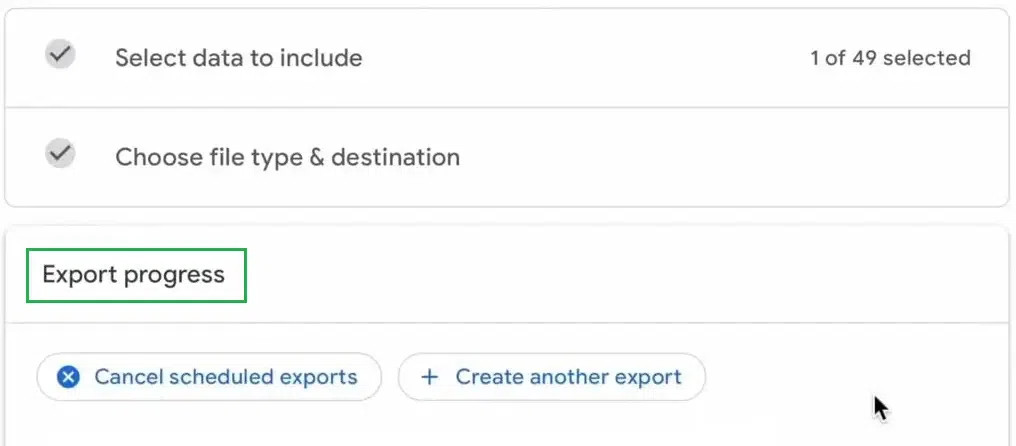
After configuring your settings, click the “Create export” button. Google will then start preparing your Google Photos export.
 Create Export in Google Takeout
The time it takes for Google to prepare your export depends on the size of your Google Photos library. It can range from a few hours to a few days. You can monitor the progress on the “Export progress” page. Once your export is ready, you will receive an email from Google with the subject line “Your Google data is ready to download.”
Step 5: Download Your Photos
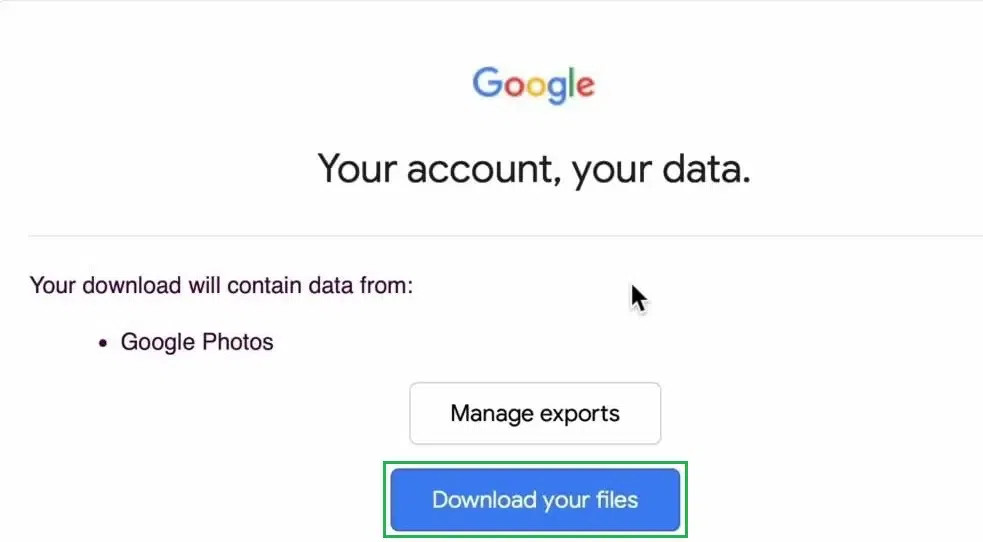
Open the email from Google and click the “Download archive” button in the email. This will take you back to the Google Takeout page where you can download your photos as a .zip file (or multiple files, depending on the size).
 Download Archive Link in Google Takeout Email
Once the download is complete, locate the downloaded .zip file on your computer. You may need to unzip or extract the files to access your photos. After extracting, you’ll find your Google Photos organized in folders, often by album and date.
Downloading a Particular Image from Google Photos to Your Computer
If you only need to download a few specific photos, downloading them individually is the quickest method. Here’s how to download a single image from Google Photos:
- Open Google Photos: Go to the Google Photos website (
photos.google.com) and sign in to your Google account. - Select the Image: Find and click on the image you want to download to open it in a larger view.
- Open the Options Menu: In the top right corner of the screen, you’ll see three vertical dots. Click on these dots to open the options menu.
- Choose Download: From the dropdown menu, select “Download.” The image will then be downloaded to your computer’s default download location.
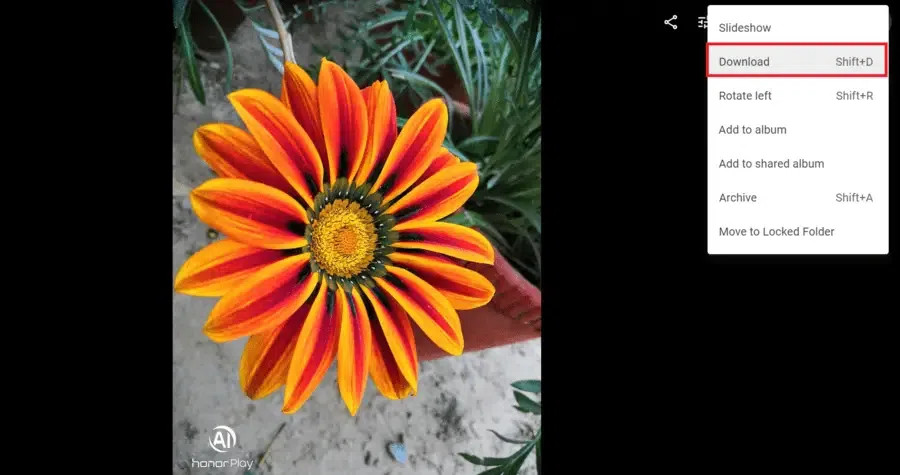 Download a Single Image from Google Photos Menu
Shortcut: You can also use the keyboard shortcut Shift + D once you have opened the image to directly download it.
Downloading a Complete Album from Google Photos to Your Computer
Downloading an entire album is a convenient way to save a collection of photos at once. Here are the steps to download a complete album from Google Photos:
- Open Google Photos and Select Album: Go to Google Photos and navigate to the “Albums” section. Open the album you wish to download.
- Open Album Options: At the top right of the album view, click the three-dot menu to open the album options.
- Choose Download All: From the dropdown menu, select “Download all.” Google Photos will then compress the album into a
.zipfile and download it to your computer.
After the download finishes, you’ll find a .zip file containing all the photos and videos from the album. Extract the contents of the .zip file to access your downloaded album.
Common Issues and Troubleshooting Tips During Google Photos Download
While downloading photos from Google Photos is generally straightforward, you might encounter some issues. Here are common problems and how to troubleshoot them:
1. Slow or Interrupted Downloads
Large downloads, especially when using Google Takeout for your entire library, can take a significant amount of time. Unstable internet connections can lead to slow or interrupted downloads.
Fix:
- Stable Internet Connection: Ensure you are using a stable and reliable internet connection. If using Wi-Fi, try moving closer to your router or consider using an Ethernet connection for a more stable wired connection.
- Download During Off-Peak Hours: Internet speeds can be slower during peak usage times. Try downloading during off-peak hours for potentially faster speeds.
2. File Size Limitations
Google Takeout might create very large archive files, especially if you have years of photos and videos. Large files are more prone to download interruptions and can be harder to manage.
Fix:
- Choose Smaller Archive Sizes: When setting up your Google Takeout export, choose a smaller archive size (e.g., 2GB or 4GB) instead of the maximum size. This will split your download into smaller, more manageable parts, reducing the risk of interruptions and making downloads easier to handle.
3. Missing Photos in Download
In rare cases, some users report missing photos after downloading from Google Takeout.
Fix:
- Verify Backup: Before initiating the download, double-check that all your photos are indeed backed up to Google Photos. Ensure that you have synced all devices and accounts correctly.
- Retry Export: If you suspect photos are missing, try running the Google Takeout export again. Sometimes, temporary glitches can occur during the export process.
Tips for Efficiently Managing Your Downloaded Photos
Once you’ve successfully downloaded your photos, here are some tips for managing them efficiently:
- Organize Your Photos: Create a logical folder structure on your computer to organize your downloaded photos. You can organize them by date, event, or album, mirroring your Google Photos organization or creating a new system.
- Backup Your Downloaded Photos: Consider backing up your downloaded photos to an external hard drive or another cloud storage service. This ensures you have multiple backups of your precious memories.
- Use Photo Management Software: Software like Adobe Lightroom, or even your operating system’s built-in photo apps (like Photos on macOS or Photos app on Windows) can help you organize, edit, and view your downloaded photos.
Conclusion
Downloading your photos from Google Photos to your computer is a straightforward process, whether you need your entire library, a single image, or a specific album. Using Google Takeout is ideal for bulk downloads, while direct download options within Google Photos are perfect for individual photos or albums. By following these steps and tips, you can ensure your valuable photo memories are safely backed up and accessible on your computer. Regularly backing up your Google Photos to your computer provides an extra layer of security and peace of mind, safeguarding your digital legacy for years to come.