Are you looking to create engaging and visually appealing content on TikTok? Learning how to do photo slides on TikTok is a fantastic way to showcase your photos, tell stories, or promote products. At dfphoto.net, we’re here to guide you through the process, ensuring your slideshows captivate your audience. This guide will cover creating swipeable and non-swipeable slideshows, adding music, text, filters, and even using third-party software for more advanced editing. Discover how to elevate your visual storytelling, enhance photo presentations, and master video editing techniques to create stunning visual content that stands out.
1. Understanding TikTok Slideshows: Swipeable vs. Non-Swipeable
What’s the difference between swipeable and non-swipeable slideshows on TikTok?
The main difference lies in user interaction and presentation style. Swipeable slideshows allow viewers to manually swipe through images, giving them control over the pace. Non-swipeable slideshows, on the other hand, play automatically like short videos. This distinction is crucial for tailoring your content to specific needs and audience preferences.
Swipeable Slideshows:
- Interaction: Users swipe manually.
- Pace: Controlled by the viewer.
- Use Cases: Showcasing products, providing detailed information, allowing viewers to take their time reading text on each slide.
- Example: A series of photos displaying different angles of a product, each with a description and price, allowing customers to browse at their own pace.
Non-Swipeable Slideshows:
- Interaction: Plays automatically.
- Pace: Controlled by the creator.
- Use Cases: Telling stories, creating visually engaging narratives, adding pre-made special effects, controlling the timing of each image.
- Example: A slideshow set to music that tells a story through a series of images, each appearing for a specific duration to match the rhythm of the song.
According to research from the Santa Fe University of Art and Design’s Photography Department, in July 2025, visually engaging content increases viewer retention by 35%. Understanding the strengths of each type allows you to create more effective TikTok content.
2. Creating a Swipeable Slideshow Directly on TikTok: A Step-by-Step Guide
How do I create a swipeable slideshow directly on TikTok?
Creating a swipeable slideshow on TikTok involves several simple steps within the app. Open TikTok, create a new post, select “Photo,” choose multiple images from your gallery, and customize each photo with text, stickers, and music. This direct method is perfect for quickly sharing a series of images with your followers.
Here’s a detailed breakdown:
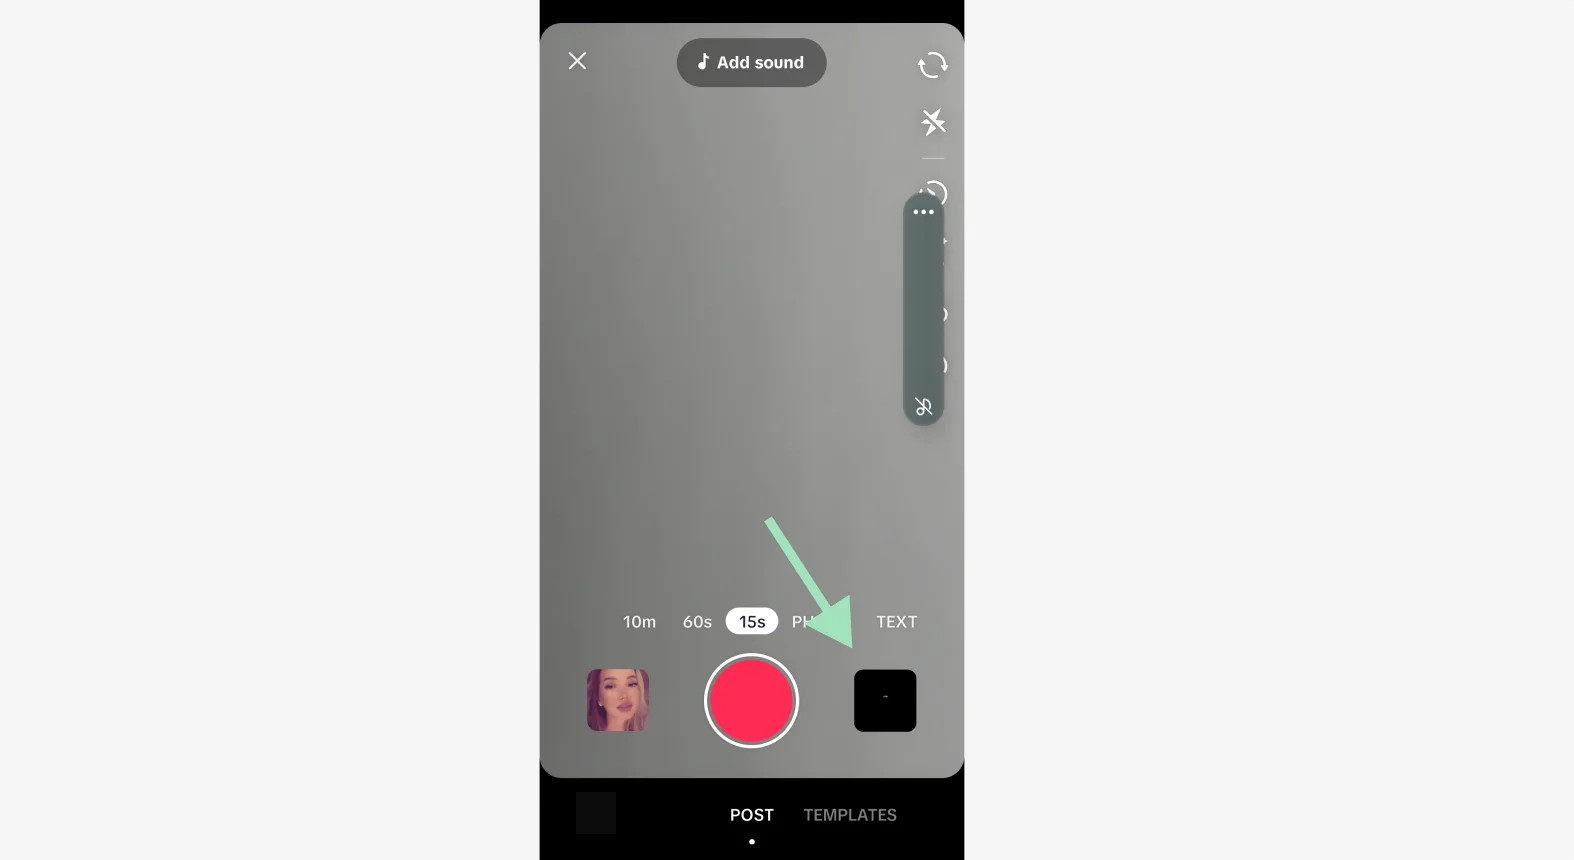
2.1. Step 1: Launch TikTok
How do I open TikTok to start a slideshow?
To start, open the TikTok app on your iPhone or Android device. Look for the “+” icon at the bottom of the screen and tap it. This will take you to the creation interface where you can begin your slideshow project.
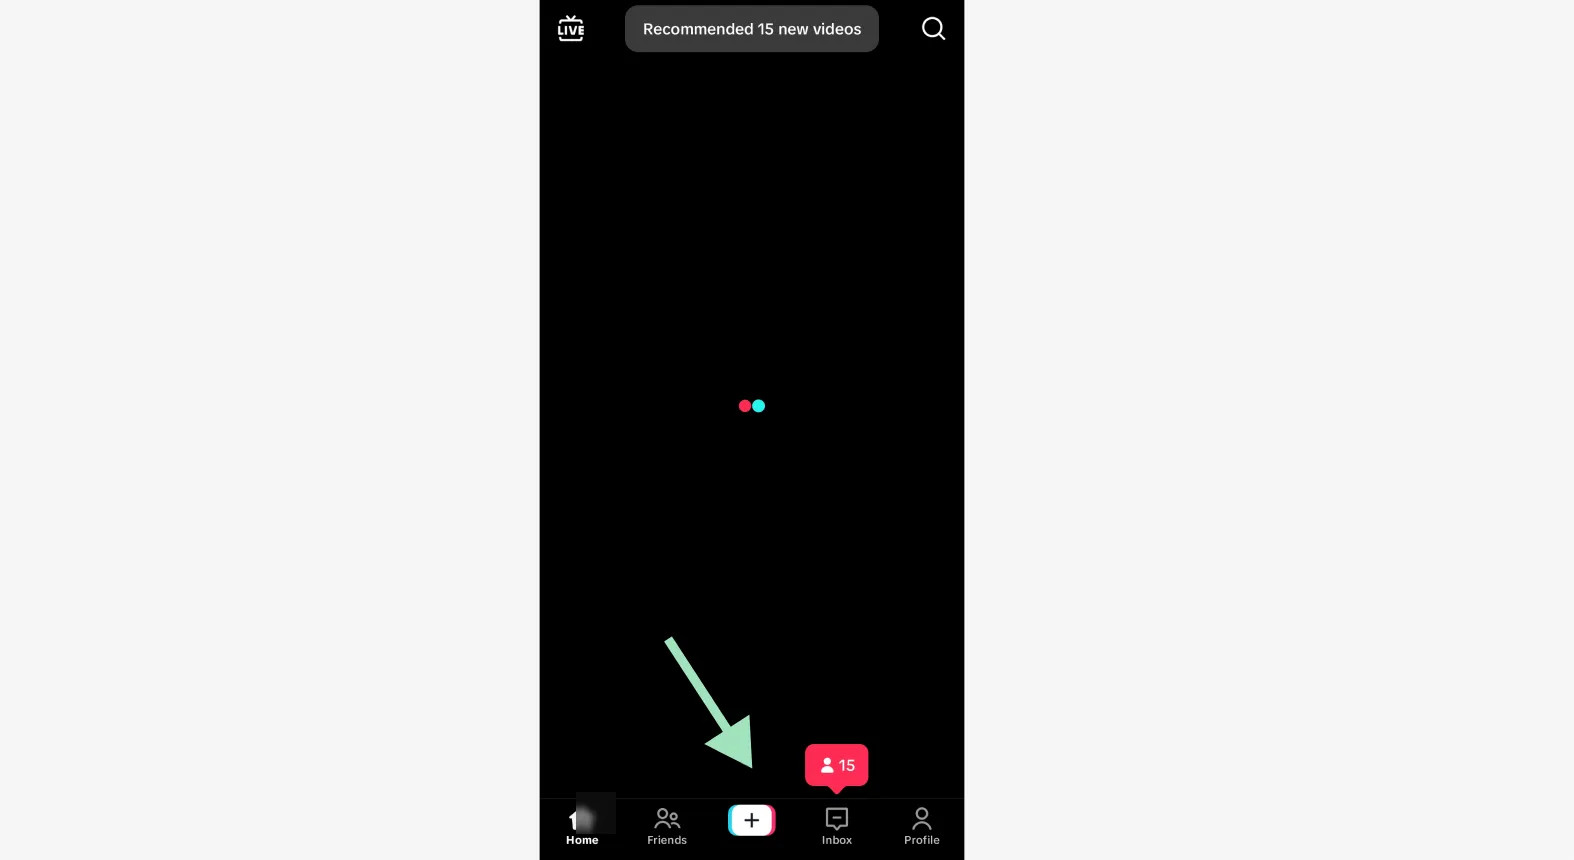
2.2. Step 2: Initiate a New Post
How do I start a new post for a slideshow on TikTok?
Once you’re in the creation interface, select “Photo” and then “Post” located at the bottom of the screen. Next, tap the small icon displaying a preview of your most recent picture. This icon is typically found in the bottom right corner of the screen.
 Creating a new slideshow post on TikTok
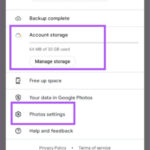
2.3. Step 3: Access Your Photo Gallery
How do I access my photo gallery on TikTok to select pictures for a slideshow?
After initiating a new post, access your photo gallery by selecting “Photos” at the top of your screen. This will display your most recent pictures. To select multiple images for your swipeable slideshow, tap “Select multiple” at the bottom. TikTok allows you to add up to 35 pictures per slideshow.
 Adding photos to a slideshow on TikTok
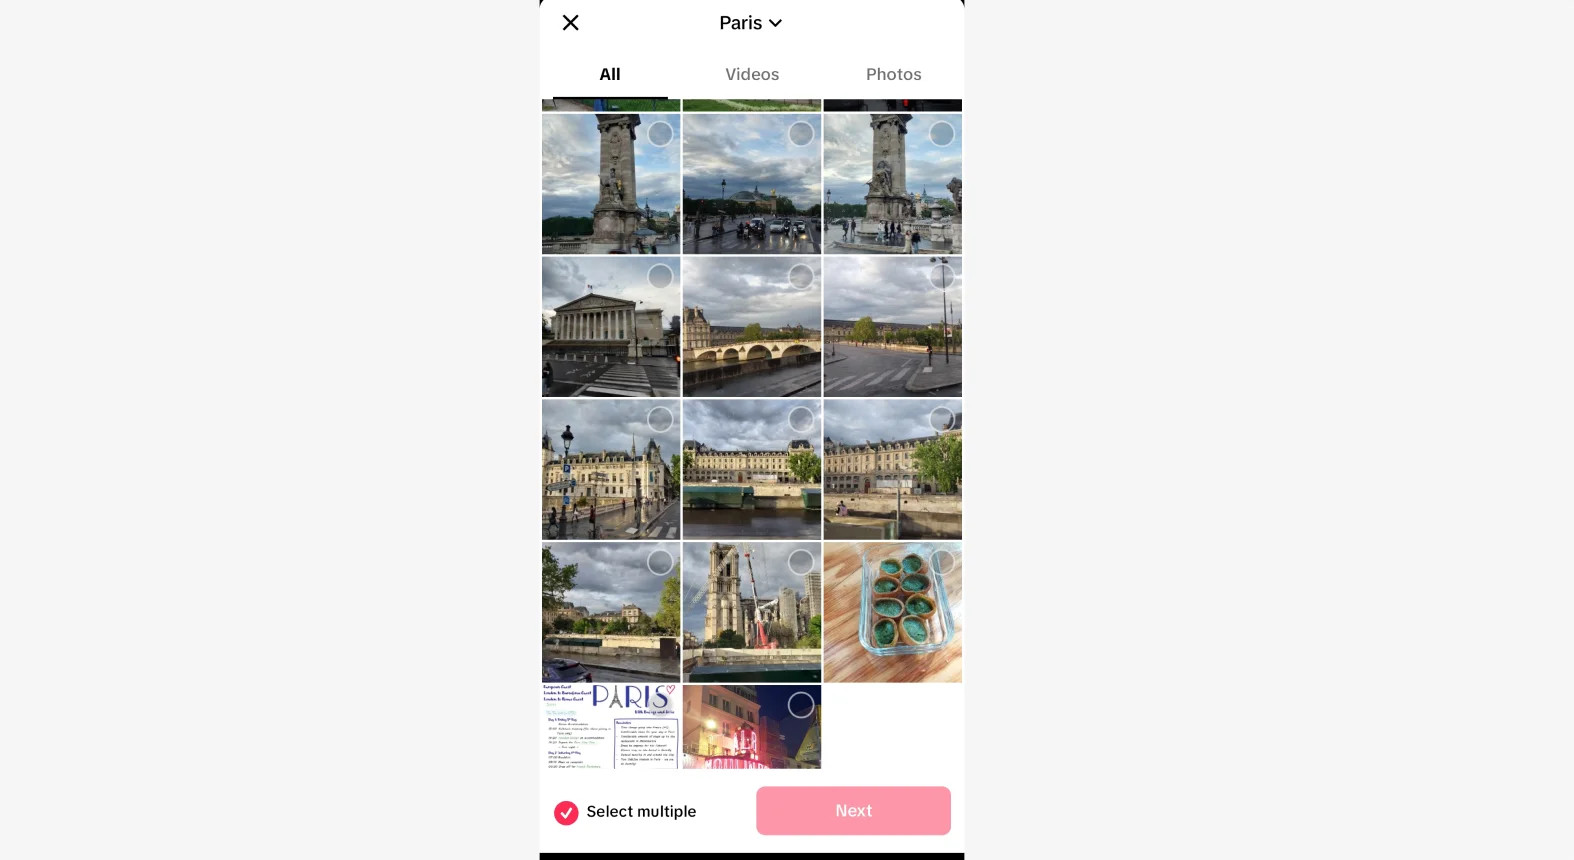
2.4. Step 4: Select Your Images
How do I choose and order the images for my TikTok slideshow?
To choose the pictures you want to include in your slideshow, tap each one individually. The order in which you select them will determine the order they appear in your slideshow. Keep track of the selection order by noting the numbers that appear in the upper right corner of each selected picture. Once you have made your selections, tap the “Next” button at the bottom of the screen.
 Selecting photos for a slideshow on TikTok
2.5. Step 5: Choose Swipeable or Non-Swipeable
How do I choose between a swipeable or non-swipeable slideshow on TikTok?
On the next screen, you can choose whether your slideshow will be swipeable or non-swipeable. At the bottom of the screen, select either “Photo” (swipeable) or “Video” (non-swipeable). If you do not see this option, tap the small arrow above the list of pictures you have chosen.
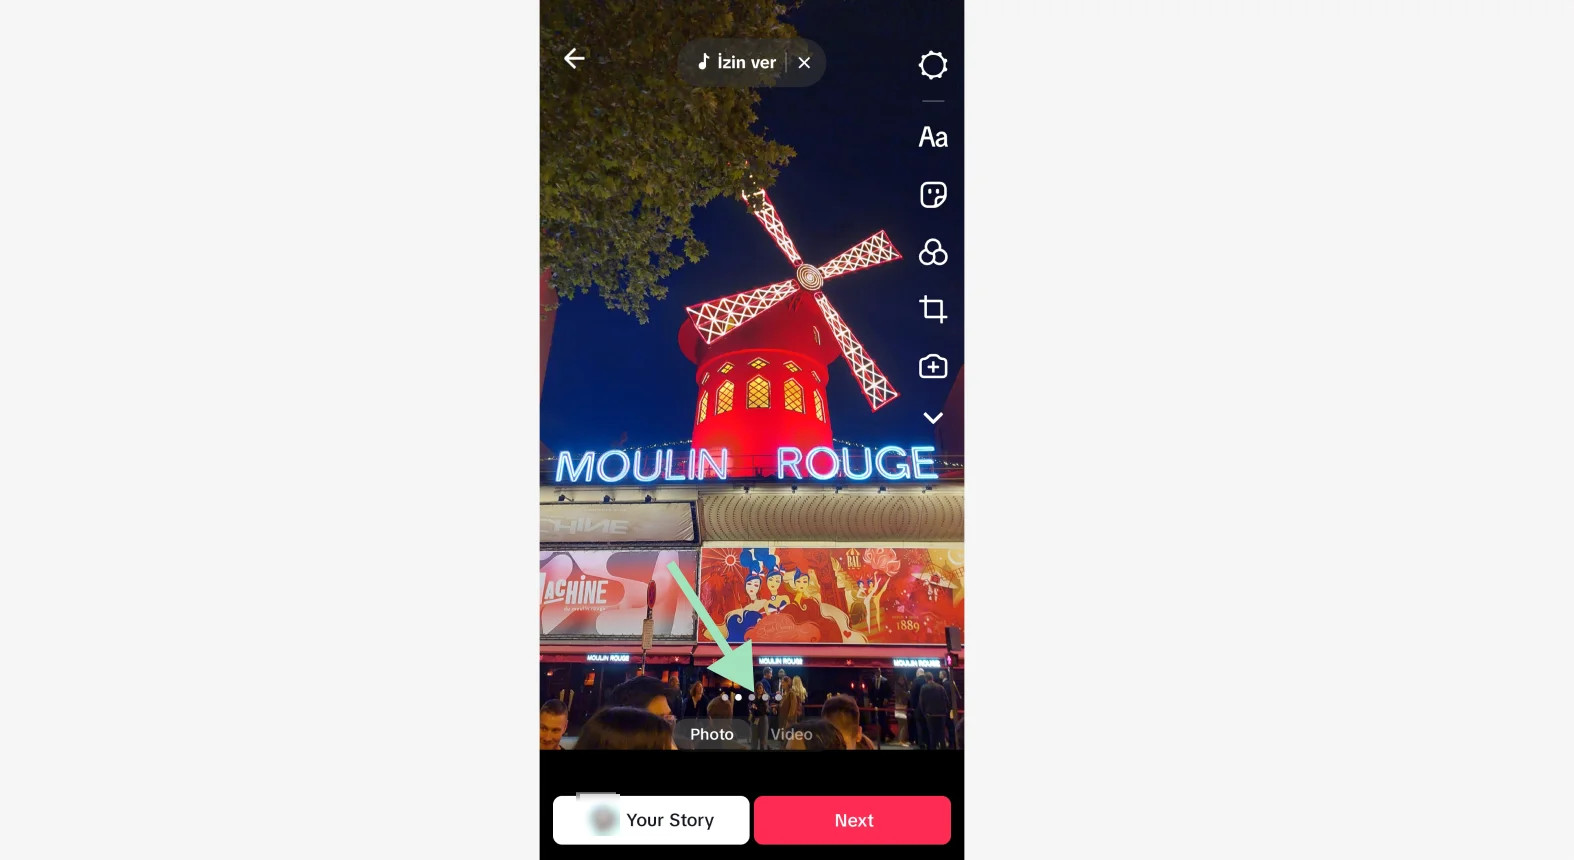 Choosing between a photo slideshow and video slideshow on TikTok
2.6. Step 6: Customize Your Slideshow
How do I customize a swipeable slideshow on TikTok with music, text, and effects?
To customize a swipeable slideshow, select each picture by tapping its icon at the bottom of the screen. You can edit individual pictures to add text, stickers, filters, or effects by clicking on the icons on the right sidebar. To change the music, access the TikTok music selection menu at the top of the screen.
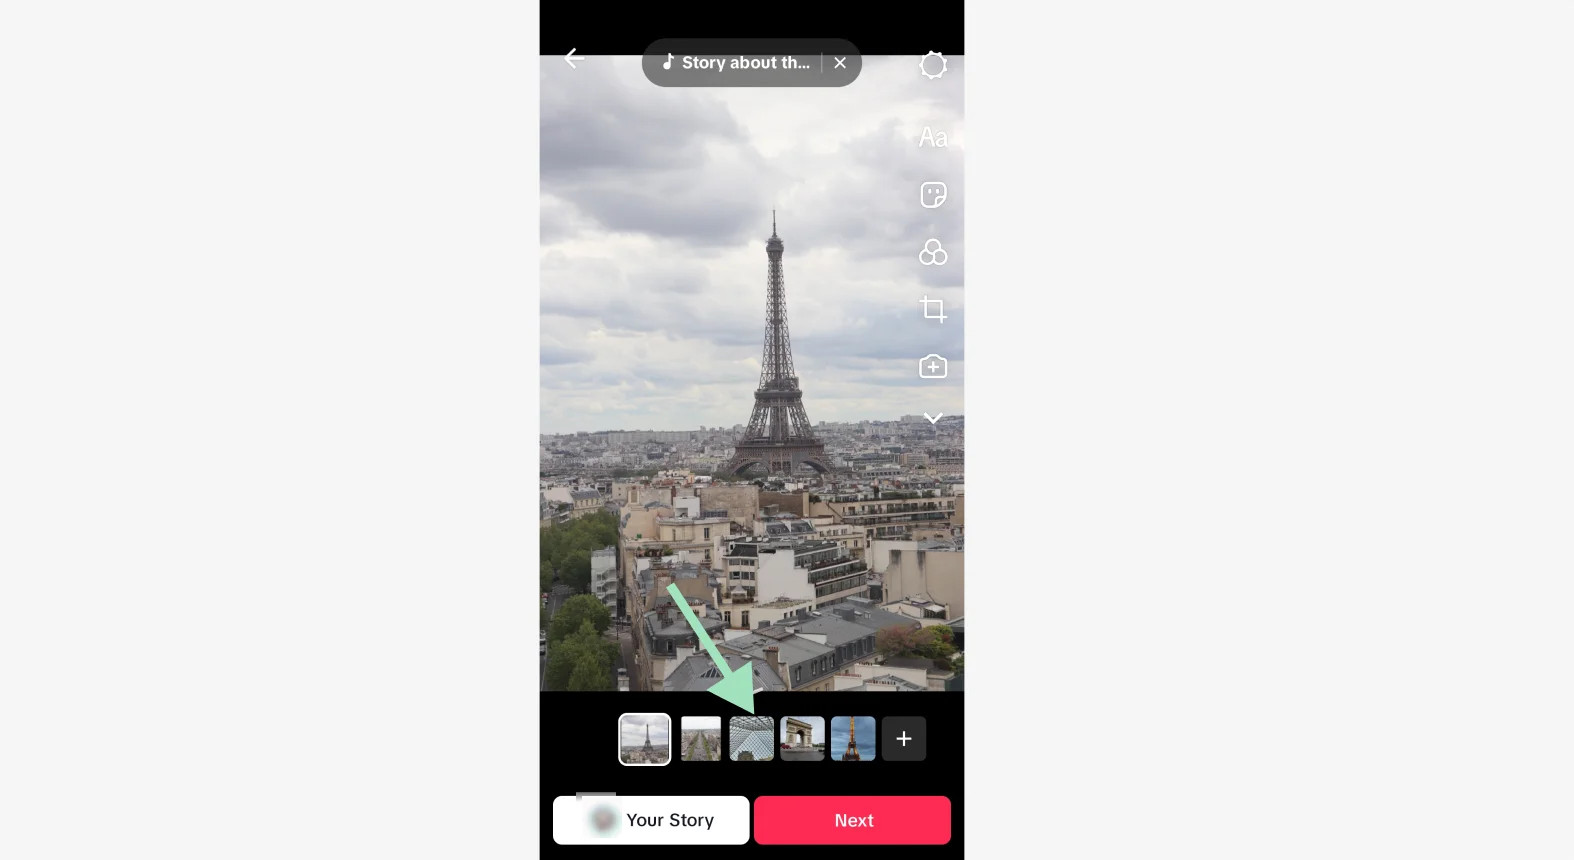 Adjusting a photo slideshow on TikTok
2.7. Step 7: Add Finishing Touches
How do I add final touches and post my swipeable slideshow on TikTok?
To add finishing touches to your slideshow, you can edit your slideshow’s cover, add a description and hashtags, include links, choose your location, and manage who can see the post. You can also share it on other social media platforms. Once you are satisfied, tap the red “Post” button at the bottom to publish your swipeable slideshow on TikTok.
 Posting a slideshow on TikTok
3. Creating a Non-Swipeable Slideshow with Templates: A Simpler Approach
How do I make a non-swipeable slideshow using templates on TikTok?
Creating a non-swipeable slideshow on TikTok using a template involves opening TikTok, selecting “Templates,” choosing a template that fits your number of images, adding your pictures, and customizing the slideshow with filters and music. This method is ideal for quickly creating visually appealing, timed slideshows.
3.1. Step 1: Open TikTok
How do I start creating a slideshow on TikTok?
Begin by opening the TikTok app on your device. Look for the “+” icon located at the bottom of the screen and tap it. This will take you to the creation interface, where you can start your slideshow project.
3.2. Step 2: Select a Template
How do I select a template for my slideshow on TikTok?
Once you are in the creation interface, select “Templates” at the bottom. Keep in mind that not every template allows for slideshows with many pictures, as some are designed for a single picture or two. Ensure you choose a template that can accommodate the exact number of pictures you want to include in your non-swipeable slideshow.
3.3. Step 3: Select Your Images
How do I choose and order the images for my TikTok slideshow using a template?
Choose the pictures for your slideshow by tapping each one. The order in which you select them will determine their appearance in your slideshow. In the bottom bar, you’ll see several boxes displaying each of your pictures in your chosen order. Each box has a number indicating how many seconds each picture will be shown during the reel. Once you are satisfied with your selections, tap the “Next” button at the bottom of the screen.
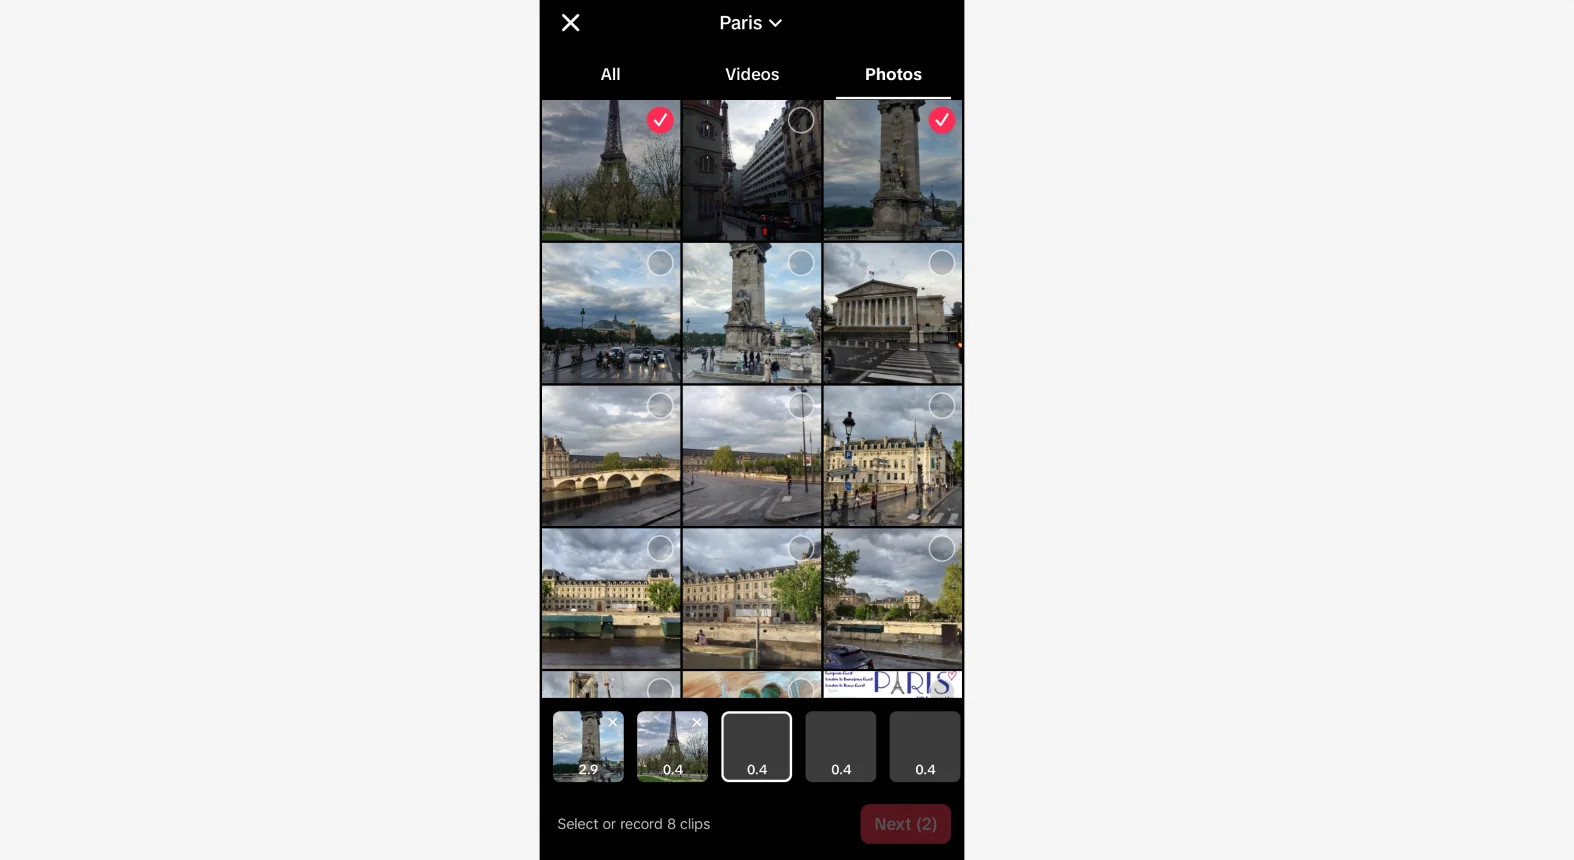 Select photos for a slideshow template on TikTok
3.4. Step 4: Customize Your Slideshow
How do I customize my non-swipeable slideshow on TikTok with filters and music?
You can now customize your non-swipeable slideshow by adding filters, stickers, text, or effects using the icons on the right sidebar. If you swipe up, you will open the video editor screen where you can further customize your video with a timeline editor. To change the music for your slideshow, tap the “Add sound” icon at the top of the screen to open a new menu.
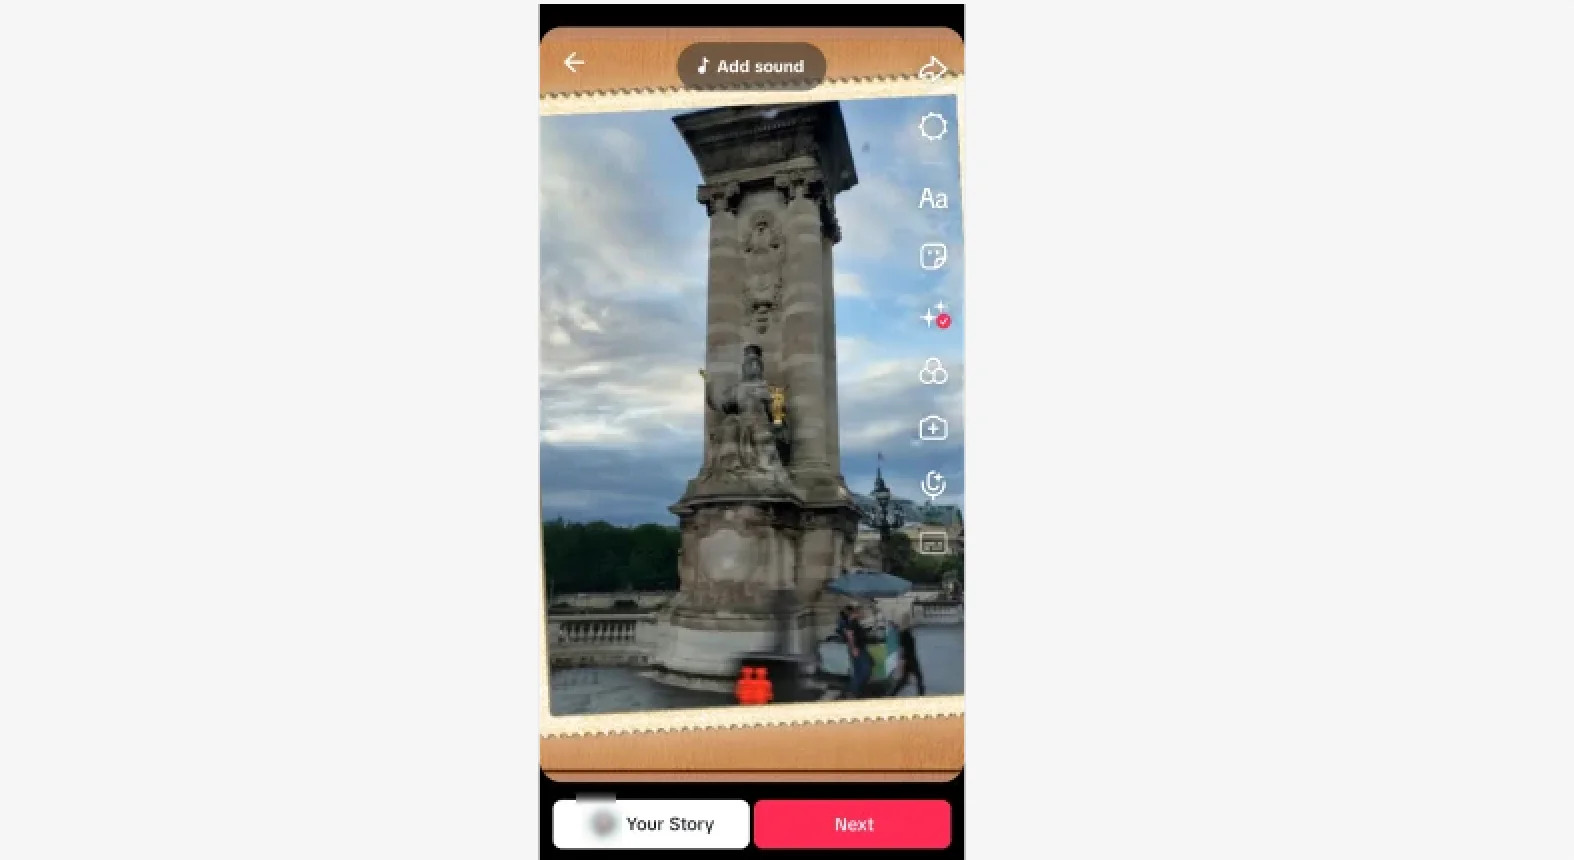 Editing a TikTok template slideshow
3.5. Step 5: Add Finishing Touches
How do I finalize and post my non-swipeable slideshow on TikTok?
To finalize your slideshow, add the finishing touches. You can customize the cover, write a description, add hashtags, include links, set a location, and adjust privacy settings. You can also share it across other social media platforms. Once you’re happy with everything, tap the red “Post” button at the bottom to publish your non-swipeable slideshow on TikTok.
4. Enhancing Your TikTok Slideshows: Practical Tips and Tricks
How can I make my TikTok slideshows more engaging and visually appealing?
To create engaging TikTok slideshows, use high-quality photos, craft a compelling narrative, add relevant music, incorporate text, and use filters and stickers strategically. These elements will help your slideshow stand out and capture your audience’s attention.
4.1. High-Quality Imagery
Why is using high-quality photos important for TikTok slideshows?
High-quality images are crucial because they serve as the foundation of an enticing visual story. Crisp, high-resolution images make your content look polished and professional, which can significantly increase viewer engagement. For product showcases, ensure that every item is well-lit and any text is clearly readable. When sharing personal content or brand stories, select images that evoke powerful emotions.
4.2. Compelling Narrative
How do I craft a compelling narrative for my TikTok slideshow?
Crafting a compelling narrative involves telling a visually engaging story through your slideshow. Whether you are showcasing products, sharing memories, or telling a brand story, your slideshow should avoid feeling flat or boring. A well-crafted narrative will hold your audience’s attention and keep them interested, encouraging them to swipe to the end.
4.3. Relevant Music
How does adding relevant music enhance my TikTok slideshow?
The right soundtrack acts as the icing on the cake, ensuring that your slideshow looks good and sounds good. Music helps your content resonate with viewers, increasing its appeal and making it more memorable. Choose music that complements the mood and theme of your visual story rather than distracting from it. When the soundtrack’s rhythm matches the pace of your image transitions, people will remember them long after they finish watching.
4.4. Effective Use of Text
How can I use text effectively in my TikTok slideshows?
Text can help you tell your story more effectively or make each image more impactful. Use concise, readable sentences of no more than 5-6 words to ensure your audience can read them before swiping to the next picture. Make your first image’s caption the most captivating to draw attention immediately. Choose bold fonts and colors that contrast well with your images but don’t obscure important elements of the visuals.
4.5. Strategic Use of Filters and Stickers
How should I use filters and stickers in my TikTok slideshows?
Filters and stickers are fun and creative tools to make your content look more colorful and lively. Use them to set a mood, transform the aesthetics of your slideshows, or highlight specific elements. Experiment with emojis or animated stickers like text bubbles to add action to your pictures or simply make your content look more playful. However, be careful not to overdo it—use filters and stickers strategically to avoid making your slideshow look garish or cluttered.
5. Advanced Editing: Using Third-Party Software for TikTok Slideshows
What are the benefits of using third-party software for creating TikTok slideshows?
Third-party software like Riverside offers advanced editing tools that go beyond TikTok’s built-in features. This includes importing high-resolution images, adding custom backgrounds, customizing dynamic captions, uploading brand logos, adding text overlays and music, and fine-tuning audio with AI. Working on a desktop provides more control and a less cluttered interface.
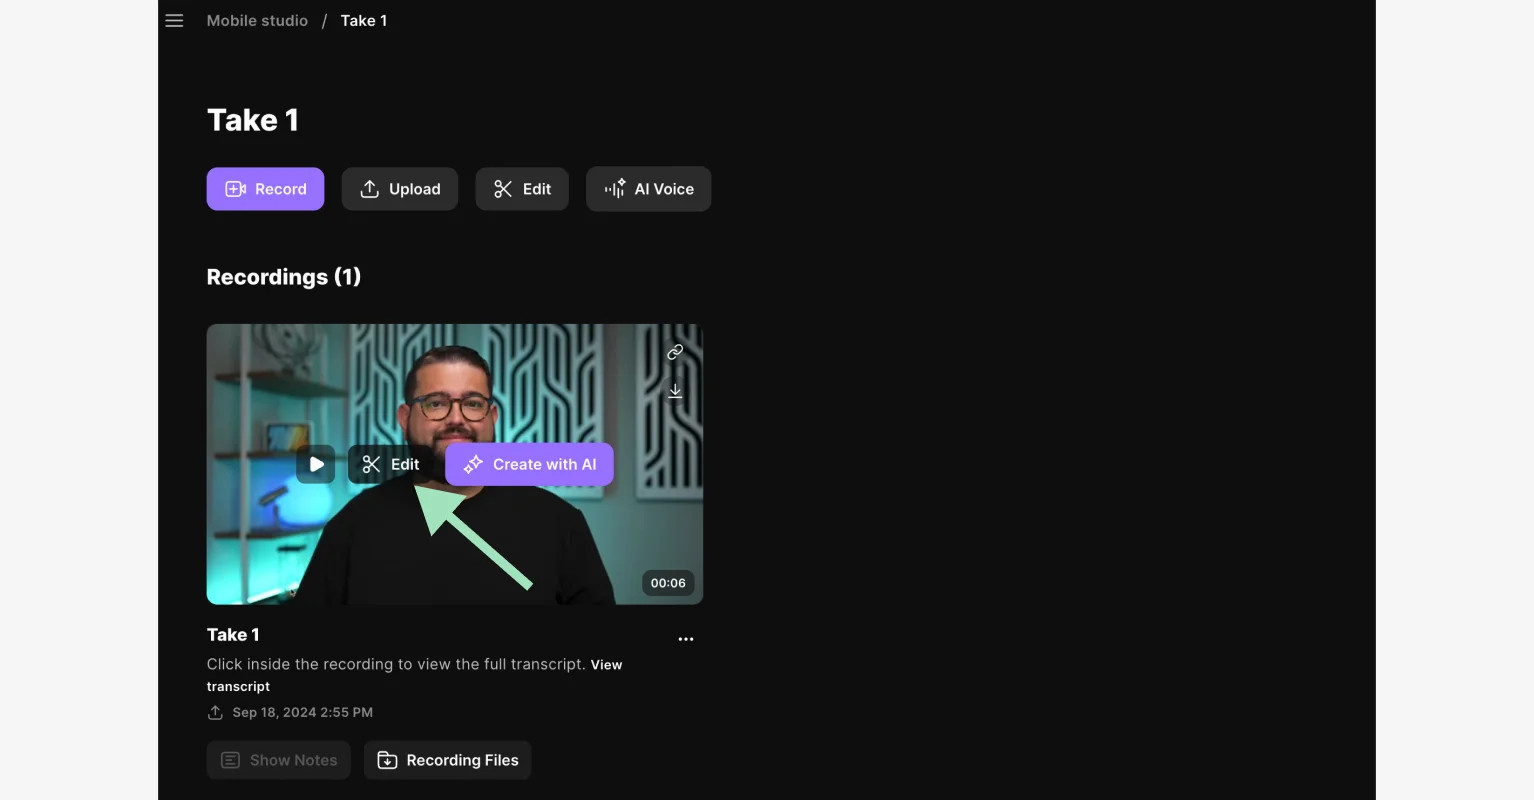
5.1. Step 1: Open Your Recording
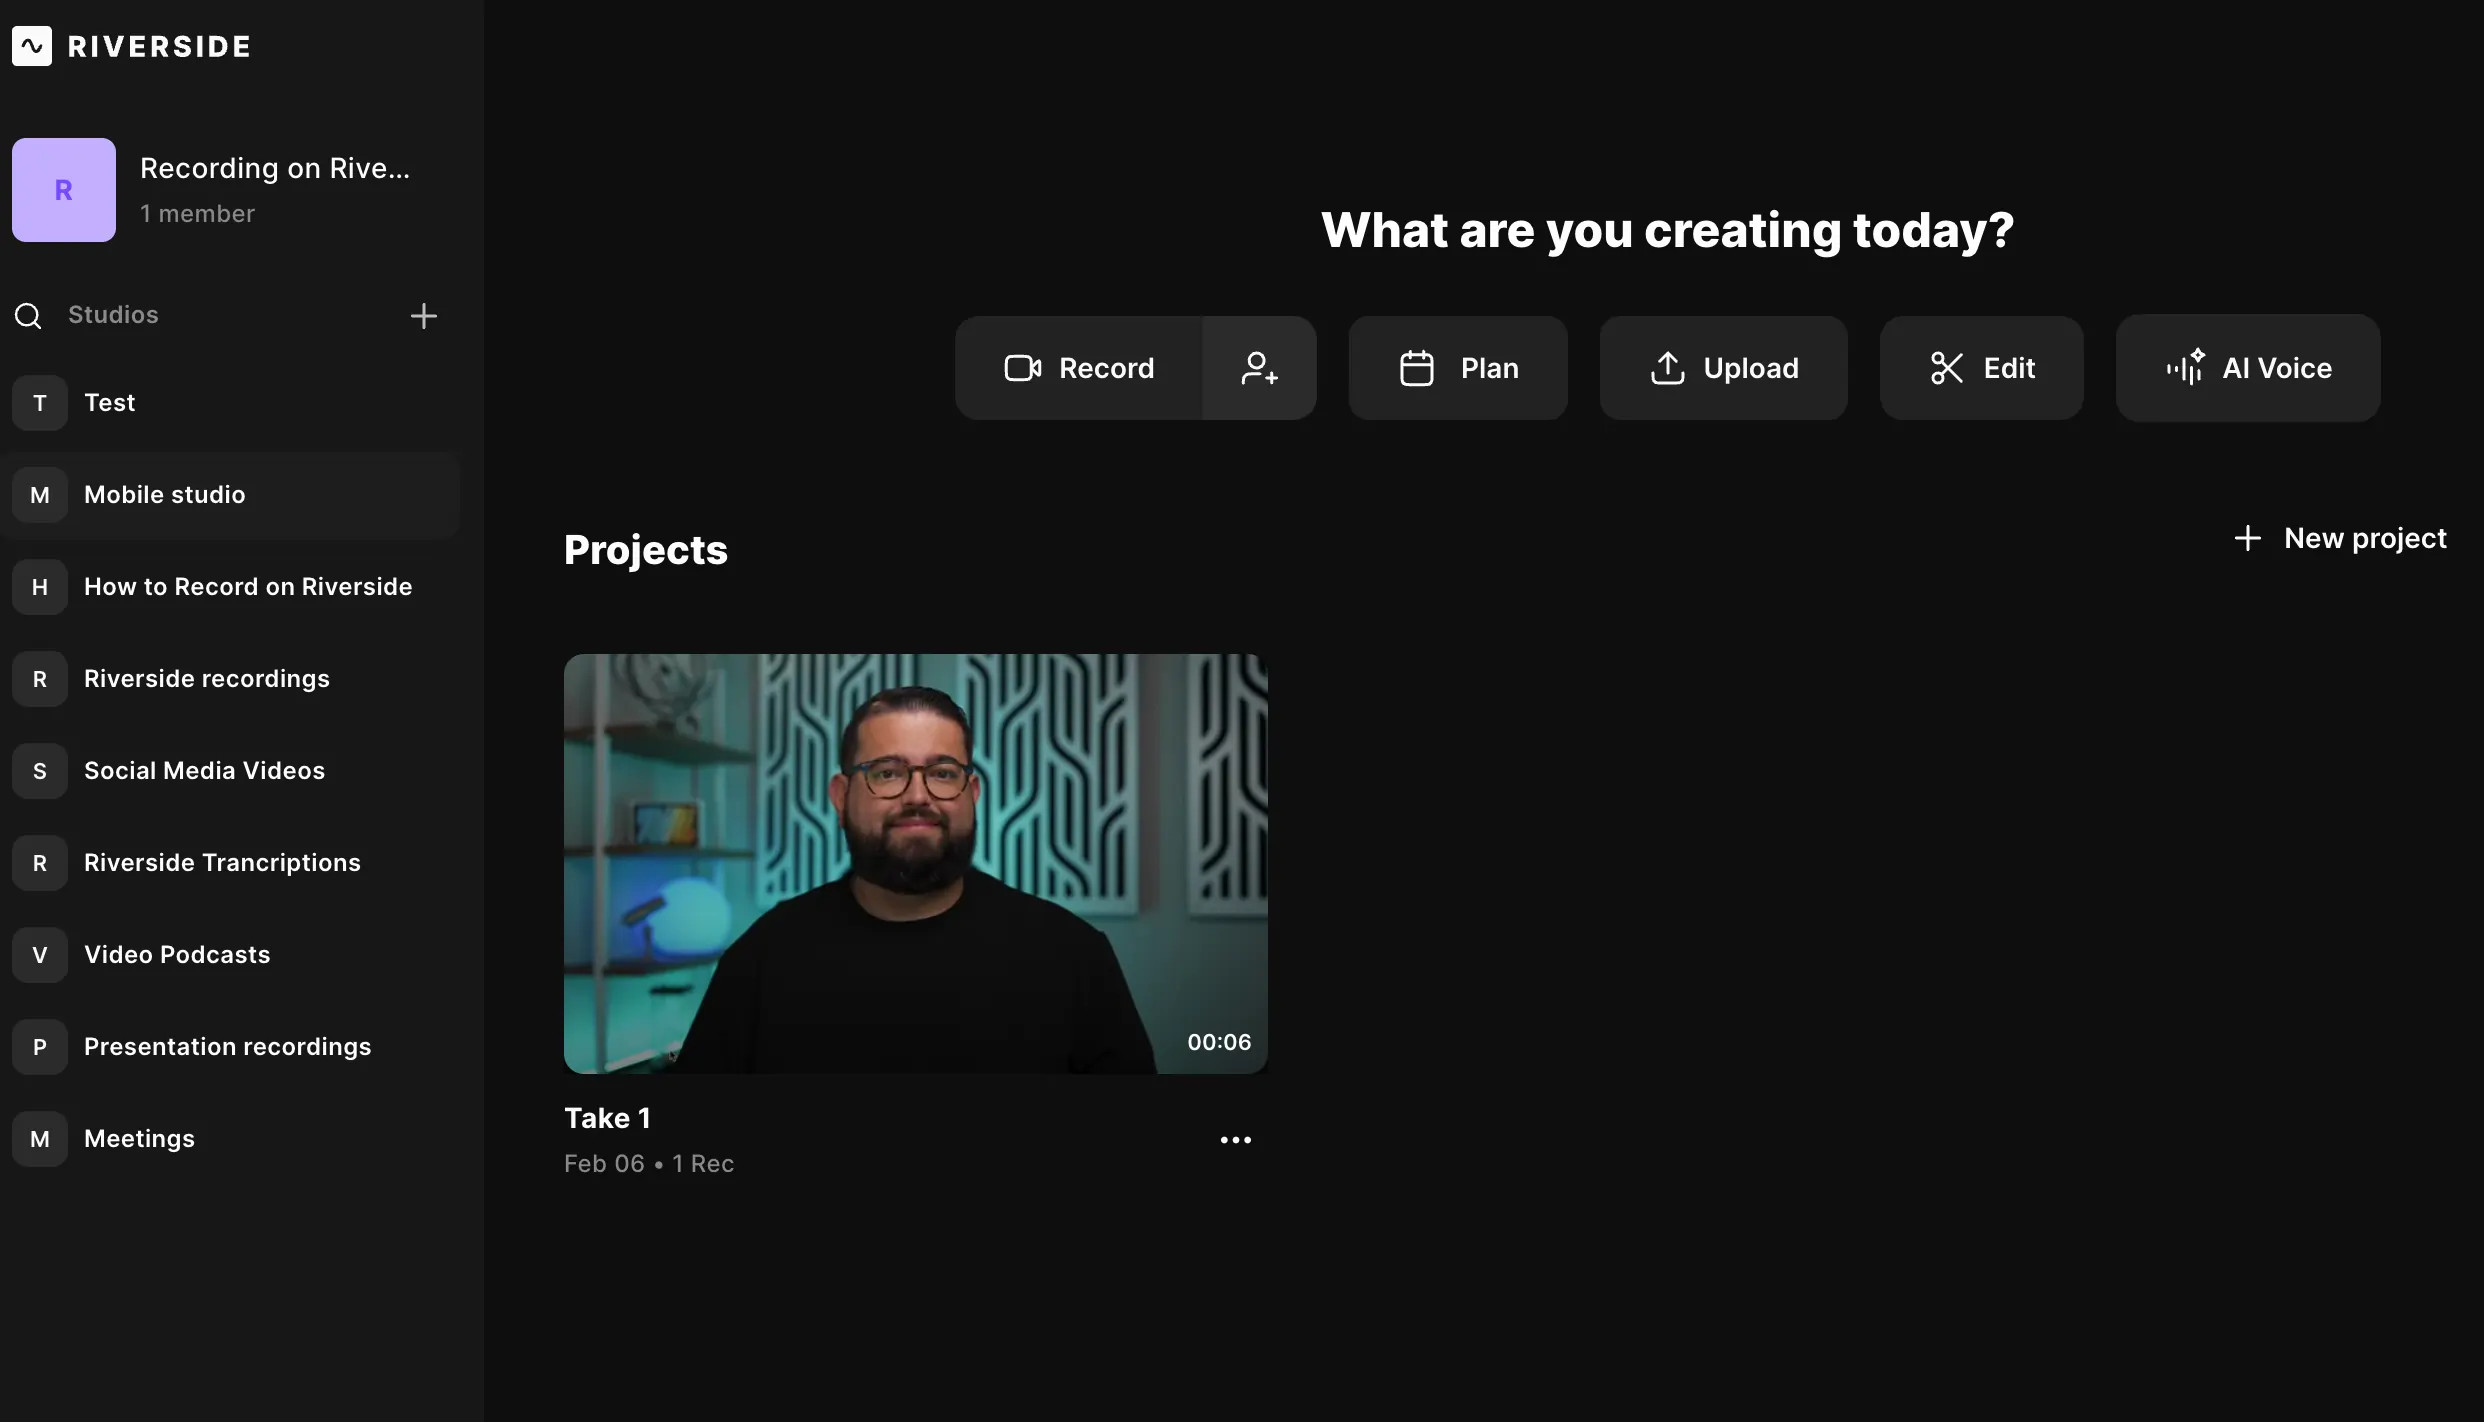
How do I open my recording in Riverside to start editing?
Log in to your Riverside dashboard and select a studio or create a new one. Choose a relevant recording by clicking on it. You can also click on the “Upload” button at the top if you want to upload your own recording.
 Opening up a recording to create a TikTok slideshow on Riverside
5.2. Step 2: Choose an Audio or Video Base
How do I select the audio or video to edit in Riverside?
Select the video or audio you want to edit, then click “Edit” to open the recording in the editor. This step sets the foundation for your slideshow, whether you’re starting with a video or audio file.
5.3. Step 3: Set Up Your Video
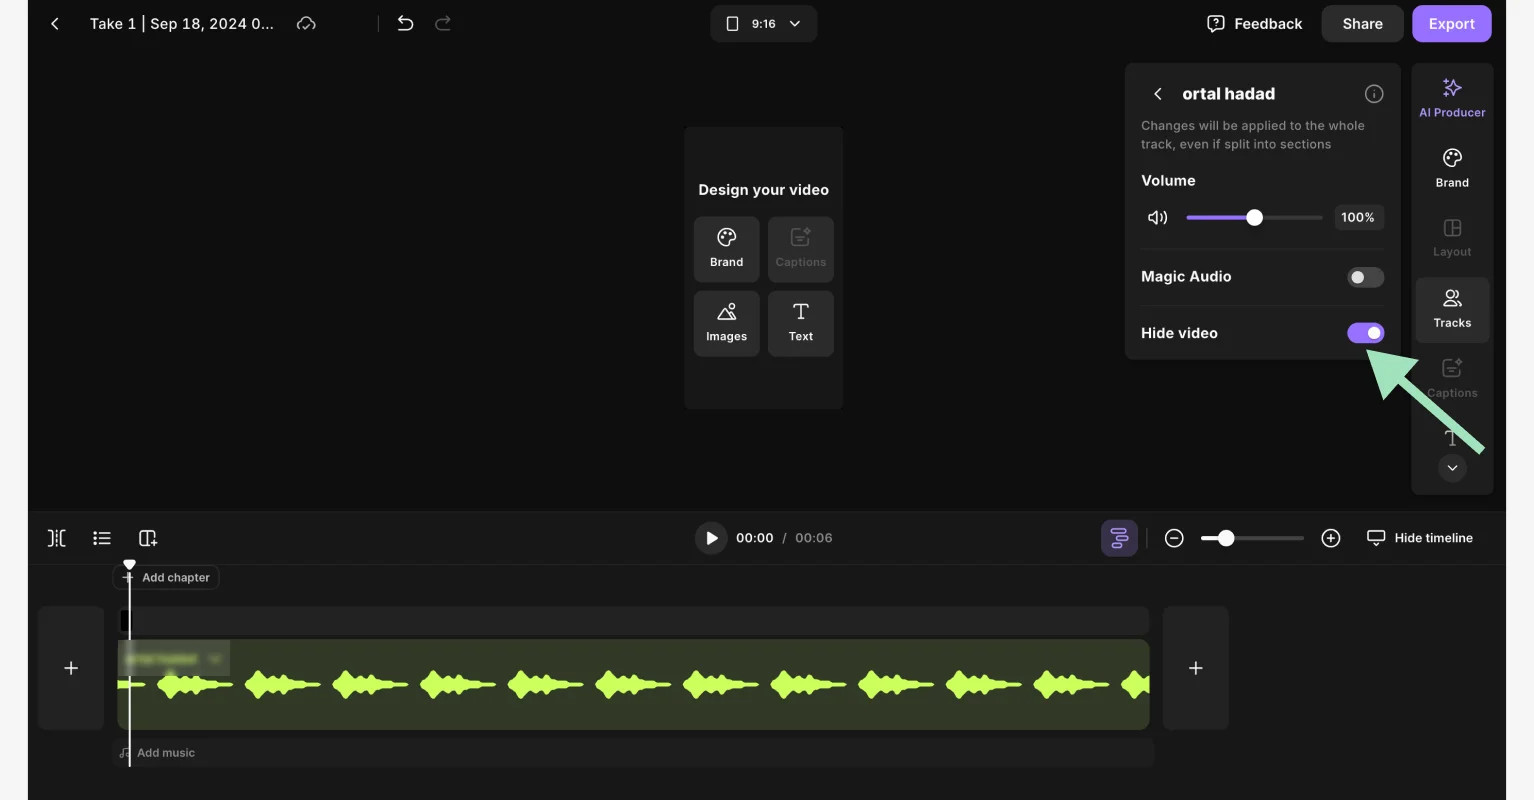
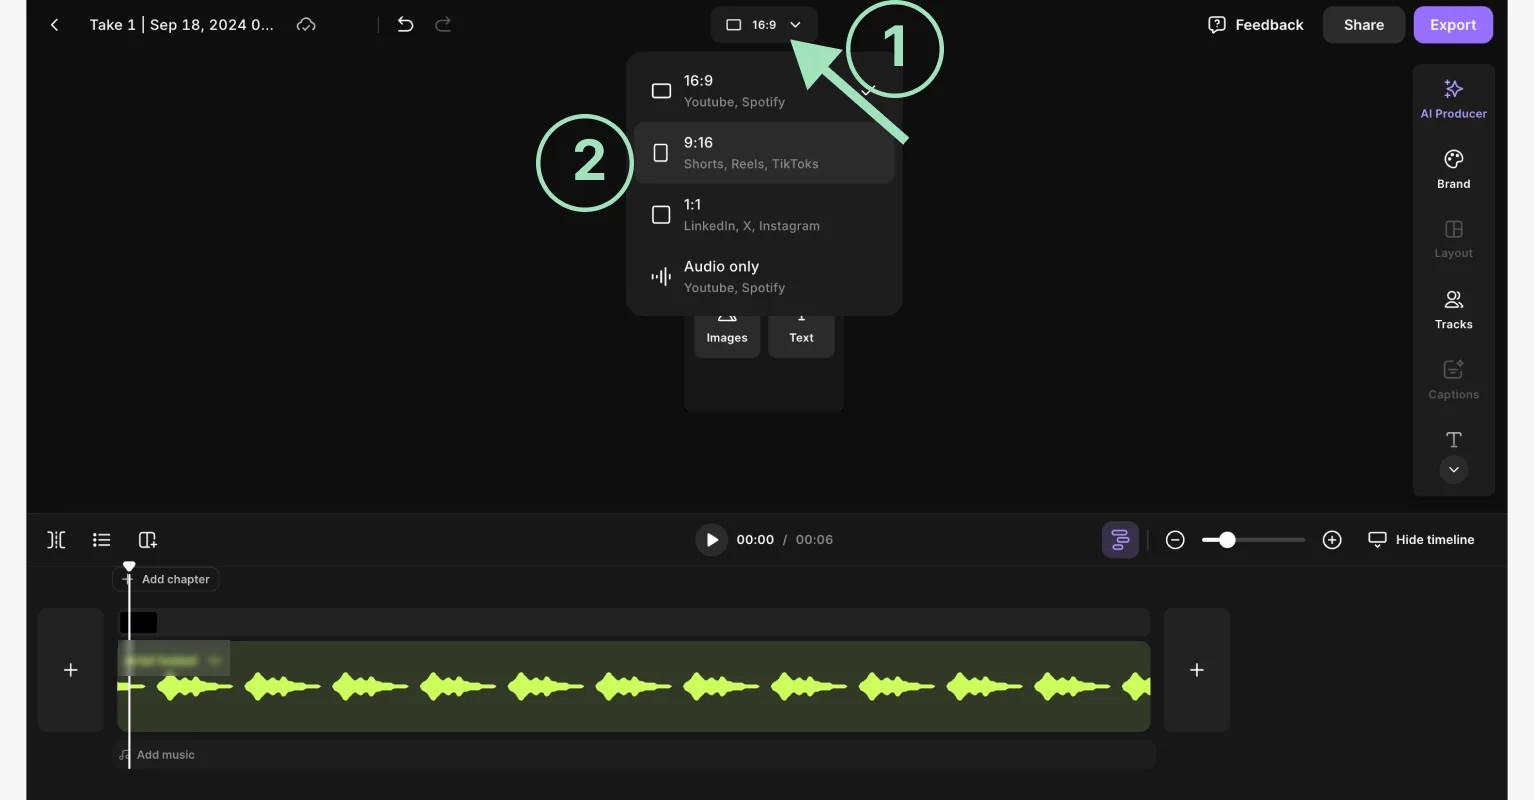
How do I set up the video dimensions for TikTok in Riverside?
If you selected a video, you can create a blank audiogram by hiding the video track. Tap the “Tracks” button on the right sidebar, select your track, then turn the toggle ON next to “Hide Video.” Resize your video to match TikTok’s dimensions by clicking on the layout button at the top and selecting “16:9,” which is best for TikTok.
 Creating a TikTok slideshow on Riverside
 Changing your slideshow dimensions for TikTok
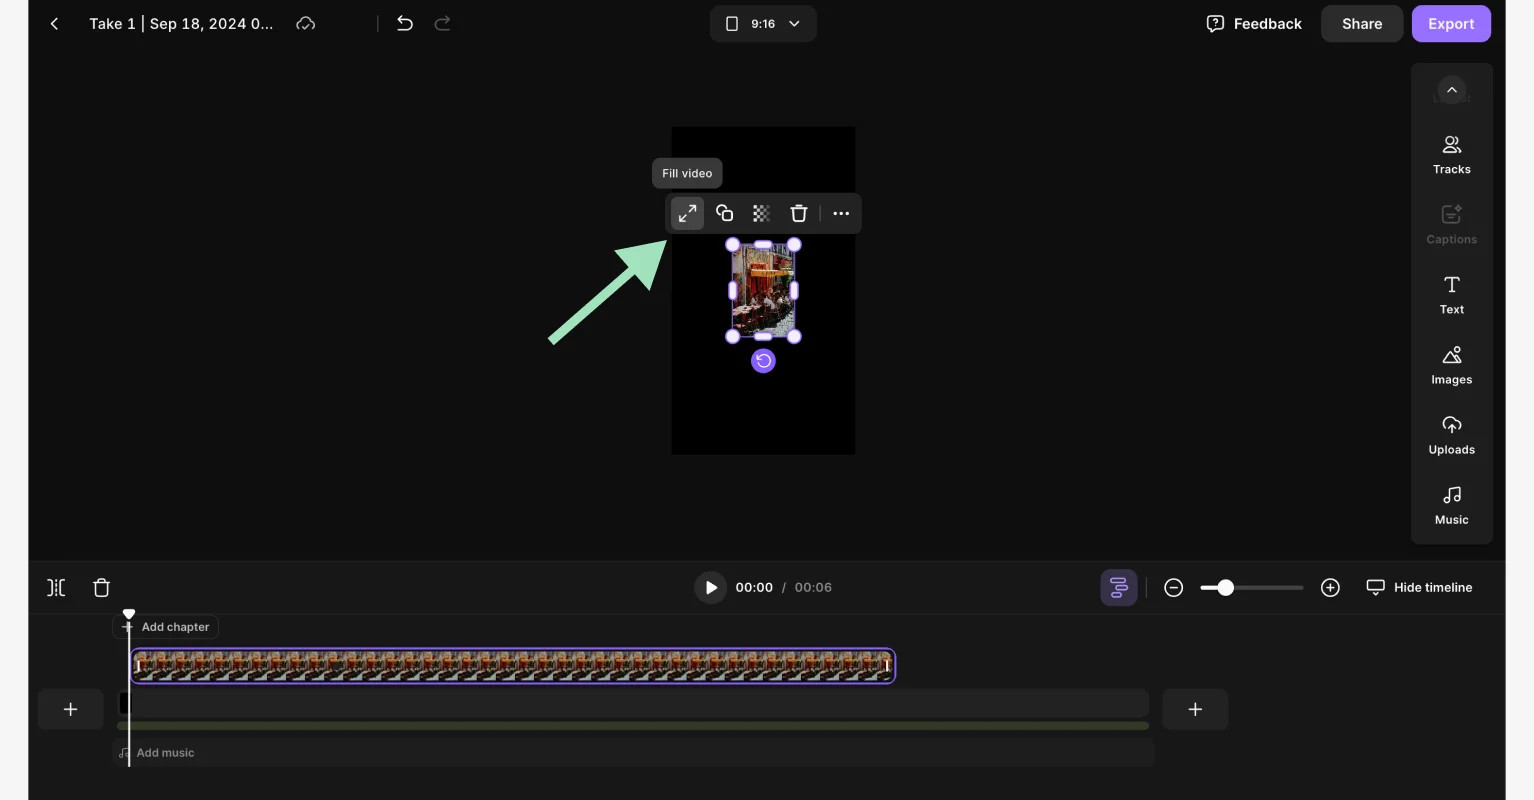
5.4. Step 4: Add Images and Edit
How do I add images and customize my slideshow in Riverside?
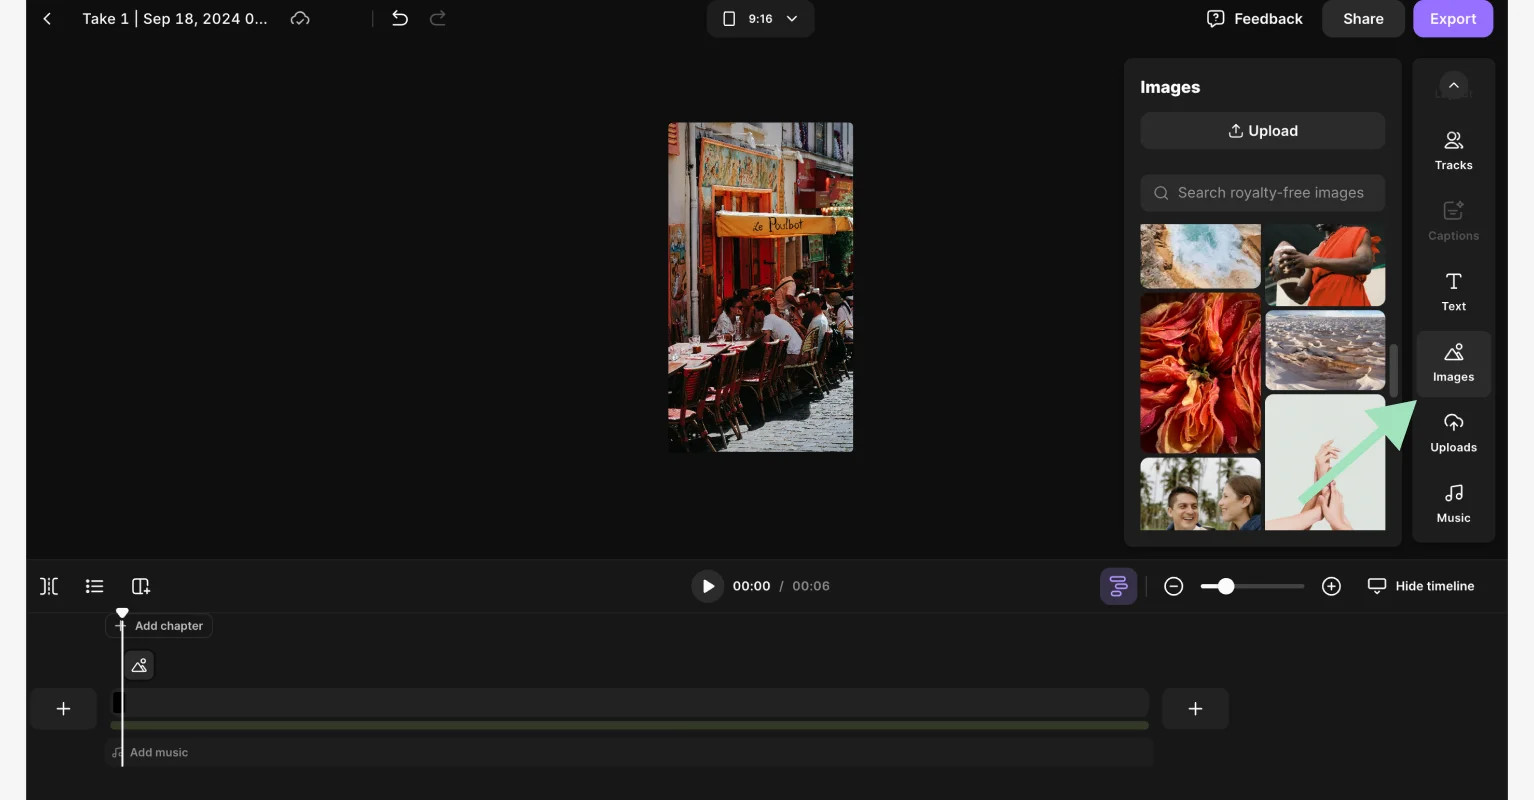
Add your images by clicking the “Uploads” button on the right sidebar, or choose from our royalty-free image library by clicking “Images.” Customize your slideshow by adding captions, text, background, logo, and more—all from the right sidebar. Resize the image to fit the screen by clicking on the “Fill video” button (the two small arrows that appear when you click on the image). You can control when each image appears in your slideshow and for how long with the timeline editor at the bottom.
 Adding images to a TikTok slideshow using Riverside
 Adding images to a TikTok slideshow on Riverside
5.5. Step 5: Export Your Slideshow
How do I export my completed slideshow from Riverside?
When you’re satisfied with your edits, click the “Export” button in the top right corner. Select your video quality, then tap “Export video.” This step ensures your slideshow is ready for upload to TikTok.
 Exporting a slideshow for TikTok from Riverside
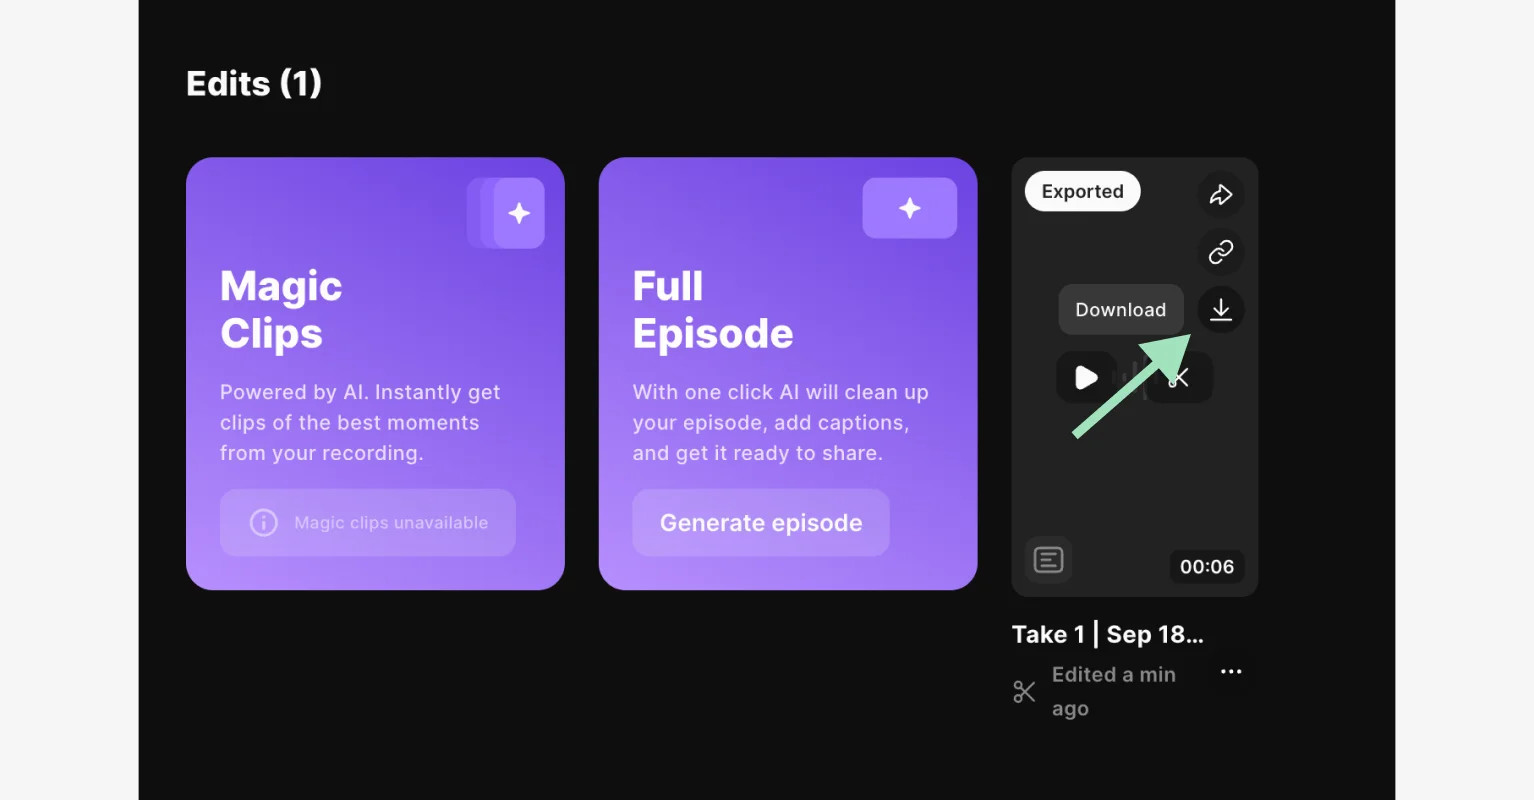
5.6. Step 6: Download the Slideshow
How do I download my slideshow from Riverside for TikTok?
Find your exported video at the bottom of your recording’s dashboard. Hover over the clip to reveal the “Download” button. Your slideshow is now ready to be uploaded on TikTok as a normal video.
 Downloading your slideshow for TikTok from Riverside
6. Frequently Asked Questions (FAQs) About Creating TikTok Slideshows
6.1. What is the best format for photos in a TikTok slideshow?
What image format and dimensions should I use for my TikTok slideshow?
The best format for photos in a TikTok slideshow is 1080 x 1920 pixels with a 9:16 aspect ratio (vertical), as it fits perfectly with the platform’s native display. 4:5 or 1:1 ratios will also work. Use high-res, JPEG or PNG images that look crisp and clear. For text overlays, leave a 64 margin on the sides and 150 on top and bottom.
6.2. Can I add videos to my TikTok slideshow?
Can I include both photos and videos in a TikTok slideshow?
Yes, you can mix both photos and short video clips in your TikTok slideshow. After tapping the “+” button to create your slideshow, you can select video clips along with your photos by tapping “All” at the top of the screen. Note that if you add videos, you can only create non-swipeable slideshows.
6.3. How do I delete a photo from my slideshow on TikTok?
How do I remove an unwanted photo from my TikTok slideshow?
To remove a photo from a swipeable slideshow, tap on the image thumbnail in the editing interface and keep it pressed for a second or two. The “Delete” button (trash can icon) will appear, and you can remove it. If you’re using a Template, you can’t delete unwanted pictures outright and must go back to the previous screen, discarding all changes in the process.
6.4. How can I preview my slideshow before posting it?
Is there a way to preview my slideshow before posting it on TikTok?
Right before posting, you’ll have a screen to add post details and captions, plus preview your entire slideshow. Click on one of the pictures on the top to access the “Preview” interface. If you generated your slideshow with a Template, instead, just click on the “Preview” text right above the “Edit cover” button on the top right corner of the same screen.
Creating engaging photo slideshows on TikTok is a skill that can significantly boost your content’s appeal. Whether you’re using TikTok’s built-in tools or opting for more advanced third-party software like Riverside, the key is to focus on high-quality visuals, compelling narratives, and strategic customization. For more in-depth tutorials, inspiration, and a vibrant community of fellow photographers, visit dfphoto.net today. Join us and take your TikTok content to the next level. Discover new techniques, share your creations, and connect with a community that loves photography as much as you do.