The box photo trend is a creative photography technique transforming ordinary images into captivating visual narratives, and dfphoto.net is here to show you how to master it. By combining careful planning, precise shooting, and skilled editing, you can create stunning box photos that stand out. This article provides a detailed walkthrough, covering everything from selecting the right equipment to mastering post-processing techniques, ensuring your photos are visually appealing and technically sound, along with visual storytelling and creative composition.
Here’s a breakdown to optimize your photos:
- Clarity: Enhances details for sharpness.
- Vibrance: Boosts colors subtly without oversaturation.
- Saturation: Adjusts color intensity for vividness or muting.
1. What Is The Box Photo Trend And Why Is It So Popular?
The box photo trend involves creating a composite image where subjects appear to be inside individual boxes, arranged in a grid-like fashion, and it’s popularity is due to its creative visual appeal and versatility. This trend, popularized on platforms like Instagram, allows photographers and enthusiasts to create eye-catching, narrative-rich images, which makes it a favorite for showcasing creativity and visual storytelling.
The box photo trend is popular because:
- Creative Visual Appeal: Offers a unique and visually striking way to present subjects.
- Versatility: Adaptable to various themes, from family portraits to artistic compositions.
- Narrative Potential: Allows photographers to tell stories and create engaging scenes.
- Social Media Engagement: Highly shareable and attention-grabbing content.
- Accessibility: Achievable with basic photography and editing skills.
1.1 How Can Understanding The History Of Composite Photography Enhance My Box Photo Creations?
Understanding the history of composite photography can significantly enhance your box photo creations by providing context, inspiration, and a deeper appreciation for the techniques involved. Composite photography, which dates back to the mid-19th century, involves combining multiple images into a single, unified composition, and knowing this history can inform your creative choices and technical approaches.
Here are some ways that this knowledge can be beneficial:
- Inspiration from Pioneers: Early photographers like Henry Peach Robinson and Oscar Rejlander created intricate composite images using multiple negatives. Studying their work can inspire you to think creatively about how to combine different elements in your box photos.
- Technical Understanding: Learning about the historical techniques used in composite photography, such as dodging, burning, and manual layering, can provide a foundation for understanding modern digital editing processes.
- Appreciation for Evolution: Understanding the evolution of composite photography from manual processes to digital software can give you a greater appreciation for the tools and techniques available today.
- Creative Problem-Solving: Historical examples of composite photography can offer insights into how photographers overcame technical challenges and achieved their artistic visions, helping you solve problems in your own work.
- Contextual Awareness: Knowing the historical context of composite photography can inform your creative decisions, allowing you to create box photos that are both visually appealing and conceptually meaningful.
1.2 What Are The Key Elements That Make A Box Photo Visually Appealing?
A visually appealing box photo combines several key elements that draw the viewer’s eye and create a cohesive and engaging image. These elements work together to transform individual shots into a unified, storytelling composition.
Key elements of a visually appealing box photo include:
| Element | Description |
|---|---|
| Consistent Lighting | Ensures each box has similar lighting, creating a uniform look. |
| Balanced Composition | Arranges subjects and elements within each box to create visual harmony. |
| Thematic Coherence | Connects all boxes with a common theme, color palette, or narrative. |
| Creative Storytelling | Uses poses, props, and interactions to tell a story or convey a message. |
| High-Quality Editing | Seamlessly blends images, corrects imperfections, and enhances overall aesthetic. |
1.3 How Does The Box Photo Trend Differ From Traditional Portrait Photography?
The box photo trend differs from traditional portrait photography in several key aspects, primarily in its composition, storytelling approach, and the level of creative manipulation involved. Traditional portrait photography focuses on capturing a single, well-composed image of a subject, often emphasizing their personality and likeness, while the box photo trend is a composite art form.
Here’s a comparison:
| Feature | Traditional Portrait Photography | Box Photo Trend |
|---|---|---|
| Composition | Single shot, emphasis on subject’s face and expression | Composite of multiple shots arranged in a grid |
| Storytelling | Focus on individual’s character and presence | Narrative created through the arrangement and interaction of subjects |
| Creative Manipulation | Minimal editing, focus on natural representation | Extensive editing to blend and create a unified image |
| Setting | Typically a studio or natural environment | Created in a controlled environment with specific props and setup |
| Purpose | Capturing a likeness or expressing individual personality | Creating a visually engaging and narrative-rich composition |
2. Planning Your Box Photo: Essential Steps
Planning is crucial for a successful box photo project. From selecting the right subjects and themes to gathering necessary equipment and setting up your shooting space, each step contributes to the final result.
2.1 How Do I Choose The Right Theme And Concept For My Box Photo?
Choosing the right theme and concept for your box photo is crucial for creating a visually engaging and meaningful image. A well-defined theme will guide your creative decisions and help you tell a compelling story.
Here are some tips to help you choose the right theme and concept:
- Identify Your Interests: Start by considering your personal interests, hobbies, or passions.
- Consider Your Audience: Think about who will be viewing your box photo.
- Brainstorm Ideas: Once you have a general idea of your interests and audience, brainstorm specific concepts that align with them.
- Research and Gather Inspiration: Look at examples of box photos and other composite images to gather inspiration.
- Define Your Narrative: Determine the story you want to tell with your box photo.
- Create a Mood Board: Compile images, colors, and textures that reflect the mood and style you want to achieve in your box photo.
2.2 What Are The Best Practices For Selecting Subjects And Posing Them In The Boxes?
Selecting the right subjects and posing them effectively within the boxes are critical steps in creating a compelling box photo. The subjects and their poses should align with your chosen theme and contribute to the overall narrative of the image.
Best practices include:
- Choose Subjects Carefully: Select subjects whose personalities and characteristics complement your theme.
- Plan Poses in Advance: Before the shoot, plan out the poses for each subject in each box.
- Consider Interactions: Think about how the subjects can interact with each other across the boxes.
- Use Props: Incorporate props that add context and visual interest to each box.
- Ensure Comfort and Safety: Make sure the subjects are comfortable and safe in their poses.
2.3 How Can I Create A Detailed Shot List And Storyboard To Guide My Photo Shoot?
Creating a detailed shot list and storyboard is essential for organizing your photo shoot and ensuring you capture all the necessary elements for your box photo. These tools help you visualize the final composition and guide your shooting process.
Here’s how to create an effective shot list and storyboard:
1. Define Your Theme and Narrative:
- Clearly define the theme and story you want to convey in your box photo.
- Identify the key elements and messages you want to communicate.
2. Create a Shot List:
- Number Each Shot: Assign a unique number to each shot for easy reference.
- Describe the Shot: Provide a detailed description of what should be included in each shot.
- Specify the Pose: Indicate the pose each subject should adopt.
- List Any Props: Note any props that should be included in the shot.
- Lighting Notes: Add any specific lighting requirements or considerations.
- Camera Angle: Specify the desired camera angle for each shot.
3. Develop a Storyboard:
- Sketch Each Shot: Create a rough sketch of each shot based on your shot list.
- Arrange the Sketches: Arrange the sketches in the order they will appear in the final composition.
- Add Notes: Include brief notes about the narrative or purpose of each shot.
4. Review and Refine:
- Review your shot list and storyboard to ensure they align with your overall theme and narrative.
- Make any necessary adjustments to improve the visual flow and storytelling of your box photo.
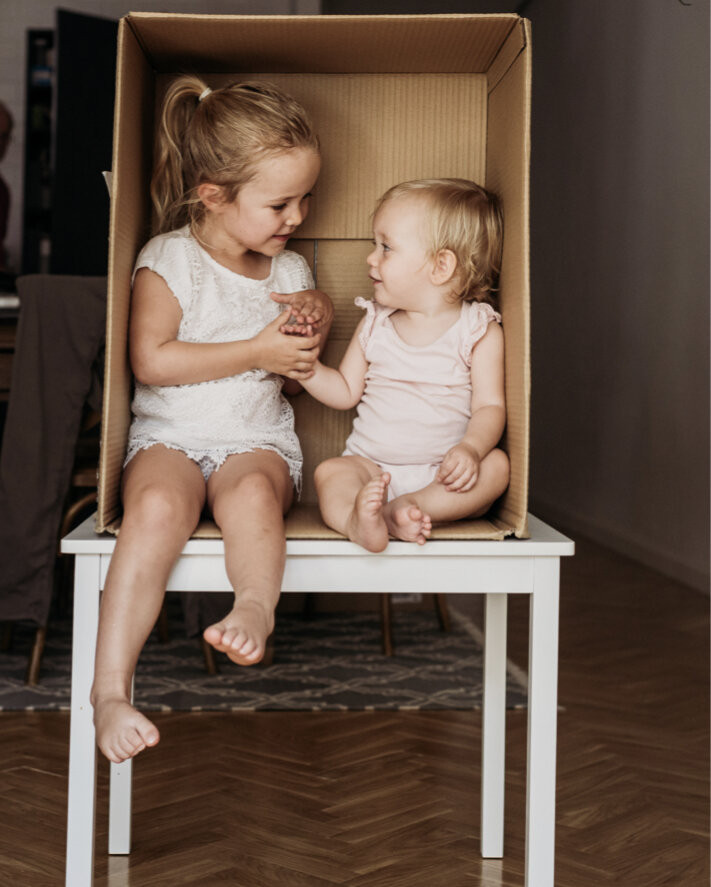 Kids making funny faces in box photo setup
A look into the ‘behind the scenes’ set up for Claire’s ‘in the box’ image. Source: @clairefluttersby
3. Setting Up Your Shoot: Equipment And Environment
Setting up your shoot involves selecting the right equipment and creating a controlled environment to ensure consistent and high-quality results. From choosing the appropriate camera and lighting to arranging the boxes and background, each element plays a crucial role in the success of your box photo.
3.1 What Equipment Do I Need For A Box Photo Shoot?
Having the right equipment is essential for a successful box photo shoot. The specific equipment you need will depend on your budget, skill level, and the complexity of your vision, but here’s a comprehensive list to get you started:
- Camera: A DSLR or mirrorless camera with manual controls is ideal for capturing high-quality images.
- Lens: A versatile lens, such as a 24-70mm or 35mm prime lens, allows you to capture a variety of shots.
- Tripod: A sturdy tripod is crucial for maintaining a consistent frame and sharp images.
- Lighting: Consistent lighting is key.
- Boxes: Sturdy cardboard boxes of the same size and shape are essential.
- Background: A seamless background, such as a white or gray backdrop, provides a clean and uniform look.
- Props: Props can add context and visual interest to each box.
- Computer: A computer with photo editing software, such as Adobe Photoshop or Lightroom, is necessary for post-processing.
3.2 How Do I Set Up Consistent Lighting For Each Box?
Consistent lighting is crucial for creating a cohesive and visually appealing box photo. Uneven lighting can create distractions and make the final composite look disjointed.
Here are several lighting methods:
- Use Natural Light: Position your setup near a large window to utilize soft, natural light.
- Use Artificial Lights: Set up two softbox lights on either side of your boxes.
- Use Reflectors: Place reflectors opposite your light source to bounce light into the shadows and even out the lighting.
- Avoid Mixing Light Sources: Stick to one type of light source (either natural or artificial) to maintain consistent color temperature.
3.3 What Are The Best Practices For Arranging The Boxes And Background?
Arranging the boxes and background properly is essential for creating a visually appealing and professional-looking box photo. The setup should be clean, organized, and consistent to ensure a cohesive final image.
Here are best practices for the setup:
- Choose Uniform Boxes: Use boxes of the same size, shape, and color to create a consistent grid.
- Arrange Boxes Neatly: Align the boxes in a grid formation, ensuring they are evenly spaced and parallel to each other.
- Use a Seamless Background: Set up a seamless background behind the boxes to eliminate distractions.
- Ensure Proper Box Placement: Make sure the subjects are positioned comfortably and safely within each box, with enough space to move and pose.
4. Shooting Techniques: Capturing The Perfect Shots
Mastering the shooting techniques is essential for capturing the perfect shots for your box photo. From setting the right camera settings to directing your subjects effectively, each aspect of the shooting process contributes to the final result.
4.1 What Camera Settings Should I Use For A Box Photo Shoot?
Using the correct camera settings is essential for capturing high-quality images for your box photo. The ideal settings will depend on your lighting conditions, equipment, and creative vision.
Here are recommended camera settings:
| Setting | Recommendation |
|---|---|
| Aperture | f/8 to f/11 for sufficient depth of field to ensure sharpness across the subject |
| Shutter Speed | Adjust to achieve proper exposure, avoiding motion blur |
| ISO | Keep as low as possible (ISO 100-400) to minimize noise |
| White Balance | Set to match your lighting conditions (e.g., Daylight, Tungsten) |
| Shooting Mode | Manual mode (M) for full control over aperture, shutter speed, and ISO |
| Focus Mode | Single-point autofocus for precise focusing on the subjects |
| Image Quality | Shoot in RAW format for maximum flexibility in post-processing |
4.2 How Can I Ensure Consistent Focus And Sharpness Across All Boxes?
Maintaining consistent focus and sharpness across all boxes is crucial for creating a cohesive and professional-looking box photo. Soft or blurry images can detract from the overall visual appeal of the final composition.
Here’s how to ensure consistent focus and sharpness:
- Use a Tripod: A sturdy tripod is essential for keeping your camera stable and preventing camera shake.
- Set Focus Manually: Use manual focus to precisely set the focus on the subjects in each box.
- Use a Narrow Aperture: Choose an aperture between f/8 and f/11 to increase your depth of field.
- Check Focus on Each Shot: Before moving on, review each image on your camera’s LCD screen to ensure it is sharp and in focus.
4.3 What Are The Best Practices For Directing Subjects During The Shoot?
Effective subject direction is crucial for capturing engaging and authentic images for your box photo. Clear communication and a collaborative approach can help you achieve your creative vision while ensuring your subjects feel comfortable and confident.
Here are best practices for directing subjects:
- Communicate Your Vision: Clearly explain your theme, concept, and desired poses to your subjects.
- Provide Specific Instructions: Give specific and actionable instructions to help your subjects understand what you want them to do.
- Encourage Creativity: Allow your subjects to express their personalities and ideas within the framework of your vision.
- Be Patient and Positive: Maintain a patient and positive attitude throughout the shoot to create a comfortable and supportive environment.
- Monitor and Adjust: Continuously monitor the poses, expressions, and overall look of each shot.
5. Post-Processing: Assembling The Final Image
Post-processing is a critical step in creating a compelling box photo. It involves assembling the individual shots, blending them seamlessly, and making adjustments to enhance the overall visual appeal.
5.1 What Software Should I Use For Editing My Box Photo?
Choosing the right software is essential for editing your box photo effectively. The software should offer the tools and features you need to assemble the composite image, make necessary adjustments, and enhance the overall look and feel.
Here are some software options:
- Adobe Photoshop: Industry-standard software with advanced editing tools.
- Adobe Lightroom: Excellent for basic adjustments and color correction.
- GIMP (GNU Image Manipulation Program): Free, open-source software with a wide range of features.
- Affinity Photo: A professional-grade alternative to Photoshop.
5.2 How Do I Combine The Individual Photos Into A Cohesive Composite?
Combining individual photos into a cohesive composite is a critical step in creating a box photo. This process involves layering the images, aligning them properly, and blending them seamlessly to create a unified final image.
Here are steps to make it happen:
- Open All Images in Your Editing Software: Launch your chosen photo editing software and open all the individual images you want to include in your box photo.
- Create a New Canvas: Create a new canvas with the desired dimensions for your final composite image.
- Import Images as Layers: Import each individual image as a separate layer in your new canvas.
- Arrange the Layers: Arrange the layers in the order they will appear in the final composite.
- Align the Images: Use the move tool to precisely align each image within its designated box.
- Add Layer Masks: Add a layer mask to each image layer to selectively reveal or hide portions of the image.
- Blend the Edges: Use the brush tool with a soft-edged brush to paint on the layer masks and blend the edges of each image seamlessly into the background.
- Adjust Opacity: Adjust the opacity of each layer to fine-tune the blending and create a natural-looking composite.
- Use Adjustment Layers: Add adjustment layers (such as Levels, Curves, or Color Balance) to fine-tune the overall look and feel of the composite.
5.3 What Are The Key Editing Techniques For Enhancing The Final Image?
Enhancing the final image involves using various editing techniques to refine the overall look and feel of your box photo. These techniques can help you correct imperfections, enhance colors, and create a more visually appealing composition.
Here are some editing techniques:
- Color Correction: Adjust the white balance, exposure, and contrast to ensure consistent colors across all boxes.
- Sharpening: Apply sharpening to enhance details and improve the overall clarity of the image.
- Noise Reduction: Reduce noise or graininess to create a cleaner and more professional look.
- Retouching: Remove any distractions or imperfections, such as blemishes or unwanted objects.
- Creative Effects: Add creative effects, such as filters or textures, to enhance the artistic style of the image.
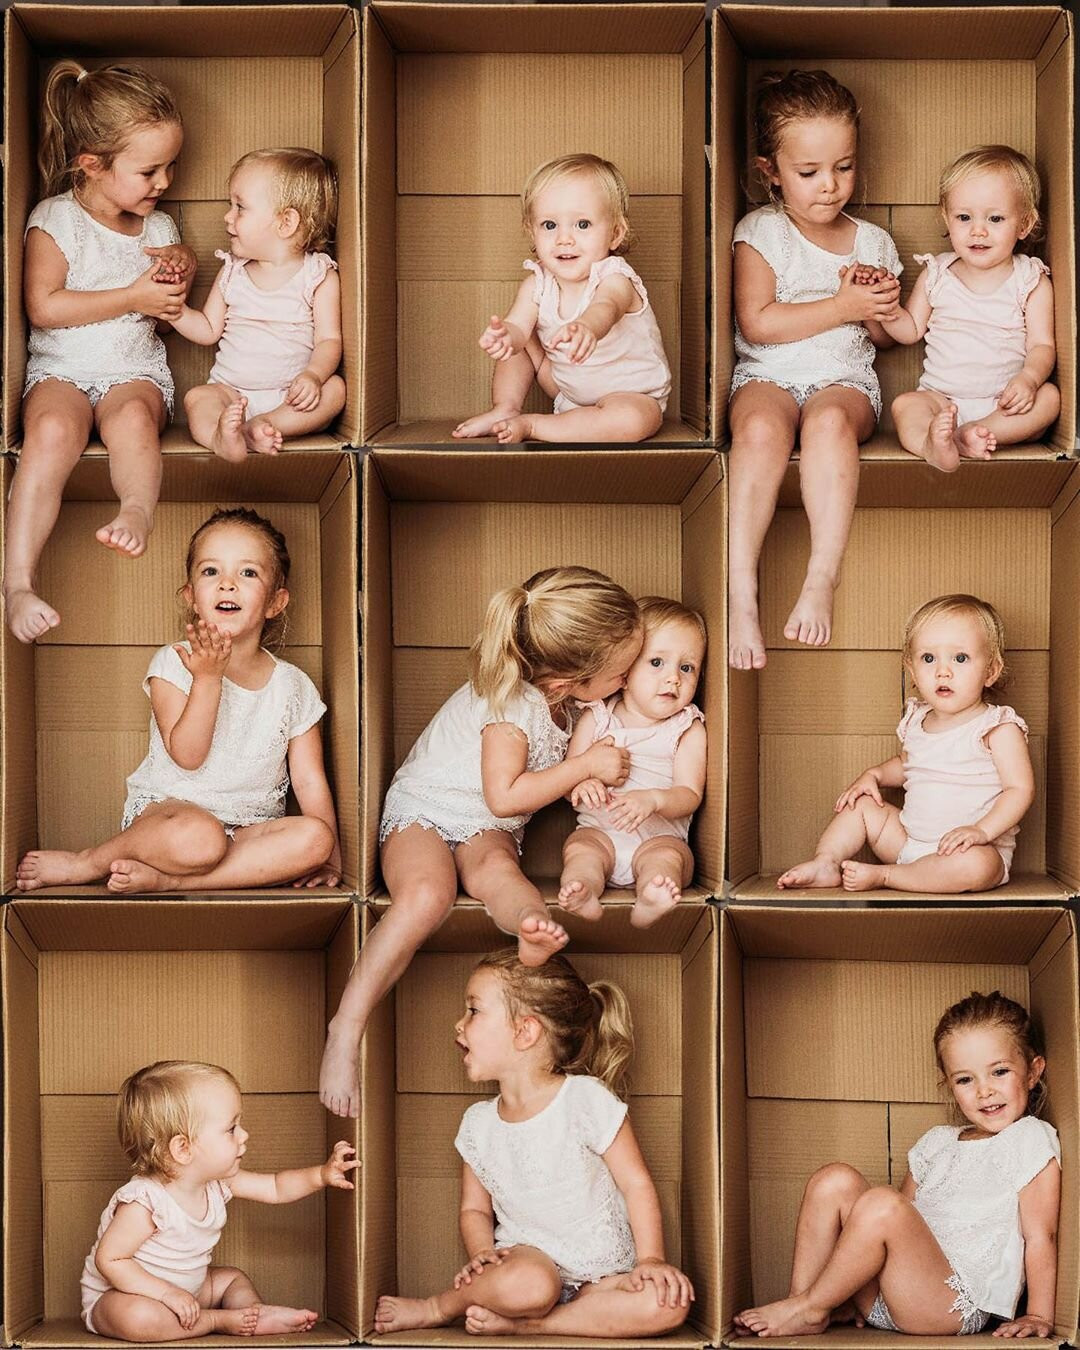 Composite image of adorable kids inside a box
Claire’s take on the ‘in the box’ movement. Source: @clairefluttersby
6. Creative Variations: Exploring Different Styles And Themes
Exploring different styles and themes can help you create unique and engaging box photos that stand out. Experimenting with various concepts, color palettes, and visual elements allows you to push the boundaries of creativity and develop your own signature style.
6.1 How Can I Incorporate Different Themes Into My Box Photo?
Incorporating different themes into your box photo can add depth, meaning, and visual interest to your composition. A well-chosen theme can guide your creative decisions and help you tell a compelling story.
Here are some themes to incorporate:
- Family Portraits: Capture individual family members in each box, showcasing their personalities and relationships.
- Occupations/Hobbies: Highlight different occupations or hobbies by featuring relevant props and poses in each box.
- Seasons: Create a series of boxes that represent different seasons, using appropriate colors, props, and attire.
- Travel Destinations: Feature different travel destinations by incorporating iconic landmarks or cultural elements into each box.
- Storytelling: Use each box to tell a part of a larger story, with the overall composition revealing the complete narrative.
6.2 What Are Some Creative Ideas For Posing Subjects In The Boxes?
Creative posing can significantly enhance the visual appeal and storytelling potential of your box photo. Think beyond static poses and explore dynamic and engaging ways to position your subjects within the boxes.
Here are some posing ideas:
- Interactive Poses: Have subjects reach, point, or gesture towards other boxes, creating a sense of connection and interaction.
- Themed Poses: Align the poses with your chosen theme.
- Dynamic Poses: Use dynamic poses, such as jumping, dancing, or stretching, to add energy and movement to your composition.
- Props: Incorporate props that complement the poses and theme.
6.3 How Can I Use Color And Lighting To Enhance The Mood And Atmosphere Of My Box Photo?
Color and lighting play a crucial role in setting the mood and atmosphere of your box photo. Thoughtful use of these elements can evoke specific emotions and enhance the overall visual impact of your composition.
Here’s how:
- Color Palettes: Choose a color palette that aligns with your theme and desired mood.
- Lighting Techniques: Use different lighting techniques to create different effects.
- Color Gels: Experiment with color gels on your lights to add vibrant hues and create a more dramatic atmosphere.
- Post-Processing: Use post-processing tools to fine-tune the colors and lighting.
7. Advanced Techniques: Taking Your Box Photos To The Next Level
Mastering advanced techniques can elevate your box photos from simple compositions to stunning works of art. These techniques involve more complex shooting and editing processes, allowing you to create unique and visually impactful images.
7.1 How Can I Use Perspective And Depth To Create More Dynamic Box Photos?
Using perspective and depth can add dimension and visual interest to your box photos, creating a more dynamic and engaging composition. These techniques involve manipulating the camera angle, subject placement, and focal length to create a sense of depth and spatial relationships within the image.
Here are some perspective and depth techniques:
- Camera Angle: Experiment with different camera angles to create a sense of depth and perspective.
- Overlapping Elements: Position subjects and props so that they overlap each other, creating a sense of depth and spatial relationships.
- Foreground and Background: Use elements in the foreground and background to create a sense of distance and depth.
- Focal Length: Use a wide-angle lens to exaggerate perspective and create a sense of depth.
7.2 What Are Some Advanced Editing Techniques For Seamlessly Blending Images?
Seamlessly blending images is crucial for creating a cohesive and professional-looking box photo. Advanced editing techniques can help you achieve a smooth and natural transition between the individual shots, creating a unified final image.
Some advanced blending techniques:
- Frequency Separation: Use frequency separation to smooth skin tones and reduce imperfections without affecting the overall sharpness of the image.
- Dodge and Burn: Use the dodge and burn tools to selectively lighten and darken areas of the image, enhancing contrast and creating depth.
- Color Grading: Use color grading techniques to fine-tune the colors and create a cohesive color palette across the entire image.
- Content-Aware Fill: Use content-aware fill to seamlessly remove distractions or imperfections.
7.3 How Can I Add Special Effects And Visual Elements To Enhance My Box Photo?
Adding special effects and visual elements can enhance the artistic style and visual impact of your box photo. These effects can range from subtle enhancements to dramatic transformations, depending on your creative vision.
How to enhance your box photo:
- Overlays: Add overlays, such as textures, patterns, or light leaks, to create a unique and artistic look.
- Particles: Incorporate particles, such as dust, snow, or sparks, to add movement and visual interest to your composition.
- Light Effects: Add light effects, such as lens flares,光芒, or light rays, to create a more dynamic and dramatic atmosphere.
- Filters: Experiment with filters to alter the colors, tones, and overall style of the image.
8. Showcasing Your Work: Sharing And Promoting Your Box Photos
Showcasing your work is an essential step in gaining recognition, building a following, and connecting with other creatives. Sharing and promoting your box photos can help you reach a wider audience and establish yourself as a talented photographer.
8.1 What Are The Best Platforms For Sharing My Box Photos?
Choosing the right platforms for sharing your box photos is crucial for reaching your target audience and maximizing your exposure. Different platforms cater to different types of content and audiences, so it’s important to select the ones that best align with your goals.
Here are some platforms:
- Instagram: A visual-based platform ideal for showcasing your best box photos and connecting with other photographers and enthusiasts.
- Facebook: A versatile platform for sharing your box photos with friends, family, and a wider audience.
- Behance: A professional portfolio platform for showcasing your best work and connecting with other creatives.
- 500px: A photography-focused platform for sharing your box photos and receiving feedback from other photographers.
- Your Own Website: A professional website is an excellent way to showcase your box photos, establish your brand, and attract potential clients.
8.2 How Can I Use Social Media To Promote My Box Photos?
Social media is a powerful tool for promoting your box photos, reaching a wider audience, and building a following. Effective social media strategies can help you increase your visibility, engage with your audience, and drive traffic to your website or portfolio.
How to use social media:
- Use High-Quality Images: Share only your best box photos on social media, ensuring they are well-composed, sharp, and visually appealing.
- Write Engaging Captions: Write engaging captions that provide context, tell a story, or ask questions to encourage interaction.
- Use Relevant Hashtags: Use relevant hashtags to increase the visibility of your posts.
- Engage With Your Audience: Respond to comments and messages, ask questions, and participate in relevant conversations.
- Collaborate With Others: Collaborate with other photographers, models, or brands to cross-promote your work and reach a wider audience.
8.3 What Are Some Effective Strategies For Building A Photography Portfolio?
Building a strong photography portfolio is essential for showcasing your skills, attracting clients, and advancing your career. A well-curated portfolio should highlight your best work, demonstrate your range and versatility, and reflect your unique style and vision.
Strategies for building a photography portfolio:
- Select Your Best Work: Choose only your best box photos to include in your portfolio.
- Showcase Your Range: Include a variety of box photos that demonstrate your ability to work with different themes, subjects, and styles.
- Tell a Story: Arrange your box photos in a way that tells a story or conveys a cohesive message.
- Keep It Updated: Regularly update your portfolio with your latest and greatest box photos.
- Get Feedback: Ask other photographers or industry professionals to review your portfolio and provide feedback.
Address: 1600 St Michael’s Dr, Santa Fe, NM 87505, United States.
Phone: +1 (505) 471-6001.
Website: dfphoto.net.
9. Resources And Inspiration: Expanding Your Knowledge And Creativity
Expanding your knowledge and creativity is essential for continuous growth and improvement as a photographer. Exploring various resources, seeking inspiration from other artists, and staying up-to-date with the latest trends can help you refine your skills and develop your unique style.
9.1 What Are Some Recommended Books And Online Courses For Improving My Photography Skills?
Investing in your education is one of the best ways to improve your photography skills. Books and online courses can provide structured learning, expert guidance, and valuable insights into various aspects of photography.
Books and Online Courses:
- “Understanding Exposure” by Bryan Peterson: Explores the fundamentals of exposure and how to use aperture, shutter speed, and ISO to create stunning images.
- “The Photographer’s Eye” by Michael Freeman: Explores the principles of composition and how to use them to create visually compelling images.
- CreativeLive: Offers a wide range of online photography courses taught by industry experts.
- Skillshare: Provides a variety of photography classes for different skill levels and interests.
- Lynda.com (LinkedIn Learning): Offers comprehensive photography tutorials covering various topics and techniques.
9.2 Where Can I Find Inspiration For My Box Photos?
Finding inspiration is essential for fueling your creativity and developing unique and engaging box photo concepts. Inspiration can come from various sources, including other photographers, artists, and the world around you.
Places to find inspiration:
- Online Photography Communities: Join online photography communities, such as Flickr, 500px, or Reddit’s r/photography, to discover new photographers and explore their work.
- Art Galleries and Museums: Visit art galleries and museums to see the work of established and emerging artists, gaining inspiration from their techniques and styles.
- Nature and Travel: Explore the natural world and travel to new places, capturing the beauty and diversity of different landscapes, cultures, and environments.
- Books and Magazines: Browse photography books and magazines to discover new photographers, techniques, and trends.
- Everyday Life: Find inspiration in everyday life by observing the people, places, and objects around you.
9.3 How Can I Stay Up-To-Date With The Latest Trends And Techniques In Photography?
Staying up-to-date with the latest trends and techniques in photography is essential for remaining competitive, relevant, and innovative. Continuous learning and exploration can help you refine your skills, experiment with new approaches, and develop your unique style.
Staying up-to-date:
- Follow Photography Blogs and Websites: Subscribe to photography blogs and websites, such as PetaPixel, Digital Photography School, or Fstoppers, to stay informed about the latest news, trends, and techniques.
- Attend Photography Workshops and Conferences: Attend photography workshops and conferences to learn from industry experts, network with other photographers, and discover new equipment and software.
- Join Photography Communities: Join online and offline photography communities to share ideas, ask questions, and learn from other photographers.
- Experiment With New Gear and Software: Experiment with new cameras, lenses, and editing software to discover new possibilities and enhance your creative process.
- Follow Influential Photographers: Follow influential photographers on social media to stay inspired and learn from their work.
10. FAQ: Answering Common Questions About The Box Photo Trend
Here are some frequently asked questions about the box photo trend, addressing common concerns and providing helpful tips.
10.1 What Is The Best Size For The Boxes In A Box Photo?
The ideal size for the boxes depends on your subjects. Ensure they fit comfortably without being too cramped or lost in the space.
10.2 How Do I Avoid Shadows In My Box Photo?
Use soft, diffused lighting and reflectors to minimize shadows. Ensure consistent lighting across all boxes.
10.3 What Is The Best Way To Pose Multiple Subjects In A Box Photo?
Plan poses in advance and encourage interaction between subjects. Use props to add context and visual interest.
10.4 Can I Use Different Types Of Boxes For A Box Photo?
While uniformity is preferred, you can use different boxes creatively, provided they maintain a cohesive look.
10.5 How Do I Get Sharp Focus Across All Boxes?
Use a narrow aperture (f/8 to f/11) and a sturdy tripod. Manually focus on each box to ensure sharpness.
10.6 What Are The Best Editing Techniques For Blending Images Seamlessly?
Use layer masks and blend edges with a soft-edged brush. Adjust opacity and use frequency separation for smooth skin tones.
10.7 How Can I Add Special Effects To My Box Photo?
Incorporate overlays, particles, or light effects using photo editing software. Experiment with filters to enhance the artistic style.
10.8 What Are The Best Platforms For Sharing My Box Photos?
Share your work on Instagram, Facebook, Behance, and your own website. Use relevant hashtags to increase visibility.
10.9 How Can I Build A Strong Photography Portfolio?
Showcase your best work, demonstrate your range, and tell a story through your images. Keep your portfolio updated.
10.10 Where Can I Find Inspiration For My Box Photo Ideas?
Explore online photography communities, art galleries, nature, and everyday life for inspiration. Follow influential photographers and stay updated with trends.
Ready to dive into the world of box photography? Visit dfphoto.net for more tutorials, inspiring galleries, and a vibrant community of photographers eager to share their knowledge and creativity! Unleash your potential and start creating stunning box photos today.