Creating side-by-side photos is a fundamental photo editing skill, perfect for comparisons, showcasing before-and-after shots, or simply adding a creative touch to your images. While seemingly straightforward, many beginners find themselves unsure where to start. This guide will walk you through six simple and effective methods to effortlessly combine two photos side by side, even if you’re a complete novice.
6 Simple Ways to Create Side-by-Side Pictures
Method 1: Using User-Friendly Collage Maker Apps
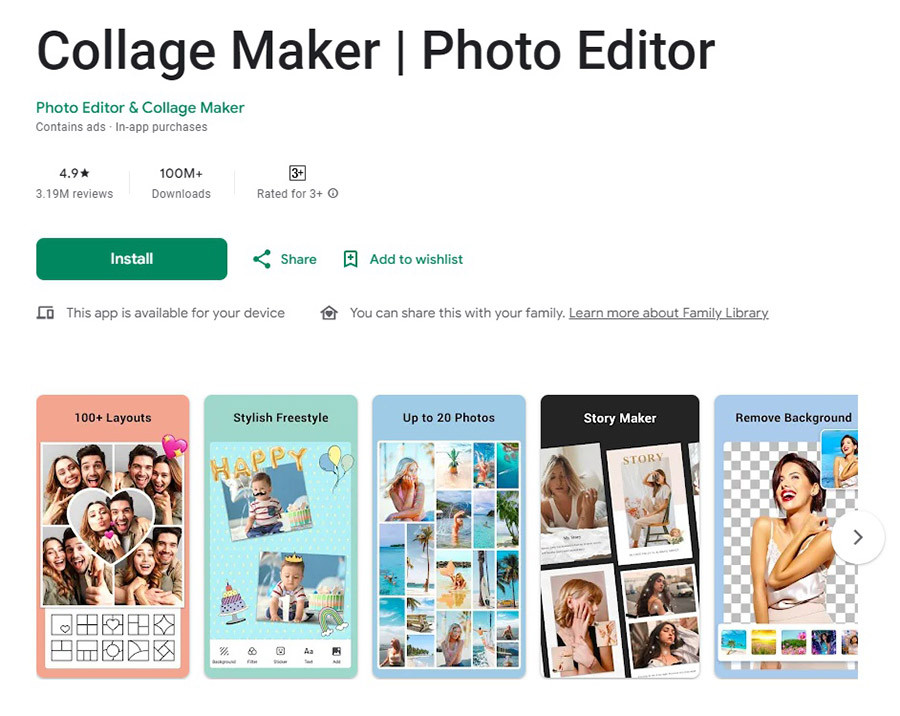 Collage Maker
“Collage Maker” isn’t the name of one specific application, but rather a category encompassing various mobile apps specifically designed for creating photo collages. These apps offer an intuitive way to arrange your photos, including creating side-by-side layouts. Here’s a general guide to using these types of apps to combine your images:
- Launch the App: Begin by opening your chosen Collage Maker app. Look for a button labeled “Collage” or “Grid” on the main screen and tap it to start your project.
- Select Your Photos: Choose the two photos you want to place side by side. Once you’ve selected them, a “Next” or “Import” button will usually appear – tap this to proceed.
- Choose a Side-by-Side Template: Browse through the available templates and select one that arranges photos side by side. You can often customize the template further by adjusting the aspect ratio and border thickness. Many apps also allow you to remove borders entirely for a seamless look. If you opt for borders, consider customizing the background color or pattern in the spaces between the photos, or even using a third image as a background.
- Edit and Customize: Enter the editing mode to refine your collage. Here, you can individually adjust each photo within the layout. Zoom in or out, reposition images by dragging, and apply individual edits like text overlays or filters to each picture to enhance your visual story.
- Finalize and Save: Once you’re satisfied with your side-by-side photo arrangement, confirm your changes. The app will then merge your selected pictures into a single, cohesive image. You often have options to further edit the finalized image before saving it to your device.
Method 2: Leveraging Google Photos for Quick Collages
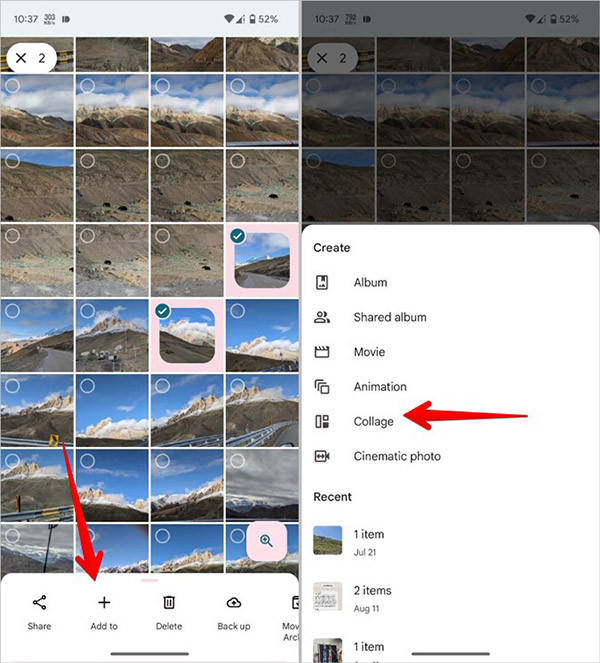 Use Google Photos
Google Photos provides another straightforward and widely accessible method for creating side-by-side photos. This method is particularly convenient if you already use Google Photos for photo storage and management. The process is remarkably simple:
- Open Google Photos: Launch the Google Photos app on your smartphone or access it via the web.
- Select Your Images: Find the first photo you want to use and long-press on it to select it. Then, simply tap on the second photo to add it to your selection (circles will appear on the photo previews to indicate selection).
- Create a Collage: Tap the + icon, typically located in the top right corner of the screen. From the menu that appears, choose the “Collage” option.
- Automatic Side-by-Side Creation: Google Photos will automatically combine the two selected images into a side-by-side collage. It’s a quick and efficient process, but keep in mind that Google Photos offers limited customization options for borders and layouts compared to dedicated collage maker apps.
Method 3: Utilizing the Built-in Samsung Photo Editor
If you are a Samsung Galaxy user, you already have a powerful photo editor readily available within your device’s gallery app. This built-in tool makes creating side-by-side photos incredibly convenient:
- Access Your Gallery: Open the Samsung Gallery app and navigate to the photos you wish to combine. Select the two images you want to place side by side.
- Initiate Collage Creation: Tap the More options icon (usually represented by three dots) and choose Create > Collage.
- Customize Your Layout: Samsung’s built-in editor will offer various collage layouts. Select a side-by-side arrangement and further customize it using the available editing tools. You can adjust borders, spacing, and potentially even apply filters to the entire collage.
This method offers a seamless experience for Samsung users, allowing for quick side-by-side photo creation without needing to download any additional apps.
Method 4: Combining Photos Side-by-Side with Instagram Layouts
Surprisingly, Instagram, primarily known for social media sharing, also offers a handy feature for creating side-by-side photos. Using Instagram Stories’ layout tool, you can arrange two photos side by side and then save the result directly to your phone’s gallery.
- Open Instagram Stories: Launch the Instagram app and tap the + icon, usually at the top right corner. Select “Story” to enter the Stories creation mode.
- Access Layout Feature: In the Stories camera interface, look for the Layout icon (it resembles a grid). Tap this icon to activate the layout options.
- Capture or Upload Photos: With the layout selected, you can either take new photos directly within the Instagram Story interface, or upload existing images from your phone’s gallery. The number of photos you can include depends on the layout you choose, but for side-by-side, select a two-panel layout.
- Save to Your Device: Once you have your side-by-side photos arranged in the Instagram Story layout, you don’t need to actually post it as a Story. Simply tap the Download icon (usually a downward arrow) at the top of the screen to save the combined image directly to your phone’s photo gallery.
Method 5: Using iPhone Shortcuts for Side-by-Side Photos (No Apps Needed)
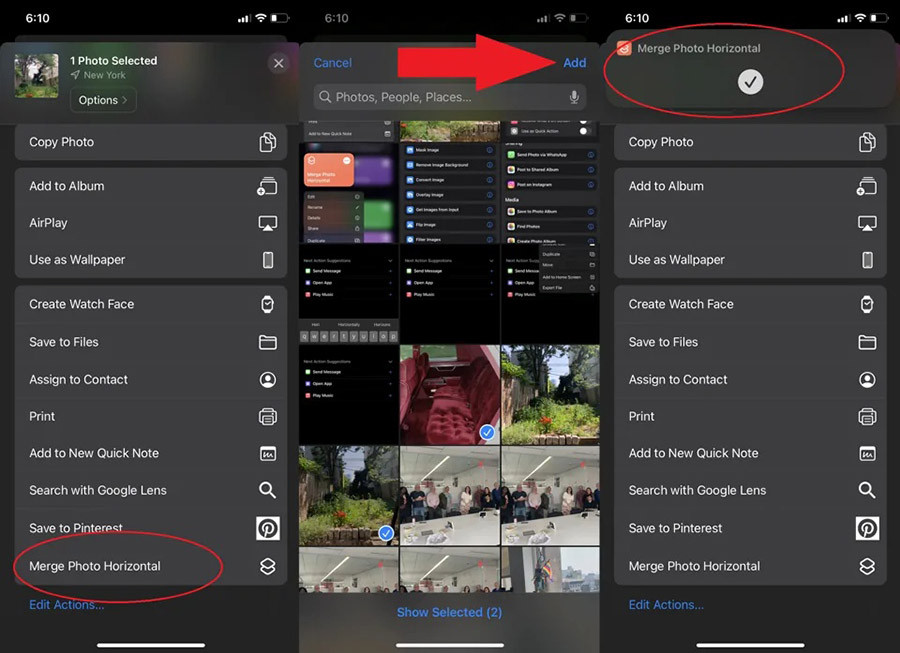 Use iPhone to combine image
For iPhone users seeking a no-app-download solution, the built-in Shortcuts app is a powerful tool. It allows you to create custom workflows, including one for combining photos side by side. Here’s how to set up a shortcut for creating side-by-side images:
- Open the Shortcuts App: Find and open the Shortcuts app on your iPhone. Tap the + icon in the top right corner to create a new shortcut.
- Add “Select Photos” Action: In the shortcut editor, use the search bar at the bottom and type “Select Photos”. Tap the Select Photos action that appears. Tap the arrow to expand the action’s options and enable “Select Multiple” to allow choosing more than one photo.
- Add “Combine Images” Action: In the search bar again, type “Combine Images” and select the Combine Images action. Choose your preferred combination method (e.g., Horizontally for side-by-side). You can also adjust the spacing between photos within this action if desired.
- Add “Save to Photo Album” Action: Search for “Save to Photo Album” and select this action. This will automatically save your combined image to your iPhone’s Photos app. No further settings are typically needed for this step.
- Customize and Add to Home Screen (Optional): You can rename your shortcut to something like “Side-by-Side Photos” and even customize its icon for easier recognition. To quickly access this shortcut, tap “Add to Home Screen” and then “Done”.
- Run Your Shortcut: The new shortcut icon will now be on your home screen. To combine photos, simply tap the shortcut, select the two images you want to combine, and tap “Add”. Your side-by-side photo will be instantly saved to your Photos app.
Method 6: Online Side-by-Side Photo Tools Like TinyWow
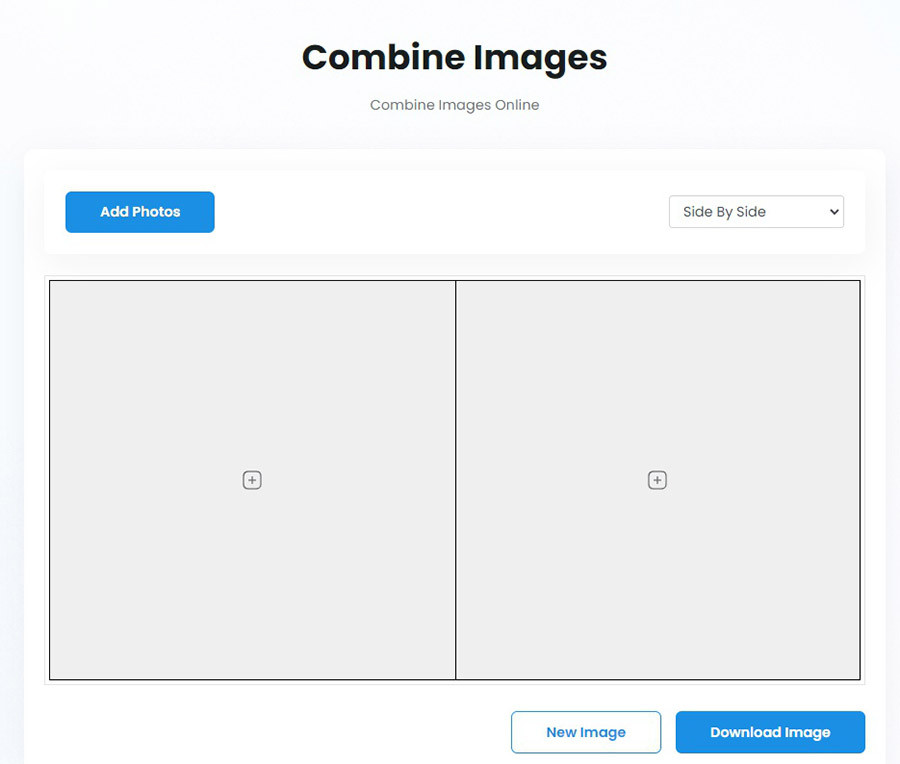 TinyWow combine image
If you prefer not to install apps or are working on a computer, online tools offer a convenient alternative. TinyWow is a great example of a free online tool that can quickly combine photos side by side. While we use TinyWow as an example, many similar websites offer comparable functionality.
- Visit TinyWow Website: Go to the TinyWow website in your web browser and navigate to their Combine Images tool (usually found under image tools).
- Upload Your Photos: Click the “Add photos” button on the TinyWow webpage. Select the two images you want to combine from your computer. To select multiple photos at once, click the first photo, hold down the Ctrl key (or Command key on Mac), and then click the second photo.
- Upload and Combine: Click “Open” to upload your selected photos to TinyWow.
- Download Your Side-by-Side Image: Wait a few seconds for the upload and processing to complete. Once done, click the “Download Image” button. You may need to complete a ReCAPTCHA verification before the download starts.
Keep in mind that free online tools like TinyWow often have temporary storage policies. TinyWow, for instance, typically stores finalized files for only about an hour. Ensure you download your combined image promptly after creation to avoid needing to repeat the process.
FAQs
How Can I Create a Photo Collage with More Than Two Photos?
For more complex collages with multiple photos, Collage Maker apps and online tools are ideal. They offer templates to combine three, four, or even more images. Explore various apps and websites to find one that suits your collage needs and offers the desired level of customization.
Can I Edit Live Photos in Side-by-Side Collages?
Yes, Live Photos can be used and edited in side-by-side collages just like standard photos. You can trim their duration, mute the sound, change the key photo, and even convert them to still images before or after placing them in a collage.
Is it Possible to Combine Pictures without Using Third-Party Apps?
Absolutely. As demonstrated, you can combine photos using Google Photos (on Android), Samsung’s built-in editor, and iPhone Shortcuts, all without downloading any external apps. While these built-in options might offer fewer advanced features compared to dedicated apps, they are perfectly capable for basic side-by-side photo creation and offer convenience and ease of use.
See more: How to Convert RAW to JPEG?
Conclusion
You now have six distinct methods at your fingertips for creating compelling side-by-side photos. The best way to solidify your understanding is to put these methods into practice. Open your preferred device, choose a method, and follow the steps outlined. Hands-on practice is key to mastering these techniques. If you encounter any difficulties, don’t hesitate to revisit this guide or seek further assistance. Happy photo combining!