TikTok has evolved beyond just short videos; it’s now a versatile platform where photo slideshows are gaining immense popularity. Whether you’re a budding influencer, a business promoting products, or simply wanting to share memories with friends, slideshows offer a dynamic way to captivate your audience. They’re perfect for showcasing product ranges, telling visual stories, or presenting information in an easily digestible format. Creating a photo slideshow on TikTok is straightforward, whether you’re using an iPhone or Android device.
This guide will walk you through the simple steps to create compelling TikTok slideshows, along with tips to ensure your content is both visually appealing and sounds great, maximizing engagement and reach.
Swipeable vs. Non-Swipeable Slideshows on TikTok
TikTok offers two distinct types of slideshows: swipeable and non-swipeable, each catering to different content needs and user experiences. Understanding the difference is key to choosing the right format for your message.
Swipeable slideshows function like a photo album within TikTok. Users can manually swipe through each image at their own pace. This format gives viewers control and is ideal for content that requires more attention per slide.
Swipeable slideshows excel in scenarios like:
- Product showcases: Displaying individual products with descriptions and prices on separate slides, allowing users to browse at their leisure.
- Service and offer presentations: Detailing various services or promotional offers across multiple slides, letting potential customers explore at their own pace.
- Text-heavy content: Presenting information in chunks across slides, giving viewers ample time to read and absorb the text.
Non-swipeable slideshows, on the other hand, play automatically, transitioning between images like a short video. These are created using TikTok’s Templates, which offer pre-designed filters and effects to enhance visual appeal and maintain a consistent aesthetic.
Non-swipeable slideshows are particularly effective for:
- Visual storytelling: Creating a narrative flow through images, controlling the pacing and emotional impact.
- Timed content delivery: Ensuring viewers experience the slideshow at a specific rhythm and timing you set.
- Leveraging pre-set effects: Adding professional-looking visual enhancements quickly and easily through Templates.
Let’s delve into how to create both types of slideshows directly on TikTok, ensuring you can choose the best format for your content goals.
How to Make a Swipeable Photo Slideshow Directly on TikTok: 7 Steps
Creating a swipeable slideshow directly within the TikTok app is a simple process. Before starting, ensure you have all the photos you want to use readily available in your phone’s gallery.
Step 1: Open TikTok
Launch the TikTok app on your smartphone. Look for the “+” (plus sign) icon at the bottom center of the screen and tap it to start creating new content.
Alt text: Tap the plus icon at the bottom of the TikTok app to begin creating a new post.
Step 2: Create a New Post
In the creation interface, locate the options at the bottom. Select “Photo” to indicate you’re working with images, and then tap “Post” to proceed.
Next, in the bottom left corner, you’ll see a small icon displaying a preview of your most recent photo. Tap this icon to access your phone’s gallery and select images for your slideshow.
 Accessing the photo gallery to add images to a TikTok slideshow
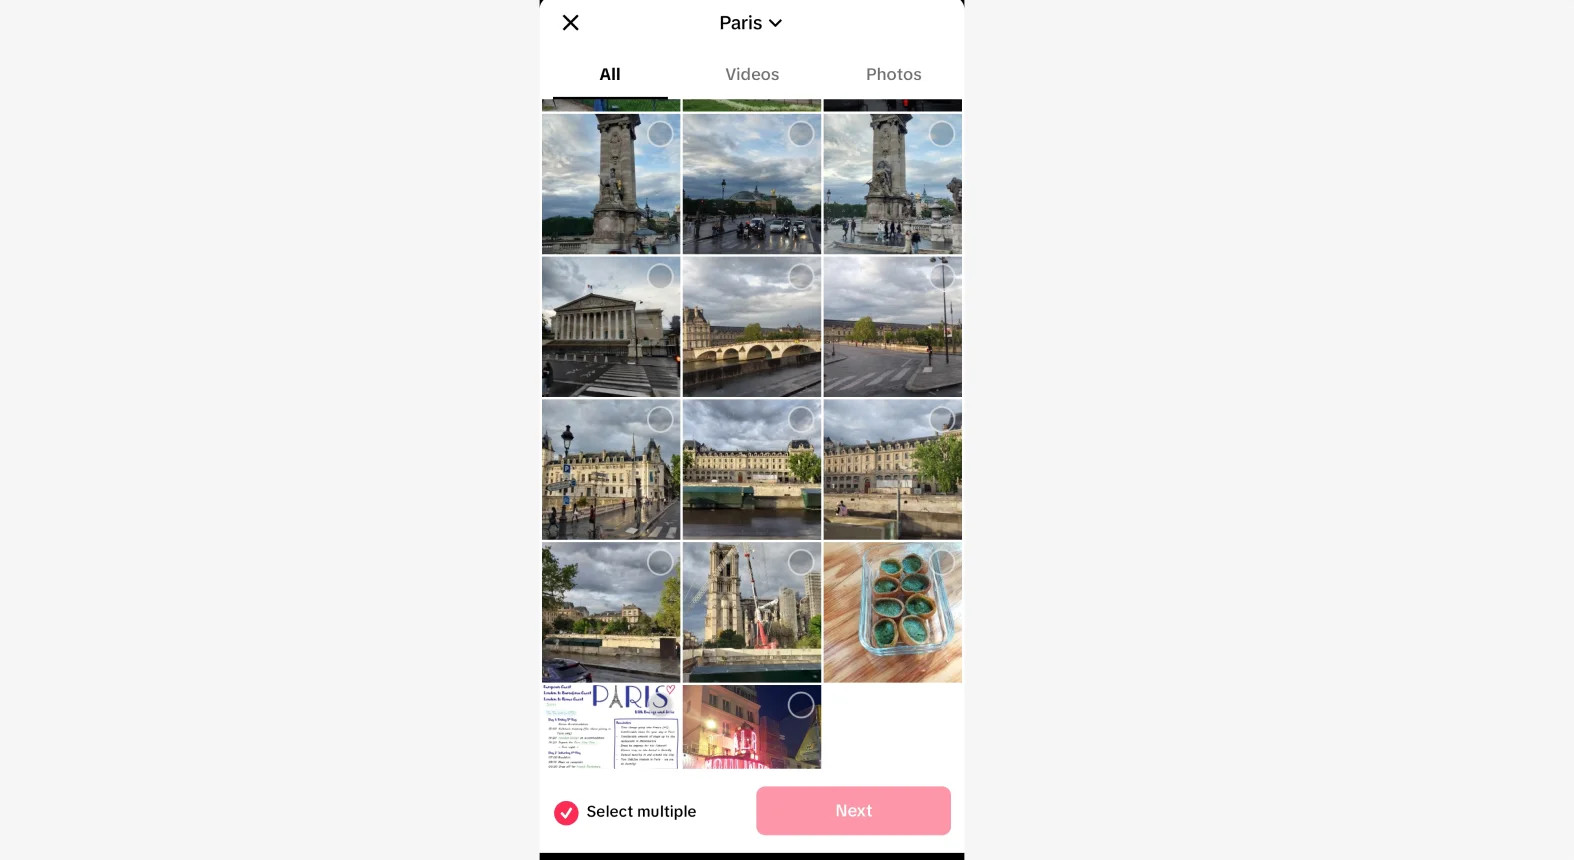
Step 3: Open Your Gallery
At the top of your screen, ensure “Photos” is selected to view your recent images. Then, at the bottom of the gallery view, tap “Select multiple”. This allows you to choose multiple photos for your swipeable slideshow. TikTok supports up to 35 images in a single slideshow.
 Selecting multiple photos from the gallery for a TikTok slideshow
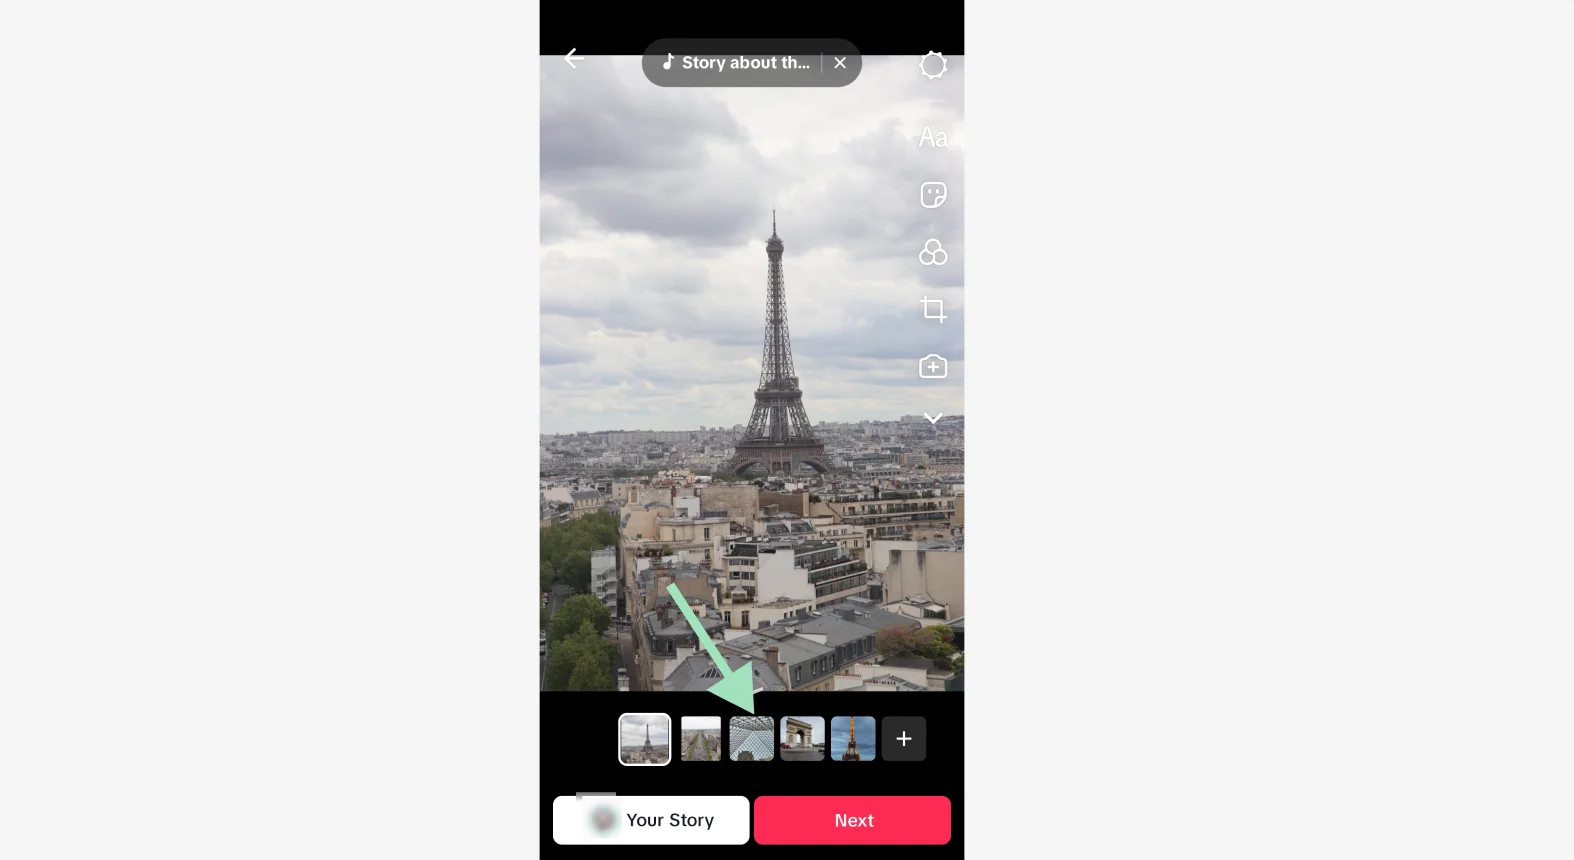
Step 4: Choose the Pictures
Select the photos you wish to include in your slideshow by tapping on each one. The order in which you select them is crucial as it determines the sequence in your slideshow. You can monitor the selection order by observing the numbered circles that appear in the upper right corner of each selected image.
Once you’ve chosen all your images, tap the “Next” button located at the bottom of the screen to move forward.
Step 5: Swipeable or Non-swipeable?
On the next screen, you’ll decide whether your slideshow will be swipeable or non-swipeable. Look for the options at the bottom of the screen. Select “Photo” for a swipeable slideshow or “Video” for a non-swipeable slideshow.
If you don’t immediately see this switch, look for a small arrow icon just above the list of selected pictures and tap it to reveal the Photo/Video options.
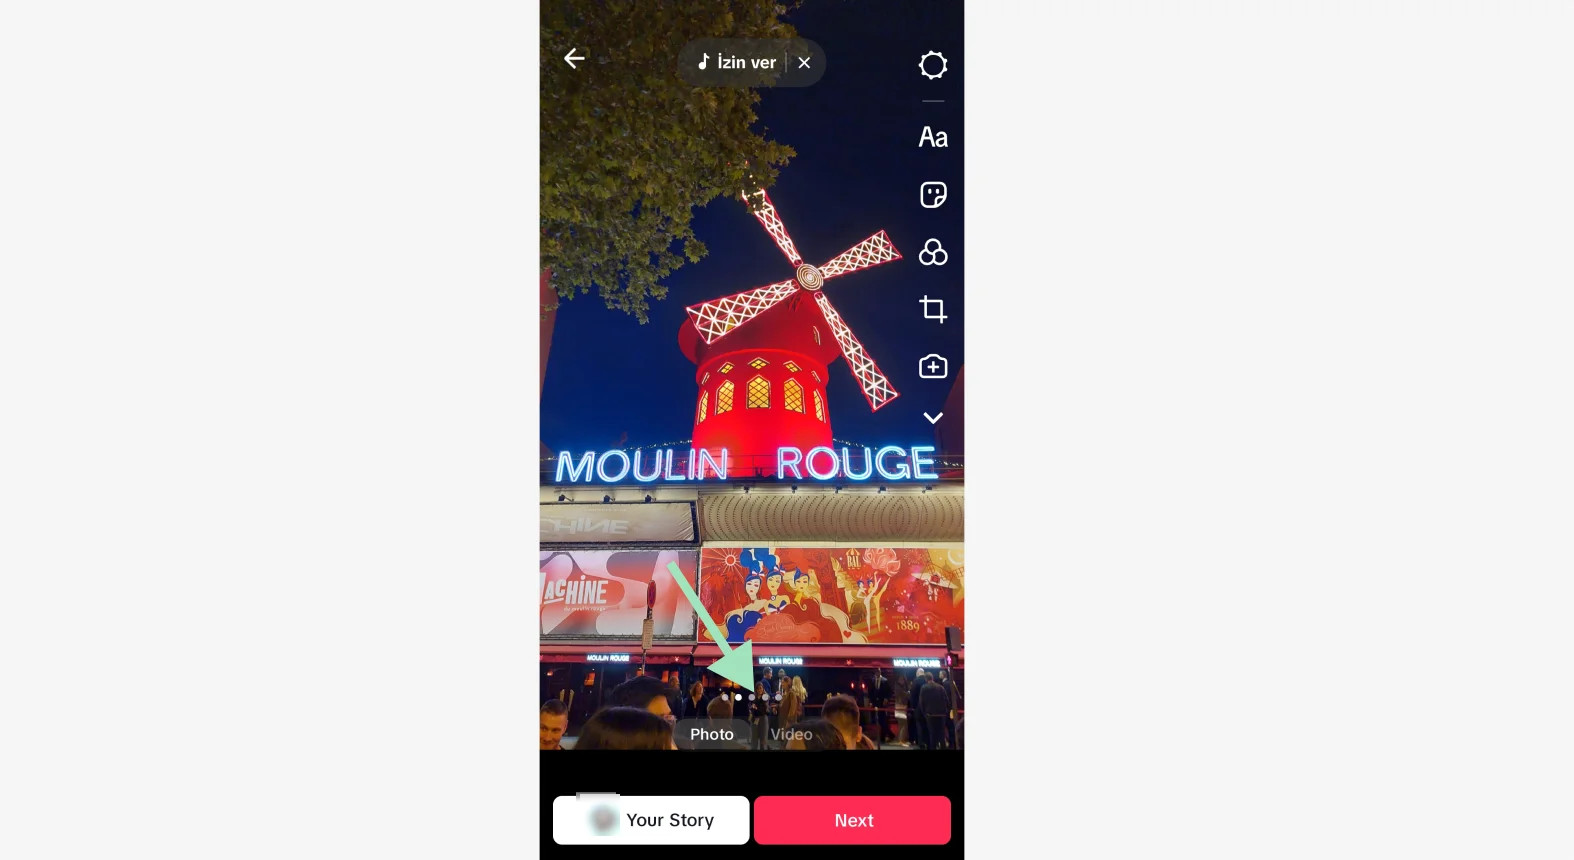 Choosing between a photo and video slideshow format on TikTok
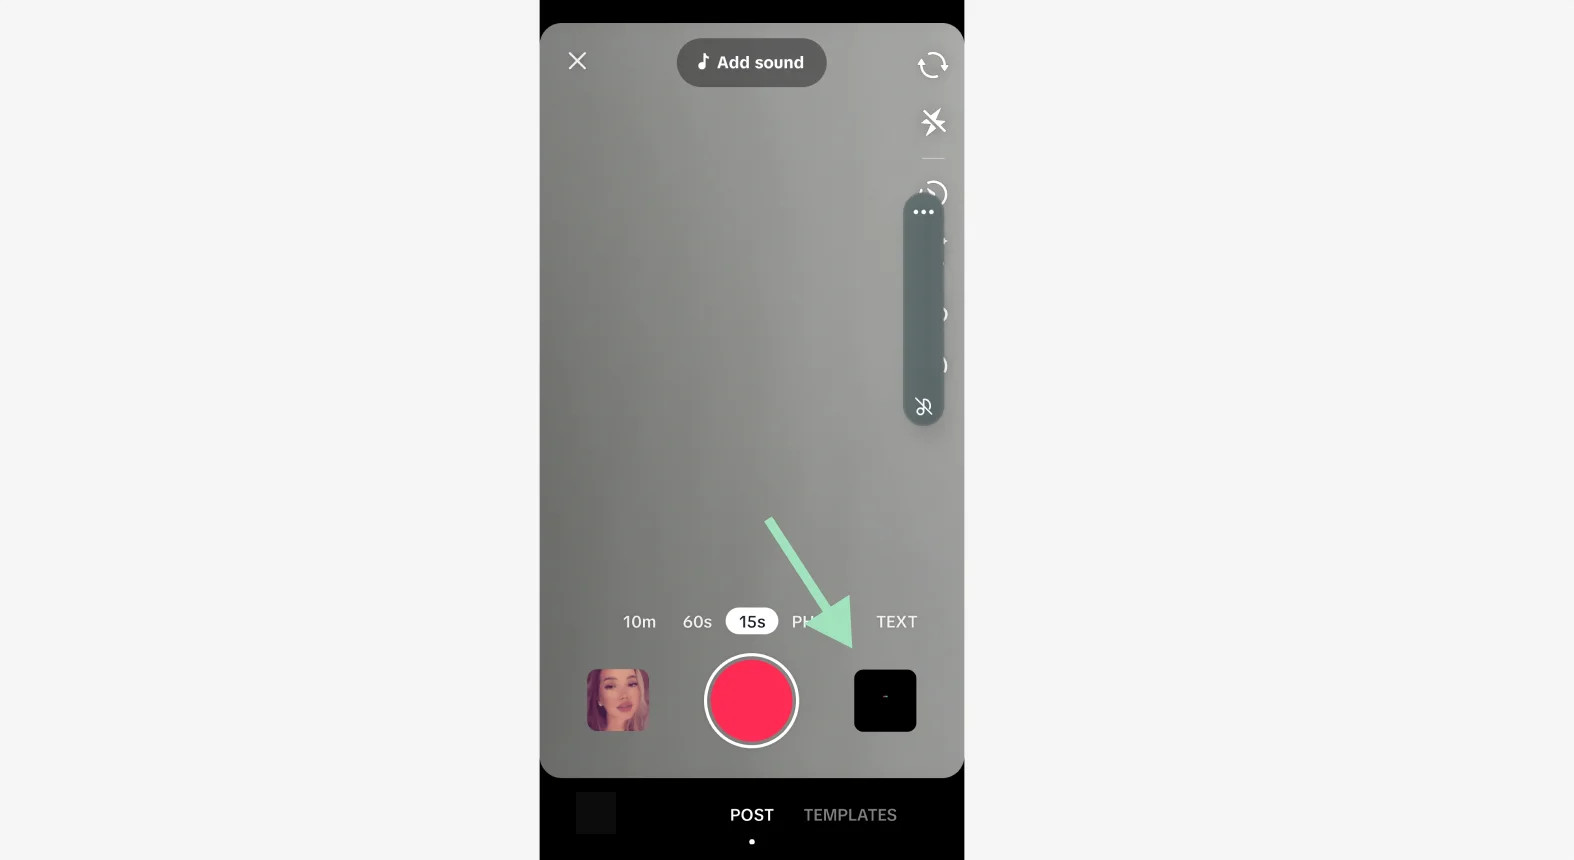
Step 6: Customizing Your Slideshow
Now it’s time to personalize your slideshow. The customization options vary slightly depending on whether you’ve chosen a swipeable or non-swipeable format.
Customizing a Swipeable Slideshow
For swipeable slideshows, tap on each picture’s thumbnail at the bottom of the screen to select it for individual editing.
On the right sidebar, you’ll find icons to add text, stickers, filters, or effects to each selected image. To change the background music, tap “Add music” at the top of the screen to explore TikTok’s music library.
 Customizing individual photos within a swipeable TikTok slideshow
Customizing a Non-swipeable Slideshow
If you opted for a non-swipeable slideshow, you can swipe up on the screen to access the video editing menu. Here, you’ll find a timeline editor that offers more detailed control over your slideshow’s timing and effects.
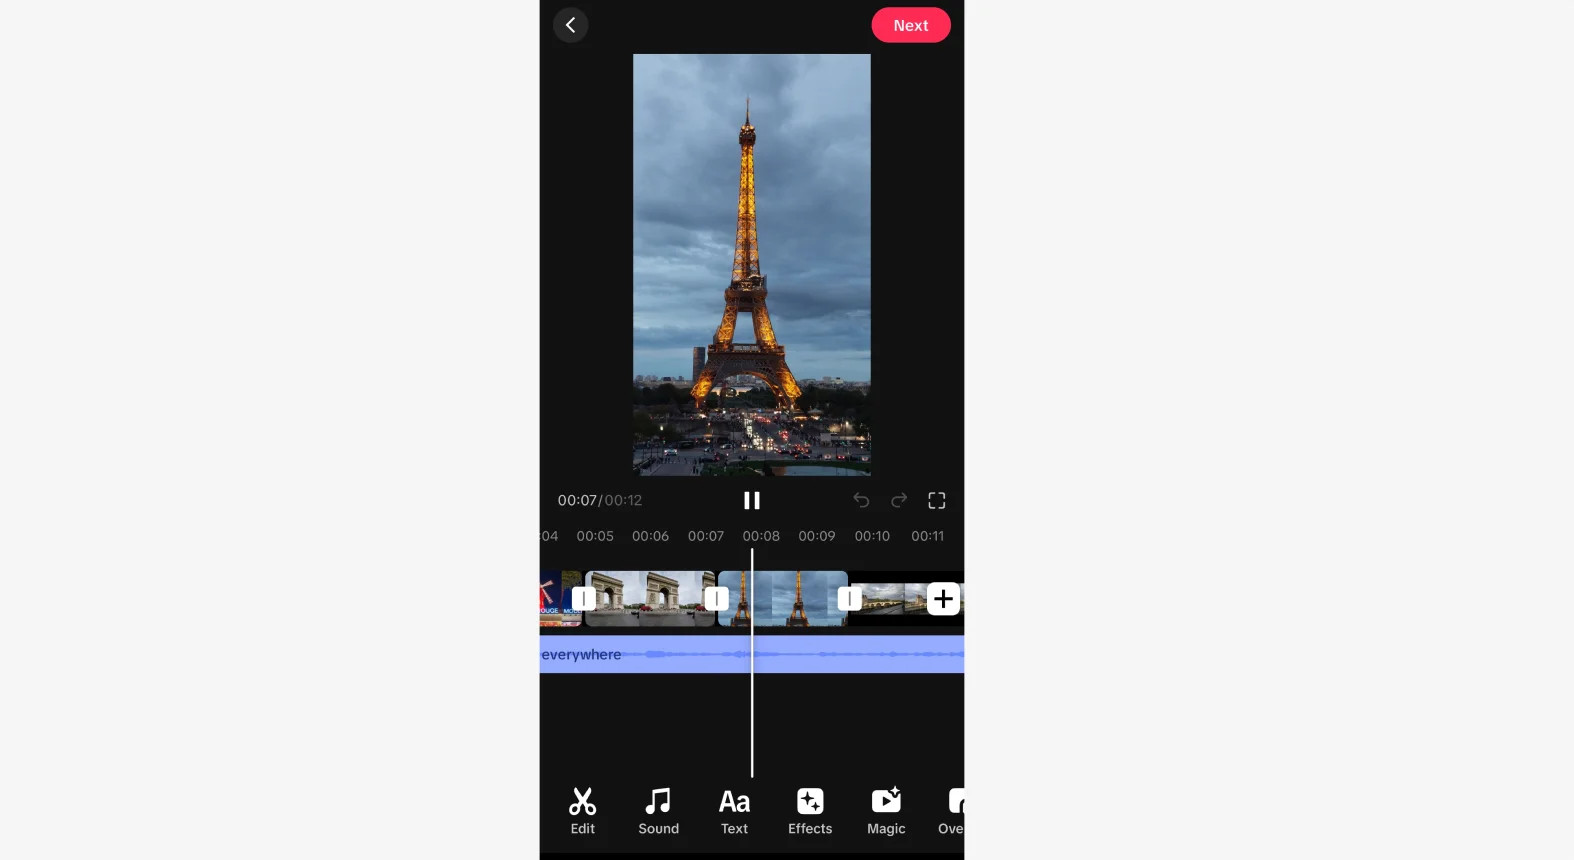 Accessing the video editing timeline for a non-swipeable TikTok slideshow
After you’ve finished customizing all your images to your liking, tap the “Next” button at the bottom to proceed to the final step.
Step 7: Add Finishing Touches
This is the final stage before publishing your slideshow. Here, you can add the finishing touches to make your slideshow ready for your audience.
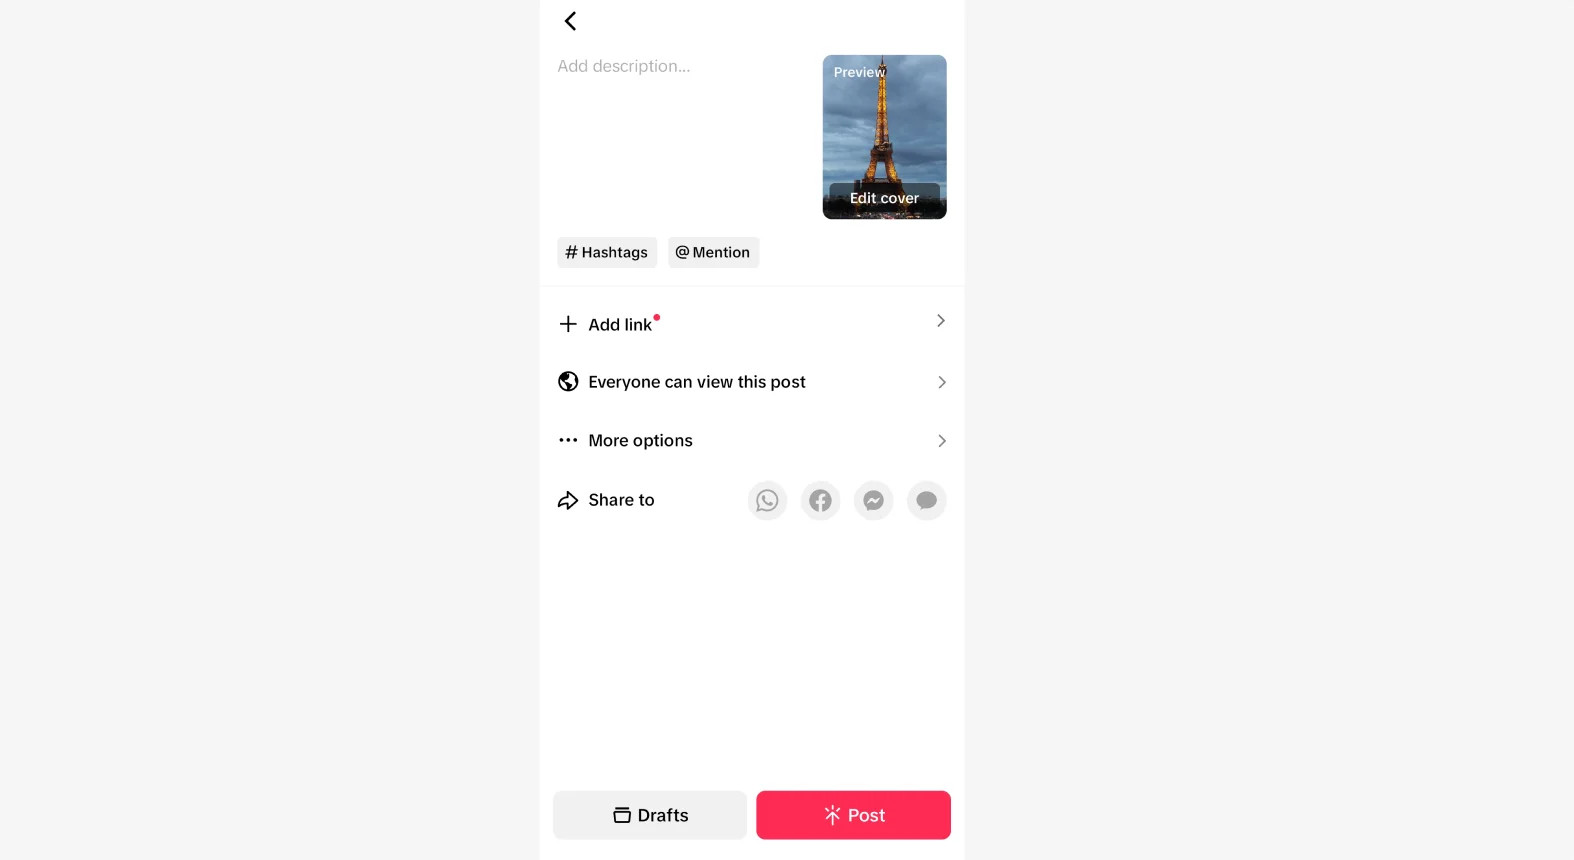 Adding final details before posting a TikTok slideshow
You can:
- Edit your slideshow’s cover image: Choose a visually appealing image to grab attention.
- Add a description and hashtags: Write engaging text and use relevant hashtags to increase discoverability.
- Include links: If relevant, add links to products or other content.
- Choose your location: Tag your location if it adds context to your slideshow.
- Manage who can view your post: Adjust privacy settings as needed.
- Share it on other social media platforms: Expand your reach by sharing to connected platforms.
Once you are satisfied with all the elements, tap the red “Post” button at the bottom to publish your swipeable slideshow on TikTok.
How to Make a Non-Swipeable Slideshow with Templates: 5 Steps
Creating a non-swipeable slideshow using TikTok Templates offers an alternative approach with pre-designed styles and effects. Remember, using a template means you cannot create a swipeable slideshow.
Again, ensure you have the photos you want to use readily available in your phone’s gallery before you begin.
Step 1: Open TikTok
Open your TikTok app and tap the “+” (plus sign) icon at the bottom to start a new post.
Step 2: Create a New Post
In the creation interface, this time select “Templates” at the bottom of the screen.
Be aware that not all templates support multiple images. Some are designed for just one or two photos. Choose a template that accommodates the number of pictures you want to include in your non-swipeable slideshow.
Step 3: Choose the Pictures
Select the photos for your slideshow by tapping on each one in your gallery. The order of selection will determine their sequence in the slideshow.
In the template interface, you’ll see placeholders or boxes at the bottom that represent the slots for your images. Each box may also indicate the duration for which each photo will be displayed in the slideshow. Once you are satisfied with your image selections, tap the “Next” button at the bottom.
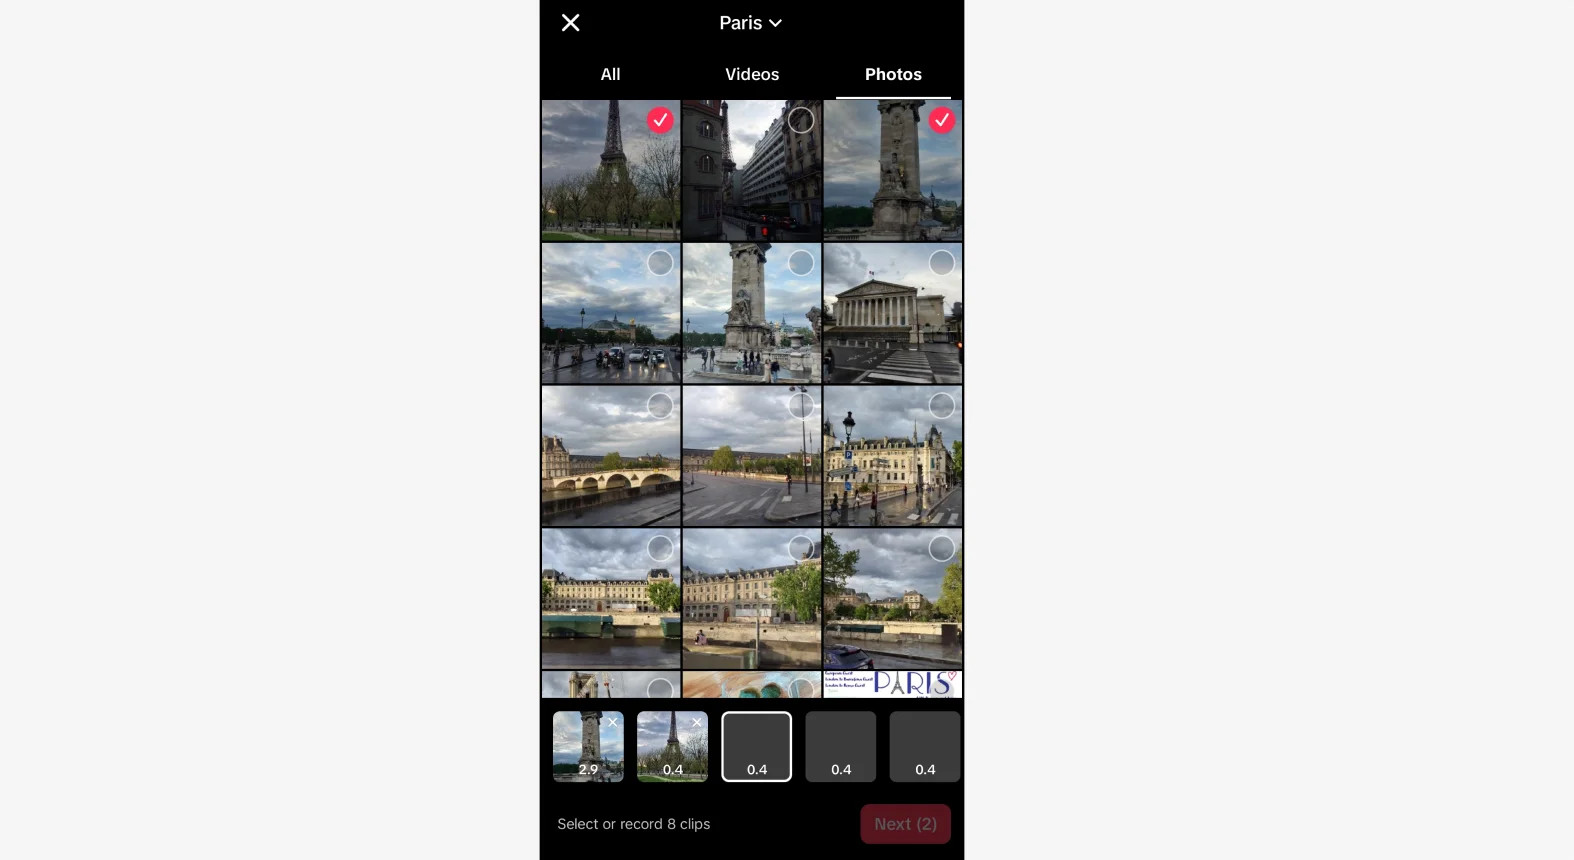 Selecting photos for a slideshow template on TikTok
Step 4: Customizing Your Slideshow
Now you can further customize your non-swipeable slideshow. On the right sidebar, you will find options to add filters, stickers, text, or effects to enhance the template’s base design.
Swiping up on the screen opens the video editor, offering timeline-based adjustments for more granular control. To add or change the music, tap the “Add sound” icon at the top to access TikTok’s sound library.
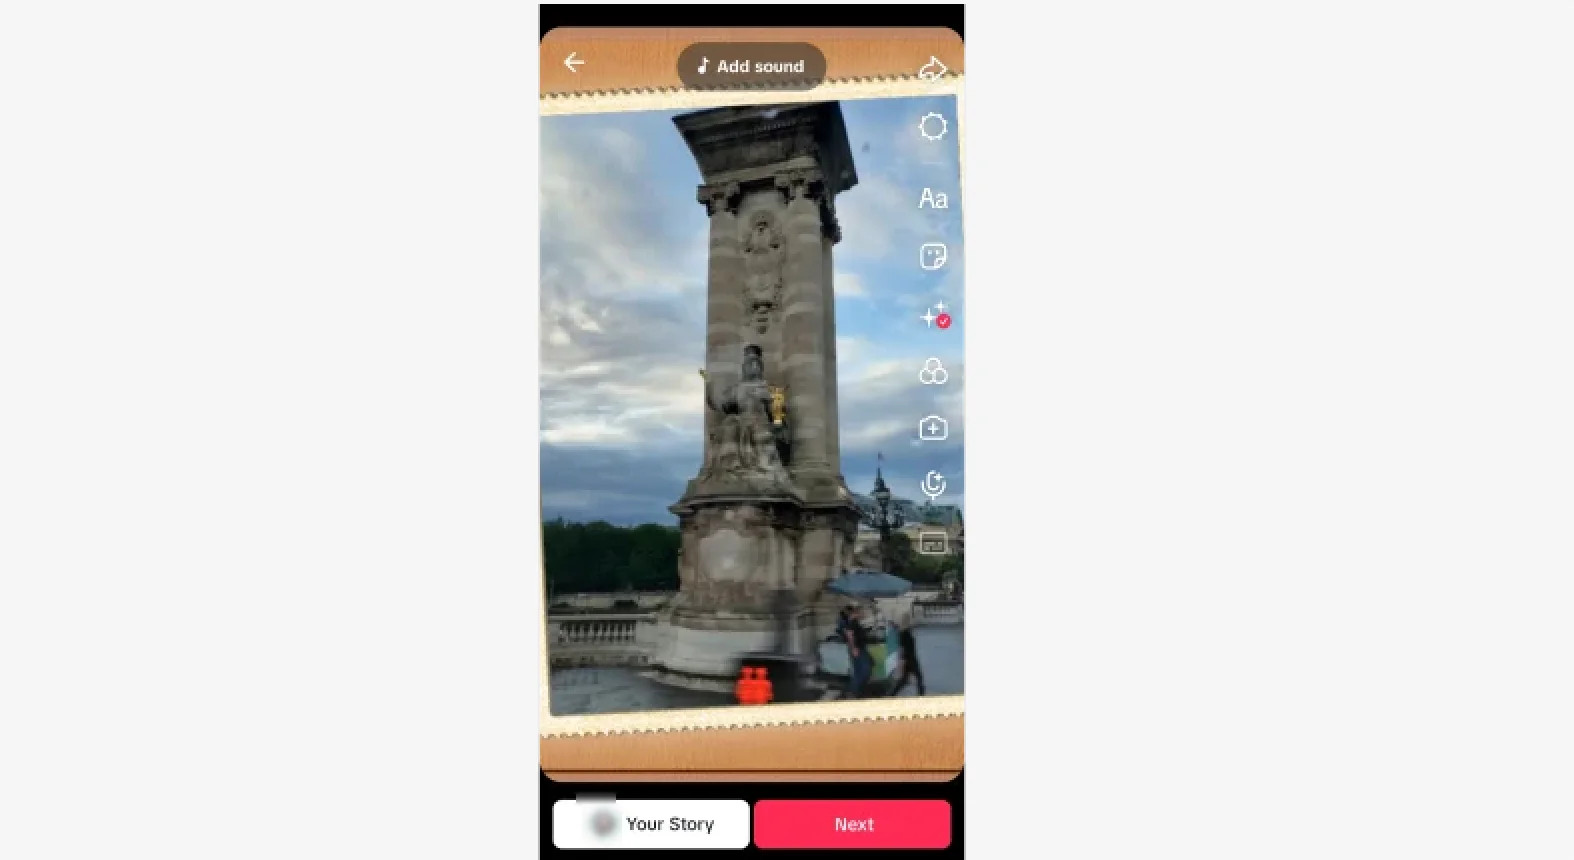 Editing a TikTok template slideshow with filters and music
After making all your desired edits, click the “Next” button at the bottom to proceed to the final publishing step.
Step 5: Add Finishing Touches
In this final step, you can add the last details before publishing your template-based slideshow. Just like with swipeable slideshows, you can:
- Customize the cover image
- Write a description and add hashtags
- Include relevant links
- Set your location
- Adjust privacy settings
- Share across other social media platforms
Once you are completely satisfied, tap the red “Post” button at the bottom to publish your non-swipeable slideshow on TikTok.
Tips for Creating a Great TikTok Slideshow
Creating a slideshow on TikTok is simple, but making a great slideshow that truly engages your audience requires more than just putting photos together. Here are some key tips to elevate your TikTok slideshows:
Add High-Quality Photos
The visual quality of your photos is paramount. Low-resolution or blurry images can deter viewers. Always use crisp, high-resolution images to ensure your slideshow looks professional and polished. For product showcases, ensure products are well-lit and any accompanying text is easily readable. For personal or storytelling content, choose images that are emotionally resonant and visually compelling.
Craft a Compelling Narrative
Storytelling is at the heart of engaging content. Whether you’re presenting products, sharing memories, or building brand narratives, ensure your slideshow tells a story. A compelling narrative arc keeps viewers engaged and encourages them to watch until the end. A slideshow without a clear narrative can feel disjointed and fail to capture attention.
Add Relevant Music
Music significantly enhances the mood and impact of your slideshow. The right soundtrack can amplify the emotions you want to convey and make your content more memorable. Choose music that complements the theme and mood of your visuals, rather than distracting from them. Music that aligns with the rhythm of image transitions can create a more cohesive and engaging viewing experience.
Add Text to Your Photos
Text can add context, highlight key points, or even tell a story within your slideshow. Use text sparingly but effectively. Keep text concise and readable, ideally no more than 5-6 words per image, so viewers can quickly grasp the message before the slide changes. Make the text on your first image particularly captivating to hook viewers immediately. Choose fonts and colors that contrast well with your images but don’t obscure important visual elements.
Use Filters and Stickers
Filters and stickers are fun, creative tools to inject personality and visual interest into your slideshows. Use them to set a specific mood, enhance the aesthetic, or draw attention to certain elements. Emojis and animated stickers, like text bubbles, can add dynamism and playfulness. However, use these effects judiciously. Overdoing filters and stickers can make your slideshow look cluttered or garish, detracting from your core message.
How to Make a TikTok Slideshow Video with Third-Party Software
While TikTok’s built-in tools are convenient for quick slideshow creation, third-party software offers enhanced features and greater creative control for more sophisticated projects.
For example, Riverside provides a robust platform with a wider array of editing tools, perfect for users seeking professional-grade slideshows.
With Riverside, you can effortlessly:
- Import high-resolution images: Maintain visual quality without compression issues.
- Add custom backgrounds: Create unique visual environments for your slideshow.
- Customize dynamic captions: Generate engaging and styled text overlays.
- Upload brand logos: Seamlessly integrate branding elements.
- Add text overlays and music: Enhance your slideshow with diverse multimedia elements.
- Fine-tune audio with AI: Ensure clear and professional sound quality.
Working on a desktop interface, rather than a mobile one, often streamlines the editing process, offering more screen real estate and control. Plus, Riverside’s cloud-based platform allows you to access and edit your projects from anywhere, including your mobile device.
Creating a non-swipeable TikTok slideshow video on Riverside is surprisingly straightforward:
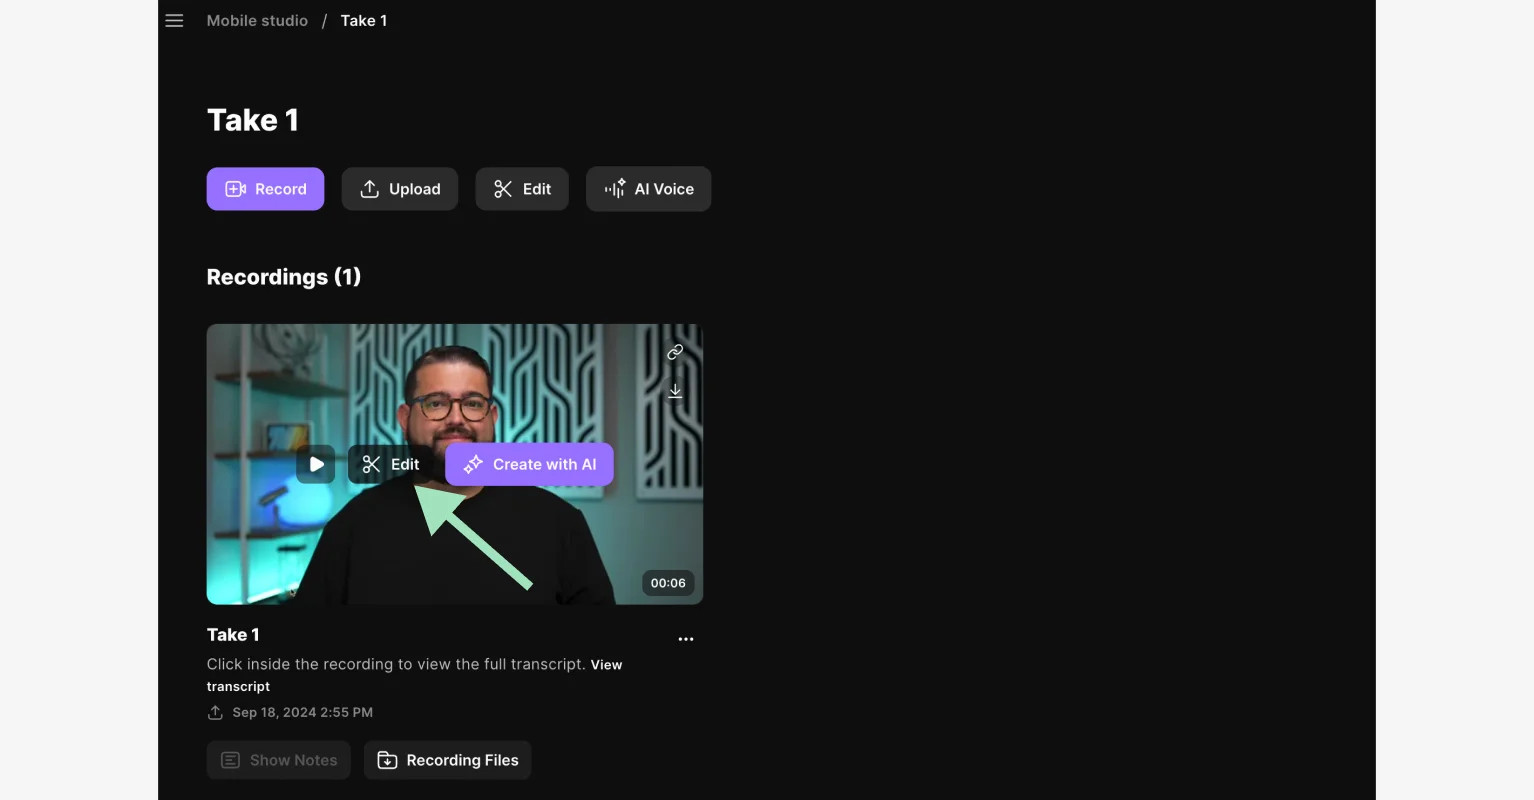
Step 1: Open Your Recording
Log into your Riverside dashboard and select an existing studio or create a new one. Choose a relevant recording from your library by clicking on it. Alternatively, click the “Upload” button if you want to use media from your local drive.
 Opening a Riverside recording studio to create a TikTok slideshow
Step 2: Choose an Audio or Video Base
Select the video or audio track you want to edit from your recording. Click “Edit” to open it in Riverside’s editor interface.
Step 3: Setup Your Video
If you selected a video and want to create a slideshow with a blank background (like an audiogram but with images), you can hide the video track.
Click the “Tracks” button on the right sidebar, select your video track, and toggle “Hide Video” to ON.
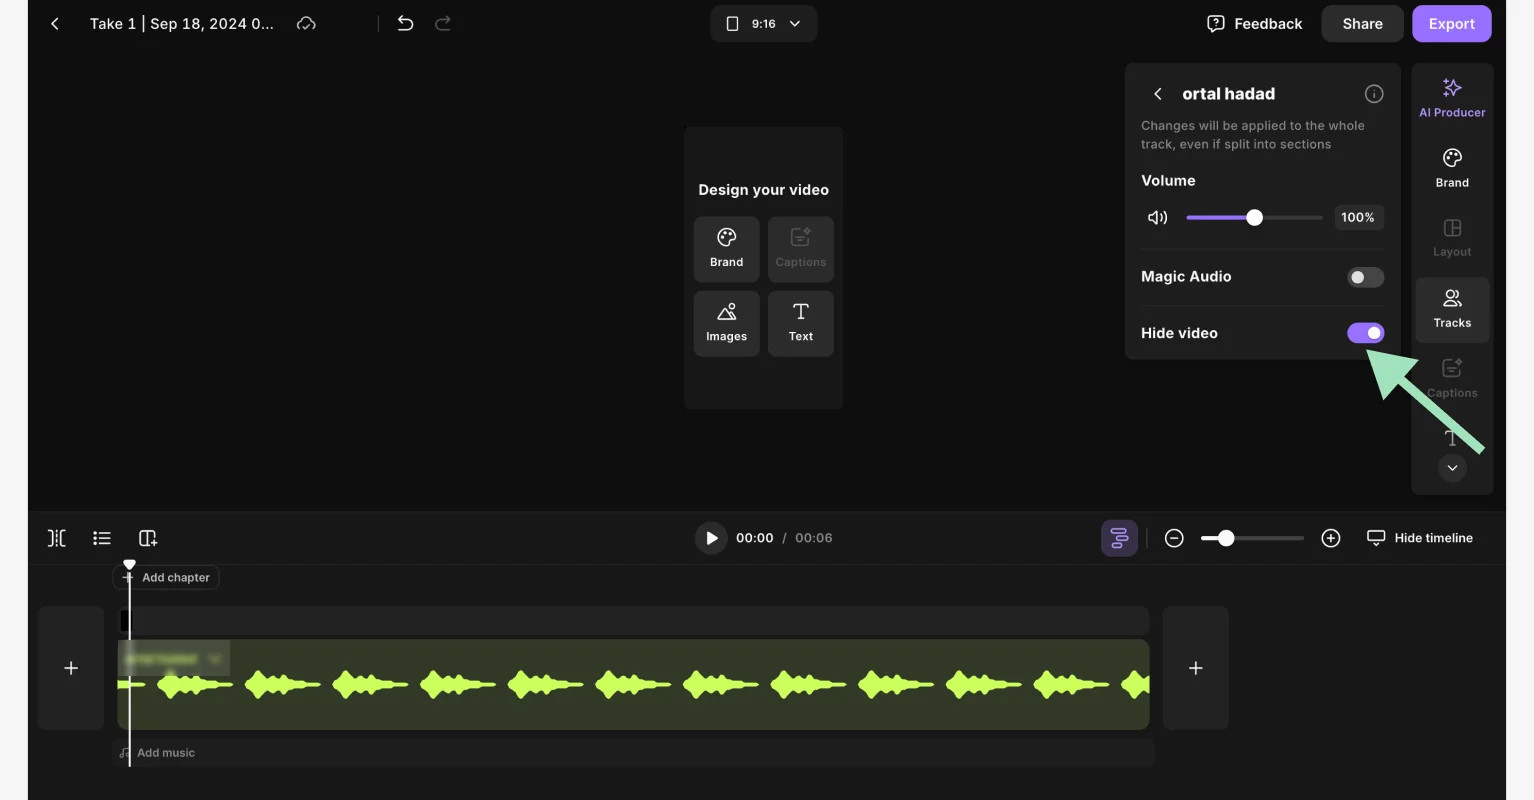 Hiding the video track to create a slideshow base in Riverside
It’s also recommended to resize your project to TikTok’s optimal dimensions. Click the layout button at the top and choose “9:16” aspect ratio, which is ideal for vertical TikTok content.
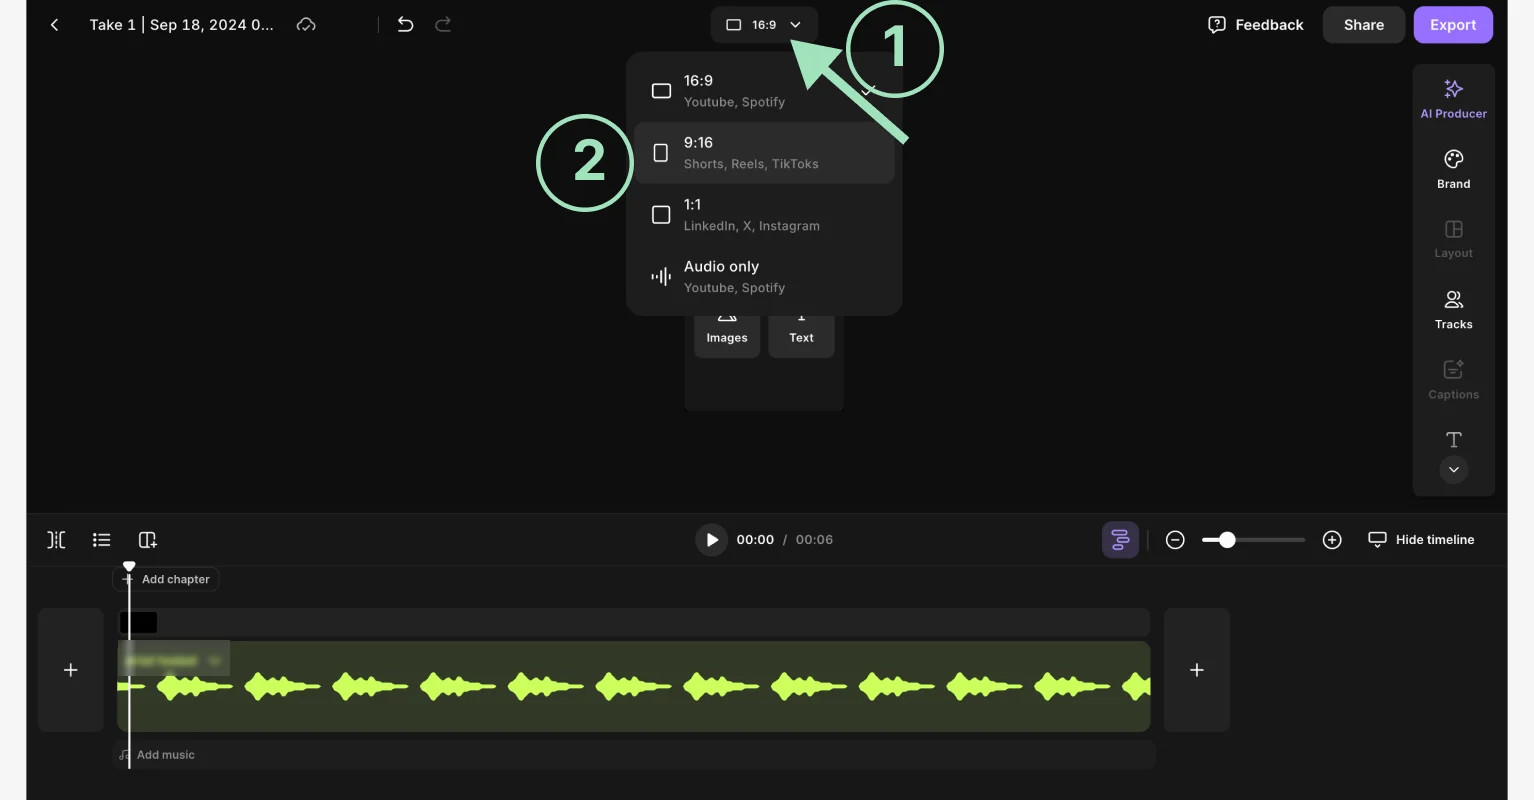 Resizing the video dimensions for TikTok in Riverside
Step 4: Add Images and Edit
Add your images by clicking the “Uploads” button on the right sidebar to import from your computer. Alternatively, explore Riverside’s royalty-free image library by clicking “Images” to find stock photos.
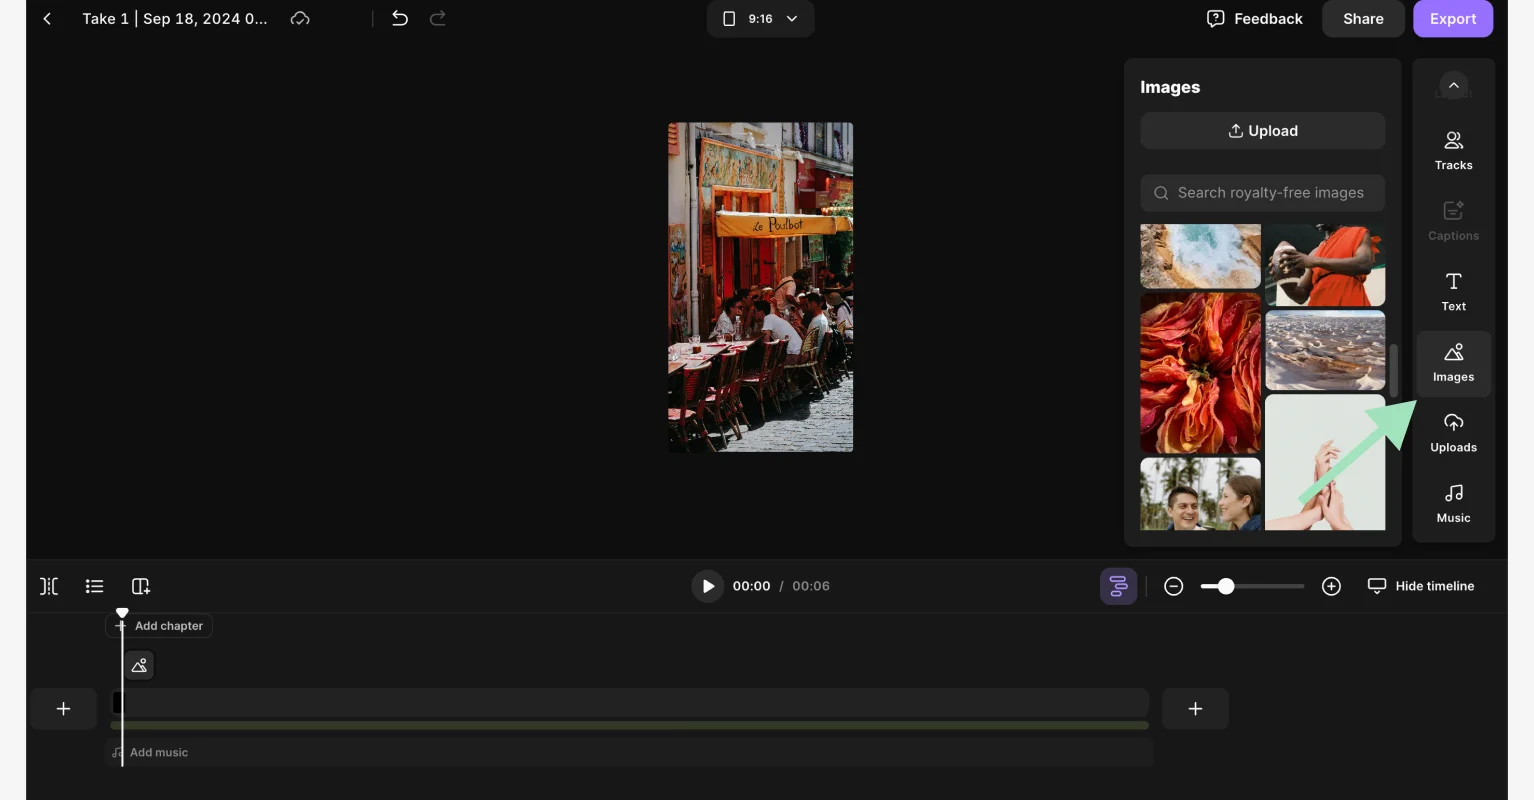 Adding images to a TikTok slideshow project in Riverside
Customize your slideshow further using the right sidebar options to add captions, text overlays, backgrounds, logos, and more. To make an image fill the screen, select the image and click the “Fill video” button (represented by two small arrows).
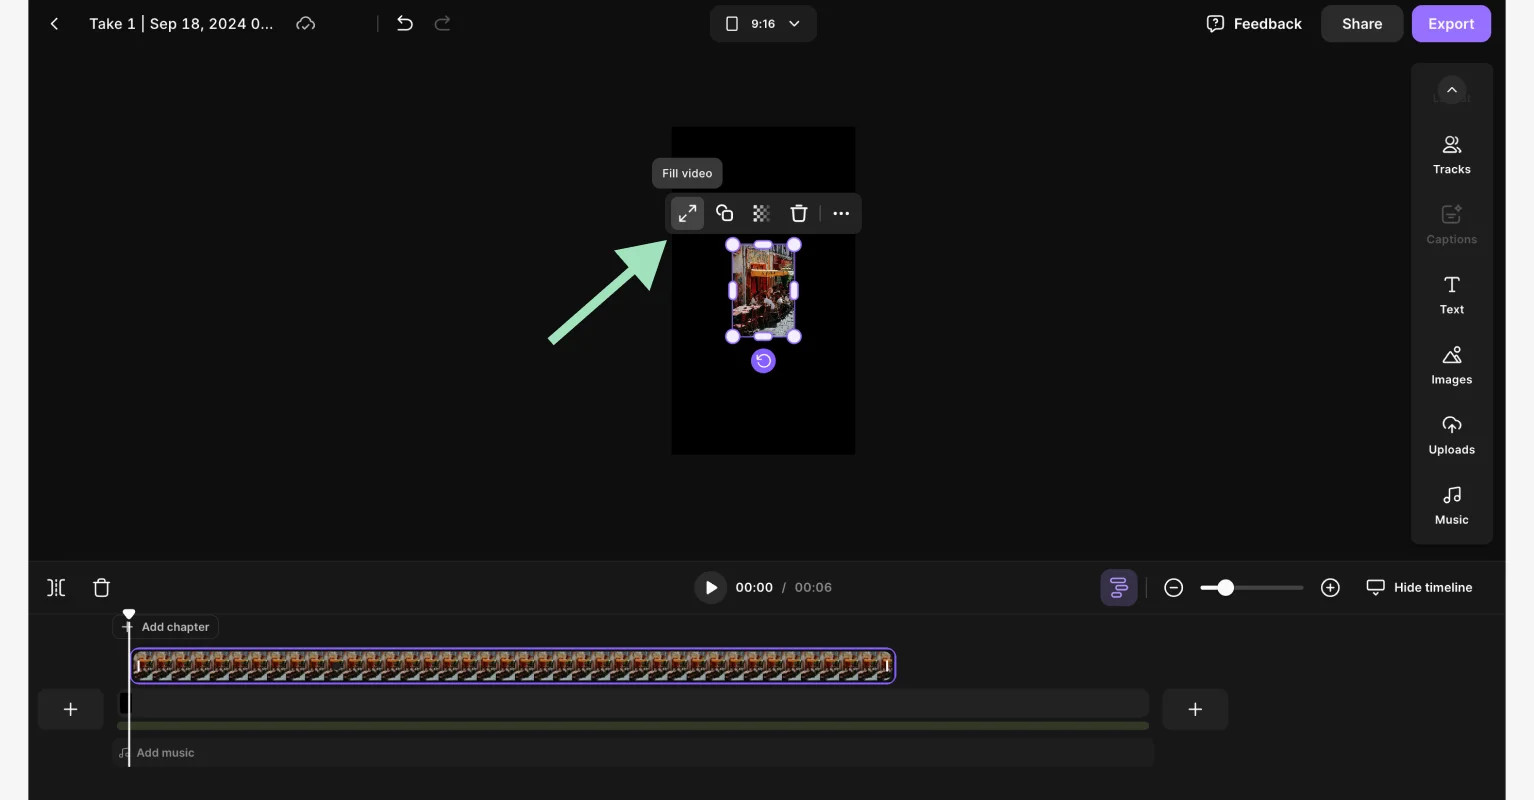 Customizing images and layout for a TikTok slideshow in Riverside
Use the timeline editor at the bottom to precisely control when each image appears and for how long it is displayed in your slideshow.
Step 5: Export Your Slideshow
Once you are satisfied with your edits, click the “Export” button in the top right corner. Select your desired video quality settings, and then click “Export video”.
 Exporting a TikTok slideshow video from Riverside
Step 6: Download the Slideshow
Find your exported video in your recording’s dashboard, typically at the bottom. Hover over the clip to reveal the “Download” button. Click to download your slideshow, which is now ready to be uploaded to TikTok as a regular video file.
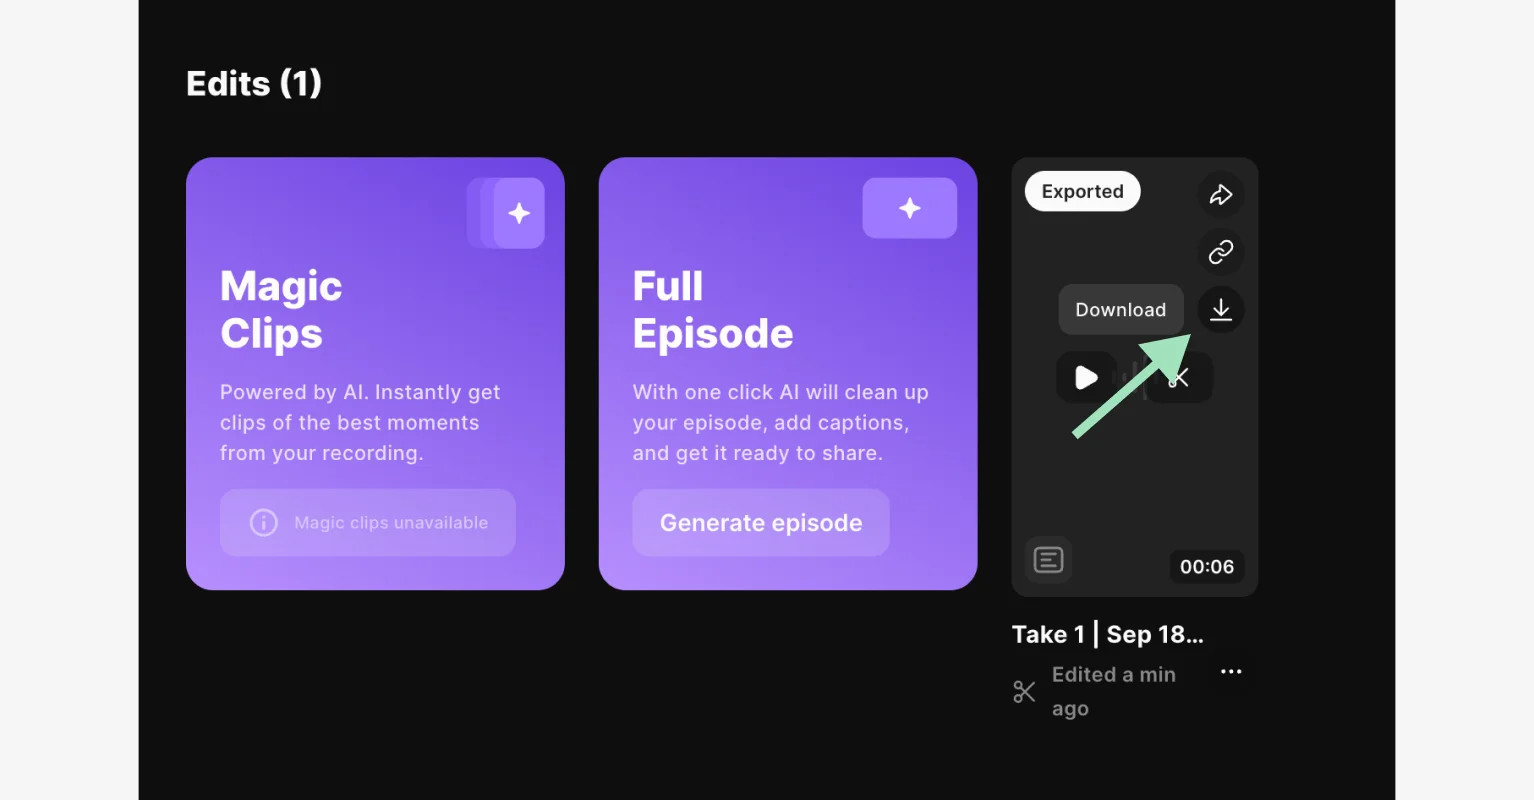 Downloading a TikTok slideshow video from Riverside's dashboard
FAQs on How to Make a Slideshow on TikTok
What is the best format for photos in a TikTok slideshow?
The ideal format for photos in a TikTok slideshow is 1080 x 1920 pixels with a 9:16 aspect ratio (vertical), perfectly fitting TikTok’s native full-screen display. While 4:5 or 1:1 ratios are also acceptable, 9:16 maximizes screen use. Use high-resolution JPEG or PNG images for clarity. When adding text overlays, maintain a margin of at least 64 pixels on the sides and 150 pixels on the top and bottom to avoid text being cut off on different devices.
Can I add videos to my TikTok slideshow?
Yes, you can incorporate both photos and short video clips into your TikTok slideshows. When starting a new slideshow by tapping the “+” button, you can select video clips alongside photos by tapping “All” at the top of the media selection screen. However, note that adding videos restricts you to creating only non-swipeable slideshows.
How do I delete a photo from my slideshow on TikTok?
To remove a photo from a swipeable slideshow, tap and hold the image thumbnail in the editing interface for a couple of seconds. A “Delete” button (trash can icon) will appear. Tap it to remove the photo. If you are using a Template, deleting a photo is less direct. You typically need to go back to the photo selection screen, which may require discarding any edits made within the template and starting the selection process again.
How can I preview my slideshow before posting it?
TikTok allows you to preview your slideshow before it goes live. Just before posting, on the screen where you add post details and captions, you’ll see thumbnails of your slideshow images at the top. Tap on any of these images to enter the “Preview” interface and watch your entire slideshow. If you created your slideshow using a Template, look for the “Preview” text located right above the “Edit cover” button at the top right corner of the same screen to access the preview.
