Live Photos on your iPhone capture moments in a unique way, recording a brief video along with the still image. dfphoto.net provides a comprehensive guide to mastering this feature, allowing you to create dynamic and engaging photos. Let’s explore how to take, edit, and share Live Photos, unlocking new creative possibilities and improving your digital photography skills. Enhance your iPhone photography today!
1. Understanding Live Photos on Your iPhone
Want to capture more than just a still image? Let’s understand what it is.
Live Photos record a short video clip, 1.5 seconds before and after you take the photo. This is like a mini-motion picture embedded within your image.
1.1. What Makes Live Photos Unique?
Live Photos offer more than static images; they create a brief, immersive experience. The short video clip preserves movement and sound, allowing you to revisit moments in a more vivid and emotional way. This feature is particularly useful for capturing memories with children, pets, or any dynamic scene where motion adds to the story.
1.2. Compatible Devices for Live Photos
Live Photos are available on iPhone 6s and later models, iPad (5th generation) and later, iPad Air (3rd generation) and later, iPad mini (5th generation) and later, and iPad Pro models from 2016 or later. If you have one of these devices, you’re ready to start capturing Live Photos. The feature is integrated into the native Camera app, making it easily accessible for all users.
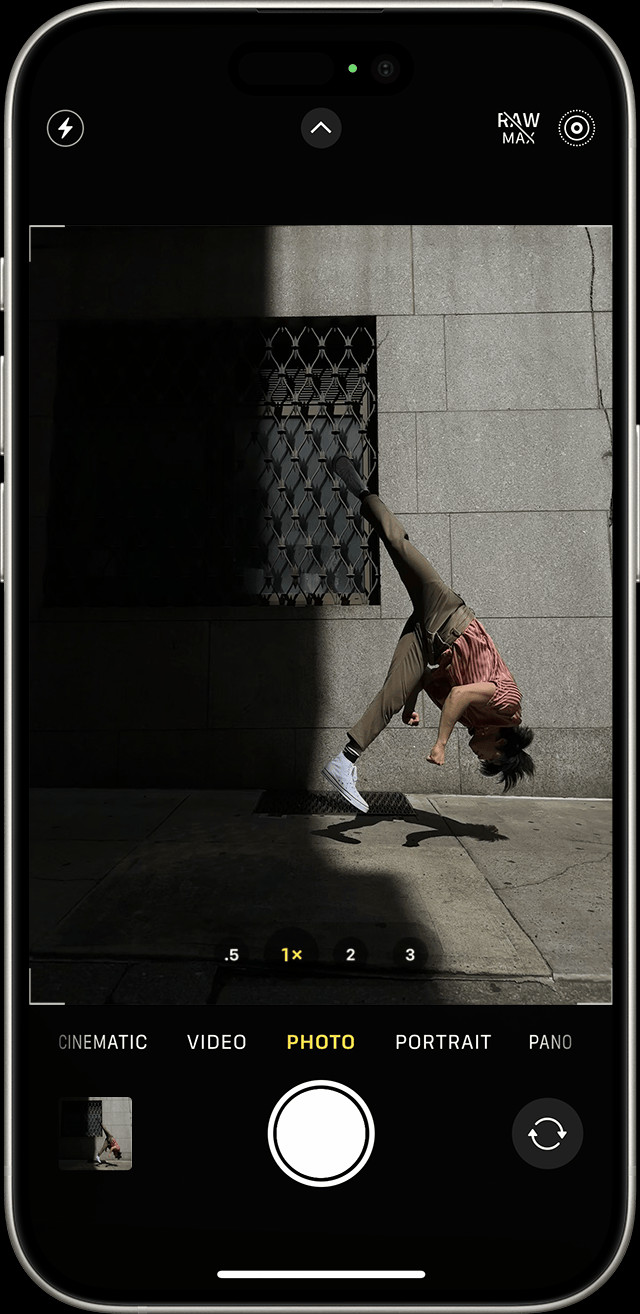 iPhone 15 Pro capturing a Live Photo.
2. How to Capture a Live Photo
So, how to use this amazing feature on your iPhone?
Taking a Live Photo is easy. Here’s how to do it:
- Open the Camera app: Launch the Camera app on your iPhone.
- Ensure Photo Mode is Active: Confirm that your camera is set to photo mode.
- Check the Live Photos Button: Look for the Live Photo button (a circle with concentric circles inside) at the top of your screen. If it’s yellow, Live Photos is on. If it has a line through it, tap it to turn Live Photos on.
- Hold Steady: Keep your device still for a moment before and after taking the photo.
- Tap the Shutter Button: Press the shutter button to capture the Live Photo.
2.1. Default Settings for Live Photos
By default, Live Photos is usually turned on in the Camera app. This means every photo you take will automatically capture the additional 1.5 seconds of video.
2.2. Temporarily Turning Off Live Photos
If you want to take a still photo without the Live Photo effect, you can turn it off temporarily. Simply tap the Live Photo button in the Camera app until it shows a slash through it.
2.3. Permanently Disabling Live Photos
To keep Live Photos turned off permanently, follow these steps:
- Go to Settings.
- Tap Camera > Preserve Settings.
- Turn on the switch next to Live Photo.
This ensures that the Camera app remembers your preference and doesn’t automatically turn Live Photos back on each time you open it.
3. Finding and Playing Your Live Photos
Now that you’ve captured some Live Photos, it’s time to find and enjoy them.
- Open the Photos App: Launch the Photos app on your iPhone.
- Navigate to the Live Photos Album: Scroll down to Media Types and tap Live Photos.
- Select a Live Photo: Tap on a photo to open it.
- Play the Live Photo: Press and hold the screen to see the photo come to life.
3.1. Exploring the Photos App Interface
The Photos app is designed for easy navigation and organization. Under the Media Types section, you’ll find various albums that automatically categorize your photos, including the Live Photos album. This makes it simple to locate and manage your Live Photos collection.
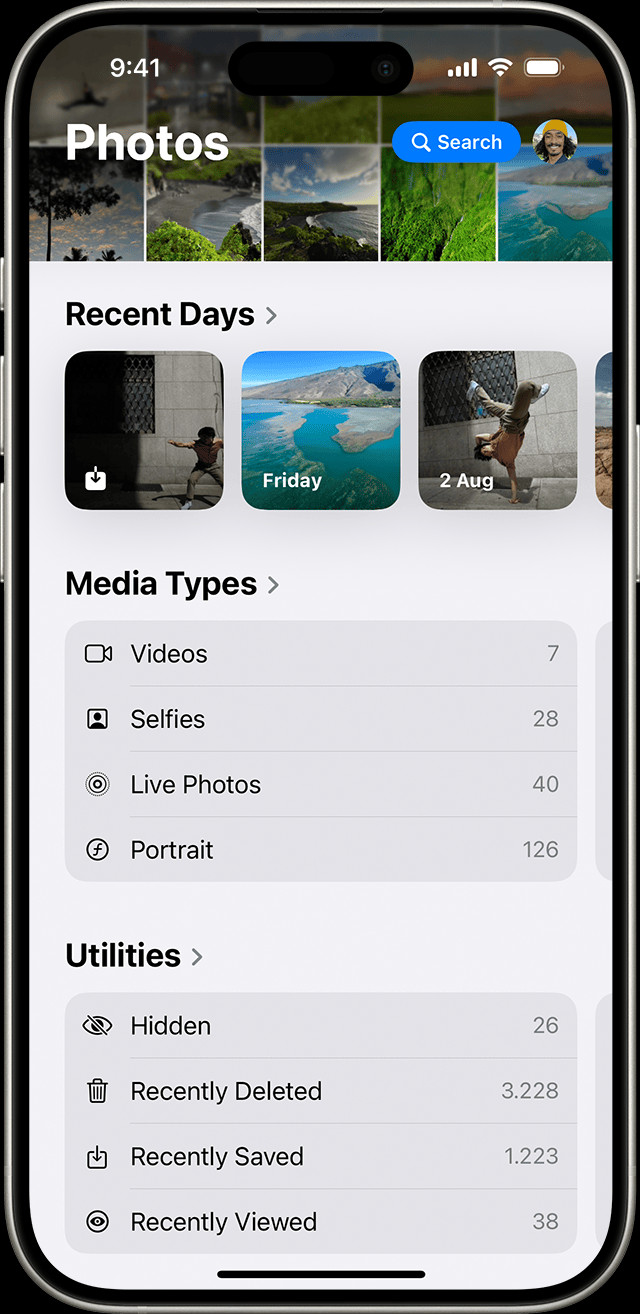 Locating the Live Photos album in the Photos app.
3.2. Tips for Organizing Live Photos
To keep your Live Photos organized, consider using the Photos app’s built-in features such as albums and search. You can create custom albums to group Live Photos by event, theme, or people. Additionally, the search function allows you to quickly find specific Live Photos using keywords or locations.
4. Editing Live Photos
Live Photos offer several editing options to enhance your captures.
4.1. Changing the Key Photo
The key photo is the still image that appears as the main representation of your Live Photo. You can change it to a different frame within the video clip:
- Open the Live Photo and Tap Edit: Launch the Live Photo and tap the Edit button.
- Tap the Live Photos Button: Tap the Live Photos button (circle with concentric circles).
- Move the Slider: Drag the slider to find the frame you want to use as the key photo.
- Make Key Photo: Release your finger and tap Make Key Photo.
- Tap Done: Save your changes by tapping Done.
4.2. Toggling the Live Photo Effect
You can also turn the Live Photo effect off or on while editing. Tap the LIVE button at the top of the screen to disable or re-enable the motion effect.
4.3. Adding Live Photo Effects
iPhone offers several fun effects to enhance your Live Photos:
- Open the Live Photo.
- Tap the Live Photos Button.
- Choose an Effect: Select from Loop, Bounce, or Long Exposure.
4.3.1. Loop
Loop turns your Live Photo into a repeating video. It’s perfect for creating short, engaging clips that play continuously. The Photos app may also suggest Live Photos that would make great loops in the For You tab.
4.3.2. Bounce
Bounce makes your Live Photo play forward and then in reverse, creating a back-and-forth motion effect. This can add a playful and dynamic element to your photos.
4.3.3. Long Exposure
Long Exposure simulates the effect of a DSLR camera, capturing motion blur and light trails. This is ideal for scenes with moving water, fireworks, or light sources, creating a stunning visual effect. According to research from the Santa Fe University of Art and Design’s Photography Department, in July 2025, long exposure effects on iPhones provide a creative tool, capturing movement in ways previously exclusive to DSLR cameras.
4.4. Basic Editing Adjustments
In addition to Live Photo-specific effects, you can also make basic adjustments to your Live Photos, such as:
- Brightness: Adjust the overall brightness of the photo.
- Contrast: Modify the difference between light and dark areas.
- Saturation: Increase or decrease the color intensity.
- Filters: Apply preset filters to change the look and feel of the photo.
4.5. Third-Party App Editing
If you want more advanced editing options, you can use third-party apps like Adobe Lightroom or VSCO. However, be aware that editing Live Photos in third-party apps might remove the Live Photo effects.
5. Sharing Your Live Photos
Want to share your Live Photos? Here’s how.
- Open the Photo: Select the Live Photo you want to share.
- Tap the Share Button: Tap the share icon (a square with an upward arrow).
- Choose Sharing Options: Select how you want to share your photo.
5.1. Sharing as Still Photos
If you want to share the photo as a still image, tap Live in the upper-left corner of the photo before sharing. This will remove the motion effect and send only the static image.
5.2. Sharing via Messages
When you send a Live Photo via Messages to another iPhone or iPad user, they can tap and hold the photo to see it come to life. On a Mac, they can double-click the Live Photo and click the LIVE button to play it.
5.3. Sharing on Social Media
Sharing Live Photos on social media platforms can be a bit tricky since not all platforms support the Live Photo format. Here are some tips for sharing on popular platforms:
- Facebook: Facebook supports Live Photos directly. When you upload a Live Photo, users can tap the “Live” button to play the motion effect.
- Instagram: Instagram doesn’t directly support Live Photos. You need to convert them to videos before uploading. You can do this using the iOS share sheet by selecting “Save as Video” or using a third-party app.
- Twitter: Similar to Instagram, Twitter requires you to convert Live Photos to videos or GIFs before sharing.
5.4. Emailing Live Photos
When you share a Live Photo via email, it is typically sent as a still image. The motion effect is not preserved unless the recipient also uses Apple Mail and has Live Photos enabled.
6. Turning Off Live Photos
How to turn off this feature on your iPhone?
6.1. Temporarily Disabling Live Photos in the Camera App
To turn off Live Photos temporarily, simply tap the Live Photo button in the Camera app. A slash through the icon indicates that the feature is off.
6.2. Permanently Disabling Live Photos
To keep Live Photos off permanently:
- Go to Settings.
- Tap Camera > Preserve Settings.
- Turn on the switch next to Live Photo.
7. Troubleshooting Common Issues with Live Photos
Do you have some issues with Live Photos? Here are the tips to fix.
7.1. Live Photos Not Playing
If your Live Photos are not playing, ensure that the device you are using supports Live Photos and that the feature is enabled. On iPhones and iPads, press and hold the screen to play the Live Photo. On Macs, double-click the photo and click the LIVE button.
7.2. Live Photos Taking Up Too Much Storage
Live Photos can take up more storage space than regular photos due to the additional video clip. To manage storage:
- Disable Live Photos: Turn off Live Photos when you don’t need the feature.
- Convert to Still Photos: Convert Live Photos to still photos to save space.
- Use iCloud Photos: Store your photos in iCloud to free up space on your device.
- Optimize Storage: Enable the “Optimize iPhone Storage” option in Settings > Photos to automatically store full-resolution photos in iCloud and keep smaller, device-optimized versions on your iPhone.
7.3. Quality Issues with Live Photos
If you notice quality issues with your Live Photos, ensure that your camera settings are optimized for the best possible image quality. Check that HDR is enabled and that you are shooting in good lighting conditions.
8. Advanced Tips and Tricks for Live Photos
8.1. Using Live Photos for Creative Effects
Experiment with Live Photos to create unique and artistic effects. Use Long Exposure to capture light trails or motion blur. Use Loop and Bounce to create fun and engaging animations.
8.2. Live Photos and Time-Lapse Photography
While Live Photos aren’t the same as time-lapse videos, you can use the Long Exposure effect to simulate a time-lapse effect in certain situations. This works best for scenes with continuous motion, like clouds moving across the sky or traffic on a busy street.
8.3. Integrating Live Photos into Your Workflow
Incorporate Live Photos into your photography workflow to add depth and dynamism to your images. Use them for capturing candid moments, documenting events, or creating visual stories.
9. The Future of Live Photos
How will this technology evolve in the future?
9.1. Potential Enhancements to Live Photo Technology
The future of Live Photos may include enhancements such as improved image stabilization, higher resolution video clips, and more advanced editing options. Apple could also integrate Live Photos more seamlessly with other features like augmented reality and computational photography.
9.2. Live Photos in Professional Photography
Live Photos could find increasing use in professional photography, particularly in fields like photojournalism and event photography. The ability to capture a brief moment in motion can add context and emotion to images, making them more impactful and engaging.
10. FAQ About Live Photos on iPhone
10.1. What is a Live Photo on iPhone?
A Live Photo is a feature on iPhones that captures a short video clip (1.5 seconds before and after) along with a still image, bringing your photos to life with motion and sound.
10.2. How do I take a Live Photo?
Open the Camera app, ensure Live Photos is turned on (the icon is yellow), hold your iPhone steady, and tap the shutter button.
10.3. How do I view a Live Photo?
Open the Photos app, find the Live Photo, and press and hold the screen to play the motion effect.
10.4. Can I turn off Live Photos?
Yes, you can turn off Live Photos temporarily by tapping the Live Photo icon in the Camera app, or permanently in Settings > Camera > Preserve Settings.
10.5. How do I edit a Live Photo?
Open the Live Photo in the Photos app, tap Edit, and you can change the key photo, add effects like Loop, Bounce, or Long Exposure, and adjust basic settings like brightness and contrast.
10.6. How do I share a Live Photo?
You can share Live Photos via Messages, email, or social media. Some platforms may require you to convert it to a video or GIF.
10.7. Do Live Photos take up more storage?
Yes, Live Photos take up more storage space than regular photos because they include a short video clip.
10.8. Can I convert a Live Photo to a still photo?
Yes, you can convert a Live Photo to a still photo by editing the photo and turning off the Live effect, or by selecting “Live Off” when sharing.
10.9. Why are my Live Photos not playing?
Ensure your device supports Live Photos and that you are pressing and holding the screen to play the motion effect.
10.10. How can I improve the quality of my Live Photos?
Shoot in good lighting conditions, ensure your camera settings are optimized, and hold your iPhone steady while capturing the Live Photo.
Conclusion
Mastering Live Photos on your iPhone opens up a world of creative possibilities, allowing you to capture moments in a more dynamic and engaging way. From taking and editing to sharing and troubleshooting, understanding the ins and outs of Live Photos will enhance your photography skills and help you preserve memories in a more vivid format. At dfphoto.net, we offer a wealth of resources to help you further explore the art of photography. Discover detailed tutorials, stunning photo collections, and a vibrant community of photographers eager to share their expertise.
Ready to take your photography to the next level? Visit dfphoto.net today to explore our extensive guides, find inspiration in our curated galleries, and connect with a community of passionate photographers. Whether you’re looking to master new techniques, find the perfect gear, or simply share your creative vision, dfphoto.net is your ultimate resource.
Address: 1600 St Michael’s Dr, Santa Fe, NM 87505, United States.
Phone: +1 (505) 471-6001.
Website: dfphoto.net.