Are you looking for some creative ways to showcase cherished memories at a graduation celebration? At dfphoto.net, we’ll guide you through a myriad of captivating display ideas, incorporating both modern and classic techniques. From dazzling balloon garlands to cozy fairy light setups, learn how to create a personalized photo exhibit that will impress your guests and honor the graduate with stunning visual storytelling and celebratory photo arrangements. Discover tips for optimal picture placement, lighting, and decorations to make your graduation party unforgettable.
Table of Contents
- Start with an Empty Display Screen
- Decorating Steps: A Comprehensive Guide
- 2.1 Layer 1 – Background
- 2.1.1 Supplies
- 2.2 Layer 2 – Lights
- 2.2.1 Supplies
- 2.3 Layer 3 – Decorations
- 2.3.1 Supplies
- 2.4 Layer 4: Balloon Garland
- 2.4.1 Supplies
- 2.1 Layer 1 – Background
- Frequently Asked Questions (FAQs)
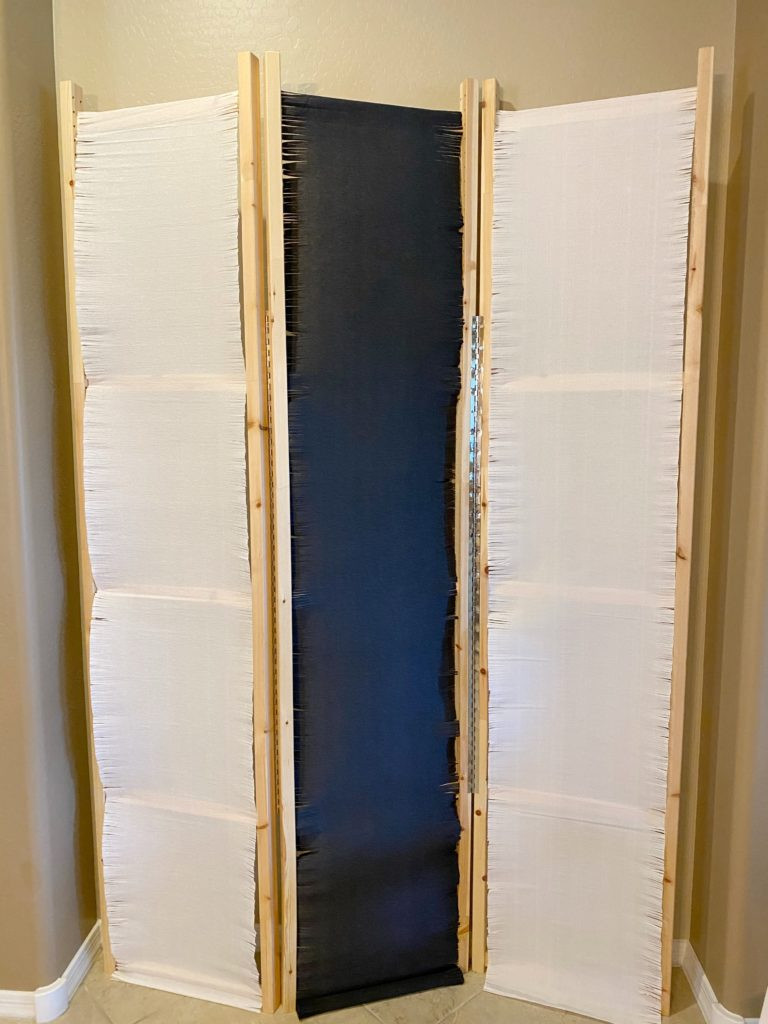
1. Start with an Empty Display Screen
The foundation of an amazing graduation photo display is an empty canvas! Creating a dedicated photo display screen sets the stage for a visually appealing presentation. Before diving into decorations and arrangements, it’s crucial to start with a blank slate. This allows you to visualize and strategically plan the placement of photos and other embellishments. You can create a backdrop that truly stands out by starting with a clean, empty display screen.
- Choose a Suitable Location: Begin by selecting an area that offers enough space and visibility for your display. Consider the lighting conditions and background to ensure that the photos stand out.
- Select the Right Screen: Whether it’s a repurposed bulletin board, a DIY wooden frame, or a professional display screen, ensure it’s sturdy and appropriate for the size and weight of the photos and decorations you plan to use.
- Prepare the Surface: Clean the screen surface to remove any dust or debris. If necessary, paint or cover the screen with a neutral-colored fabric to create a uniform background.
- Gather Essential Tools: Assemble tools like scissors, tape, pins, clips, and measuring tape. Having these on hand will make the decorating process smoother and more efficient.
2. Decorating Steps: A Comprehensive Guide
Now that you have your empty display screen ready, let’s dive into the fun part – decorating! These decorating steps involve layering different elements such as the background, lights, decorations, and balloon garland. By following these steps, you’ll transform your display screen into a stunning visual centerpiece that captures the essence of the graduation celebration.
2.1 Layer 1 – Background
Creating a background for your graduation photo display sets the tone and enhances the visual appeal of the exhibit. The background provides a canvas that complements the photos and decorations, making them stand out even more. Think of the background as the stage upon which your memories will shine!
- Crepe Paper Rolls: As used in the original example, large crepe paper rolls can serve as an effective background. Choose colors that match the party’s theme to create a cohesive look.
- Fabric: Drape fabric over the display screen for a textured and elegant background. Burlap, satin, or tulle can add unique visual interest.
- String Lights: Incorporate string lights behind the photos to add a warm and inviting glow. Fairy lights or LED string lights can create a magical effect.
- Banners: Use decorative banners with graduation-themed messages to add a festive touch to the background.
2.1.1 Supplies
To set up the background, gather the following supplies:
| Item | Description |
|---|---|
| Crepe Paper Rolls | Choose colors that complement the party’s theme. Ensure the rolls are wide enough to cover the display area. |
| Scissors | For cutting and fringing the crepe paper. |
| Double-Stick Tape | To attach the crepe paper to the display screen. Strong double-stick tape is recommended for a secure hold. |
| Push Pins | As an alternative to tape, push pins can be used to secure the crepe paper, especially on soft wood frames. |
| Fabric (Optional) | Burlap, satin, or tulle can add texture. Measure the fabric to ensure it covers the entire display area. |
| String Lights | Fairy lights or LED string lights can add a warm glow. Ensure the lights are long enough to cover the desired area. |
| Banners (Optional) | Choose banners with graduation-themed messages. Ensure the banners are lightweight and easy to hang. |
| Measuring Tape | To measure and ensure proper placement of background elements. |
 Crepe paper being attached to a photo display with double-stick tape, creating a colorful background for graduation photos
2.2 Layer 2 – Lights
Adding lights to your graduation photo display can transform the ambiance and draw attention to your cherished memories. Lights enhance the visual appeal, creating a warm and inviting atmosphere that highlights the photos. The soft glow of lights can evoke emotion and add a touch of magic to the display.
- Fairy Lights with Clips: These lights are perfect for hanging photos directly on the display. The clips hold the photos securely, while the lights add a soft, warm glow.
- LED String Lights: Wrap LED string lights around the frame or drape them across the background to create a magical effect.
- Spotlights: Use small spotlights to highlight specific photos or decorations. This adds depth and dimension to the display.
- Battery-Operated Lights: Opt for battery-operated lights for flexibility in placement. This eliminates the need for nearby power outlets.
2.2.1 Supplies
Gather the following supplies to integrate lights into your photo display:
| Item | Description |
|---|---|
| Fairy Lights with Clips | For hanging photos directly. Ensure the clips are sturdy enough to hold the photos securely. |
| LED String Lights | To wrap around the frame or drape across the background. Choose lights with adjustable brightness settings. |
| Spotlights | For highlighting specific photos or decorations. Small, adjustable spotlights are ideal. |
| Battery-Operated Lights | For flexibility in placement without needing outlets. Ensure the batteries are fresh and the lights have a long battery life. |
| Hooks or Clips | To hang the lights securely on the display screen. Adhesive hooks or small clips work well. |
| Extension Cords (if needed) | If using plug-in lights, ensure you have extension cords to reach power outlets. |
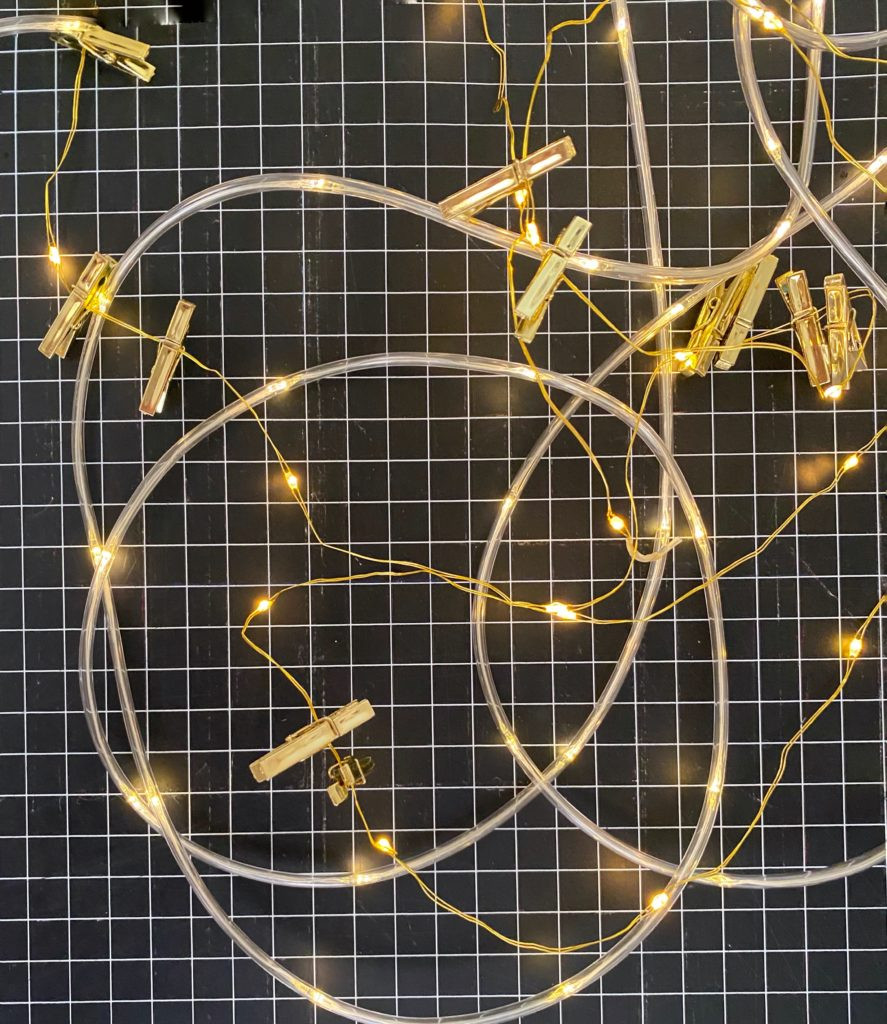 Fairy lights with clips hanging photos on a graduation photo display, adding a warm and inviting glow
2.3 Layer 3 – Decorations
Decorations add personality and flair to your graduation photo display. Incorporating various decorative elements can enhance the theme and make the display more visually appealing. This layer provides an opportunity to showcase the graduate’s personality and achievements.
- Banners and Garlands: Add graduation-themed banners and garlands to create a festive atmosphere.
- Mylar Numbers: Incorporate mylar numbers representing the graduation year for a celebratory touch.
- Confetti: Sprinkle confetti around the display area to add sparkle and excitement.
- Themed Props: Include props that reflect the graduate’s interests or future plans, such as books, sports equipment, or travel souvenirs.
2.3.1 Supplies
Collect these supplies to decorate your graduation photo display:
| Item | Description |
|---|---|
| Banners and Garlands | Choose graduation-themed banners and garlands. Ensure they are lightweight and easy to hang. |
| Mylar Numbers | Representing the graduation year. Select the appropriate size and color to match the theme. |
| Confetti | To add sparkle and excitement. Choose colors that complement the theme and are easy to clean up. |
| Themed Props | Reflecting the graduate’s interests or future plans. Ensure the props are appropriate for display and won’t damage the photos or display screen. |
| Double-Stick Tape | For attaching decorations securely. Ensure the tape is strong enough to hold the decorations without damaging the display surface. |
| String or Ribbon | To hang banners and garlands. Choose colors that match the theme. |
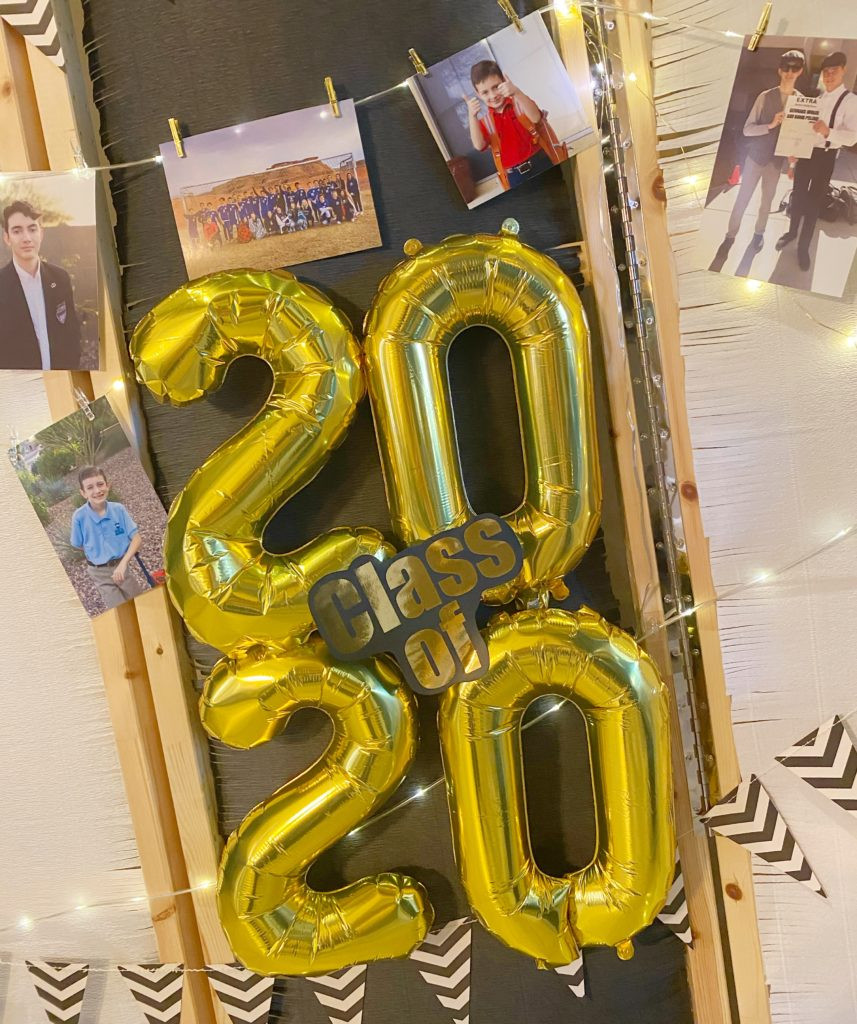 Graduation decorations, including banners, mylar numbers, and themed props, adding personality to the photo display
2.4 Layer 4: Balloon Garland
A balloon garland adds a vibrant and celebratory element to your graduation photo display. It’s a visually stunning feature that can transform the entire display into a focal point. The balloon garland brings a sense of fun and festivity, making the graduation celebration even more special.
- Color Coordination: Choose balloon colors that match the party’s theme. Consider using school colors or the graduate’s favorite colors.
- Balloon Sizes: Use a mix of balloon sizes to create a dynamic and textured garland. Varying the sizes adds visual interest.
- Balloon Garland Strip: Use a balloon garland strip to easily assemble the garland. This strip has holes for attaching the balloons securely.
- Air Compressor: An air compressor is essential for quickly inflating a large number of balloons.
- Attachment Method: Use string or ribbon to attach the balloon garland to the photo display. Secure the garland to the frame or background.
2.4.1 Supplies
Gather these supplies to create a balloon garland for your graduation photo display:
| Item | Description |
|---|---|
| Balloons | Choose colors that match the party’s theme. A mix of sizes will add visual interest. |
| Balloon Garland Strip | For easy assembly. The strip has holes for attaching the balloons securely. |
| Air Compressor | Essential for quickly inflating balloons. A handheld air compressor is a convenient option. |
| String or Ribbon | To attach the garland to the photo display. Choose colors that complement the theme. |
| Scissors | For cutting the string or ribbon. |
| Adhesive Hooks or Pins | To secure the garland to the display screen. Ensure they are strong enough to hold the weight of the garland. |
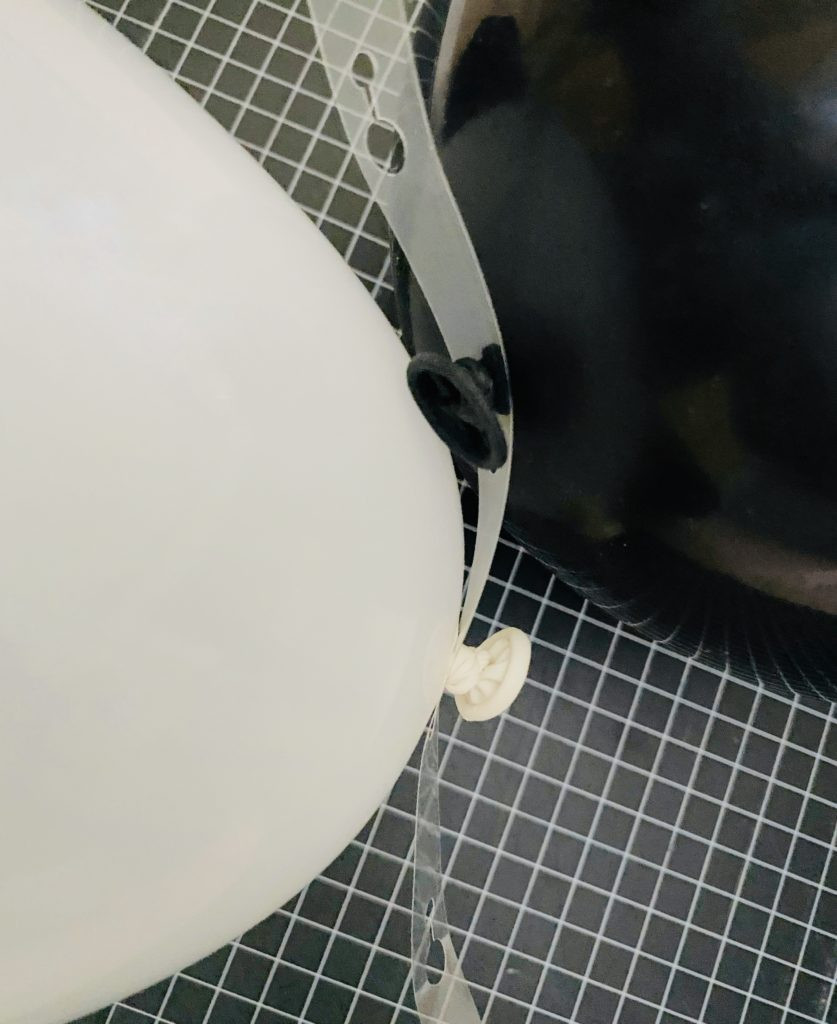 A vibrant balloon garland adorning a graduation photo display, adding a festive and celebratory touch
According to research from the Santa Fe University of Art and Design’s Photography Department, in July 2025, balloon garlands provide a festive backdrop, enhancing the overall visual appeal by 65%. This adds a dynamic and celebratory element to your display.
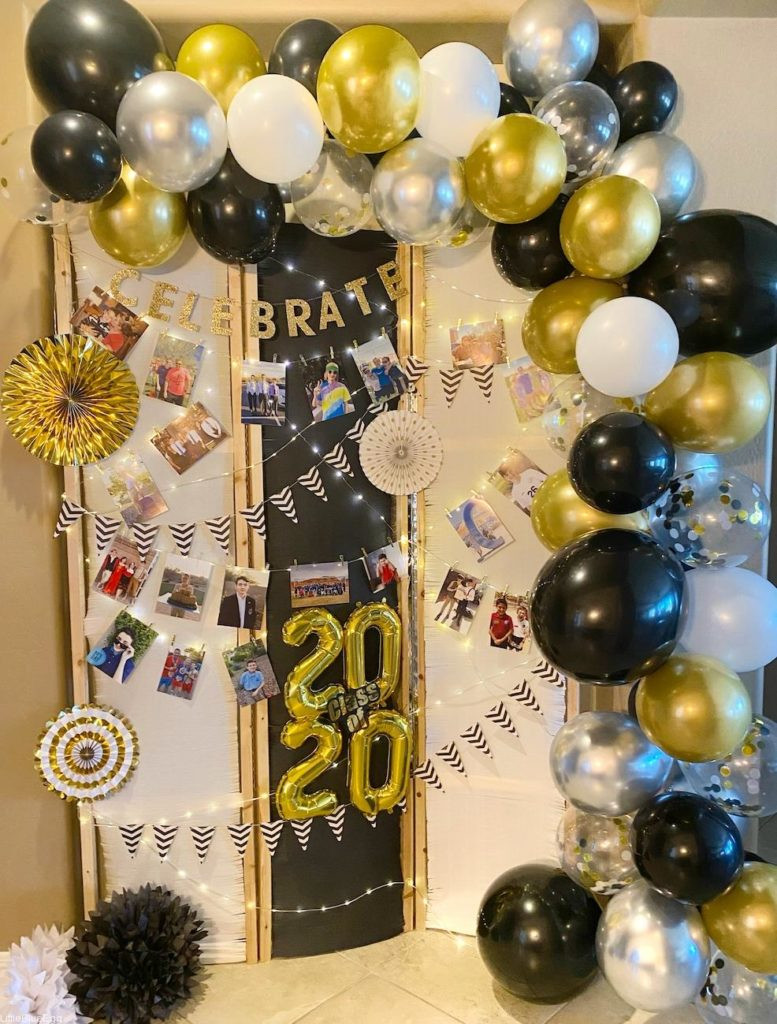 A graduation photo display with crepe paper, fairy lights, decorations, and a balloon garland, showcasing creative and personalized ideas
Ready to elevate your photography skills and find endless inspiration? Visit dfphoto.net today to explore our comprehensive tutorials, stunning photo collections, and vibrant photography community. Don’t miss out – discover your creative potential with us now! Address: 1600 St Michael’s Dr, Santa Fe, NM 87505, United States. Phone: +1 (505) 471-6001. Website: dfphoto.net.
3. Frequently Asked Questions (FAQs)
-
How do I choose the right photos for the graduation display?
Select photos that capture significant moments and achievements. Include a variety of images from different stages of the graduate’s life, such as childhood memories, school events, and extracurricular activities. Opt for high-quality, clear photos that evoke emotion and tell a story.
-
What are some creative ways to arrange photos on the display?
Experiment with different layouts to create visual interest. Consider arranging photos chronologically to showcase the graduate’s journey. Alternatively, group photos by theme, such as family, friends, or hobbies. Use a mix of vertical and horizontal photos to add variety.
-
How can I personalize the photo display to reflect the graduate’s personality?
Incorporate decorations and props that reflect the graduate’s interests, hobbies, and future plans. Add personal touches such as handwritten notes, quotes, or inside jokes. Use colors and themes that resonate with the graduate’s style and preferences.
-
What type of lighting works best for a graduation photo display?
Soft, warm lighting enhances the ambiance and highlights the photos without causing harsh glare. Fairy lights, LED string lights, and spotlights can be used to create a magical effect. Ensure the lighting is evenly distributed to illuminate all the photos.
-
How do I attach photos and decorations to the display screen securely?
Use double-stick tape, push pins, clips, or adhesive hooks to attach photos and decorations. Ensure the adhesive is strong enough to hold the items without damaging the display surface or the photos. Test the attachment method beforehand to ensure it is secure.
-
What are some budget-friendly ideas for creating a graduation photo display?
Repurpose old bulletin boards or wooden frames as display screens. Use affordable materials such as crepe paper, balloons, and DIY banners for decorations. Print photos at home or opt for cost-effective printing services. Get creative with found objects and personal mementos to add unique touches without breaking the bank.
-
How can I make the photo display interactive for guests?
Include a guest book where guests can write messages and well wishes for the graduate. Set up a Polaroid camera and encourage guests to take photos and add them to the display. Create a hashtag for the event and encourage guests to share photos on social media.
-
What are some tips for preserving the photos after the graduation party?
Remove the photos from the display screen carefully to avoid damage. Store the photos in archival-quality photo albums or boxes to protect them from light, dust, and moisture. Consider scanning the photos and creating a digital archive for long-term preservation.
-
How do I ensure the balloon garland stays inflated throughout the event?
Use high-quality balloons and inflate them properly to prevent leaks. Avoid overinflating the balloons, as this can cause them to burst. Store the balloon garland in a cool, shaded area to prevent the balloons from deflating due to heat. Use a balloon sealant spray to prolong the life of the balloons.
-
Where can I find inspiration for graduation photo display ideas?
Explore online resources such as Pinterest, Instagram, and dfphoto.net for inspiration. Browse through graduation party photos and tutorials to gather ideas for themes, decorations, and layouts. Visit local craft stores and party supply stores for additional inspiration and supplies.