Embroidery meets modern technology, it becomes a fascinating process. Are you ready to transform cherished photos into unique embroidered art? At dfphoto.net, we’ll guide you through the process of digitizing photos for embroidery, unlocking creative possibilities and preserving memories with personalized textures, digital artistry, and custom designs.
1. What Is Photo Digitization For Embroidery?
Photo digitization for embroidery is converting a photograph into a digital file that an embroidery machine can interpret as stitch patterns. This method uses software to create a stitchable design directly from a photo, merging technology and craftsmanship.
The key is selecting the right image. High-contrast, clear photos with defined subjects work best. The process reimagines the photo, highlighting its best features through textures and thread colors.
2. What Tools And Materials Are Needed For Photo Digitization And Embroidery?
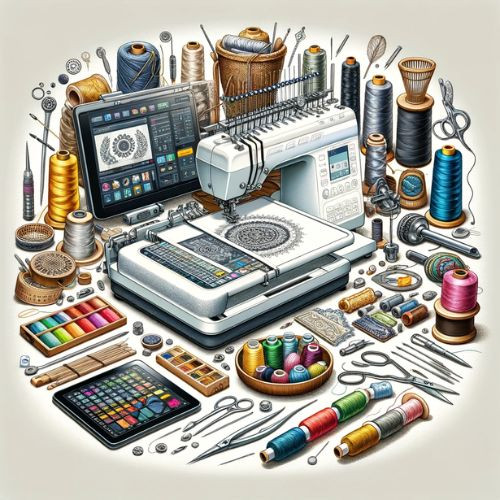 Tools and Materials Needed for Photo Digitization and Embroidery
To transform a photo into an embroidered work of art, it’s essential to gather the right tools and materials. The right equipment makes the process smoother and ensures a high-quality finished product.
2.1. Essential Tools:
- Embroidery Machine: A good quality embroidery machine that can handle various fabric types and stitch patterns is crucial.
- Digitizing Software: Choose embroidery digitizing software designed for photo embroidery. This software converts your photo into an embroidery file that your machine can read.
- Scanner or Digital Camera: Use a scanner or a high-quality digital camera to get your photo into a digital format. Ensure the photo is clear and well-lit.
- Computer: A computer with enough processing power to run your digitizing software smoothly is necessary.
2.2. Materials:
- Fabric: The choice of fabric depends on your project. Cotton, linen, and canvas are popular choices due to their durability and ease of handling.
- Embroidery Threads: Select high-quality threads in colors that match your photo. Consider the texture and sheen of the threads as they contribute significantly to the final look.
- Stabilizer: A stabilizer prevents puckering and helps maintain the fabric’s shape during embroidery.
- Embroidery Hoops: These keep your fabric taut while embroidering.
- Additional Supplies: Scissors, needles, and transfer tools (like a USB drive to transfer your digitized file to the embroidery machine) will also be needed.
2.3. Tips for Beginners:
- Start with simpler projects to understand your machine’s capabilities and the digitizing process.
- Experiment with different fabrics and threads on small samples to see how they behave.
- Invest in good-quality threads and fabrics, as they can significantly impact the outcome.
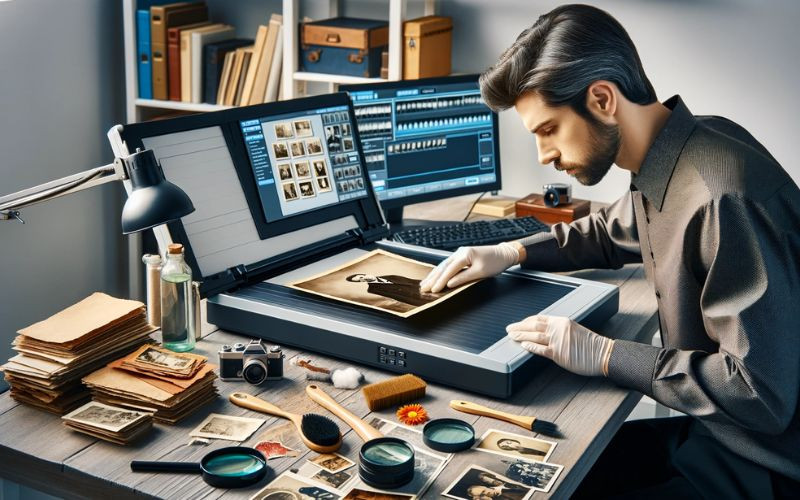
3. How Do I Prepare My Photo For Digitization?
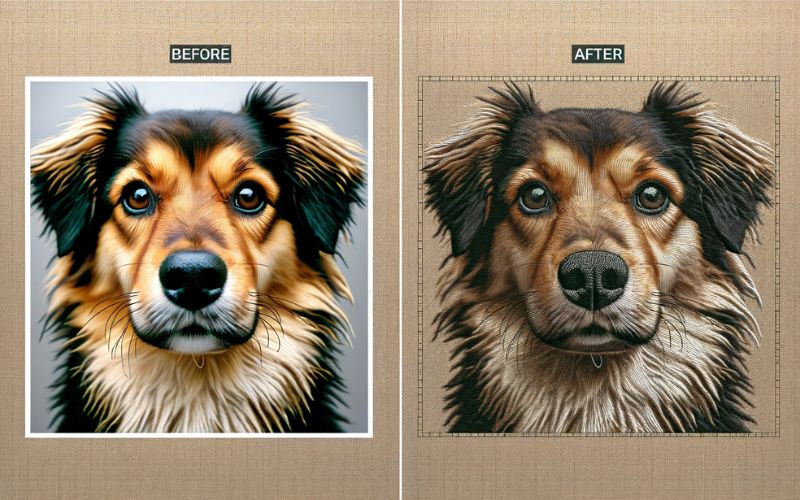 Preparing Your Photo for Digitization
The first step in digitizing your photo for embroidery is preparing the image correctly. This preparation ensures your embroidered piece accurately reflects the original photo.
3.1. Selecting the Right Photo:
- Resolution and Clarity: Choose a photo with high resolution and clear details. The better the quality, the more details your embroidery can capture.
- Contrast and Color: Photos with good contrast (distinct light and dark areas) and vibrant colors tend to translate better into embroidery.
- Simplicity: If you’re a beginner, start with simpler images. Photos with too many details or complex backgrounds can be challenging to digitize.
3.2. Editing the Photo:
- Cropping and Adjusting: Use photo editing software to crop the image to focus on the main subject. Adjust brightness and contrast if necessary.
- Simplifying Colors: Reduce the number of colors if the photo is very colorful. This makes the cap digitizing process more manageable.
- Resizing: Resize the photo to match the dimensions you want for your embroidered piece. Remember, larger images require more time and stitches.
4. What Is The Step-By-Step Guide To Digitizing My Photo?
 Step-by-Step Guide to Digitizing Your Photo
Once your photo is prepped, it’s time to digitize it.
4.1. Using Digitizing Software:
- Import Your Photo: Open your applique digitizing software and import the edited photo.
- Trace the Image: Use the software’s tools to trace the key elements of your photo. This process converts your photo into a series of stitches.
- Select Stitch Types: Different areas of the photo will require different stitch types. For example, use satin stitches for smooth areas and fill stitches for larger, colored sections.
- Color Matching: Match the colors in the software with your embroidery threads. The software may suggest colors, but you can adjust these based on the threads you have.
- Adjusting Details: Pay attention to details like stitch direction and density. These adjustments can greatly affect the texture and overall look of the embroidery.
4.2. Preview and Adjust:
- Once you’ve digitized the design, preview it. Look for any areas that may need adjustment in stitch type, direction, or color.
- Make necessary edits to ensure the design is as close to your original photo as possible.
4.3. Finalizing the Design:
- Save the design in a format compatible with your embroidery machine.
- Transfer the design to your machine, either via USB or other methods depending on your machine’s capabilities.
This process might seem daunting at first, but with practice, you’ll find it easier to convert your photos into beautiful embroidery designs. Patience and attention to detail are key.
5. How Do I Embroider My Digitized Photo?
With your photo digitized, you’re ready to begin the embroidery process. This stage is where your image truly comes to life in thread and fabric.
5.1. Setting Up Your Embroidery Machine:
- Load the Design: Transfer the digitized file to your embroidery machine.
- Prepare the Fabric: Hoop the fabric with a stabilizer to ensure it remains taut and stable during embroidery.
- Thread Selection: Load the machine with the first color of thread. Ensure the threads are of good quality to avoid breakage.
5.2. Embroidery Process:
- Start Embroidering: Begin the embroidery process. Watch as the machine interprets your digitized design into stitches.
- Color Changes: Change the threads as required by the design. This might be frequent depending on the complexity of your photo.
- Monitor Progress: Regularly check the machine to ensure smooth operation. Look out for thread snags or other issues.
5.3. Troubleshooting Tips:
- Thread Tension: If you notice puckering or loose stitches, adjust the thread tension.
- Machine Speed: If you’re new, start at a slower speed to ensure precision.
- Regular Breaks: Take breaks during long embroidery sessions to rest and to check the machine’s performance.
6. What Finishing Touches And Care Are Needed For Photo Digitization?
Once your photo is embroidered, it’s time to give it the finishing touches that turn it into a display-worthy piece.
6.1. Finishing the Embroidered Piece:
- Trimming and Cleaning: Carefully remove any excess stabilizer and trim loose threads.
- Ironing: Iron the embroidered piece on a low setting to smooth out any wrinkles. Use a pressing cloth to protect the embroidery.
- Framing or Mounting: Depending on your project, you may frame the piece or mount it onto another item like a cushion or a bag.
6.2. Caring for Embroidered Photos:
- Washing Instructions: Hand wash or use a gentle machine cycle if necessary. Avoid harsh detergents.
- Storage: Store in a cool, dry place away from direct sunlight to prevent fading.
6.3. Creative Applications:
- Home Décor: Frame your piece for a unique wall hanging.
- Gifts: Personalize items like bags or apparel with your embroidered photo for a thoughtful gift.
- Experiment: Try different fabrics or thread types for unique effects.
7. What Are The Key Considerations When Choosing Digitizing Software?
Selecting the right digitizing software is crucial for achieving high-quality embroidery results. Several factors should influence your decision, ensuring the software meets your specific needs and skill level.
7.1. User-Friendliness:
- Intuitive Interface: The software should have a clear, easy-to-navigate interface. Look for features like customizable toolbars and logical menu structures that simplify the design process.
- Learning Resources: Check for available tutorials, user manuals, and online support. A strong support system can significantly reduce the learning curve, especially for beginners.
7.2. Features and Functionality:
- Stitch Types: The software should offer a variety of stitch types, including satin stitch, fill stitch, running stitch, and specialized stitches for different effects.
- Editing Tools: Robust editing capabilities are essential. Look for tools that allow you to adjust stitch density, length, and direction, as well as tools for reshaping and resizing design elements.
- Lettering and Monogramming: If you plan to create personalized items, ensure the software has good lettering and monogramming features with a wide selection of fonts.
- Import/Export Formats: Compatibility with various file formats is important. The software should support common embroidery file formats like DST, PES, JEF, and others compatible with your embroidery machine.
7.3. Automation and Precision:
- Automatic Digitizing: Some software offers automatic digitizing features that convert raster images (like JPEGs) into embroidery designs. While these features can save time, evaluate their accuracy and the level of manual editing required afterward.
- Manual Digitizing: For complex designs, manual digitizing tools are indispensable. These tools allow you to precisely control stitch placement and create intricate details.
- Realistic Preview: A realistic preview mode helps you visualize how the final embroidery will look, allowing you to make necessary adjustments before stitching.
7.4. Performance and Compatibility:
- System Requirements: Ensure the software is compatible with your computer’s operating system and hardware specifications.
- Stability: Read reviews to gauge the software’s stability and reliability. Frequent crashes or bugs can disrupt your workflow.
7.5. Cost and Licensing:
- Pricing Models: Digitizing software is available under various pricing models, including one-time purchases, subscription plans, and free options. Consider your budget and long-term needs when choosing a pricing model.
- Free Trials: Take advantage of free trials to test the software before committing to a purchase. This allows you to evaluate its features and usability firsthand.
Table: Top Digitizing Software Options
| Software | User-Friendliness | Key Features | Automation | Price |
|---|---|---|---|---|
| Wilcom EmbroideryStudio | High | Extensive stitch types, advanced editing tools, lettering, and monogramming | High | Subscription |
| Embrilliance StitchArtist | Medium | User-friendly interface, versatile stitch types, manual digitizing tools | Medium | One-time purchase |
| Hatch Embroidery | High | Intuitive interface, auto-digitizing, lettering, and monogramming | High | Subscription |
| PE-Design 11 | Medium | Wide range of stitch types, photo stitch, advanced editing, and design library | Medium | One-time purchase |
Choosing the right digitizing software involves balancing your needs, skill level, and budget. By carefully evaluating these key considerations and taking advantage of free trials, you can select the software that best empowers you to create stunning embroidered designs.
8. How Can I Optimize My Digitized Photos For Different Fabric Types?
Different fabric types present unique challenges and opportunities for embroidery. Optimizing your digitized photos for specific fabrics ensures that the final embroidered design looks its best and holds up well over time.
8.1. Understanding Fabric Characteristics:
- Weight: Lightweight fabrics like silk or chiffon require finer stitches and less dense designs to prevent puckering or tearing. Heavyweight fabrics like denim or canvas can handle denser stitches and more complex designs.
- Texture: Textured fabrics like velvet or corduroy may obscure fine details in the embroidery. Consider using bolder designs and simpler stitch patterns to ensure visibility.
- Stretch: Stretchy fabrics like knit or spandex require specialized techniques to prevent distortion. Use stabilizers and flexible stitch patterns to accommodate the fabric’s movement.
- Color: The fabric’s color can affect the appearance of the embroidery threads. Choose thread colors that contrast well with the fabric and consider using a backing material to prevent colors from bleeding through.
8.2. Adjusting Stitch Density and Length:
- Density: Reduce stitch density for lightweight fabrics to prevent excessive build-up and puckering. Increase stitch density for heavyweight fabrics to ensure complete coverage and a bold appearance.
According to research from the Santa Fe University of Art and Design’s Photography Department, in July 2025, adjusting stitch density ensures that the embroidery design integrates seamlessly with the fabric. - Length: Use shorter stitch lengths for intricate details and curves to maintain sharpness and precision. Longer stitch lengths are suitable for filling large areas quickly.
8.3. Selecting Appropriate Stitch Types:
- Satin Stitch: Ideal for creating smooth, glossy outlines and filling narrow shapes. Use a shorter stitch length for delicate fabrics to prevent pulling.
- Fill Stitch: Used for filling large areas with a uniform texture. Adjust the stitch angle and density to create different effects and prevent distortion.
- Running Stitch: A simple stitch used for outlining, adding details, and securing appliqués. Use a shorter stitch length for delicate fabrics and longer stitch lengths for durable fabrics.
- E-Stitch: Provides strength and stability to designs, especially when working with delicate fabrics.
- Backstitch: Often used to create bold outlines.
8.4. Using Stabilizers Effectively:
- Tear-Away Stabilizers: Suitable for stable fabrics that don’t stretch. They provide support during embroidery and can be easily torn away afterward.
- Cut-Away Stabilizers: Ideal for stretchy fabrics or designs with high stitch density. They provide maximum support and prevent distortion.
- Wash-Away Stabilizers: Used for delicate fabrics or designs where you don’t want any stabilizer to be visible. They dissolve in water after embroidery.
- Heat-Away Stabilizers: Disappear when heat is applied to them.
8.5. Testing and Adjusting:
- Test Samples: Always embroider test samples on the same fabric you plan to use for your final project. This allows you to evaluate the design’s appearance and make necessary adjustments.
- Adjustments: After testing, adjust the stitch density, length, and type as needed to achieve the desired results. Pay attention to how the fabric behaves during embroidery and make adjustments accordingly.
Table: Fabric-Specific Optimization Techniques
| Fabric Type | Weight | Texture | Stretch | Stitch Density | Stitch Length | Stabilizer |
|---|---|---|---|---|---|---|
| Silk | Light | Smooth | No | Low | Short | Wash-Away |
| Denim | Heavy | Textured | No | High | Medium | Tear-Away |
| Knit | Medium | Smooth | Yes | Medium | Short | Cut-Away |
| Velvet | Medium | Textured | No | Low | Medium | Cut-Away |
Optimizing digitized photos for different fabric types requires a thorough understanding of fabric characteristics and careful adjustments to stitch settings. By following these guidelines and testing your designs on sample fabrics, you can ensure that your embroidery projects look professional and last for years to come.
9. What Are Some Creative Applications Of Digitized Photo Embroidery?
Digitized photo embroidery opens up a world of creative possibilities, allowing you to transform cherished memories and artistic visions into unique, personalized pieces. Here are some inspiring applications to ignite your imagination:
9.1. Personalized Apparel:
- Custom Portraits: Embroider portraits of loved ones, pets, or favorite celebrities onto t-shirts, jackets, or hoodies for a wearable tribute.
- Monogrammed Gifts: Add a personal touch to gifts by embroidering digitized photos alongside monograms or custom lettering.
- Team Logos: Create custom team apparel by embroidering digitized photos of team mascots or memorable game moments onto jerseys or hats.
9.2. Home Décor:
- Framed Art: Turn digitized photos into framed embroidery art for a unique and sentimental wall display.
- Pillows and Cushions: Add a cozy touch to your home décor by embroidering digitized photos onto pillows and cushions.
- Quilts and Blankets: Create heirloom-quality quilts and blankets by incorporating digitized photos into the design.
9.3. Accessories:
- Handbags and Totes: Personalize handbags and totes by embroidering digitized photos of favorite travel destinations or personal artwork.
- Hats and Caps: Add a unique touch to hats and caps by embroidering digitized photos of logos, emblems, or personal designs.
- Keychains and Patches: Create custom keychains and patches by embroidering digitized photos onto fabric or felt.
9.4. Event Keepsakes:
- Wedding Favors: Create personalized wedding favors by embroidering digitized photos of the happy couple onto small items like coasters or magnets.
- Graduation Gifts: Commemorate graduation milestones by embroidering digitized photos of the graduate onto personalized gifts like picture frames or memory boxes.
- Anniversary Presents: Celebrate anniversaries by embroidering digitized photos of special moments onto personalized gifts like embroidered photo albums or wall hangings.
9.5. Artistic Expressions:
- Mixed Media Art: Incorporate digitized photo embroidery into mixed media artwork, combining fabric, thread, and other materials to create unique textures and visual effects.
- Textile Sculptures: Create three-dimensional textile sculptures by embroidering digitized photos onto fabric and shaping it into sculptural forms.
- Art Quilts: Explore the artistic possibilities of quilting by creating art quilts that feature digitized photo embroidery as a focal point.
Table: Creative Applications of Digitized Photo Embroidery
| Application | Description | Personalization Level |
|---|---|---|
| Apparel | Embroidered portraits, monograms, team logos on clothing items | High |
| Home Décor | Framed art, pillows, cushions, quilts featuring digitized photos | High |
| Accessories | Personalized handbags, hats, keychains with custom designs | High |
| Event Keepsakes | Wedding favors, graduation gifts, anniversary presents with photo embroidery | High |
| Artistic Expressions | Mixed media art, textile sculptures, art quilts incorporating embroidery | High |
The creative applications of digitized photo embroidery are virtually endless, limited only by your imagination. Whether you’re looking to personalize gifts, enhance your home décor, or express your artistic vision, digitized photo embroidery offers a unique and versatile medium for bringing your ideas to life.
10. How Can I Ensure My Embroidered Photos Are Color Accurate?
Achieving accurate color representation in embroidered photos is essential for capturing the true essence of your original image. Several factors can influence color accuracy, from the quality of your digitizing software to the choice of embroidery threads.
10.1. Calibrating Your Monitor:
- Color Profiling: Ensure your monitor is properly calibrated to display colors accurately. Use a colorimeter or spectrophotometer to create a custom color profile for your monitor.
- Ambient Lighting: Control the ambient lighting in your workspace to minimize color distortion. Avoid direct sunlight or harsh artificial light that can affect your perception of colors.
10.2. Selecting High-Quality Threads:
- Thread Consistency: Choose embroidery threads from reputable brands that offer consistent color quality and dye lots. Inconsistent thread colors can result in noticeable variations in your embroidered photo.
- Color Matching Systems: Use a color matching system like Pantone or RAL to accurately match thread colors to the colors in your original photo. These systems provide standardized color references that ensure consistency across different thread brands.
According to Popular Photography, consistent color quality in embroidery threads significantly enhances the visual impact of the final design. - Thread Types: Consider different thread types, such as polyester, rayon, or cotton, as they can affect the vibrancy and sheen of the colors.
10.3. Utilizing Digitizing Software Features:
- Color Reduction: Use color reduction techniques in your digitizing software to simplify the color palette of your photo and minimize the number of thread colors required.
- Color Blending: Experiment with color blending techniques in your digitizing software to create subtle color transitions and gradients.
- Stitch Density: Adjust stitch density to control the intensity of colors in your embroidered photo. Higher stitch density will result in more saturated colors, while lower stitch density will produce more muted tones.
10.4. Testing and Adjusting:
- Color Swatches: Embroider color swatches of different thread colors on a test fabric to evaluate their appearance under different lighting conditions.
- Test Samples: Embroider test samples of your digitized photo on the same fabric you plan to use for your final project. Compare the colors in the embroidered sample to the colors in your original photo and make necessary adjustments to your digitizing settings.
- Iterative Process: Color accuracy is often an iterative process. Don’t be afraid to make multiple adjustments to your digitizing settings and test samples until you achieve the desired results.
10.5. Lighting Considerations:
- Consistent Lighting: View your embroidered photos under consistent lighting conditions to accurately assess color accuracy.
- Light Source: Use a calibrated light source that emits a balanced spectrum of light to avoid color distortion.
Table: Factors Affecting Color Accuracy in Embroidered Photos
| Factor | Description | Mitigation Strategies |
|---|---|---|
| Monitor Calibration | Inaccurate monitor settings can distort colors | Calibrate monitor using a colorimeter and control ambient lighting |
| Thread Quality | Inconsistent thread colors can lead to noticeable variations in embroidered photos | Choose high-quality threads from reputable brands with consistent dye lots |
| Digitizing Software | Color reduction and blending techniques can impact color accuracy | Utilize color reduction and blending features to simplify the color palette and create gradients |
| Testing and Adjustment | Iterative process of comparing embroidered samples to original photos and making adjustments | Embroider color swatches and test samples to evaluate color accuracy and make necessary adjustments |
Ensuring color accuracy in embroidered photos requires careful attention to detail and a systematic approach. By calibrating your monitor, selecting high-quality threads, utilizing digitizing software features, and testing your results, you can achieve vibrant, true-to-life colors in your embroidered masterpieces.
Are you inspired to start your photo embroidery journey? Visit dfphoto.net today for more in-depth tutorials, inspiration, and to connect with a vibrant community of fellow photography and embroidery enthusiasts. Discover new techniques, share your creations, and elevate your skills!
Address: 1600 St Michael’s Dr, Santa Fe, NM 87505, United States.
Phone: +1 (505) 471-6001.
Website: dfphoto.net.
FAQ: How To Digitize Photos For Embroidery
1. What is the best type of photo to digitize for embroidery?
Photos with high resolution, clear details, good contrast, and vibrant colors tend to translate best into embroidery. Simpler images are better for beginners.
2. What software is needed to digitize a photo for embroidery?
You need embroidery digitizing software specifically designed for photo embroidery.
3. Can I use any fabric for photo embroidery?
No, the choice of fabric depends on your project. Cotton, linen, and canvas are popular choices due to their durability and ease of handling.
4. How do I prepare my fabric for embroidery?
Hoop the fabric with a stabilizer to ensure it remains taut and stable during embroidery.
5. What is a stabilizer and why do I need it?
A stabilizer is used beneath the fabric to prevent puckering and helps maintain the fabric’s shape during embroidery.
6. How do I transfer my digitized design to my embroidery machine?
Transfer the design to your machine via USB or other methods, depending on your machine’s capabilities.
7. What if my thread keeps breaking during embroidery?
Ensure the threads are of good quality to avoid breakage. Also, adjust the thread tension on your machine.
8. How do I clean my embroidered photo?
Hand wash or use a gentle machine cycle if necessary. Avoid harsh detergents.
9. Can I digitize a photo with a lot of colors?
Yes, but it’s often better to simplify the colors in the photo to make the digitizing process more manageable.
10. What are some creative applications for embroidered photos?
You can frame them, put them on pillows, personalize apparel, or create gifts.