Do you have boxes filled with old photos gathering dust? Perhaps albums overflowing with snapshots from years gone by? These physical photographs are precious time capsules, holding memories of loved ones, special occasions, and personal milestones. However, physical photos are vulnerable to fading, damage, and loss over time. Learning How To Digitize A Photo is the key to preserving these irreplaceable moments for future generations. This comprehensive guide will walk you through the best methods to digitize your photos, ensuring they are safely stored, easily shared, and enjoyed for years to come.
Why You Should Digitize Your Old Photos
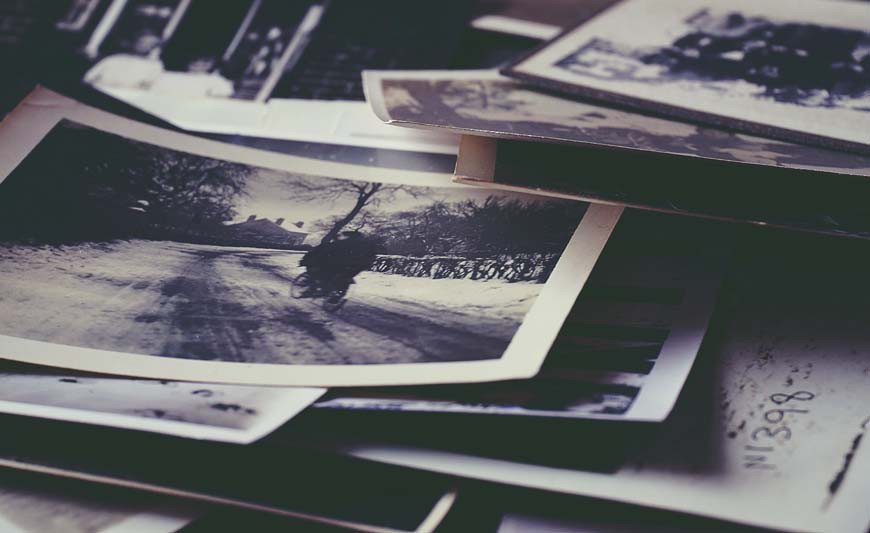 Stacked old photos
Digitizing your old photo prints isn’t just about decluttering physical space; it’s about safeguarding your history and unlocking a wealth of benefits. As I embarked on my own photo digitization journey, transforming boxes of faded prints into vibrant digital images, the advantages became strikingly clear.
Preserving Priceless Memories: The most compelling reason to digitize photos is preservation. Physical photos, whether prints or negatives, are susceptible to degradation from light, humidity, and even just the passage of time. Colors fade, paper yellows, and precious moments can be lost forever. Digitizing your photos creates a digital backup, ensuring these memories remain vibrant and accessible, unaffected by physical decay.
Effortless Sharing with Loved Ones: Imagine instantly sharing childhood photos with siblings across the country or surprising distant relatives with images from family gatherings they haven’t seen in decades. Once digitized, your photos are no longer confined to albums or boxes. They can be easily shared via email, social media, or cloud storage, connecting family and friends with shared histories in a way that physical albums simply can’t. The joy of rediscovering and sharing these visual stories is truly remarkable.
Rediscovering and Reliving Moments: How often do you actually look through your physical photo albums? For many, they remain tucked away, rarely seen. Digitizing your photos breathes new life into these memories. Suddenly, years of forgotten moments are readily accessible on your computer, tablet, or smartphone. This ease of access encourages you to revisit these memories, sparking conversations, laughter, and a deeper connection to your personal history.
Enhancing and Restoring Old Photos: Digitizing photos opens up a world of possibilities for restoration and enhancement. Scratches, dust, faded colors, and red-eye – common issues with older prints – can be addressed with photo editing software. From simple color correction to more advanced retouching, you can revitalize old photos, bringing them back to their former glory and even improving upon their original appearance. This digital restoration can breathe new life into photos that might otherwise be considered lost to time.
Organization and Accessibility: Searching for a specific photo in physical albums or boxes can be a time-consuming and frustrating task. Digitizing your photo collection allows for digital organization. You can tag photos with dates, locations, people, and events, making them easily searchable. Imagine typing in “Grandma’s birthday 1985” and instantly accessing all related photos. This level of organization transforms your photo collection from a static archive into a dynamic and easily navigable resource.
Reducing Clutter and Saving Space: Physical photo albums and boxes take up considerable space. Digitizing your photos allows you to declutter your home while still preserving your memories. Digital photos can be stored on hard drives, cloud services, or USB drives, freeing up physical space and simplifying your living environment.
Before You Digitize, Organize!
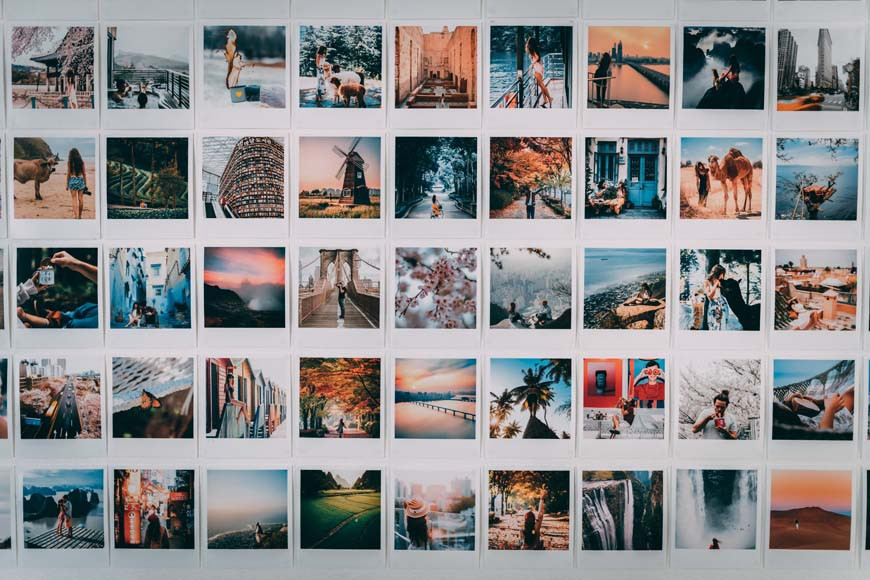 Polaroid collage
Before diving into the digitization process, take the time to organize your physical photos. This crucial step will streamline the entire workflow, saving you time and frustration in the long run. Think of it as laying the foundation for a successful digitization project. A well-organized photo collection is easier to scan, edit, and ultimately enjoy.
Inventory and Assessment: Begin by gathering all your photos in one place. This might involve collecting albums, boxes, shoeboxes, and even loose prints scattered in drawers. Take stock of the sheer volume of photos you’re dealing with. Are we talking about a few hundred snapshots or thousands? Understanding the scale of the project will help you choose the most efficient digitization method and allocate sufficient time.
Gather Supplies: Once you have an overview of your photo collection, gather the necessary organizational supplies. This might include:
- Photo Albums or Archival Boxes: Even if you’re digitizing, you’ll still need a place to store the original prints after scanning. Archival-quality albums or boxes are designed to protect photos from light, dust, and humidity.
- Photo Storage Boxes: For loose photos, consider acid-free photo storage boxes. These come in various sizes and can be labeled for easy categorization.
- Acid-Free Dividers or Index Cards: These are helpful for separating photos within boxes or albums, allowing for chronological or thematic organization.
- Soft Cloth or Photo Cleaning Wipes: Gently cleaning your photos before scanning removes dust and fingerprints, improving scan quality.
- Gloves (Optional): If you’re handling very old or delicate photos, consider wearing cotton gloves to prevent transferring oils from your hands.
Sorting Strategies: Now comes the task of sorting. Develop a sorting system that makes sense to you and will aid in future organization and retrieval of your digital photos. Here are a few effective approaches:
- Chronological Order: Sorting by date is a popular and logical method. If your photos are already dated or you have a general idea of the timeframe, arrange them by year, decade, or even season. This allows you to trace family history and life events in a timeline.
- By People and Events: Group photos by individuals (portraits, family members) or events (birthdays, weddings, vacations). This is particularly useful for creating thematic albums or easily locating photos of specific people or occasions.
- Location-Based Sorting: If location is a significant factor in your photos, sort them geographically (vacations, hometown events, etc.). This can be combined with chronological or event-based sorting for finer organization.
- Photographer-Based Sorting (For Enthusiasts): If you have photos taken by a specific family member who had a distinct photographic style, you might want to group these together as a unique collection within your larger archive.
Layered Approach: For a truly detailed and searchable photo archive, consider a layered sorting approach. Start with a broad chronological sort (by year), then further refine within each year by event or person. Finally, you could even sort by photo size if you plan to batch scan later. The depth of your sorting will depend on the size of your collection and your desired level of organization.
Document and Label: As you sort, take notes! Jot down dates, locations, names of people, and event details on index cards or dividers placed within your photo boxes or albums. This information will be invaluable when you later add metadata to your digital photo files, making them easily searchable. Label boxes and albums clearly, reflecting your chosen sorting system.
How to Digitize Photos: Four Proven Methods
Once your photos are organized, you’re ready to explore the various methods for digitizing them. From using readily available smartphone apps to employing professional-grade scanning services, there’s a digitization solution to fit every need and budget. Let’s delve into four effective techniques for converting your physical photos into digital treasures.
1. Flatbed Scanners: The Gold Standard for Home Digitization
For achieving high-quality digital copies of your photos at home, a flatbed scanner remains the gold standard. These scanners, commonly found in homes and offices, offer excellent resolution and control, making them ideal for preserving precious photo prints. If you are looking for a reliable and budget-friendly way to digitize photos, a flatbed scanner is an excellent starting point.
Benefits of Flatbed Scanners:
- High Image Quality: Flatbed scanners typically offer high resolutions (measured in DPI – Dots Per Inch), ensuring sharp, detailed digital images that capture the nuances of your original photos.
- Versatility: They can handle various photo sizes, from small snapshots to larger prints, and even accommodate delicate or slightly damaged photos.
- Affordability: While professional-grade scanners exist, consumer-level flatbed scanners are readily available and relatively affordable.
- Control and Precision: You have precise control over scanning settings like resolution, color depth, and file format, allowing you to tailor the digitization process to your specific needs.
- Batch Scanning Capability: Most flatbed scanners allow you to scan multiple photos simultaneously on the platen (glass surface), which can significantly speed up the digitization process. You can then crop and separate individual images using photo editing software.
Choosing the Right Flatbed Scanner:
- Resolution (DPI): For most photo digitization purposes, a scanner with a resolution of at least 300 DPI is recommended. For prints you intend to enlarge significantly or for highly detailed photos, consider 600 DPI or higher.
- Color Depth: Opt for a scanner that offers at least 24-bit color depth (or 48-bit for advanced users). This ensures accurate color reproduction of your photos.
- Software: Good scanner software is essential. Look for scanners that come bundled with user-friendly software that allows for easy scanning, cropping, color correction, and file management. Features like automatic dust and scratch removal can also be beneficial.
- Photo Negative and Slide Scanning (Optional): Some flatbed scanners come with adapters for scanning photo negatives and slides. If you have a collection of these, consider a scanner with this capability to digitize your entire photo archive in one go.
Scanning Best Practices with a Flatbed Scanner:
- Clean the Scanner Platen: Before each scanning session, clean the scanner’s glass platen with a soft, lint-free cloth and a specialized scanner cleaning solution or a slightly damp cloth. Dust and smudges on the platen will show up in your scans.
- Clean Your Photos: Gently remove dust and loose particles from your photos using a soft brush or compressed air. For fingerprints or smudges, use photo cleaning wipes sparingly.
- Position Photos Correctly: Place photos face down on the scanner platen, ensuring they are flat and aligned with the scanner’s guides. For batch scanning, leave a small gap between photos to allow for easy cropping later.
- Adjust Scanner Settings: In your scanner software, select the appropriate settings:
- Resolution: 300 DPI (minimum), 600 DPI (for higher detail or enlargement).
- Color Mode: Color for color photos, Grayscale for black and white photos, Color for sepia-toned photos.
- File Format: TIFF for archival quality (larger file size), JPEG for general use and sharing (smaller file size).
- Preview and Scan: Use the preview function in your scanner software to check the photo placement and settings. Make adjustments as needed, then initiate the scan.
- Batch Scan (Optional): If scanning multiple photos at once, use the batch scanning feature if available, or manually arrange multiple photos on the platen.
- Crop and Edit (Post-Scanning): After scanning, use photo editing software to crop individual photos from batch scans, rotate images if necessary, and perform basic color correction or retouching as desired.
2. Digital Cameras: A Quick and Versatile Alternative
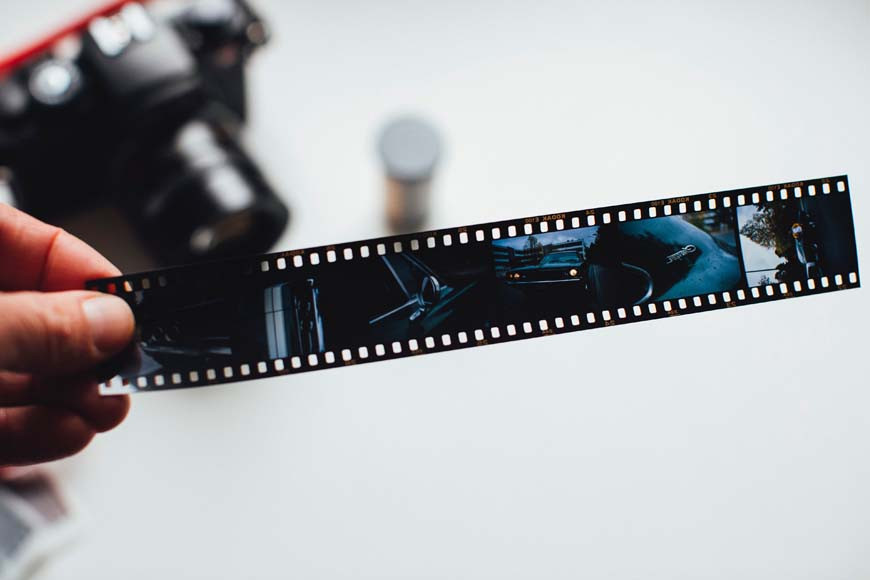 Using a digital camera to digitize photos
While flatbed scanners offer the highest quality, using a digital camera to digitize photos is a surprisingly effective and faster alternative, especially for larger collections or when you need a more portable setup. This method leverages the technology you likely already have at your fingertips – your digital camera or even a smartphone camera – to capture digital images of your prints.
Advantages of Using a Digital Camera:
- Speed and Efficiency: Photographing photos with a camera is generally faster than scanning, particularly for large quantities. You can quickly capture images in batches.
- Portability: Digital cameras (especially smartphones) are portable, allowing you to digitize photos anywhere, without being tethered to a scanner.
- Flexibility: Cameras can handle photos in albums or framed photos more easily than flatbed scanners. They are also adaptable to various lighting conditions and shooting angles.
- No Specialized Equipment (Often): You can use a digital camera you already own, or even a high-quality smartphone camera, minimizing the need for additional equipment purchases.
Equipment and Setup for Camera Digitization:
- Digital Camera (DSLR, Mirrorless, or High-Quality Smartphone): A camera with good resolution (at least 12 megapixels) and manual control is recommended. Smartphones with advanced camera systems can also produce excellent results.
- Tripod: A sturdy tripod is essential for stability and sharp, blur-free images. Look for a tripod with a center column that can be inverted or a boom arm to position the camera directly above the photos.
- Lighting: Good, even lighting is crucial. Soft, diffused natural light is ideal. Avoid direct sunlight, which can create harsh shadows and glare. Alternatively, use two softbox lights or lamps positioned at 45-degree angles to the photos.
- Copy Stand (Optional but Recommended): A copy stand provides a stable platform for both your camera and photos, ensuring consistent alignment and distance. This is particularly helpful for digitizing large collections.
- Acrylic Sheet or Glass (Optional): A clear acrylic sheet or a piece of clean glass can be used to flatten curled or warped photos, ensuring they are in focus.
- Color Calibration Target (Optional but Recommended for Color Accuracy): A color calibration target (like a ColorChecker) can be photographed with your photos and used during editing to ensure accurate color reproduction.
Steps for Digitizing Photos with a Digital Camera:
- Set Up Your Shooting Area: Choose a location with consistent, diffused lighting. Set up your tripod and camera (or copy stand).
- Position Your Photo: Place the photo flat on a stable surface beneath your camera. Use an acrylic sheet or glass to flatten curled photos if needed.
- Camera Settings:
- Shooting Mode: Manual (M) mode is recommended for full control.
- Aperture: Set to a mid-range aperture (e.g., f/5.6 to f/8) for good depth of field and sharpness.
- ISO: Keep ISO as low as possible (ISO 100 or 200) to minimize noise.
- Shutter Speed: Adjust shutter speed to achieve proper exposure based on your lighting conditions.
- White Balance: Set white balance to match your lighting (e.g., Daylight, Cloudy, or Tungsten). Alternatively, shoot in RAW format and adjust white balance in post-processing.
- File Format: Shoot in RAW format for maximum flexibility in editing and color correction. If RAW is not an option, use JPEG at the highest quality setting.
- Focus and Composition: Ensure the photo is sharply in focus. Frame the photo to fill the camera’s viewfinder, minimizing background distractions. Make sure the camera lens is perfectly parallel to the photo to avoid distortion.
- Lighting Check and Adjustments: Examine your lighting for evenness and lack of glare. Adjust lighting positions or use a polarizing filter (CPL filter) on your lens to reduce glare from glossy prints.
- Use Self-Timer or Remote Shutter Release: To minimize camera shake, use your camera’s self-timer (2-second delay) or a remote shutter release to trigger the shot.
- Capture Your Photos: Carefully photograph each photo, ensuring consistent framing and focus. If using a color calibration target, photograph it at the beginning of your session for color correction reference.
- Review and Edit: Transfer your photos to your computer and review them for sharpness, exposure, and color accuracy. Use photo editing software to crop, adjust colors, correct perspective distortion (if any), and perform retouching as needed.
3. Smartphone Apps: Digitizing on the Go
For ultimate convenience and speed, especially when dealing with snapshots for social media sharing or quick backups, smartphone apps offer a surprisingly capable solution for digitizing photos. Modern smartphone cameras are increasingly powerful, and dedicated photo scanning apps streamline the process, making it accessible to anyone with a smartphone. While not offering the absolute highest quality of flatbed scanners, smartphone apps are incredibly user-friendly and efficient for many digitization needs.
Advantages of Smartphone Photo Scanning Apps:
- Convenience and Portability: Your smartphone is always with you, making digitization possible anytime, anywhere.
- Speed and Ease of Use: Apps are designed for quick and intuitive scanning. Many offer automated features like edge detection, cropping, and perspective correction, simplifying the process.
- Cost-Effective: Most photo scanning apps are free or very low cost, making this method highly accessible.
- Direct Sharing and Cloud Integration: Many apps allow you to directly share digitized photos to social media, email, or cloud storage services.
- Built-in Editing Features: Some apps offer basic editing tools for color correction, cropping, and enhancing scans directly within the app.
Popular Photo Scanning Apps:
- Google PhotoScan (Android & iOS): A free app from Google that automatically detects edges, crops, and corrects perspective. It also removes glare and seamlessly integrates with Google Photos for storage and sharing.
- Photomyne (iOS & Android): A popular app with both free and paid versions. It offers batch scanning, automatic cropping and enhancement, and the ability to create digital photo albums. The paid version unlocks unlimited scanning and cloud backup.
- Microsoft Lens (Android & iOS): Originally designed for document scanning, Microsoft Lens also works well for photos. It offers edge detection, cropping, and image enhancement, and integrates with Microsoft Office apps and OneDrive.
- Adobe Scan (Android & iOS): Another document scanning app from Adobe that can be used for photos. It features automatic text recognition (OCR), which can be useful for digitizing photos with captions or notes.
- Notes App (iOS Built-in): The Notes app on iPhones has a built-in document scanning feature that can also be used for photos. It’s simple and convenient for quick scans.
- Your Built-in Camera App (Android & iOS): For the simplest approach, you can simply use your phone’s standard camera app to take photos of your prints. While lacking automated features, this is a fast way to capture digital copies, especially for social media sharing.
Tips for Using Smartphone Apps for Photo Digitization:
- Good Lighting is Key: Just like with digital camera digitization, good, even lighting is crucial for smartphone scanning. Utilize natural daylight or soft indoor lighting. Avoid harsh shadows and direct glare.
- Clean Your Phone Lens: Ensure your smartphone camera lens is clean and free of smudges for optimal image quality.
- Use a Steady Hand or Tripod (Optional): While many apps offer image stabilization, using a tripod or propping your phone against a stable object can further reduce blur, especially in lower light conditions.
- Follow App Instructions: Each app has its own user interface and scanning process. Familiarize yourself with the app’s instructions and features for best results. Pay attention to prompts for positioning your phone and capturing the photo.
- Experiment with Settings (If Available): Some apps offer settings for resolution, image enhancement, or file format. Experiment with these settings to find the optimal balance between image quality and file size for your needs.
- Review and Edit Within the App or Later: Many apps offer basic editing tools for cropping, rotating, and color correction. Utilize these tools to enhance your scans directly within the app or transfer the images to your computer for more advanced editing.
4. Professional Photo Digitizing Services: Hands-Off, High-Quality Results
If you have a very large photo collection, lack the time or equipment for DIY digitization, or desire the highest possible quality and professional retouching, a professional photo digitizing service is an excellent option. These services handle the entire digitization process for you, from scanning to file organization, and often offer additional services like photo restoration and slide/negative scanning. While it’s the most expensive method, professional services provide a hassle-free and top-tier solution for preserving your precious memories.
Benefits of Professional Digitizing Services:
- High-Quality Scans: Professional services utilize high-end scanners, often including drum scanners, which are capable of capturing exceptional detail and image quality, exceeding what is achievable with home scanners.
- Time-Saving and Convenient: You simply pack up your photos and ship them to the service provider. They handle all the scanning, processing, and often return your original photos along with the digitized copies.
- Expertise and Experience: Professional technicians are trained in photo handling and scanning best practices, ensuring your photos are treated with care and digitized to the highest standards.
- Additional Services: Many services offer add-on options like photo retouching, color correction, slide and negative scanning, video digitization (for old film reels), and creation of photo DVDs or USB drives.
- Large Volume Processing: Professional services are equipped to handle very large photo collections efficiently.
- Organization and Metadata Tagging (Often): Some services offer organizational options, including sorting, labeling, and adding basic metadata (dates, filenames) to your digital photo files.
Considerations When Choosing a Professional Service:
- Cost: Professional services are more expensive than DIY methods. Compare pricing structures, per-photo costs, and any additional service fees. Get quotes from multiple providers.
- Turnaround Time: Digitization can take time, especially for large orders. Inquire about the estimated turnaround time before committing to a service.
- Shipping and Handling: You’ll need to ship your precious photos. Research the service’s shipping procedures, insurance options, and packaging recommendations. Ensure they use secure and trackable shipping methods.
- Image Quality and Resolution Options: Clarify the scanning resolutions and file formats offered by the service. Ensure they meet your quality requirements. Inquire about sample scans if possible.
- Photo Handling and Security: Choose a reputable service with a proven track record of handling photos with care and maintaining confidentiality. Read reviews and check for certifications or affiliations.
- Retouching and Restoration Options: If you want to have your photos retouched or restored, inquire about the service’s retouching capabilities and pricing. View samples of their retouching work if available.
- Output Options: Determine how you want to receive your digitized photos – DVD, USB drive, cloud download, etc. Ensure the service offers your preferred output options.
- Customer Reviews and Reputation: Thoroughly research the service’s reputation by reading online reviews, checking for testimonials, and looking for any complaints or issues.
Popular Photo Digitizing Services:
- ScanMyPhotos: A well-established and reputable service known for its bulk scanning options and competitive pricing.
- ScanCafe: Another popular service offering high-quality scans and a range of additional services, including photo restoration and slide scanning.
- Digital Memories: Focuses on personalized service and high-quality digitization, with options for custom organization and metadata tagging.
- ScanDigital: Emphasizes premium quality and offers a variety of scanning resolutions and file formats.
- EverPresent: Provides comprehensive media conversion services, including photo, video, and film digitization, with a focus on customer service and archival quality.
- DigMyPics: Offers a range of digitization services at competitive prices, with options for bulk scanning and photo restoration.
- Local Document and Office Supply Stores (e.g., FedEx Office, Staples): Many local office supply stores offer photo scanning services, which can be a convenient option for smaller collections or if you prefer a local provider.
- Film Photography Project (for 8mm and 16mm movie scans): Specializes in digitizing 8mm and 16mm home movie film, as well as photos and slides.
What Resolution and File Format Should I Use?
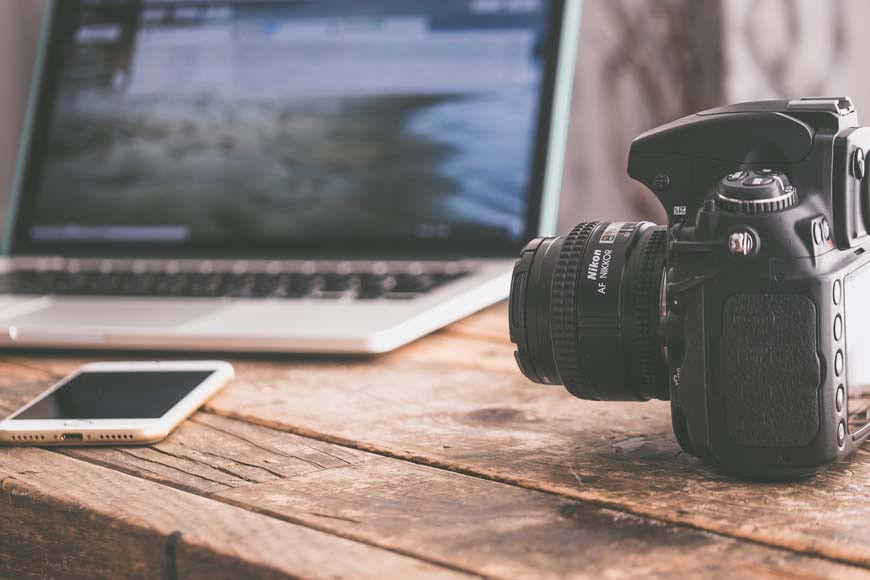 Laptop, phone and camera on desk
Choosing the right resolution and file format is crucial for ensuring your digitized photos meet your needs for quality, storage space, and intended use. Understanding these technical aspects will empower you to make informed decisions and optimize your digitization process.
Resolution (DPI – Dots Per Inch):
Resolution determines the level of detail captured in your digital images. Higher DPI means more dots per inch, resulting in sharper, more detailed images, but also larger file sizes.
- 72-96 DPI: Suitable for web display and social media sharing where file size is a primary concern and print quality is not a factor. This resolution is generally too low for printing photos.
- 200 DPI: A good balance for general digital use, viewing on screens, and creating smaller prints (up to 4×6 inches). Offers decent detail and manageable file sizes.
- 300 DPI: The industry standard for high-quality photo printing. Recommended for archival purposes and for creating prints at or slightly larger than the original photo size. Provides excellent detail and print quality.
- 600 DPI and Higher: Beneficial for scanning very detailed photos, photos you intend to enlarge significantly, or for archival of historical or highly valuable images. Results in very large file sizes.
File Formats: JPEG, PNG, and TIFF
File format determines how your digital image data is stored, affecting file size, image quality, and compatibility.
- JPEG (.jpg or .jpeg): The most common image format for photos, widely supported and used for web display, social media, and general sharing. JPEG uses lossy compression, which reduces file size by discarding some image data. This compression is generally acceptable for everyday use, but repeated saving and editing of JPEGs can lead to gradual quality degradation. JPEG is best suited for final output and sharing, not for archival masters.
- PNG (.png): A lossless image format that preserves all image data without compression artifacts. PNG is a good choice for digital graphics, illustrations, and images where quality preservation is paramount. PNG files are larger than JPEGs but offer better quality for editing and archiving.
- TIFF (.tif or .tiff): The gold standard for archival image quality. TIFF is a lossless format that retains all image data and supports various color depths and compression options (including uncompressed). TIFF files are significantly larger than JPEGs and PNGs but offer the highest possible image quality and are ideal for archival masters, professional printing, and extensive editing.
Recommendations for Resolution and File Format:
- For Archival Masters and High-Quality Prints: Scan at 300 DPI or 600 DPI and save as TIFF. This ensures the highest possible quality for preservation and printing.
- For General Digital Use, Sharing, and Smaller Prints: Scan at 300 DPI and save as JPEG. This provides a good balance of quality and file size for everyday use.
- For Web Display and Social Media Only: Scan at 200 DPI or even 96 DPI and save as JPEG. Prioritize smaller file sizes for faster loading online.
- For Black and White Photos: Scan in Grayscale mode and save as TIFF or JPEG.
- For Sepia-Toned Photos: Scan in Color mode to preserve the warm tones and save as TIFF or JPEG.
My Photos Are Digitized – Now What?
 Looking at photos on smartphone
Congratulations! You’ve successfully digitized your photo collection. But the journey doesn’t end there. Proper storage, backup, and enjoyment of your digital photo archive are the next crucial steps. Let’s explore what to do with your newly digitized memories.
Secure Storage and Backup Strategies:
- Local Storage (Computer, External Hard Drive): Store your master digital photo archive on your primary computer’s hard drive. Crucially, create a backup copy on an external hard drive. Regularly back up your photos to the external drive to protect against data loss due to computer failure.
- Cloud Storage: Utilize cloud storage services like Google Photos, iCloud Photos, Dropbox, OneDrive, or dedicated photo cloud services (e.g., SmugMug, Flickr). Cloud backup provides offsite redundancy, protecting your photos from local disasters (fire, theft, etc.). Many services offer automatic syncing, ensuring your photos are constantly backed up. Consider a combination of cloud and local backup for maximum security.
- Multiple Backup Locations: The “3-2-1 backup rule” is a best practice: Have at least three copies of your data, on two different media (e.g., hard drive and cloud), with one copy offsite (cloud or geographically separate location).
- NAS (Network Attached Storage): For advanced users with large photo collections, a NAS device provides centralized network storage with built-in redundancy (RAID) and accessibility from multiple devices within your home network.
- DVDs or USB Drives (Less Recommended for Primary Backup): While you can burn photos to DVDs or store them on USB drives, these media are less reliable for long-term archival compared to hard drives and cloud storage. They can be used for secondary or tertiary backups but are not recommended as primary backup solutions.
Organizing Your Digital Photo Library:
- File Naming Conventions: Adopt a consistent file naming system for your digitized photos. Include date, event, location, and descriptive keywords in filenames (e.g., “1985-07-BirthdayParty-Grandma-Cake.jpg”). This makes searching and organizing much easier.
- Folder Structure: Create a logical folder structure to organize your photos by year, month, event, or category. For example: “Photos > 1980s > 1985 > 1985-07-BirthdayParty”.
- Metadata Tagging: Utilize photo management software (e.g., Adobe Lightroom, Adobe Bridge, Capture One, Google Photos, Apple Photos) to add metadata tags to your photos. Tag people (names), locations, events, keywords, and descriptions. Metadata tagging makes your photos highly searchable and allows for advanced filtering and organization.
- Photo Management Software: Invest in photo management software to efficiently organize, edit, and manage your digital photo library. These programs offer powerful tools for importing, tagging, searching, editing, and sharing photos. Cloud-based services like Google Photos and Apple Photos also offer basic management features.
Enjoying and Sharing Your Digitized Photos:
- Digital Photo Frames: Showcase your digitized photos on digital photo frames. These frames can display slideshows of your memories, bringing your photos to life in your home.
- Social Media and Online Sharing: Share your digitized photos with family and friends on social media platforms like Facebook, Instagram, or dedicated photo sharing sites like Flickr or SmugMug.
- Create Photo Albums and Photo Books: Design digital photo albums or photo books using online services or software. Print physical photo books to create tangible keepsakes from your digitized collection.
- Share Cloud Albums: Utilize cloud storage services to create shareable photo albums. Invite family and friends to view and contribute to shared albums, fostering collaboration and shared memory keeping.
- Print Enlargements: Now that your photos are digitized, you can easily create enlargements of your favorite images for framing and display. Your high-resolution scans will allow for printing photos at larger sizes than the originals, opening up new possibilities for displaying your memories.
3 Ways to Store Your Original Photos After Digitization
 Elderly woman sorting photos
Even after digitization, you may want to preserve your original physical photos. Proper storage is essential to protect them from damage and ensure they last for generations to come. Here are three common storage methods, ranging from best practices to more budget-conscious options.
1. Archival Photo Albums and Boxes: The Best Protection
Archival-quality photo albums and storage boxes are the gold standard for preserving physical photos. Made from acid-free and lignin-free materials, they prevent chemical degradation and protect photos from light, dust, humidity, and pests. While slightly more expensive, archival storage is the best investment for long-term photo preservation.
Pros:
- Best Quality Photo Storage: Provides the highest level of protection against chemical degradation, light, humidity, dust, and pests.
- Purpose-Built for Photos: Designed specifically for photo storage with features like acid-free materials, protective sleeves, and secure closures.
- Variety of Sizes and Styles: Available in various sizes, colors, and styles to suit different photo formats and aesthetic preferences.
- Easy to Label and Organize: Albums and boxes can be easily labeled for clear organization and retrieval.
Cons:
- Higher Cost: Archival materials are generally more expensive than standard storage options.
2. Plastic Zip-Top Bags: A Cost-Effective Short-Term Solution (Use with Caution)
Plastic zip-top bags offer a budget-friendly and readily available storage option, providing some protection against moisture and pests. However, standard plastic bags contain chemicals that can damage photos over time, making them a less ideal long-term solution.
Pros:
- Affordable and Readily Available: Zip-top bags are inexpensive and widely available in most households.
- Moisture and Pest Protection: Provides a barrier against moisture and pests, offering some level of protection.
- Short-Term Protection: Suitable for short-term storage or temporary protection while you acquire archival-quality materials.
Cons:
- Chemical Degradation Risk: Standard plastic bags contain Butylated HydroxyToluene (BHT) and other chemicals that can leach out and damage photos over time, causing yellowing and fading.
- Not Archival Quality: Not designed for long-term photo preservation and do not offer the same level of protection as archival materials.
- Potential for Trapped Moisture: If not properly sealed and stored in a dry environment, plastic bags can trap moisture, potentially leading to mold or mildew growth.
If using plastic zip-top bags, consider these precautions:
- Use PVC-Free Bags: Look for zip-top bags specifically labeled as PVC-free and photo-safe, although these may be harder to find and slightly more expensive.
- Short-Term Storage Only: Use plastic bags as a temporary measure only and transfer photos to archival storage as soon as possible.
- Store in a Cool, Dry Place: Store plastic bags in a cool, dry, and well-ventilated location to minimize moisture buildup and chemical reactions.
- Consider Desiccants: Include desiccant packets (silica gel) inside plastic bags to absorb moisture.
3. Regular Cardboard Boxes: A Risky, Last-Resort Option (Avoid if Possible)
Using regular cardboard boxes for photo storage is the least recommended option due to the inherent risks of chemical degradation, moisture absorption, and pest infestation. Cardboard is acidic and can damage photos over time. It also offers little protection against humidity and pests. This method should only be considered as a very temporary measure if no other options are immediately available.
Pros:
- Most Affordable (Often Free): Cardboard boxes are often readily available and free.
- Temporary Storage in a Pinch: Can be used as a very short-term solution while you acquire better storage materials.
Cons:
- Acidic and Damaging to Photos: Cardboard is acidic and will cause photos to degrade over time, leading to yellowing, brittleness, and fading.
- Poor Protection from Elements: Cardboard offers minimal protection against humidity, dust, light, and pests.
- Susceptible to Moisture and Pests: Cardboard absorbs moisture and can attract pests, both of which can damage photos.
- Not Suitable for Long-Term Storage: Regular cardboard boxes are not designed for archival storage and are not recommended for preserving photos long-term.
If you must use cardboard boxes temporarily, take these precautions:
- Use Acid-Free Dividers or Envelopes: Place photos inside acid-free paper envelopes or use acid-free dividers within the box to create a barrier between the photos and the cardboard.
- Store Boxes Off the Ground: Elevate boxes off the floor to protect against moisture and pests.
- Climate-Controlled Environment: Store cardboard boxes in a cool, dry, climate-controlled environment with stable temperature and humidity. Avoid attics, basements, and garages.
- Short-Term Storage Only: Transfer photos to archival-quality storage as soon as possible.
FAQ: Digitizing Your Photo Collection
What is the best way to digitize old photos?
The best way to digitize old photos depends on your priorities. For the highest quality, a flatbed scanner is generally considered the best method. It offers excellent resolution and control. However, for speed and convenience, especially for social media sharing, using a smartphone app is a very viable option. Professional photo digitizing services offer the best of both worlds – high quality and convenience, but at a higher cost.
How much does it cost to digitize a photo?
The cost to digitize a photo varies greatly. DIY methods (scanner, camera, smartphone app) are the most cost-effective, requiring only your time and potentially the cost of a scanner or app (if using a paid app). Professional digitizing services charge per photo, with prices ranging from a few cents to several dollars per image, depending on resolution, quantity, and additional services like retouching. Bulk orders often reduce the per-photo cost.
How to make copies of old photos?
The best way to make copies of old photos is to digitize them using a scanner at a high resolution (at least 300 DPI). This creates a digital master copy. You can then make unlimited digital copies, print copies, or share them electronically. For optimal quality, use a lossless file format like TIFF for your master copy. If a scanner is unavailable, a digital camera or smartphone camera can be used, but scanner quality is generally superior.
How do I digitize a huge amount of photos?
Digitizing a large volume of photos is most efficiently handled by a professional photo digitizing service. They have the equipment, expertise, and manpower to process large collections quickly. Alternatively, consider investing in a high-speed, top-loading document scanner with photo scanning capabilities for faster home digitization. Breaking the task into smaller, manageable chunks and scanning a few photos each day or week can also make a large project feel less daunting.
How do I digitize photos with an iPhone?
Your iPhone offers several options for digitizing photos. The simplest is using the built-in Camera app to take photos of your prints. For higher quality and automated features, use the Google PhotoScan app (free) or the Photomyne app (free or paid). The Notes app also has a document scanning feature that can be used for photos.
Are there services that can digitize your photos for you?
Yes, countless professional photo digitizing services are available online and in some local areas. Reputable services include ScanMyPhotos, ScanCafe, Digital Memories, ScanDigital, EverPresent, and DigMyPics. Local office supply stores like FedEx Office and Staples also offer scanning services. Research and compare services based on price, quality, turnaround time, and customer reviews.
How to digitize large photos?
Digitizing large photos can be challenging for home scanners. For oversized prints, consider these options: Professional scanning services often have large-format scanners. Alternatively, you can scan large photos in sections using a flatbed scanner and then stitch the sections together using photo editing software like Photoshop. For a simpler approach, photographing large photos with a digital camera or smartphone can be effective, especially for non-archival purposes.
How do you digitize photos to use for embroidery projects?
To digitize photos for embroidery, first scan your photo using a flatbed scanner or smartphone app. Then, use embroidery digitizing software (like Wilcom EmbroideryStudio, PE-Design, or SewArt) to convert the scanned image into a stitch file format compatible with your embroidery machine (e.g., PES, DST, JEF). Alternatively, some apps like Cross Stitch Creator can convert images into patterns for hand embroidery.
What is the best app to restore old photos?
For restoring old photos, Photomyne is a popular mobile app with AI-powered restoration features. For more advanced and intricate restoration on a desktop computer, Adobe Photoshop’s Generative Fill and other retouching tools offer powerful capabilities. Dedicated photo restoration software like AKVIS Retoucher or Retouch4me can also be effective.
Final Words on Digitizing Photos
Digitizing your old photos is an incredibly rewarding endeavor, transforming dusty boxes of prints into a readily accessible and shareable digital archive. While it may seem like a large undertaking, breaking down the process into manageable steps, starting with organization and choosing the right digitization method for your needs, makes it achievable for anyone. Preserving these visual stories connects us to our past, strengthens family bonds, and ensures that precious memories are cherished for generations to come. So, take the first step – gather your photos, choose your method, and begin your journey into the world of photo digitization today!
What are your favorite methods for digitizing photos? Share your tips and experiences in the comments below! And be sure to explore our other articles for more photography tips and techniques.